There’s a special kind of joy that comes with a fresh manicure, a small but powerful way to express your style and lift your spirits.
As seasons change, our nails often become a tiny canvas for celebrating what’s new.
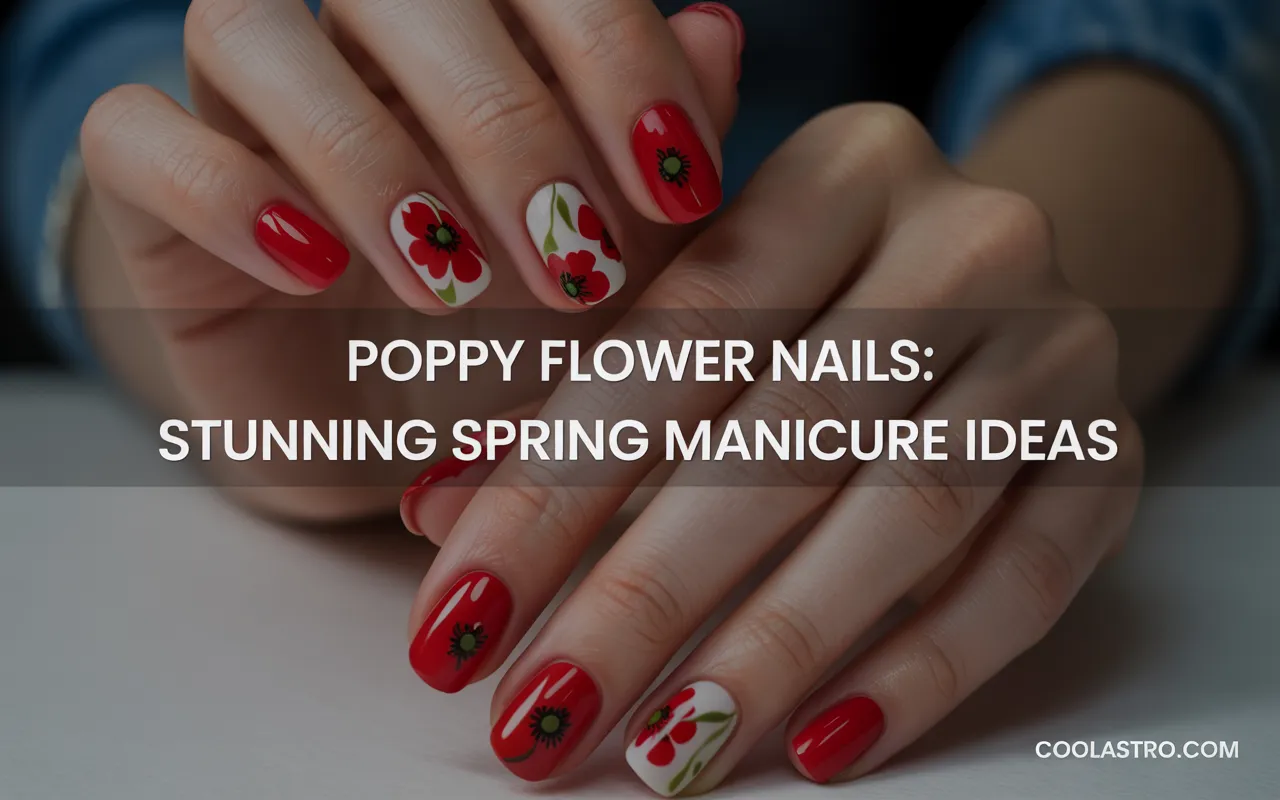
When the world starts to bloom, what could be more perfect than capturing the delicate, vibrant beauty of a poppy right at your fingertips?
Poppy flower nails are more than just a design; they are a tiny wearable piece of art that can be elegant, bold, playful, or deeply meaningful.
If you’ve ever scrolled through Pinterest, admiring intricate floral nails and thinking, “I could never do that,” this guide is for you.
We are going to explore a garden of stunning poppy flower nail ideas, from simple DIY designs you can create at home to intricate concepts to show your nail technician.
You’ll discover easy techniques, color palette inspiration, and 12 beautiful designs to try.
Forget complicated tutorials and intimidating tools. Let’s have fun and find the perfect poppy manicure to celebrate the season in style.
Simple DIY Poppy Nails: A Step-by-Step Guide
Before we jump into the list of ideas, let’s walk through how to create a basic poppy design. This is the foundation you can build on for many of the more complex looks.
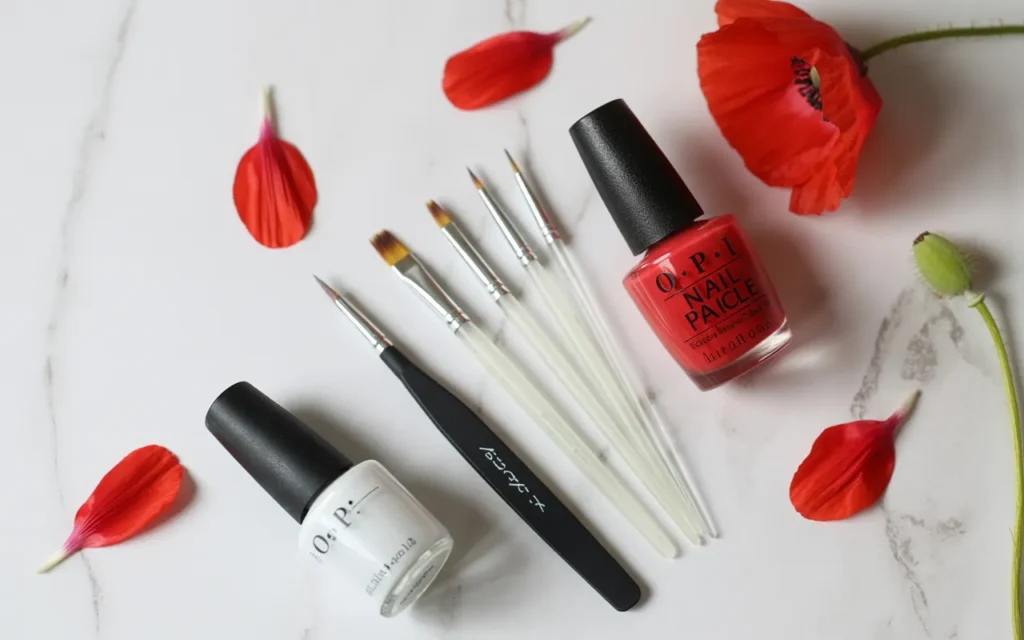
You Will Need:
- A base coat
- A base color polish (white, nude, or a pale pastel works best)
- A vibrant red polish
- A black polish
- A fine-tipped nail art brush or a toothpick
- A dotting tool or the end of a bobby pin
- A glossy top coat
Step 1: Prep and Base
- Start with clean, filed nails. Apply a thin layer of your base coat to protect your natural nails and help your manicure last longer.
- Once dry, apply two thin coats of your chosen base color. A crisp white or a soft beige will make your red poppies stand out beautifully. Let this dry completely.
Step 2: Create the Petals
- Pour a small drop of red polish onto a piece of foil or a palette.
- Dip your fine-tipped nail art brush into the red polish.
- Create the petals by painting four or five slightly curved, teardrop-like shapes arranged in a circle. Don’t worry about them being perfect! Poppy petals are naturally irregular and crinkled, so a bit of imperfection will make them look more realistic. Let the petals overlap slightly.
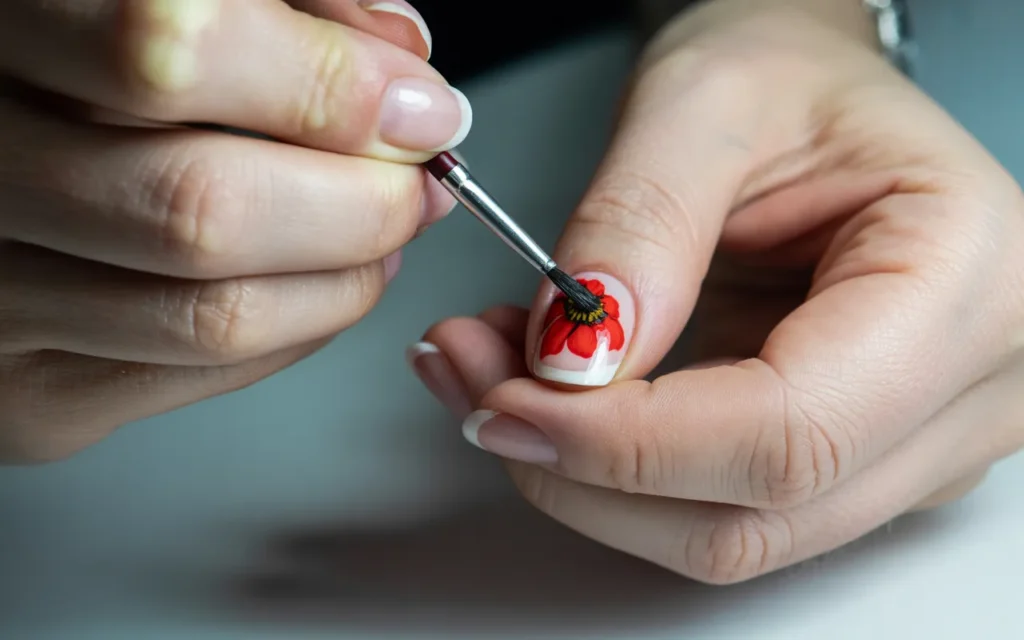
Step 3: The Poppy Center
- Pour a small drop of black polish onto your palette.
- Dip your dotting tool into the black polish.
- Gently press the dotting tool into the center of your red petals to create a perfect black dot.
Step 4: Finishing Touches and Top Coat
- Let your design dry for a few minutes.
- Once fully dry, apply a generous layer of a glossy top coat (like Seche Vite). This will seal in your design, smooth out any bumps, add a beautiful shine, and protect your poppy flower nails from chipping.
Now that you have the basic technique down, let’s explore some stunning variations!
12 Stunning Poppy Flower Nail Ideas
Here are 12 beautiful ways to incorporate poppies into your next manicure, ranging from simple and subtle to bold and artistic.
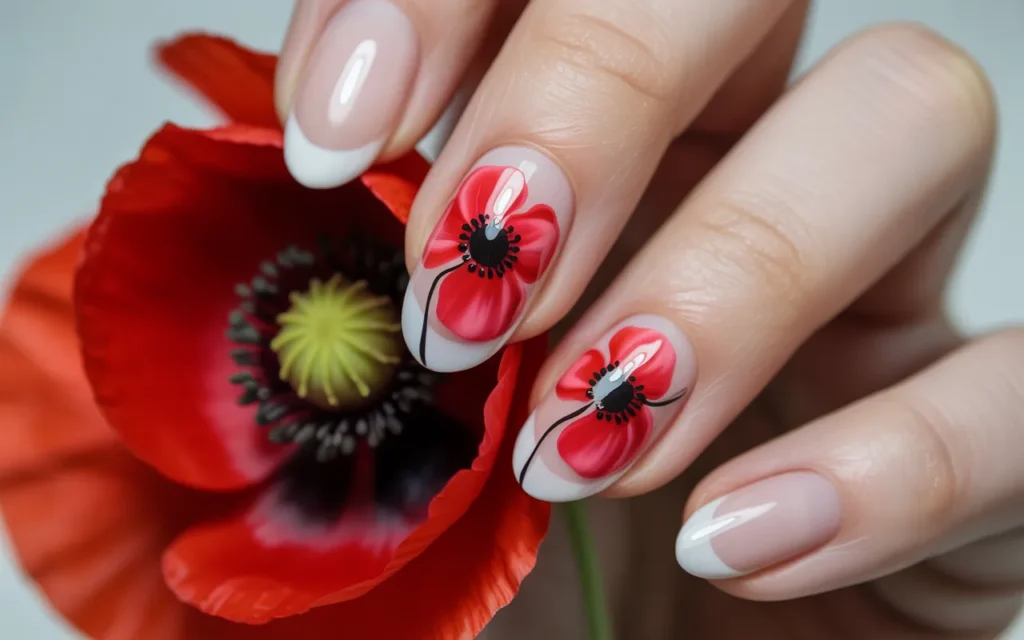
1. The Classic White and Red
This is the timeless design we just practiced. A crisp white base with vibrant red poppies is clean, fresh, and lets the flowers be the star of the show. It’s a look that is both cheerful and elegant.
For a slight variation, try a soft, sheer pink or a nude base color for a more subtle effect.
2. The Moody Black and Red
For a more dramatic and sophisticated take, reverse the classic. Use a glossy black polish as your base color.
The vibrant red of the poppies against the deep black background creates a striking and powerful contrast. This look is perfect for an evening out or for an autumn/winter interpretation of the floral trend.
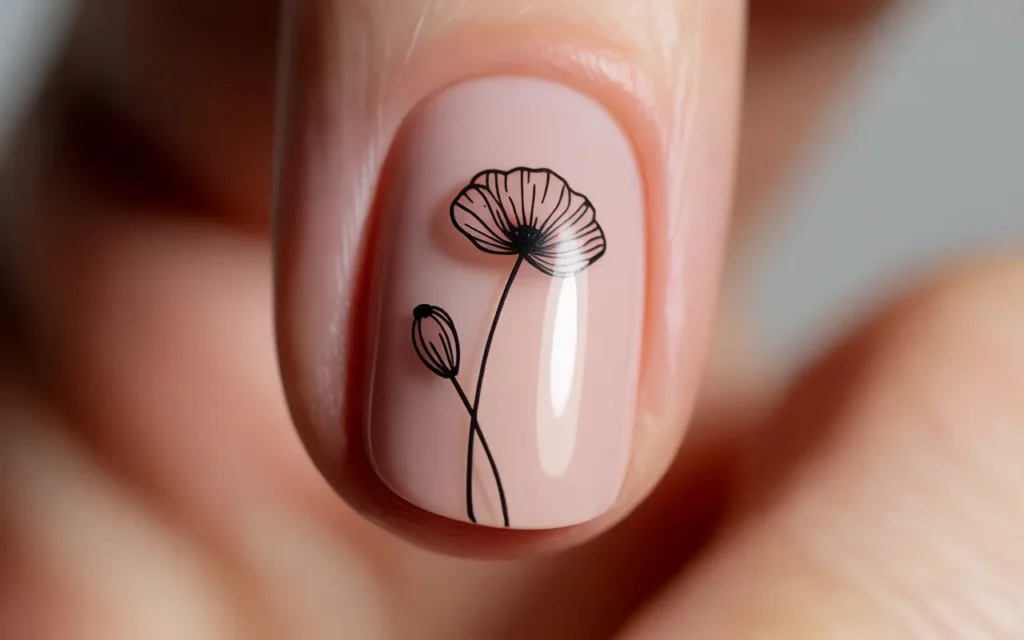
3. The Minimalist Poppy Outline
If you prefer a more modern and subtle style, this one’s for you. Instead of filling in the petals, use a very fine nail art brush and black polish to simply draw the outline of a poppy on a nude or bare-looking nail. This delicate line art is incredibly chic and understated.
4. The Poppy French Manicure
Give the classic French manicure a floral twist. Keep the traditional nude or pink base, but instead of a plain white tip, paint a delicate garland of tiny red poppies along the smile line of your nail.
This is a beautiful and unexpected way to wear floral art that feels both classic and fresh.
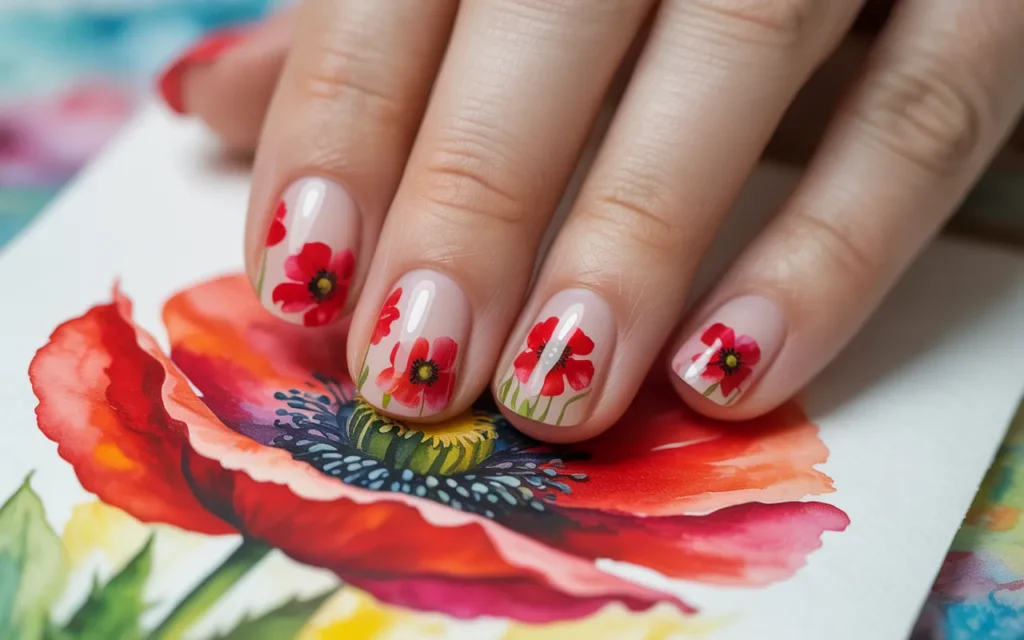
5. Watercolor Poppies
This artistic style creates a soft, dreamy, and painterly effect.
- How to do it: After your base coat, use a small brush to dab a tiny bit of acetone or rubbing alcohol onto the nail. While it’s still damp, drop on a small bit of red polish. The alcohol will cause the polish to disperse and bleed in a soft, watercolor-like way. Once dry, add your black dot center and seal with a top coat.
- The Look: This technique results in poppies with soft, blended edges, perfect for capturing their delicate, translucent nature.
6. The Single Poppy Accent Nail
For those who love a touch of art without committing to a full set, the accent nail is the perfect solution. Paint all of your nails in a solid color—a beautiful poppy red, a classic black, or even a complementary shade like olive green—and then feature a single, beautifully painted poppy on just your ring finger.
7. Matte Poppies
Changing the finish of your top coat can completely transform the look of your manicure. After painting your poppy design, apply a matte top coat instead of a glossy one.
This gives the nails a velvety, frosted finish that is very modern and sophisticated. The red of the poppies against a matte white or black background looks particularly stunning.
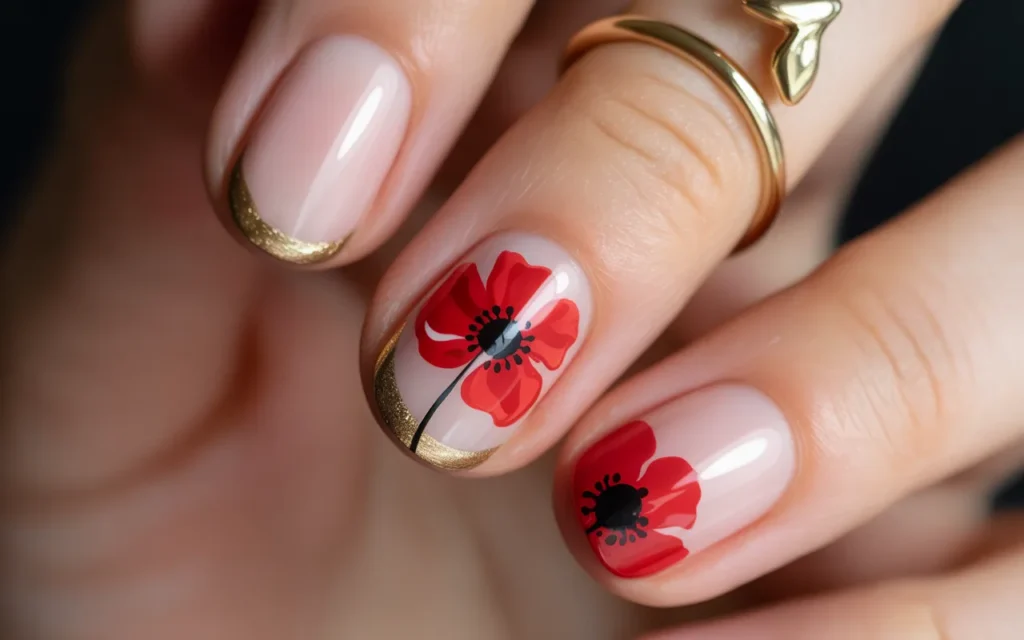
8. Poppies with a Touch of Gold
Elevate your poppy flower nails by adding a hint of metallic glamour. Use a fine brush to add small touches of gold polish.
You could outline one of the petals in gold, add tiny gold dots around the black center, or even paint the stem of the poppy in gold instead of green.
The warmth of the gold beautifully complements the red.
9. The Negative Space Poppy
This is a very contemporary and eye-catching design. Instead of a solid base color, you incorporate the natural, bare nail into the design.
You might paint poppies around the “lunula” (the half-moon at the base of your nail) or along the tip, leaving the rest of the nail bare or with just a clear coat. It’s a minimalist approach that feels very modern.
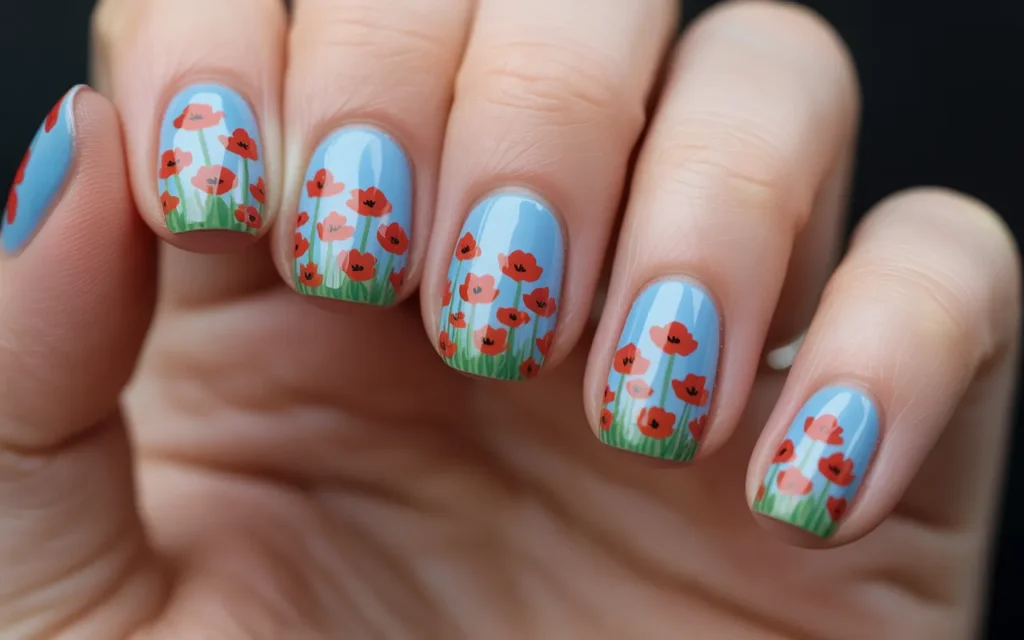
10. The Full Poppy Field
For the maximalist at heart, why stop at one poppy? Turn your nails into a miniature field of flowers.
- How to do it: On a light blue or green base to represent the sky or field, paint multiple poppies of different sizes across all your nails. Add some simple green stems and leaves with a fine brush to fill in the gaps.
- The Look: This creates a dense, beautiful, and cheerful pattern that is full of life and movement. It’s a true statement manicure.
11. Remembrance Day Poppies
The poppy is a powerful symbol of remembrance, particularly for veterans. A simple red poppy on one or all of your nails is a beautiful and respectful way to pay tribute on Remembrance Day, Veterans Day, or Memorial Day. A single poppy on a clean, simple base is a quiet and elegant statement.
12. Poppies and Stripes
Combine the organic shape of the poppy with a classic graphic pattern for a fun, mixed-media look. Paint a poppy on your ring finger, and then paint the rest of your nails with crisp, classic black-and-white stripes. The contrast between the floral and the geometric is playful and very chic.
Tips for a Longer-Lasting Manicure
After putting in the effort to create your beautiful poppy flower nails, you want them to last! Here are a few pro tips:
- Prep is Key: Always start by wiping your nails with nail polish remover or alcohol to remove any natural oils. This helps the base coat adhere better.
- Thin Coats are Best: Apply multiple thin coats of polish rather than one or two thick coats. Thin coats dry faster and are less likely to smudge or peel.
- Cap the Free Edge: When applying your color and top coat, be sure to swipe the brush along the very tip of your nail. This “caps” the edge and helps prevent chipping.
- Reapply Top Coat: For extra longevity, apply a fresh layer of top coat every 2-3 days. This will refresh the shine and add another layer of protection.
- Hydrate: Use cuticle oil daily to keep your cuticles and the skin around your nails healthy. Healthy skin supports healthy nails.
Let Your Creativity Bloom
Your nails are a wonderful canvas for self-expression, and the poppy is a beautiful and versatile subject to explore. Whether you choose a single, minimalist outline or a full field of vibrant blooms, you are now ready to try your hand at creating a stunning poppy manicure.
Don’t be afraid to experiment with different color combinations and styles. The most important part of nail art is to have fun with it!
So, pick a design that speaks to you, put on your favorite music, and enjoy the creative process. Your beautiful new poppy flower nails will be a lovely reminder of the beauty you can create.
Recommended Nail Art Supplies
Here is a quick summary of the essential products to help you create your own stunning poppy manicure at home.
| Product Name | Brand | Great For… |
|---|---|---|
| {Beetles Gel Nail Polish Starter Kit} | Beetles | A long-lasting, salon-quality gel manicure at home. |
| {Winstonia ‘Fine Line’ Nail Art Brushes} | Winstonia | Creating precise, delicate lines for petals and stems. |
| {Dotting Tools for Nail Art} | CiaraQ | Making a perfect, easy black dot for the poppy’s center. |
| {OPI Nail Lacquer, Alpine Snow & Black Onyx} | OPI | A high-quality, opaque white base and black for details. |
| {Maniology Stamping Kit} | Maniology | A foolproof way to get a perfect design without freehanding. |
| {Seche Vite Dry Fast Top Coat} | Seche Vite | A super glossy, fast-drying top coat to protect your art. |
| {Red Poppy Nail Art Stickers/Decals} | Various | The quickest and easiest way to get detailed poppy nails. |