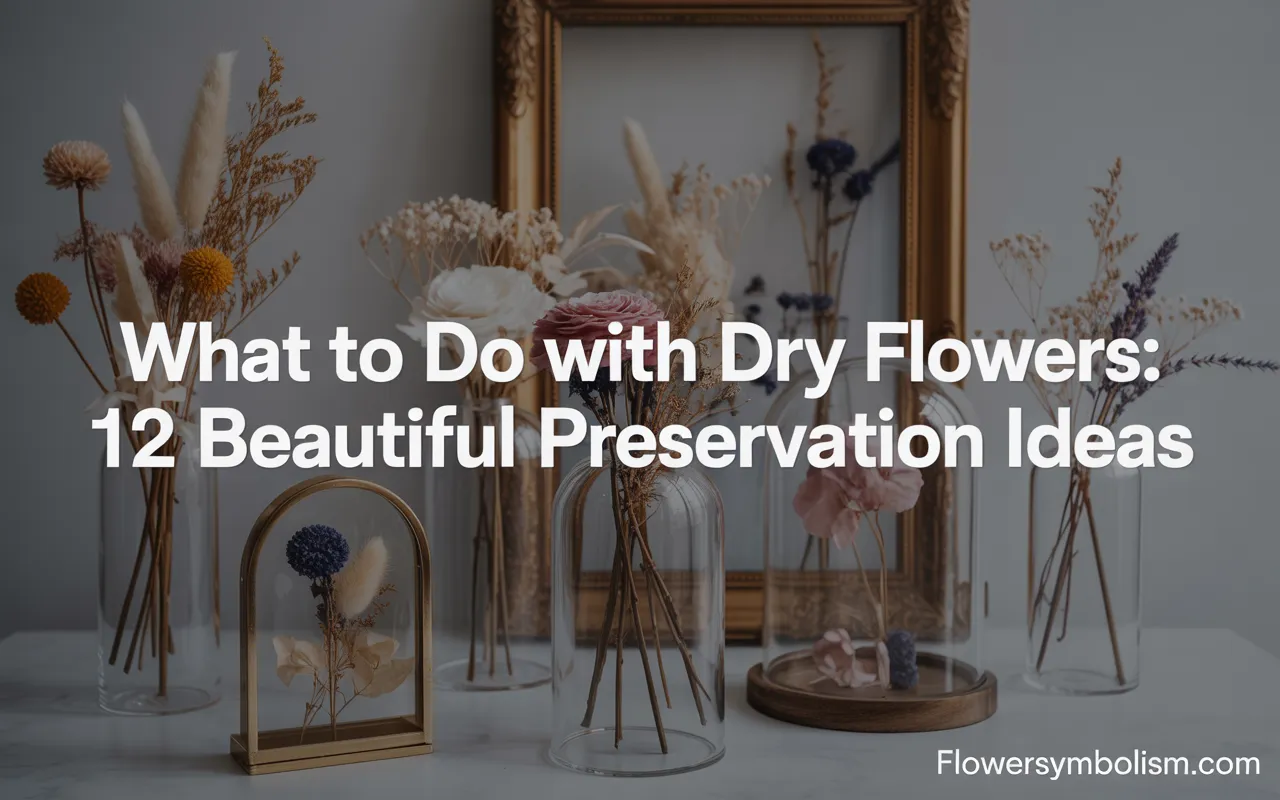
So, you’ve successfully dried your flowers. Perhaps you have a beautiful bunch of air-dried lavender, a box of vibrant silica-dried roses, or a collection of delicate pressed pansies.
They are stunning on their own, but now the real fun begins. You might be looking at your preserved treasures and wondering, what to do with dry flowers now? The answer is: almost anything you can imagine.
Dried flowers are an incredibly versatile and sustainable crafting material. They allow you to bring a piece of nature’s lasting beauty into every corner of your life, from your home decor to the gifts you give and even the jewelry you wear.
They are a way to turn a cherished memory, like a wedding bouquet, into a permanent piece of art that you can admire every day.
This guide is designed to spark your creativity and show you just how much you can do with your preserved blooms.
We will explore 12 beautiful and accessible ideas that will inspire you to transform your dried flowers into stunning creations.
We’ll provide clear instructions, helpful tips, and everything you need to know to answer the question, what to do with dry flowers, once and for all.
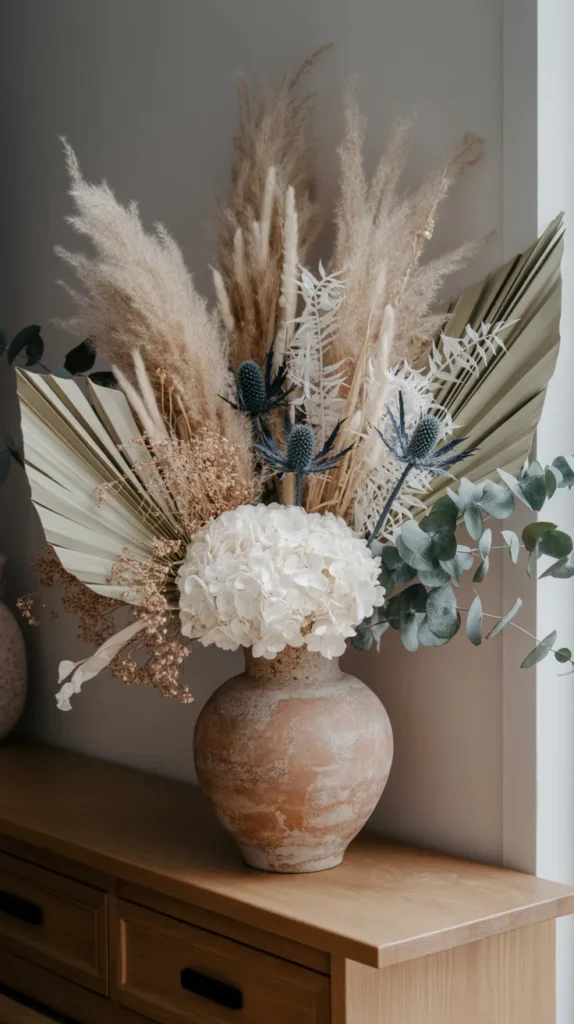
1. Create a Statement Dried Flower Arrangement
The most classic answer to the question of what to do with dry flowers is to create a beautiful bouquet.
A well-arranged bunch of dried flowers can be a stunning, low-maintenance centerpiece or a piece of decor that lasts for years. Unlike fresh flowers, they require no water and will look beautiful indefinitely.
What you’ll need:
- A mix of dried flowers (focal, filler, and textural elements).
- A beautiful vase.
- Floral tape or twine.
Step-by-Step Instructions:
- Gather Your Stems: Select a variety of dried flowers. Good arrangements have a mix of “thrillers” (large focal flowers like roses or proteas), “fillers” (smaller flowers that add volume, like baby’s breath or statice), and “spillers” (elements that add texture and movement, like grasses or eucalyptus).
- Start with a Base: Begin by creating a foundation with your filler flowers and greenery. Hold them in your hand and build the arrangement from there.
- Add Focal Flowers: Place your largest, most eye-catching flowers into the arrangement. Don’t place them all at the same height; vary their positions to create depth and interest.
- Weave in Texture: Add your textural elements, like fluffy pampas grass or spiky thistle, throughout the bouquet.
- Secure and Display: Once you are happy with your arrangement, wrap the stems tightly with floral tape or rustic twine to hold them in place. Cut the stems to the desired length and place your beautiful creation in a dry vase.
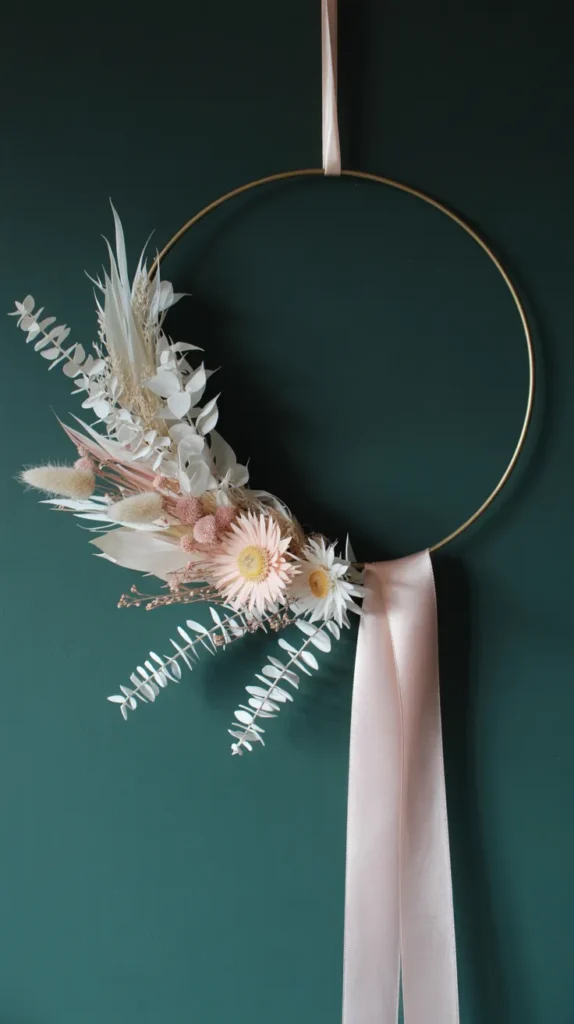
2. Craft an Asymmetrical Hoop Wreath
The traditional wreath has received a modern makeover. Today’s most stylish wreaths are often asymmetrical, with flowers clustered on one side of a simple metal or wooden hoop. This minimalist approach is chic, modern, and a fantastic way to showcase your dried blooms.
What you’ll need:
- A metal macrame hoop (gold and black are popular choices) or a grapevine wreath base.
- A selection of dried flowers and greenery.
- Thin floral wire and a hot glue gun.
Step-by-Step Instructions:
- Build Your Foundation: Start by attaching small bunches of your dried greenery (like preserved eucalyptus) to one side of the hoop using thin floral wire. The bottom-left or bottom-right quadrant is a popular placement.
- Layer in Fillers: Weave in some of your smaller, filler flowers like statice or ruscus to build up the shape and add volume.
- Place Your Focal Flowers: Now, add your more prominent “focal” flowers, like dried strawflowers, small roses, or craspedia. For a secure and lasting hold, especially with heavier flower heads or pods, a hot glue gun is invaluable. The {Gorilla Dual Temp Mini Hot Glue Gun Kit} is fantastic for this, as its precision nozzle allows for delicate work, and its strong bond ensures your beautiful design won’t fall apart over time.
- Add a Finishing Touch: For an extra touch of elegance, you can tie a long, flowing silk or velvet ribbon to the floral cluster.
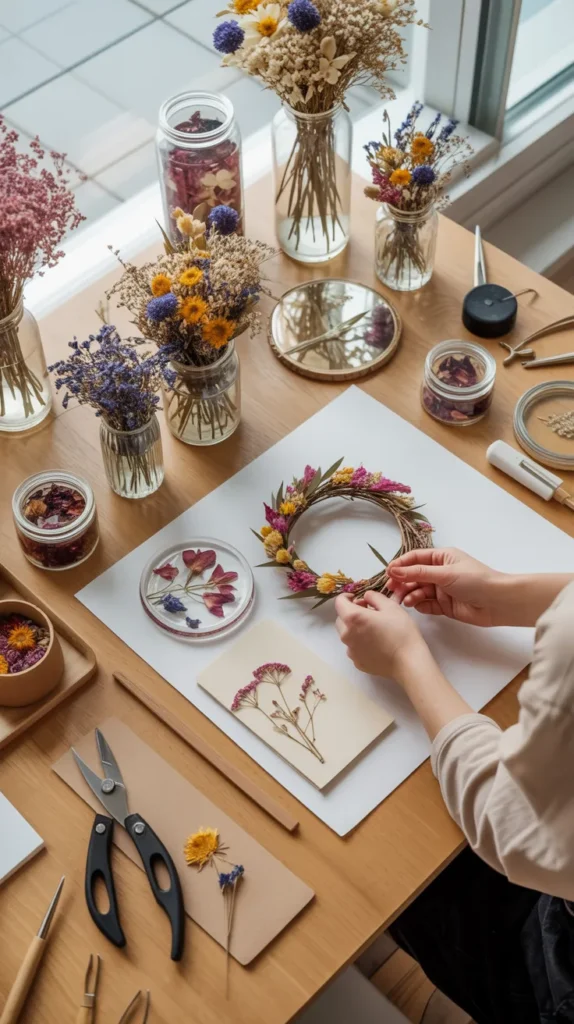
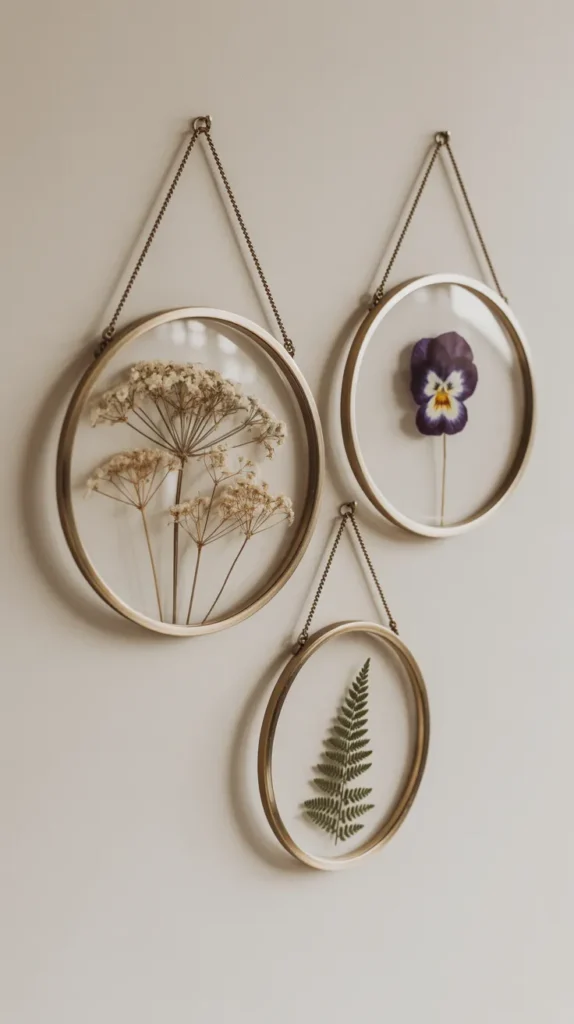
3. Design Framed Pressed Flower Art
This is a delicate, elegant, and timeless way to answer the question of what to do with dry flowers. By pressing your blooms and framing them, you can create a beautiful botanical gallery wall.
Using “floating” frames—where the flowers are sandwiched between two panes of glass—creates a particularly stunning effect, making the botanicals appear to be suspended in mid-air.
What you’ll need:
- Pressed flowers (ferns, cosmos, pansies, Queen Anne’s lace).
- Double-pane floating frames.
- Tweezers for precise placement.
Step-by-Step Instructions:
- Get Your Pressed Flowers: You can press flowers the traditional way inside a heavy book, but this can take weeks. For faster results and much better color retention, a microwave flower press like the {Microfleur Max Microwave Flower Press} can dry flowers perfectly in just a few minutes.
- Clean Your Canvas: Thoroughly clean both panes of glass to remove any fingerprints or dust.
- Compose Your Design: Use tweezers to carefully arrange your pressed flowers on one of the panes of glass. Play with negative space—sometimes a single, perfect fern frond is more powerful than a dense cluster.
- Secure the Blooms: To prevent your delicate flowers from slipping over time, use a minuscule dot of clear glue. A precision applicator like {Bearly Art Precision Craft Glue} is a must-have for this task. Its ultra-fine metal tip allows you to apply a microscopic amount of glue that won’t smudge or be visible through the glass.
- Frame Your Art: Carefully place the second pane of glass on top and slide the “sandwich” into the frame. Hang your creation in a spot with indirect light to preserve the colors.
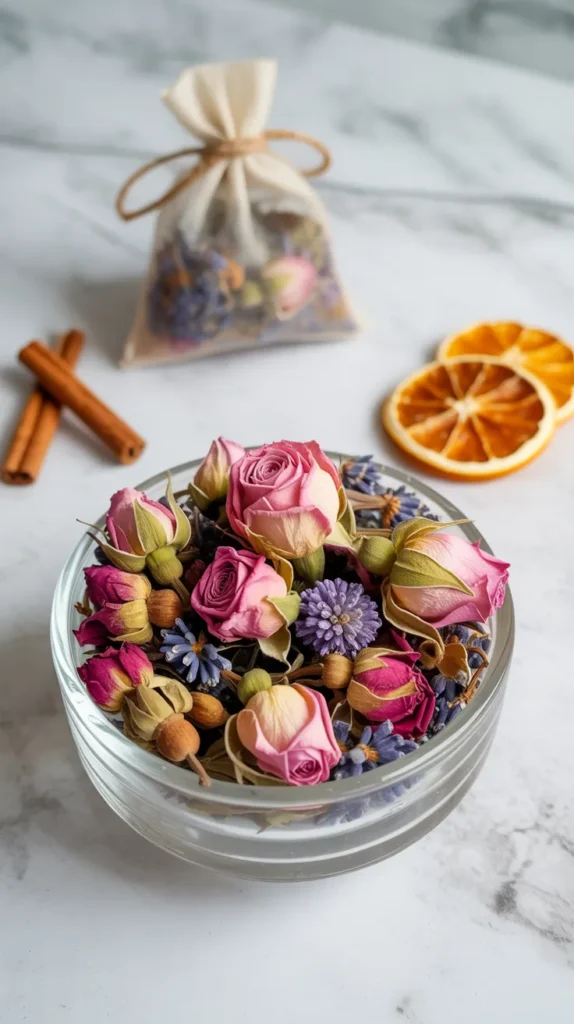
4. Make Scented Potpourri or Sachets
One of the most traditional and satisfying things to do with fragrant dried flowers like lavender and roses is to make your own potpourri or scented sachets. It’s a wonderful way to naturally perfume your home, drawers, and closets.
What you’ll need:
- A bowl of fragrant dried flower buds and petals (lavender, rose, chamomile).
- Whole spices (cinnamon sticks, cloves, star anise).
- Dried citrus peels.
- Essential oils for an extra scent boost.
- Small breathable bags for sachets.
Step-by-Step Instructions:
- Combine Your Ingredients: In a large bowl, mix your dried flower buds, petals, and any other botanicals you’d like to include.
- Add Spices and Scent: Add your whole spices and a few drops of your favorite essential oils (like lavender or rose geranium). Toss everything gently to combine.
- Cure the Mixture: For the most potent and long-lasting fragrance, let your potpourri “cure” in a sealed container for a week or two. This allows all the scents to meld together.
- Display or Bag It: Display your finished potpourri in a beautiful decorative bowl. For sachets, spoon the mixture into small muslin or organza bags. Pre-made {Ounona Cotton Muslin Drawstring Bags} are perfect for this, as they are breathable, easy to fill, and have a charmingly rustic look.
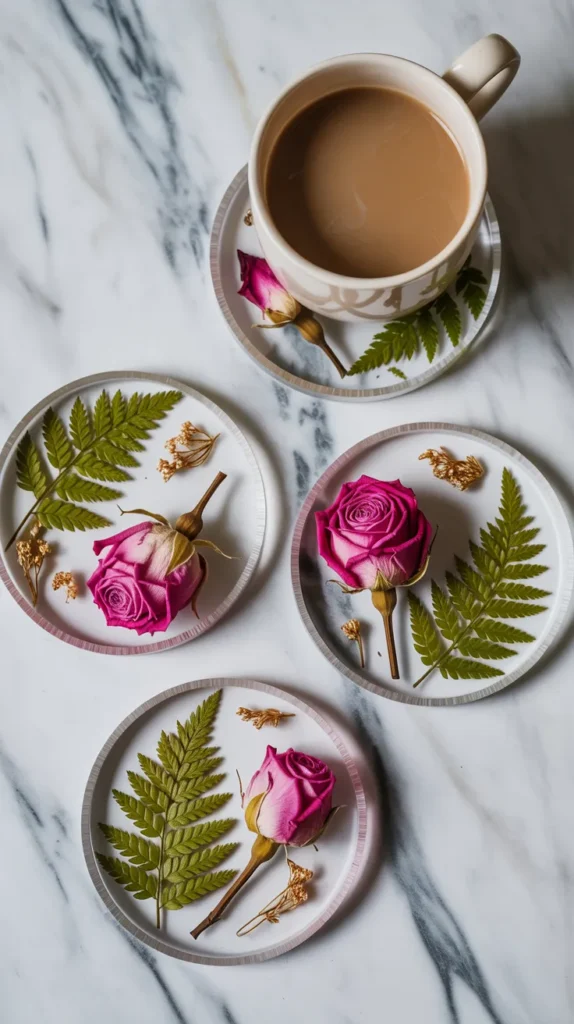
5. Create Stunning Resin Jewelry or Coasters
Encasing your dried flowers in resin is like capturing a tiny piece of a garden in crystal. This technique allows you to create durable, beautiful, and functional art, from unique pendants and earrings to stunning coasters for your coffee table.
What you’ll need:
- Small, flat-dried or pressed flowers.
- Epoxy resin and hardener.
- Silicone molds (for jewelry or coasters).
- Tweezers.
Step-by-Step Instructions:
- Ensure Flowers are Bone-Dry: This is the most important rule of resin crafting. Any moisture in your flowers will cause them to rot and will inhibit the resin from curing properly.
- Mix the Resin: Carefully mix your resin and hardener according to the package instructions. Stir slowly and deliberately to minimize air bubbles.
- Pour a Base Layer: Pour a thin layer of resin into your silicone mold.
- Arrange Your Flowers: Use tweezers to carefully place your dried flowers face down into the wet resin. You can also add other elements like gold leaf for a touch of luxury.
- Fill and Cure: Pour the remaining resin over the flowers until the mold is full. Use a lighter or a heat gun to gently pop any surface bubbles. For a crystal-clear, non-yellowing finish that protects your art, use a high-quality, professional-grade resin like {ArtResin Epoxy Resin}. It is specifically formulated to resist UV damage, keeping your floral creations bright and beautiful for years.
- De-mold: After 24-48 hours, your creation will be fully cured. Carefully pop your beautiful new piece out of the mold.
6. Craft Botanical Wax Tablets
Wax tablets, or sachets, are small, scented slabs of wax embedded with dried flowers. They are beautiful hanging ornaments that can be used to freshen small spaces like closets, drawers, or bathrooms. They look like delicate pieces of frosted art and make for a wonderful handmade gift.
What you’ll need:
- Soy wax or beeswax pellets.
- Essential oils for fragrance.
- A silicone mold (oval or rectangular shapes are popular).
- A selection of small, pretty dried flowers and petals.
Step-by-Step Instructions:
- Melt and Scent: In a double boiler or a microwave-safe container, gently melt your wax. Once melted, remove it from the heat and stir in your favorite essential oils.
- Pour into Molds: Carefully pour the scented wax into your silicone molds. If you want to hang your tablet, you can place a skewer near the top to create a hole for a ribbon.
- Decorate with Flowers: Wait a few minutes until the wax becomes slightly cloudy and starts to set. This is the perfect time to gently press your dried flowers and petals into the surface. If you do it too early, they will sink; too late, and they won’t stick.
- Cool and De-mold: Let the tablets cool completely at room temperature. Once fully hardened, gently pop them out of the molds. Thread a beautiful ribbon through the hole and they are ready to hang.

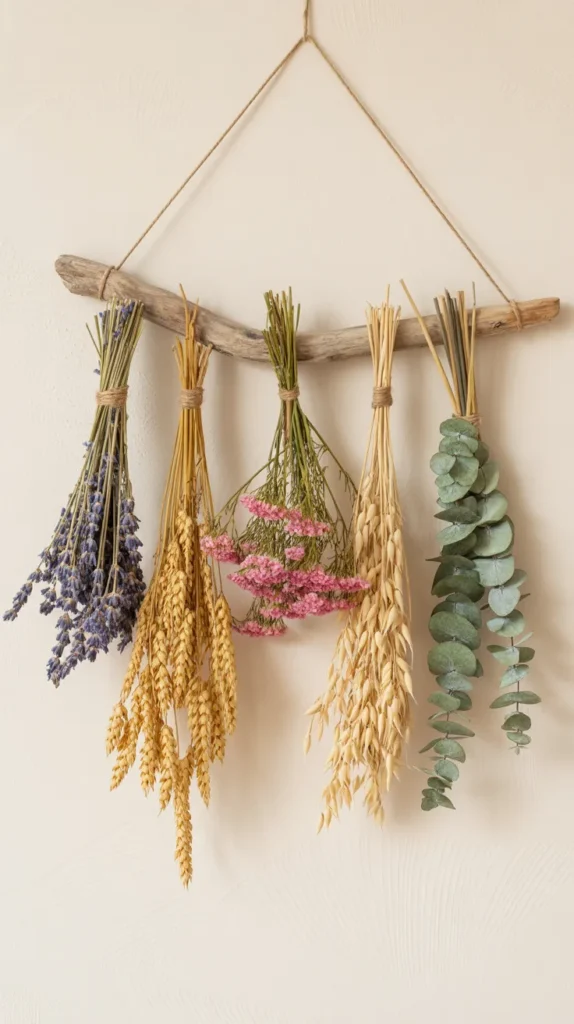
7. Make a Botanical Wall Hanging or “Swag”
For a large, textural piece of wall art with a bohemian flair, a floral wall hanging is a fantastic project. This is a wonderfully creative way to answer the question of what to do with dry flowers if you have a lot of long-stemmed varieties.
How to make it:
- Find Your Base: A beautiful piece of driftwood found on a beach walk provides a natural, organic feel. A clean, simple wooden dowel or even a copper pipe works well for a more modern look.
- Create Small Bundles: Make several small, hand-tied bouquets of dried flowers. Flowers with sturdy stems that hang straight, such as lavender, wheat, oats, statice, and eucalyptus, are ideal for this project.
- Assemble the Hanging: Using a natural fiber like jute twine, tie each bunch to the branch. You can hang them all at the same length for a neat, uniform look, or vary the lengths to create a more dynamic, cascading effect.
- Hang Your Art: Attach a long piece of twine to both ends of the branch and hang it on a prominent wall, such as above a bed, a crib, or a sofa.
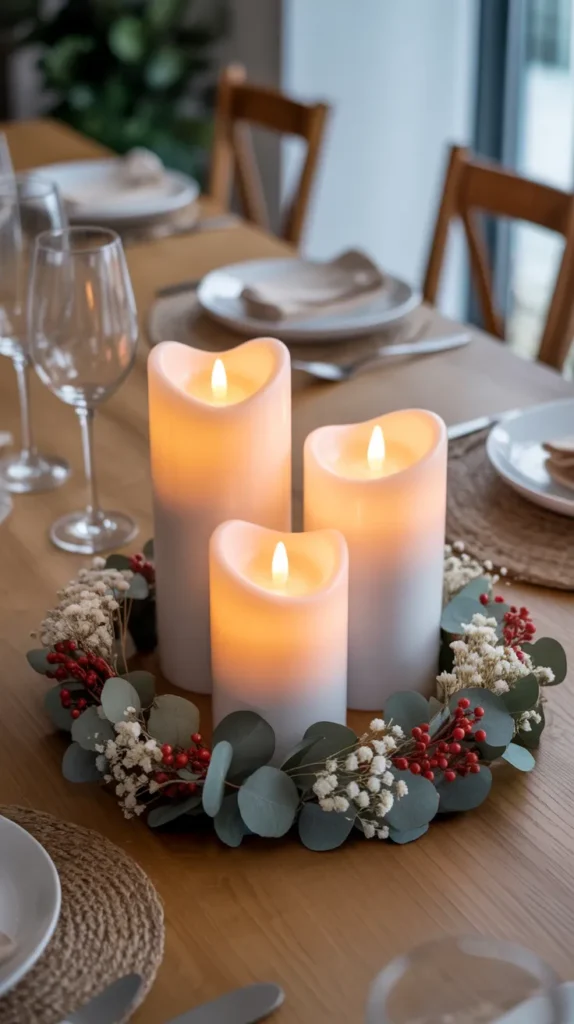
8. Decorate Candles or Make a Candle Ring
A simple pillar candle can be transformed into a stunning piece of decor with the addition of dried flowers. This is an easy and elegant way to add a botanical touch to your tablescapes.
How to do it:
- Direct Application: For a rustic look, you can press individual dried petals onto the side of a wide pillar candle. Gently heat the back of a spoon with a lighter and use the warm spoon to melt the wax just enough to adhere the petal.
- Create a Candle Ring: A safer and more versatile option is to create a small wreath or ring that sits around the base of the candle. Use a small grapevine wreath base and a hot glue gun to attach small sprigs of dried eucalyptus, berries, lavender, and other small flowers.
Safety Note: Never leave a burning candle with flammable dried flowers unattended. For absolute peace of mind, use high-quality LED pillar candles. They provide the same warm, flickering glow without any of the fire risk.
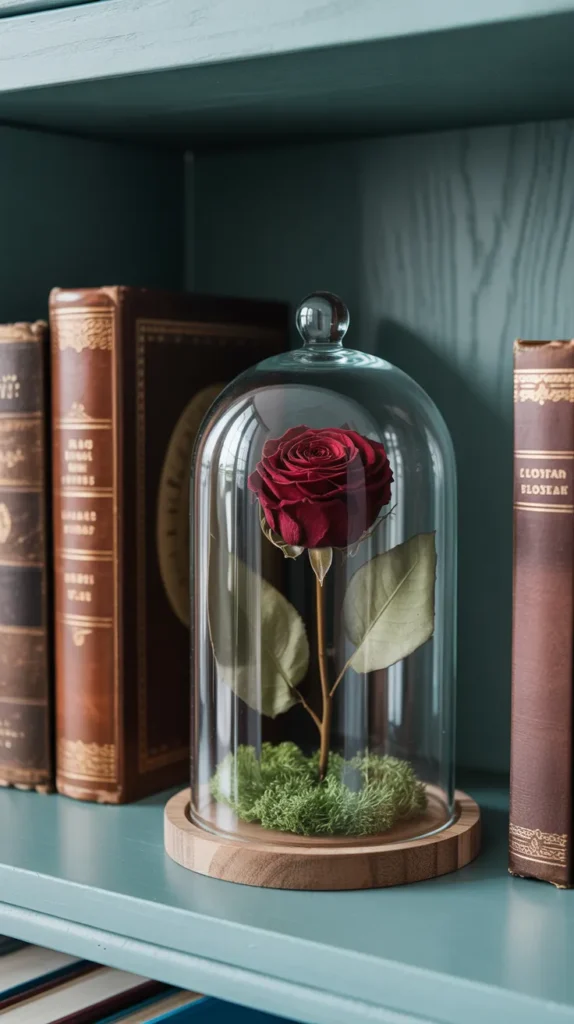
9. Create a “Cabinet of Curiosities” Cloche Display
Elevate a single, perfect bloom to the status of a museum specimen by displaying it under a glass cloche (or bell jar).
This Victorian-inspired decor idea is incredibly elegant and protects your most fragile and precious dried flowers from dust and damage.
How to create this display:
- Preserve the Perfect Flower: This display is all about showcasing one spectacular bloom. To get a flower, like a rose or a peony, that retains its full 3D shape and vibrant color, you must use silica gel. {Activa Flower Drying Art Silica Gel} is the industry standard for this. Its fine, sand-like crystals draw moisture out of the petals rapidly, preserving the flower’s natural form in a way that air-drying simply cannot match.
- Create a Base: Secure your perfectly dried flower to the wooden base of the cloche. You can create a miniature landscape by first covering the base with preserved moss.
- Encase and Display: Carefully place the glass dome over your creation. Display your beautiful cloche on a mantelpiece, a bookshelf, or a side table as a sophisticated and intriguing object of art.
10. Craft Handmade Botanical Greeting Cards
A handmade card is always a heartfelt gesture. Using your delicate pressed flowers to adorn blank cards is a simple and beautiful way to create one-of-a-kind stationery for any occasion.
What you’ll need:
- A selection of small, colorful pressed flowers.
- Blank greeting cards and envelopes.
- A precision craft glue.
Step-by-Step Instructions:
- Plan Your Design: Arrange your pressed flowers on the front of a blank greeting card before you start gluing. You could create a tiny wreath, a small bouquet, or a simple pattern.
- Glue with Precision: Use a high-quality craft glue with a fine tip to attach the delicate flowers. The fine metal tip of a glue like {Bearly Art Precision Craft Glue} is perfect for applying a tiny, controlled amount of adhesive to the back of a stem or petal without any messy smudges, keeping your card looking clean and professional.
- Let it Dry: Let the glue dry completely before writing your message inside. Your beautiful, botanical creation is ready to send!

11. Make Natural Flower Confetti
Don’t discard the petals and small flower heads that fall off your dried bouquets! Collect them and create your own beautiful, all-natural, and biodegradable confetti. It’s a wonderful, eco-friendly alternative to plastic glitter or paper confetti.
How to use it:
- Celebrations: Perfect for guests to toss at weddings or for scattering at a birthday party.
- Table Decor: Sprinkle it down the center of a dining table for a romantic, decorative touch.
- Gift Embellishment: Use it as a beautiful filler when packaging a gift or tuck some inside a greeting card for a lovely surprise.
- Crafts: Mix it into homemade paper or use it in kids’ art projects.
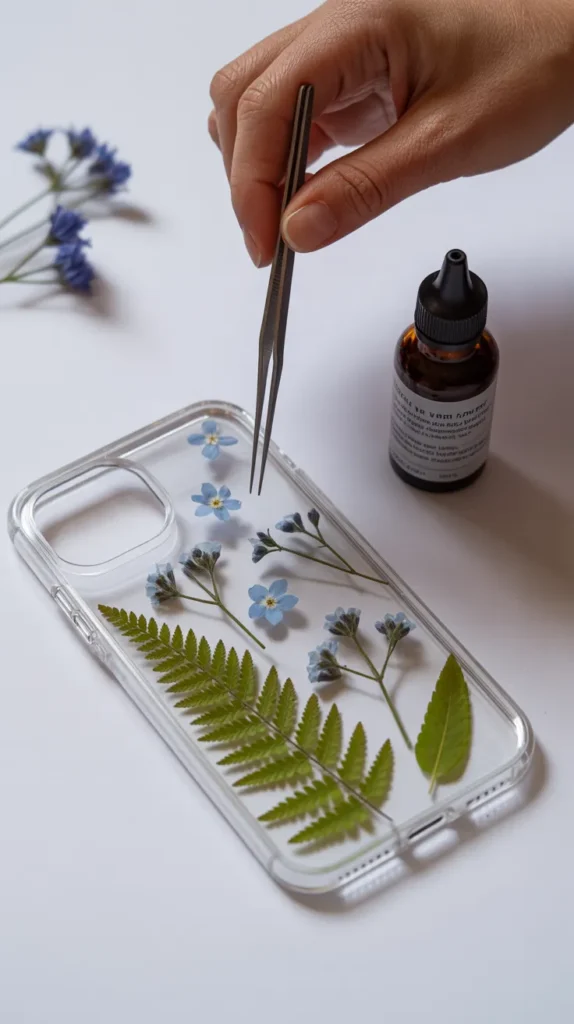
12. Create a Phone Case with Pressed Flowers
Carry a piece of a garden with you everywhere you go by creating a custom phone case. This is a trendy and personal way to showcase your prettiest pressed flowers.
What you’ll need:
- A clear phone case.
- A selection of small, very thin pressed flowers.
- Epoxy resin or a strong decoupage glue.
Step-by-Step Instructions:
- Arrange Your Flowers: Place your clear phone case on a flat surface. Arrange your thin pressed flowers on the inside of the case until you are happy with the design.
- Seal Your Design: The most durable method is to use resin. Place the flowers on the outside of the case, and carefully pour a thin, even layer of resin over them, spreading it to the edges. Let it cure completely.
- A Simpler Method: For an easier, non-permanent option, simply arrange the flowers on the inside of the clear case and then snap it onto your phone. The pressure of the phone will hold the flowers in place. This allows you to change out the design whenever you like!
Your Dried Flower Crafting Toolkit
To bring these beautiful ideas to life, having the right tools can make all the difference. Here is a quick summary of the products that will help you create your masterpieces.
| Product Name | Brand | Best Use |
|---|---|---|
| Dual Temp Mini Hot Glue Gun | Gorilla | Provides a strong, precise bond for attaching flowers and heavier elements to wreaths. |
| Max Microwave Flower Press | Microfleur | The fastest way to create perfectly pressed flowers for framing and card-making. |
| Precision Craft Glue | Bearly Art | Allows for invisible, precise gluing of delicate pressed flowers on glass and paper. |
| Cotton Muslin Drawstring Bags | Ounona | Perfect for creating instant, breathable sachets with your homemade potpourri. |
| Epoxy Resin | ArtResin | A high-quality, non-yellowing resin for creating crystal-clear jewelry and coasters. |
| Flower Drying Art Silica Gel | Activa | The secret to preserving 3D flowers like roses with their shape and color intact for cloche displays. |
Conclusion: Let Your Creativity Bloom
The next time someone asks you, “what to do with dry flowers?”, you’ll have a dozen beautiful answers.
These preserved blooms are more than just decoration; they are a medium for your creativity and a way to hold onto the beauty of the natural world. From grand arrangements to tiny, personal keepsakes, there is no limit to what you can create.
Don’t be afraid to experiment. Mix textures, play with color, and combine different techniques. The most important part of this process is to have fun and enjoy making something beautiful with your own two hands.
So, gather your dried treasures and start crafting. Which of these beautiful preservation ideas will you try first?