
There’s something truly magical about the color red. It’s the color of passion, love, and life itself. When you pair that vibrant energy with the delicate, paper-thin petals of a poppy, you get a subject that has captivated artists for centuries.
Capturing the essence of a red poppy on paper—its bold color, its graceful form, its deep black center—can feel like a daunting task, but it is one of the most rewarding drawing experiences you can have.
If you’ve ever admired a beautiful floral drawing and wished you could create something similar, this guide is for you. We’re going to demystify the process of creating a stunning red poppy flower drawing.
You don’t need to be a professional artist to bring this beautiful flower to life.
We will break down several simple, step-by-step techniques, from using colored pencils and markers to creating dreamy watercolor effects.
Prepare to unlock your creativity and learn how to translate the poppy’s vibrant spirit onto your blank page.
Your Essential Red Poppy Drawing Toolkit
To capture the iconic, rich color of a red poppy, having the right art supplies makes all the difference. The right tools can make blending colors feel effortless and help you achieve that vibrant, lifelike look you’re aiming for.
Here are some highly-rated essentials from Amazon that are perfect for your red poppy drawing adventure.
- {Prismacolor Premier Colored Pencils, 72-Pack}
- Brand: Prismacolor
- Benefit/Context: These colored pencils are beloved by artists for their soft, creamy cores and incredible blendability. This set includes a wide range of reds, from bright cadmium to deep crimson, allowing you to layer colors to create the perfect poppy red with realistic depth and shadow.
- {Copic Sketch Markers, Set of 6, Reds}
- Brand: Copic
- Benefit/Context: For a bold, vibrant, and streak-free application of color, Copic markers are unmatched. Their alcohol-based ink blends beautifully. This set of reds provides you with a range of tones, and the dual tips (a brush tip for expressive strokes and a chisel tip for broad areas) give you amazing versatility.
- {Strathmore 400 Series Bristol Paper Pad}
- Brand: Strathmore
- Benefit/Context: When working with multiple layers of colored pencil or with markers, you need paper that can handle it. Bristol paper is ultra-smooth and heavyweight, which allows for seamless blending and prevents marker ink from bleeding through. The smooth surface makes your colors look incredibly rich.
- {Arteza Real Brush Pens, 48 Colors}
- Brand: Arteza
- Benefit/Context: These pens offer the best of both worlds: the control of a pen with the effect of watercolor paint. The flexible nylon brush tips allow you to create fine lines or broad strokes. You can apply the vibrant red ink directly and then use a water brush to blend the colors for a beautiful, soft, painterly effect.
- {Sakura Pigma Micron Fineliner Pens}
- Brand: Sakura
- Benefit/Context: Before you add color, you need a solid outline. These pens provide a crisp, clean, and permanent black line. The archival ink won’t smudge or bleed when you color over it with markers or watercolor, making them essential for a clean, professional-looking drawing.
- {Derwent Blender and Burnisher Set}
- Brand: Derwent
- Benefit/Context: This is the secret weapon for colored pencil artists. The colorless blender pencil helps you smoothly merge your different shades of red, creating seamless gradations. The burnisher is a hard, colorless pencil that you apply as a final layer to give your drawing a glossy, photo-realistic finish.
- {Faber-Castell Kneaded Eraser}
- Brand: Faber-Castell
- Benefit/Context: This isn’t your typical eraser. You can mold it into any shape, allowing you to lift color in precise areas to create highlights on your poppy petals. It’s gentle on the paper and won’t leave behind any residue.

The First Step: Seeing Your Poppy in Shapes and Lines
Before we dive into color, let’s start with a simple pencil sketch. The foundation of any great drawing is a strong understanding of its basic form. Breaking the poppy down into simple shapes makes it far less intimidating.
- The Center: Start with a small, slightly flattened circle in the middle of your page. This is the seed pod, the anchor of your flower.
- The Petal Guidelines: Draw four to six simple, heart-like shapes radiating out from your center circle. Don’t worry about perfection! The key is to make them overlap. Have some petals in front and some tucked behind. This is what will create the illusion of depth right from the start.
- Refine the Edges: Now, go back to your simple heart shapes and refine their outlines. Poppy petals are not smooth; they are crinkly and delicate. Add ruffles, dips, and waves to the edges to give them that characteristic paper-like texture.
- The Center Details: Inside your center circle, draw a small crown-like shape for the top of the seed pod. Around the base of the circle, add a ring of tiny lines or dots to represent the fuzzy stamens.
- The Stem: Draw a long, thin stem coming from the base of the flower. Give it a gentle “S” curve. A perfectly straight stem looks unnatural; a slight curve adds grace and movement.
Once you have this light pencil outline, you have a perfect roadmap for adding your glorious red color.

Technique 1: The Richness of Colored Pencils
Colored pencils offer incredible control and the ability to build up rich, deep colors through layering. This technique is perfect for creating a realistic and detailed red poppy flower drawing.
You Will Need:
- A light pencil sketch of your poppy
- Colored pencils: at least three shades of red (light, medium, dark), a black, and a dark green.
- A blender pencil (optional, but recommended)
Step-by-Step Instructions:
- Establish the Lightest Red: Take your lightest red pencil. Using small, circular motions or light strokes that follow the curve of the petals, apply a consistent base layer of color to all the petals. Don’t press hard! The goal is a light, even tone. Leave the very top edges of the petals that would be catching the light almost white.
- Introduce the Mid-Tones: Now, take your medium red. Identify the areas that would be in shadow: where petals overlap, in the deep crinkles and folds, and at the base of the petals near the center. Apply the medium red in these areas, blending it out into the lighter red.
- Define the Deepest Shadows: With your darkest red or even a deep crimson/burgundy, go into the darkest parts of the shadows. Focus on the very base of the petals and the cast shadows where one petal sits on top of another. This contrast between light, medium, and dark is what will make your flower look three-dimensional.
- Color the Center: Use your black pencil to fill in the ring of stamens with small, sketchy strokes. For the central seed pod, you can use black or a very dark green, leaving a tiny spot of white as a highlight.
- Blend and Burnish: Go back over the entire flower with your lightest red or a colorless blender pencil. Use firm, even pressure. This will meld the layers of color together, creating smooth, professional-looking transitions and a rich, waxy finish.
- The Stem: Use your dark green pencil for the stem, making one side slightly darker than the other to give it a rounded appearance.

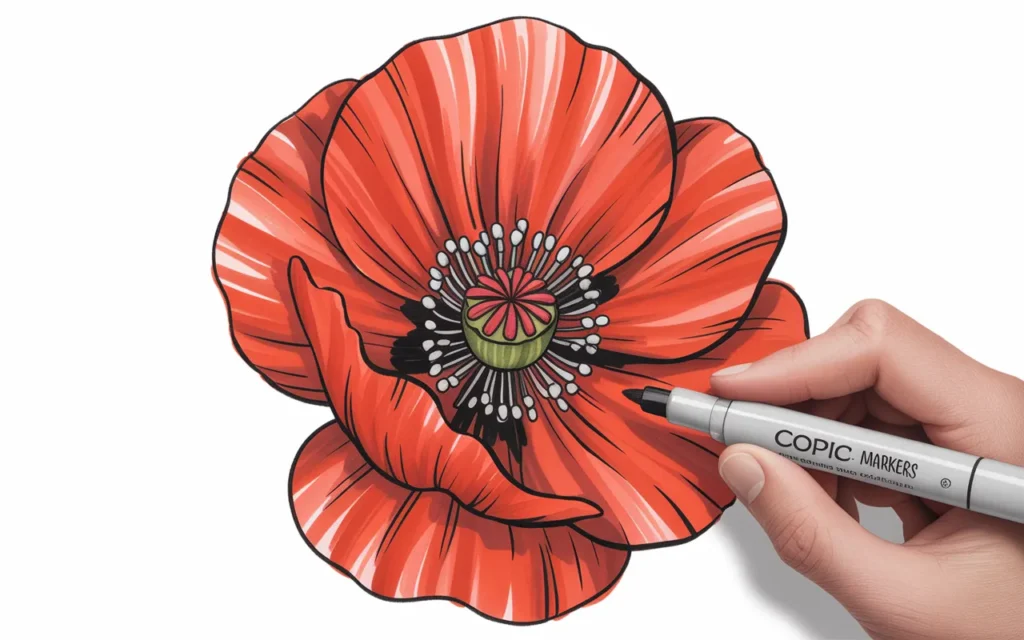
Technique 2: The Boldness of Alcohol Markers
If you want a poppy that is unapologetically vibrant and bold, alcohol markers are the perfect tool. They lay down smooth, consistent color for a graphic, illustrative look.
You Will Need:
- A permanent fineliner outline of your poppy (like a Sakura Micron)
- Marker paper or Bristol board
- Alcohol markers: a light red, a medium red, and a black
Step-by-Step Instructions:
- The Final Outline: Once you have your pencil sketch, trace over it with a black fineliner pen. Make sure the ink is completely dry before you start coloring to avoid smudging.
- Lay Down the Lightest Red: Using the brush tip of your lightest red marker, quickly fill in all the petals. Alcohol markers blend best when they are wet, so work relatively fast. This first layer is your base color.
- Add Shadows with a “Flick”: Take your medium red marker. In the shadow areas (at the base of petals and where they overlap), use a “flicking” motion. Start your stroke in the shadow area and flick your wrist outwards, lifting the pen as you move into the lighter area. This creates a natural-looking blend without harsh lines.
- Deepen the Contrast: You can go over the darkest shadow areas a second time with your medium red to deepen them, or use an even darker red if you have one. The key is to build the color in layers.
- Color the Center: Use your black marker to fill in the center of the poppy. The bold, solid black will create a striking contrast with the vibrant red petals.
- Add White Highlights (Optional): For an extra pop, you can use a white gel pen to add small highlights to the very edges of the petals and a tiny dot on the black center.
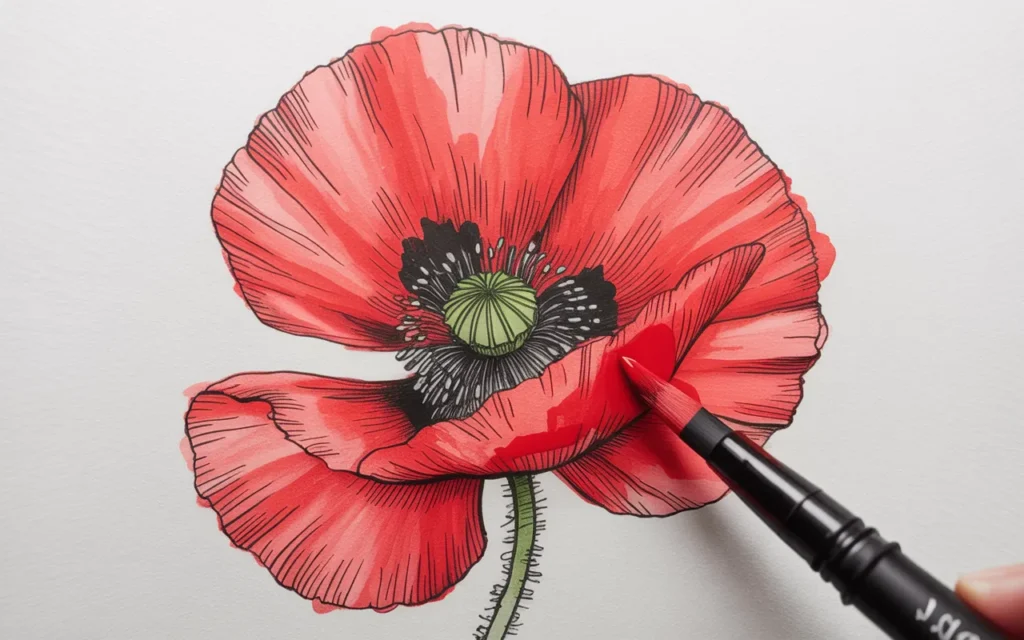
Technique 3: The Dreamy Effect of Watercolor Brush Pens
This technique gives you the beautiful, translucent effect of watercolor painting with the control of a pen. It’s perfect for creating a soft, artistic, and expressive red poppy.
You Will Need:
- A light pencil sketch on watercolor paper
- Real Brush Pens (or watercolor paints): red, black, and green
- A water brush or a regular paintbrush and a cup of water
Step-by-Step Instructions:
- Apply Color to Shadow Areas: Take your red brush pen and apply color only to the areas that will be in shadow. Lay down a line of red ink at the base of the petals and in the deep folds. Be sparing—a little ink goes a long way.
- Activate with Water: Now, take your water brush (or a clean, damp paintbrush) and go over the ink you just applied. Use the water to pull the red pigment out from the shadow areas and across the rest of the petal. The color will be darkest where you applied the ink and will fade to a very light, translucent wash at the edges. This instantly creates a beautiful gradient.
- Drop in More Color: While the petals are still damp, you can “drop in” more color for a varied effect. Touch the tip of your red pen to the wet areas at the base of the petals. The color will bleed and bloom outwards in a beautiful, organic way.
- The Center: Use your black brush pen to create the center. You can draw the stamens and then lightly touch them with your water brush to soften them slightly.
- Let It Dry Completely: It is crucial to let your painting dry completely before adding any other details.
- Add Final Details: Once dry, you can go back with the fine tip of your red brush pen (with no water) to add a few defining lines or darken the shadows to increase contrast.
Adding Depth and Character to Your Drawing
No matter which technique you use, here are a few extra tips to elevate your red poppy drawing:
- Don’t Forget the Veins: Use a sharpened colored pencil or the very tip of your marker to draw very faint, delicate lines radiating from the base of the petals outwards. This suggests the texture and veins of the flower.
- Vary Your Reds: Even in a single poppy, the red is not uniform. Mix a little orange into your reds for warmer highlights and a touch of purple or deep brown for cooler, richer shadows.
- The Background Matters: A simple grey or pale blue background can make your red poppy pop even more.
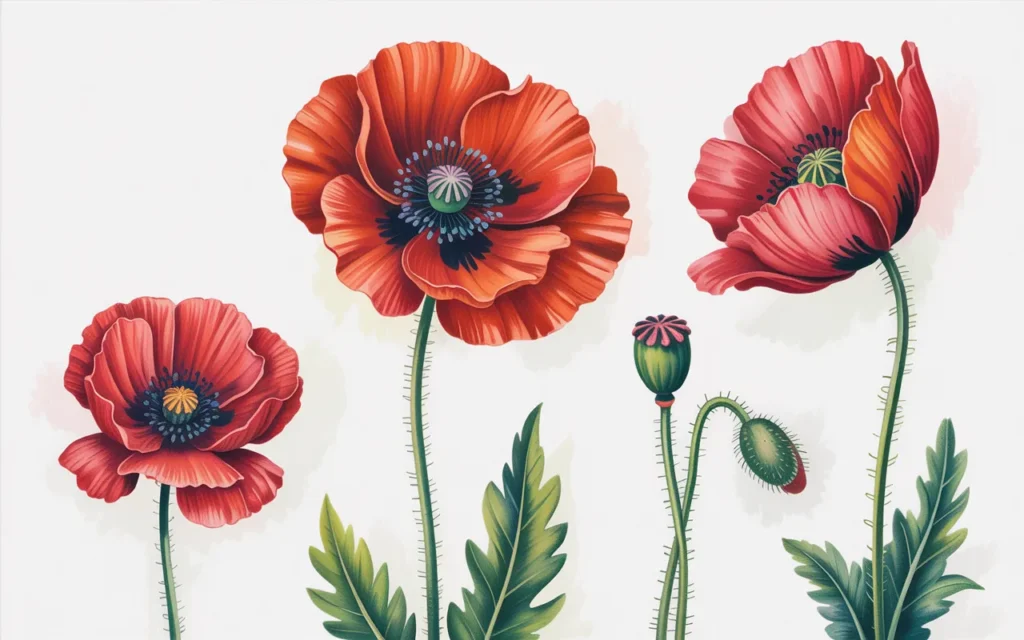
- Create a Composition: Don’t just draw one poppy! Create a small bouquet with two or three flowers. Show them from different angles—one from the side, one from the top. Add a closed bud and some green leaves to create a more dynamic and interesting composition.
Your Creative Journey Begins with a Single Line
You now have a wealth of techniques and ideas to create your very own breathtaking red poppy flower drawing.
You’ve learned how to see the flower in simple shapes and how to bring it to life with the rich layers of colored pencils, the bold strokes of markers, or the dreamy washes of watercolor.
The most important thing to remember is that every artist starts somewhere. Your first drawing doesn’t need to be a masterpiece.
The goal is to enjoy the process—the feeling of the pencil on the paper, the joy of watching colors blend, and the satisfaction of creating something beautiful with your own two hands.
So, pick the technique that excites you the most, gather your supplies, and let the vibrant energy of the red poppy flow from your heart onto the page.
Recommended Drawing Supplies
Here is a quick summary of the versatile products that will help you create stunning red poppy drawings.
| Product Name | Brand | Great For… |
|---|---|---|
| {Prismacolor Premier Colored Pencils} | Prismacolor | Rich, blendable colors for creating realistic depth. |
| {Copic Sketch Markers, Set of 6, Reds} | Copic | Bold, vibrant, and streak-free color application. |
| {Strathmore 400 Series Bristol Paper} | Strathmore | Ultra-smooth paper that’s ideal for markers and blending. |
| {Arteza Real Brush Pens} | Arteza | Achieving a beautiful, soft watercolor effect with control. |
| {Sakura Pigma Micron Fineliner Pens} | Sakura | Creating crisp, permanent outlines that won’t bleed. |
| {Derwent Blender and Burnisher Set} | Derwent | Seamlessly blending and finishing colored pencil work. |
| {Faber-Castell Kneaded Eraser} | Faber-Castell | Gently lifting color to create precise highlights. |