
Have you ever gazed at a poppy, with its delicate, crinkled petals and bold center, and felt a deep desire to capture that fleeting beauty on paper? There’s a unique magic to them, a mix of fragility and resilience that artists find endlessly inspiring.
If you’ve ever wished you could create a beautiful poppy flower sketch but felt intimidated by the blank page, you’ve found the right place. This is where your artistic journey begins.
This guide is designed to be your friendly companion, taking you by the hand and showing you just how simple and rewarding sketching poppies can be.
We will break down the entire process, from understanding the basic shapes of the flower to adding shading that makes it leap off the page.
Forget about complicated art theory and intimidating jargon. We’re going to focus on fun, encouragement, and easy-to-follow steps.
By the end of this post, you’ll have the skills and the confidence to create stunning poppy sketches of your own.
Essential Sketching Supplies for Beginners
Before we dive into the creative process, let’s talk about tools. You don’t need a fancy, expensive art studio to start sketching. In fact, a few high-quality basics can make all the difference in your experience and the quality of your work. Here are some highly recommended products from Amazon that will set you up for success on your poppy flower sketch journey.
- {Strathmore 400 Series Sketchpad}
- Brand: Strathmore
- Benefit/Context: This paper is a beginner’s dream. It has a fine-toothed surface that is perfect for graphite, charcoal, and ink. It’s also durable enough to withstand repeated erasing without tearing, which is a huge relief when you’re learning and experimenting.
- {Faber-Castell 9000 Graphite Sketch Pencil Art Set}
- Brand: Faber-Castell
- Benefit/Context: This set provides a wonderful range of pencil grades, from hard pencils (like 2H) for light initial sketches to soft pencils (like 4B or 6B) for rich, dark shading. Using different grades is the secret to creating depth and realism in your poppy sketch.
- {Prismacolor Premier Kneaded Eraser}
- Brand: Prismacolor
- Benefit/Context: This is so much more than a regular eraser. It’s soft and pliable, so you can mold it to a fine point to lift out tiny highlights on petals or erase small areas without smudging your surrounding work. It’s an essential tool for any sketch artist.
- {Staedtler Pigment Liner Fineliner Pens}
- Brand: Staedtler
- Benefit/Context: If you enjoy a clean, illustrative look, these fineliner pens are perfect for outlining your final sketch or creating beautiful line art. They are filled with archival, waterproof ink, so your poppy flower sketch won’t smudge or fade over time.
- {General’s Charcoal Pencil Kit}
- Brand: General’s
- Benefit/Context: For creating a poppy sketch with drama and high contrast, charcoal is a fantastic medium. This kit gives you various hardness levels, allowing you to create the deep, velvety blacks of the poppy’s center and the soft, smoky grays of petal shadows.
- {Derwent Blending Stumps}
- Brand: Derwent
- Benefit/Context: These are tightly rolled paper tools used to blend and smudge graphite and charcoal. They give you much more control than using your fingers, allowing you to create smooth, seamless gradients and soft shadows in your drawing.
- {Moleskine Art Sketchbook}
- Brand: Moleskine
- Benefit/Context: For sketching on the go, a quality sketchbook is a must. Moleskine books are durable, with high-quality paper that feels great to draw on. It’s the perfect place to practice your poppy sketches whenever inspiration strikes.

Seeing Like an Artist: The Anatomy of a Poppy
Before you draw your first line, let’s take a moment to really look at a poppy. Understanding its basic structure will make the sketching process feel much less daunting and far more intuitive. We’ll break it down into simple, easy-to-draw shapes.
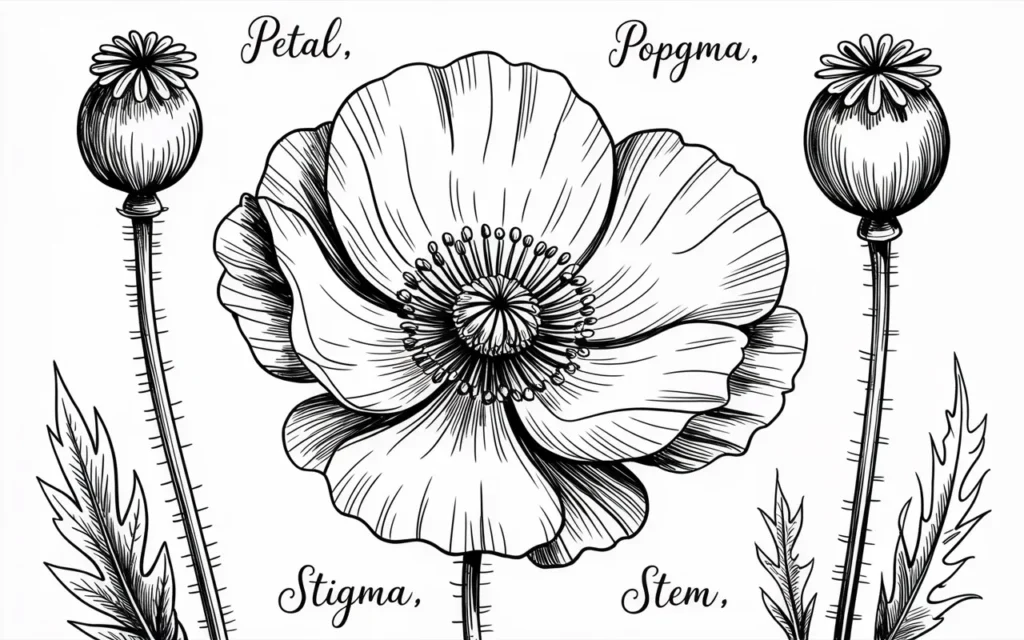
- The Petals: Poppies generally have four to six large petals that overlap. The most important thing to notice is their imperfection. They are not smooth or symmetrical. They are crinkled, delicate, and almost ruffled, like pieces of crumpled tissue paper.
- The Center (Ovary and Stamens): At the heart of the flower is the seed pod, or ovary. It’s a distinctive bulbous shape, often with a little crown-like structure on top (the stigma). Surrounding this pod is a dense ring of stamens—thin filaments with dark tips that create a powerful point of contrast against the lighter petals.
- The Stem: A poppy’s stem is typically long and slender. A key feature is that it’s usually covered in fine, fuzzy hairs. Stems are rarely perfectly straight; they often have gentle, organic curves that add grace and character to your sketch.
- The Bud: Even the bud is unique. It’s an oval-shaped pod that often droops downwards from its stem, covered in a fuzzy casing that splits open when the flower blooms.
When you start to see the poppy as a collection of these simple parts—ruffled ovals, a central pod, fuzzy lines—it suddenly becomes much more approachable. You’re not drawing a complex flower; you’re just assembling a few basic shapes.
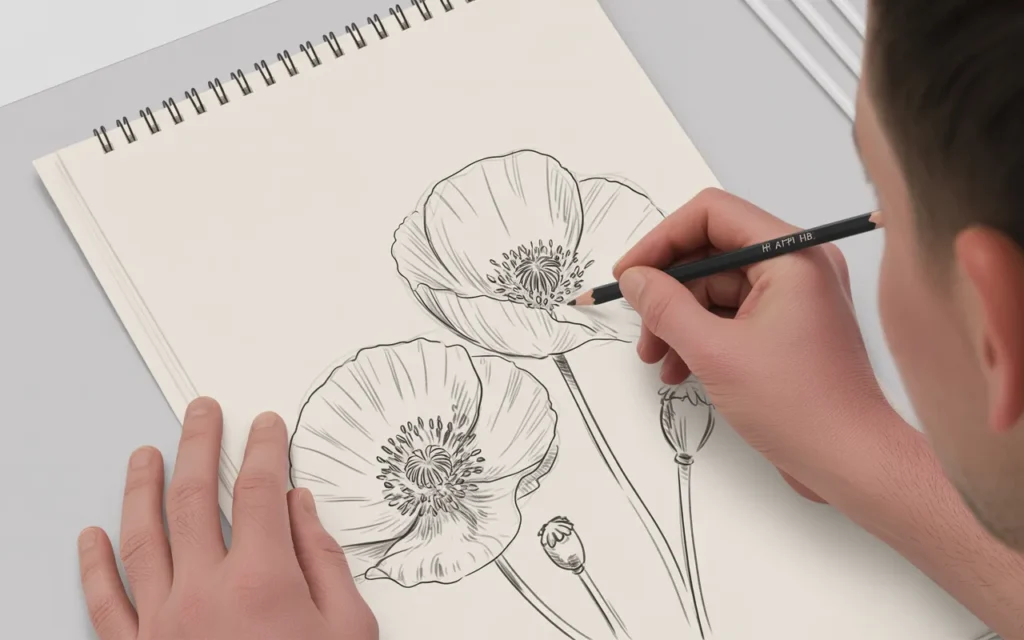
Step-by-Step: Your First Pencil Poppy Flower Sketch
Ready? Grab your sketchpad and a light graphite pencil (an HB is perfect for this). We’re going to sketch a beautiful single poppy together. The key at the beginning is to press very lightly. These first lines are just guides.
Step 1: Establish the Center and Main Shape
Instead of starting with the petals, we’ll start from the inside out.
- Lightly draw a small circle where you want the center of your flower to be.
- From that circle, draw a larger, looser circle around it. This outer circle is a rough guide for the overall size and shape of your flower head. It helps ensure your petals are somewhat balanced.
Step 2: Sketch the Front Petals
Now, let’s lay in the petals that are closest to the viewer.
- Starting from the edge of your small center circle, draw a large, wavy, “C”-like shape that extends out to your larger guide circle. This forms the outer edge of your first petal.
- Complete the petal by drawing another wavy line from the end of the “C” back to the base of the center. Don’t try to make it perfect! Add a few dips and ruffles.
- Repeat this process for a second front petal, allowing it to slightly overlap the first one. This overlap is crucial for creating a sense of depth.
Step 3: Add the Back Petals
The back petals are what will make your sketch look three-dimensional. They will be partially hidden by the front petals and the center.
- Find a gap between your two front petals. From behind them, draw the top, wavy edge of a back petal. You will only see the top part of it.
- Add another back petal in another gap. You can add two or three of these, depending on how full you want your flower to look.
- Use your eraser to clean up the lines. Erase any part of the back petals that you accidentally drew “through” the front petals. This simple act of cleaning up overlaps instantly creates a convincing 3D effect.
Step 4: Draw the Stem and Define the Center
Let’s give your flower a foundation and bring the center to life.
- From the base of the flower, where the petals all meet, draw two parallel lines curving gently downwards to form the stem. A slight S-curve will make it look more natural than a perfectly straight line.
- Go back to the small circle in the center. Refine it into the poppy’s unique seed pod shape—a small urn or vase shape with a flat, crowned top.
- Around the base of this pod, sketch a dense ring of short, radiating lines for the stamens. Add tiny dots or ovals at the tips.
Your basic line drawing of a poppy is complete! You’ve successfully created a well-proportioned sketch. Now for the magic: shading.
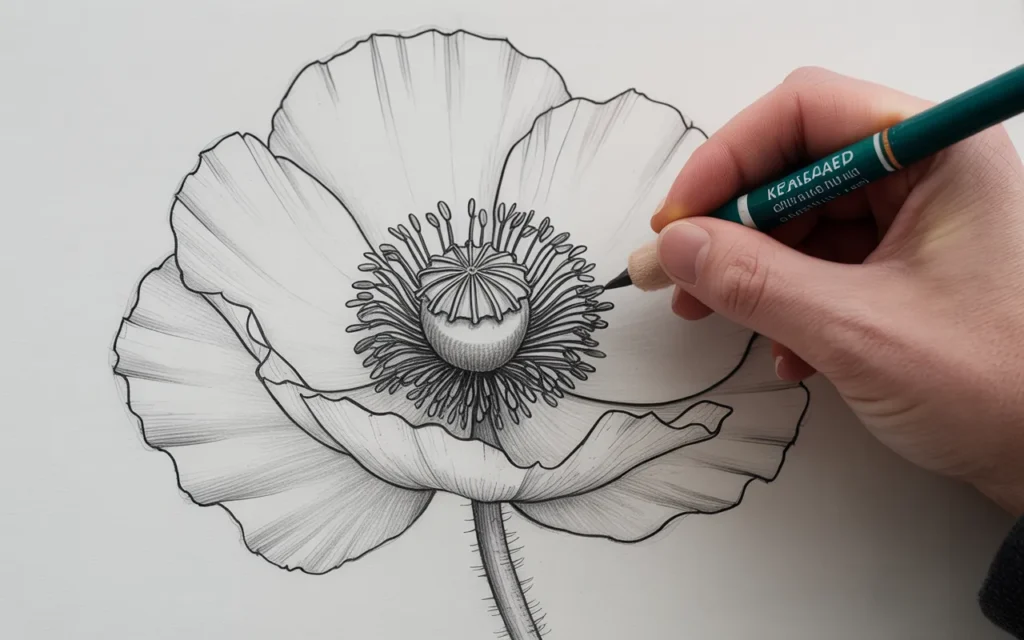
Bringing Your Sketch to Life with Shading and Texture
Shading is what transforms a flat outline into a dynamic, three-dimensional form. The trick is to determine your light source. Let’s imagine the light is coming from the top left of your page. This means areas on the top and left will be brightest, and areas on the bottom and right will be in shadow.
Shading the Petals to Create Form
- Map Out Your Shadows: The darkest areas will be at the very base of the petals where they connect to the dark center, and wherever petals overlap. The little crinkles and folds in the petals will also have small shadows within them.
- Apply a Light Base Tone: Using a light pencil (like an HB or 2B) on its side, gently shade all the areas you identified as being in shadow. Keep it soft and even.
- Build Up the Darkest Darks: Switch to a softer, darker pencil (a 4B is great). Go back over the deepest shadow areas—the overlaps and the base of the petals. Don’t be afraid to create a strong contrast. This is what makes the petals look like they are curling forward and have dimension.
- Add Subtle Veins: Poppy petals have very faint veins. With a sharpened, harder pencil (like an H), draw a few very light, delicate lines radiating from the base of each petal toward the outer edge.
- Lift Out Highlights: Take your kneaded eraser and mold it into a sharp point or a thin wedge. Gently dab or stroke the eraser along the very top edges of the petals that are facing the light source. This lifts the graphite and creates bright highlights, making the petals look thin and sun-kissed.

Adding Texture to the Stem and Center
- The Fuzzy Stem: To create the illusion of a hairy stem, use your pencil to make very short, light, flicking motions all along both sides of the stem lines.
- The Dark Center: The center is your darkest dark. Use your softest pencil (4B or 6B) to fill in the area of the stamens with a rich, dark tone. Let the individual stamen lines get a bit lost in the shadow; this is realistic. Shade the central pod as a rounded form, leaving a small highlight on its top-left side.
Take a step back and look at your poppy flower sketch. You’ve just used light and shadow to create a beautiful, realistic drawing!
Exploring Different Poppy Sketch Styles
Now that you’ve mastered the basics of a realistic pencil sketch, you can have fun exploring other artistic interpretations. Your poppy flower sketch can take on many different personalities!
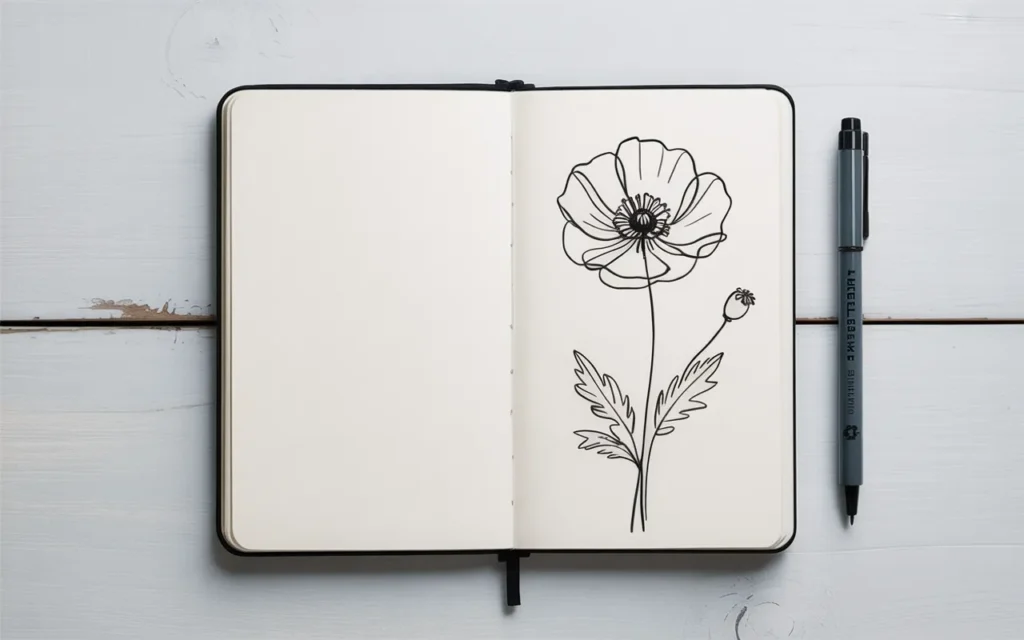
The Minimalist Ink Line Sketch
This style is modern, elegant, and very popular on platforms like Pinterest.
- Technique: Using a fineliner pen (like a Staedtler or Micron), focus only on the outline of the poppy. For an even more artistic feel, try a “continuous line” sketch, where you attempt to draw the entire flower without lifting your pen from the paper.
- Aesthetic: The result is clean, graphic, and sophisticated. It celebrates the pure form and graceful lines of the poppy.
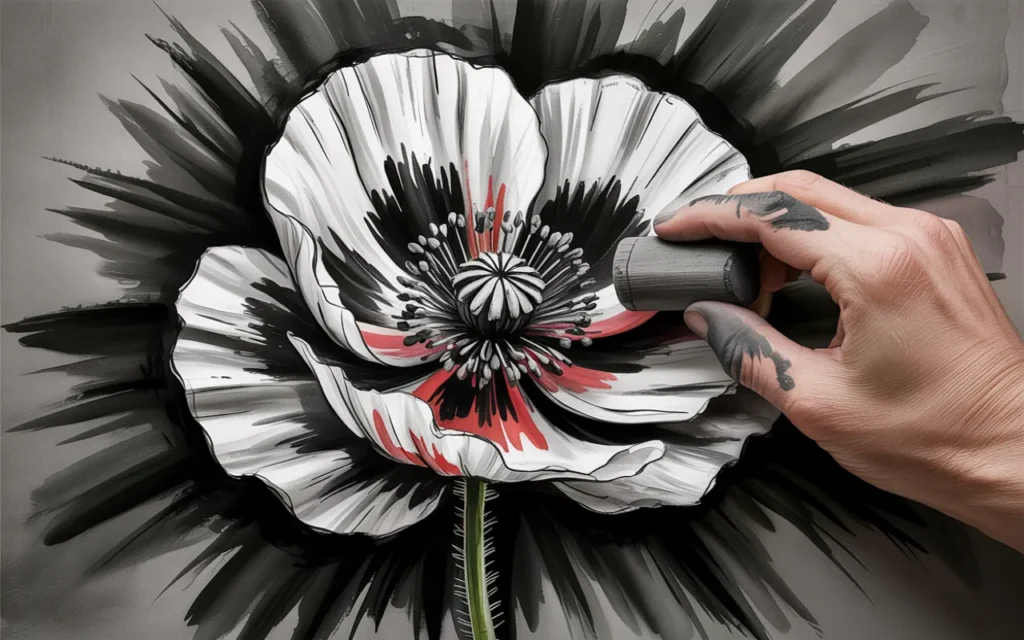
The Expressive Charcoal Sketch
If you love drama, mood, and high contrast, charcoal is an incredible medium for sketching poppies.
- Technique: Use a charcoal pencil for more controlled lines and a stick of willow or compressed charcoal for laying in large areas of shadow. Charcoal is very easy to smudge and blend.
- Aesthetic: Use your fingers or a blending stump to create soft, smoky mid-tones. Use a kneaded eraser to aggressively lift out bold, bright highlights. This creates a powerful, expressive, and moody poppy sketch with a huge emotional range.
The Botanical Illustration Sketch
This style combines artistic beauty with scientific accuracy.
- Technique: This requires careful observation. Use a sharp pencil or fine-tipped pen. The goal is to render the poppy with a high level of detail. You might include sketches of the bud, the flower in full bloom, and the seed pod, all on one page.
- Aesthetic: Often includes handwritten notes about the different parts of the plant. It’s a classic, intelligent, and beautiful style that honors the natural world.
Common Beginner Mistakes and How to Fix Them
Every artist makes mistakes; it’s a critical part of learning! Here are a few common hurdles you might encounter when starting your poppy flower sketch and how to easily overcome them.
- The “Daisy Petal” Problem:
- The Mistake: Drawing separate, symmetrical petals all radiating from the center like a classic daisy or cartoon sun.
- The Fix: Remember two key words: overlap and imperfection. Poppy petals are messy and they lay on top of each other. Always start with the front petals, then tuck the back petals behind them. Embrace wrinkles, folds, and ruffled edges.
- Fear of the Dark:
- The Mistake: Being too timid with shading, resulting in a flat, washed-out sketch that lacks depth.
- The Fix: Contrast is your best friend. A drawing needs a full range of values, from the white of the paper to the darkest black your pencil can make. Be bold! Really push the darks in the center of the flower and where petals overlap. This contrast is what will make your drawing feel three-dimensional.
- The Smudge Monster:
- The Mistake: Resting your drawing hand on your sketch and accidentally smearing your beautiful graphite work.
- The Fix: A simple but effective trick: place a spare piece of paper under your drawing hand. This creates a barrier, allowing you to glide over your sketch without smudging. If you’re right-handed, try to work on your drawing from left to right. If you’re left-handed, work from right to left.
Your Turn to Create!
You are now armed with all the techniques, ideas, and encouragement you need to start creating your own beautiful poppy flower sketches.
We’ve journeyed from understanding the flower’s simple shapes to building a full sketch with depth, shadow, and personality.
The most important thing to carry forward is the spirit of play and practice. Your first sketch doesn’t need to be a masterpiece. Every line you draw teaches you something.
So find a quiet corner, grab your sketchbook, and let your pencil explore the graceful curves and delicate ruffles of a poppy.
Draw one, draw ten, draw a whole field. The journey of a thousand drawings begins with a single, happy sketch.
Recommended Sketching Supplies
Here is a quick summary of the recommended products to help you get started on your poppy sketching adventure.
| Product Name | Brand | Great For… |
|---|---|---|
| {Strathmore 400 Series Sketchpad} | Strathmore | High-quality, durable paper for practice and finished work. |
| {Faber-Castell 9000 Graphite Sketch Pencil Set} | Faber-Castell | A full range of pencil grades for sketching and shading. |
| {Prismacolor Premier Kneaded Eraser} | Prismacolor | Precisely erasing and lifting highlights without smudging. |
| {Staedtler Pigment Liner Fineliner Pens} | Staedtler | Creating clean, permanent ink outlines and line art. |
| {General’s Charcoal Pencil Kit} | General’s | Creating dramatic, expressive sketches with high contrast. |
| {Derwent Blending Stumps} | Derwent | Smoothly blending graphite and charcoal for soft shadows. |
| {Moleskine Art Sketchbook} | Moleskine | A durable, portable sketchbook for drawing anywhere. |