There is a unique kind of peace that comes from needle and thread. The slow, rhythmic pull of floss through fabric can be a form of meditation, a way to create something beautiful and lasting with your own hands.
If you’ve ever admired the vibrant, paper-thin petals of a poppy and felt a desire to capture that beauty, then you’ve discovered the perfect subject for your next embroidery project.
A poppy flower embroidery piece is more than just a craft; it’s a stitched painting, a textured celebration of nature’s delicate artistry.
Perhaps you’re new to embroidery and the idea of starting a project feels a bit overwhelming. Or maybe you’re an experienced stitcher looking for fresh inspiration.
This guide is designed to be your friendly companion on this creative journey. We will explore everything from the essential supplies to the best stitches for creating realistic petals and textured centers.
You’ll find simple patterns and design ideas to get you started right away. Forget perfectionism and pressure. Let’s embrace the joyful, relaxing process of bringing a beautiful poppy to life, one stitch at a time.

The Essential Stitches for Your Poppy Project
Embroidery might look complex, but most designs are created using just a handful of simple, foundational stitches. For our poppy flower embroidery, we’ll focus on a few key stitches that are perfect for creating petals, stems, and textured centers.
- Back Stitch: This is your go-to for creating clean outlines. It creates a solid, continuous line that looks like it was drawn with a pen. It’s perfect for outlining your poppy petals or for stitching the stem.
- Satin Stitch: This is a fill stitch used to cover areas with smooth, solid color. As the name suggests, it creates a beautiful, satin-like finish. It’s ideal for filling in your poppy petals if you want a bold, smooth look.
- Long and Short Stitch: This is the secret to creating realistic, blended color. It’s a fill stitch where rows of long and short stitches are staggered, allowing you to seamlessly blend different shades of red to create light and shadow on your petals. It’s often called “thread painting” for this reason.
- French Knot: This stitch creates a beautiful, textured dot. A cluster of French knots is the perfect way to create the fuzzy, pollen-dusted center of your poppy.
- Stem Stitch: As the name implies, this stitch is perfect for creating stems and vines. It creates a slightly raised, rope-like line that gives your poppy’s stem a lovely texture and a bit of dimension.
Don’t be intimidated if these are new to you! A quick search on YouTube for any of these stitch names will give you a clear, visual demonstration. Practice them a few times on a spare piece of fabric, and you’ll be ready to start on your poppy..
Transferring Your Poppy Design to Fabric
Before you can start stitching, you need to get your poppy design onto your fabric. Here are a few simple, beginner-friendly methods:
- The Lightbox or Window Method (Tracing):
- Print or draw your poppy design on a piece of paper.
- Tape the paper to a window on a bright day or use a lightbox.
- Tape your fabric over the design. The light will shine through, allowing you to see the design clearly.
- Trace the lines onto your fabric using a water-soluble pen or a sharp pencil.
- The Water-Soluble Pen Method (Freehand):
- If you feel confident, you can draw your poppy design directly onto your fabric using a water-soluble marking pen. This gives you a lot of freedom. The blue lines will wash away with water when you’re finished.
- The Stabilizer Method:
- You can buy printable, water-soluble stabilizer paper. You print your design directly onto the stabilizer, stick it to your fabric, and stitch right through both layers. When you’re done, you soak the piece in water, and the stabilizer dissolves completely.
For a simple poppy flower embroidery project, the window tracing method is a fantastic and easy place to start.
Step-by-Step Tutorial: Your First Thread-Painted Poppy
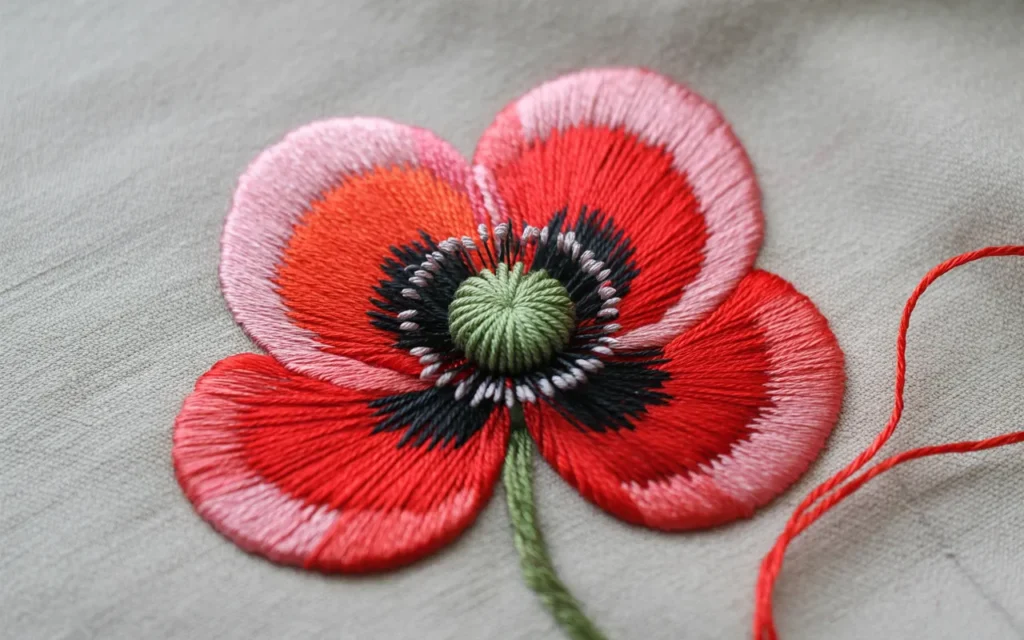
This tutorial will guide you through creating a beautiful, realistic poppy using the long and short stitch. We’ll use three shades of red to create depth: a dark red for shadows, a medium red for the main color, and a light red or pink for highlights.
Materials:
- An embroidery hoop with cotton fabric
- Your three shades of red floss, plus black and green floss
- Embroidery needle
- Scissors
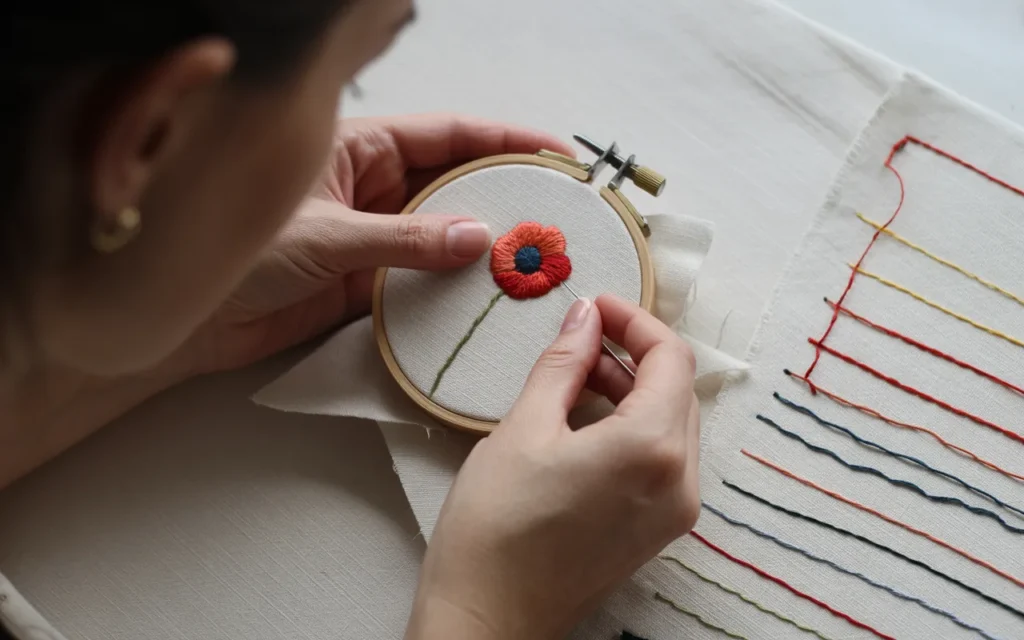
Step 1: Set Up and Outline
- Transfer a simple poppy outline onto your fabric.
- Secure your fabric in the embroidery hoop, making sure it is taut like a drum.
- Separate your floss. Standard DMC floss comes with 6 strands. For this project, we will use 2 strands at a time for a finer, more detailed look.
- Using 2 strands of your medium red, outline one of the front petals using a simple back stitch. This gives you a clean edge to work towards.
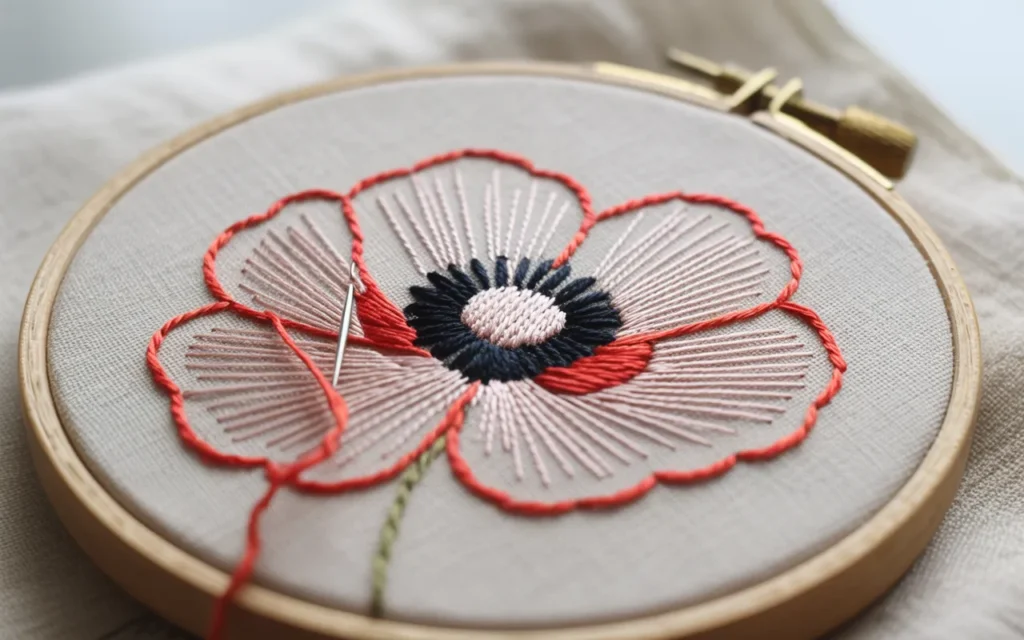
Step 2: The First Layer (Long and Short Stitches)
- Using your dark red floss, start at the base of the petal. Bring your needle up and make a long stitch that goes about a third of the way up the petal.
- Bring your needle up right next to that stitch and make a shorter stitch, about half the length of the first one.
- Continue alternating long and short stitches across the base of the petal, following the natural curve of the shape. This first layer should cover the bottom third of the petal in shadow.
Step 3: Blending the Mid-Tone
- Now, switch to your medium red floss.
- Bring your needle up through the dark red stitches from the first layer. Your needle should emerge in the middle of a previous stitch, splitting the thread. This is the key to seamless blending.
- Make long stitches that extend further up into the petal, overlapping and covering the gaps left by the first layer.
- Continue this process, working your way up the petal. The medium red should blend into the dark red and cover the central part of the petal.
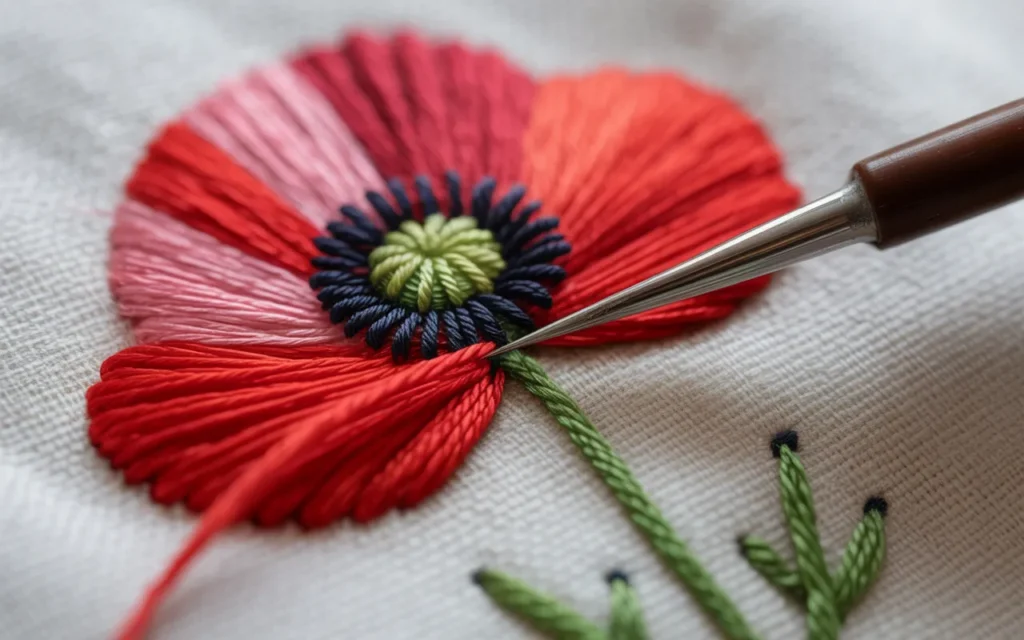
Step 4: Adding Highlights
- Switch to your light red or pink floss.
- Just as before, bring your needle up through the stitches of the previous (medium red) layer.
- Fill in the remaining top edge of the petal with long and short stitches. These are your highlights, where the light would be hitting the flower. You should now have a beautifully blended petal that transitions from dark to medium to light.
- Repeat this process for all the other petals. For petals in the back, you might use more of the medium and dark reds and less of the highlight color to create a sense of distance.
Step 5: The Center and Stem
- Using 2-3 strands of black floss, fill the center of the poppy with a dense cluster of French knots. This will create a wonderful, textured center.
- Using 2-3 strands of green floss, use the stem stitch to create a graceful, curving stem coming down from the flower.
Once you finish and tie off your threads at the back, your beautiful, thread-painted poppy is complete!
More Poppy Flower Embroidery Design Ideas
Once you’re comfortable with the basics, you can explore so many creative styles.
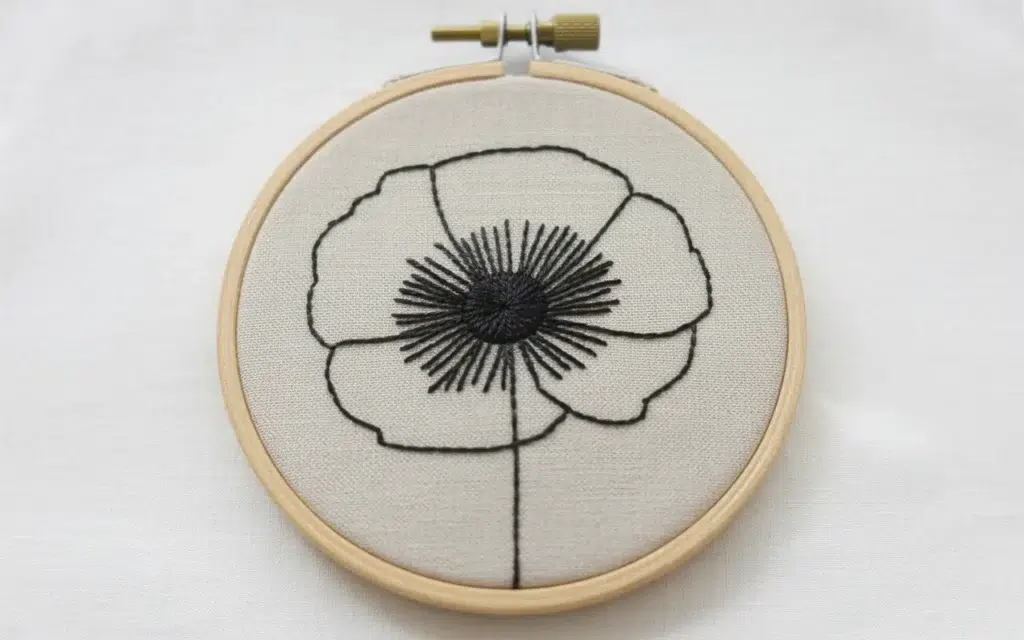
The Minimalist Outline
For a modern, chic look, forget the fill stitches altogether. Simply stitch the outline of a poppy using a back stitch in a single color, like black or a deep red. A single continuous line drawing of a poppy can also be a stunning and artistic choice.
The Bold Satin Stitch Poppy
If you love bold color and a clean, graphic look, the satin stitch is your friend. Outline your poppy petals and then fill them completely with a smooth satin stitch in a single, vibrant red. The effect is less realistic
but very striking and decorative.
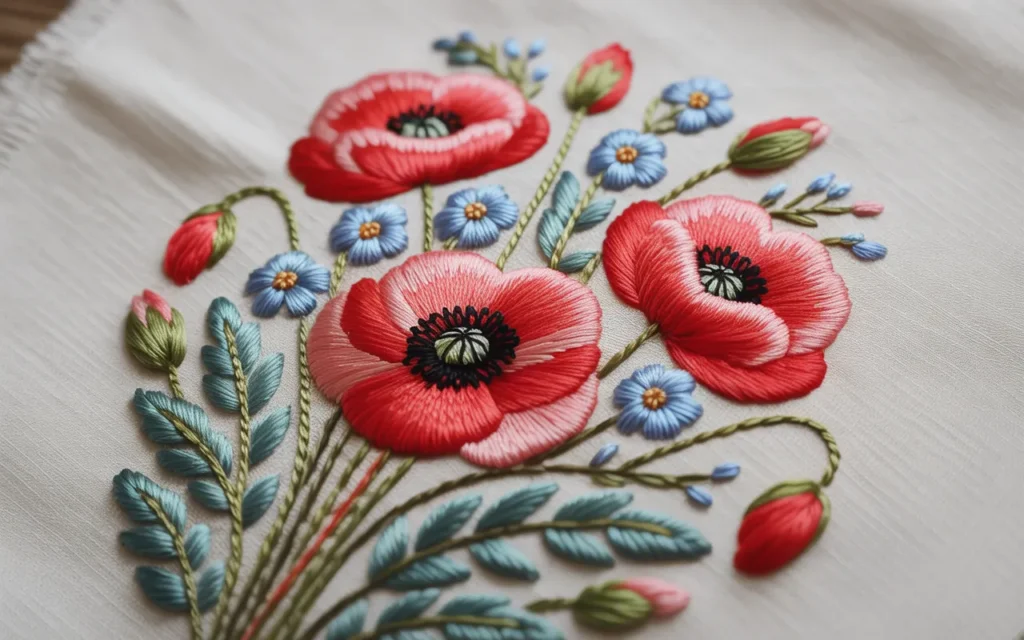
A Bouquet of Poppies
Don’t just stop at one! Create a beautiful composition by embroidering a whole bouquet.
- Draw several poppies of different sizes and at different angles.
- Overlap them to create a sense of depth.
- Add some simple green leaves (using a fishbone stitch or satin stitch) and maybe some other small filler flowers, like lavender sprigs (stitched with lazy daisy stitches) or forget-me-nots (made with French knots).
Adding Text or a Date
A poppy flower embroidery can be a wonderful way to commemorate a person or an event. Consider adding a name, a significant date, or a meaningful word like “Remember” or “Peace” alongside your
poppy, stitched in a simple back stitch.
Finishing and Displaying Your Work
You’ve poured your time and creativity into this piece, so let’s show it off!
- Frame it in the Hoop: This is the easiest and one of the most popular ways to display embroidery. Simply trim the excess fabric from the back, and either glue it to the inside of the inner hoop or use a simple running stitch to gather it neatly.
- Embellish Clothing: A small poppy embroidered on the pocket of a denim jacket, the collar of a shirt, or a pair of jeans is a beautiful and personal way to customize your wardrobe.
- Create a Pillow or Pouch: Stitch your poppy design onto a larger piece of fabric that you can then sew into a decorative pillow cover or a small zipper pouch.
- Make a Patch: Embroider your poppy, then cut it out, leaving a small fabric border. You can then sew this patch onto a backpack, a hat, or a jacket.
Your Stitching Journey Awaits
You are now ready to pick up a needle and thread and begin your own poppy flower embroidery project.
We’ve explored the essential stitches, learned how to create realistic, blended petals, and discovered a variety of design ideas to spark your imagination.
Remember that embroidery is a journey, not a race. It’s about the quiet moments, the joy of seeing a flower bloom from your fingertips, and the satisfaction of creating something truly unique.
Don’t worry about making every stitch perfect.
Embrace the process, be patient with yourself, and have fun. The beautiful poppy you create will be a testament to your time, your focus, and your newfound skills.
Recommended Embroidery Supplies
Here is a quick summary of the recommended products to help you get started on your beautiful poppy embroidery.
| Product Name | Brand | Great For… |
|---|---|---|
| {DMC 6-Strand Embroidery Floss, Reds} | DMC | A range of reds for realistic, thread-painted petals. |
| {Embroidery Hoop Set, Bamboo Circle} | Caydo | Keeping fabric taut for neat, even stitches. |
| {Robert Kaufman Kona Cotton Fabric} | Robert Kaufman | A stable, high-quality fabric canvas for your art. |
| {Clover Embroidery Needle Threader} | Clover | Effortlessly threading needles to save time and frustration. |
| {Tombow MONO Zero Eraser/Eraser Stick} | Tombow | Precisely adjusting pencil sketches on fabric. |
| {Gingher Stork Embroidery Scissors} | Gingher | Making clean, precise snips for a tidy finish. |
| {Dritz Water Soluble Marking Pen} | Dritz | Easily transferring patterns that disappear with water. |