There’s a special kind of magic that happens when you create something beautiful with your own two hands.
The process of transforming simple materials—paper, felt, yarn—into a delicate, vibrant poppy can be a wonderfully calming and joyful experience.
The poppy, with its paper-thin petals and rich symbolism of remembrance and peace, is the perfect subject for a heartfelt craft project, whether for a special occasion or just to brighten your home.
If you’ve ever scrolled through Pinterest, admiring beautiful handmade flowers and thinking you need expert skills to make them, this guide is here to change your mind.
We’re going to explore 10 stunningly simple poppy flower craft ideas that anyone can make, regardless of experience.
From easy paper crafts for kids to elegant felt brooches, you’ll find a project that sparks your creativity. Get ready to have fun, make something beautiful, and discover the simple joy of crafting.
1. The Classic Cupcake Liner Poppies
This is a fantastic and incredibly simple poppy flower craft, perfect for doing with kids or for creating a quick and cheerful decoration. The natural ruffles of the cupcake liners do most of the work for you!
Materials:
- Red cupcake liners (2 per flower)
- Black cupcake liner (1 per flower, or use a black marker/button)
- Green pipe cleaners or straws for stems
- Scissors
- Glue stick or hot glue
Step-by-Step Instructions:
- Prepare the Petals: Take two red cupcake liners. You can gently crinkle them a bit more to enhance the texture. One simple way to shape them is to cut 4-5 slits from the edge towards the center, stopping about halfway. This helps define the “petals.”
- Create the Center: Take your black cupcake liner and cut it into a smaller circle. Then, make many small snips around the edge to create a fringed, fuzzy look. Alternatively, you can simply use a black button or draw a black circle with a marker in the center.
- Assemble the Flower: Glue the black center into the middle of one of the red liners. Then, apply glue to the bottom of that liner and press it into the second red liner, staggering them so the petals are offset.
- Add the Stem: Poke a green pipe cleaner through the center of the bottom of the flower and bend it at the top to secure it. If you’re using a straw, simply glue it to the back.
These are perfect for making a whole bouquet to put in a small vase or for creating a beautiful field of poppies on a classroom bulletin board.

2. Realistic Crepe Paper Poppies
For a more elegant and lifelike flower, crepe paper is the material of choice. Its ability to stretch and hold shape allows you to create beautifully cupped and ruffled petals.
Materials:
- Red crepe paper
- Black crepe paper
- Green crepe paper or floral tape
- Floral wire
- A small styrofoam ball or cotton ball
- Scissors
- Hot glue gun
Step-by-Step Instructions:
- Create the Center: Take your small styrofoam or cotton ball and cover it with a small square of black crepe paper, twisting it at the base. Glue this to the top of a piece of floral wire. This forms the central seed pod.
- Make the Stamens: Cut a strip of black crepe paper about 1 inch wide and 4 inches long. Cut a fringe along one long edge. Glue this fringed strip around the base of the seed pod.
- Cut the Petals: Cut 5-6 heart-shaped petals from your red crepe paper. Make sure the grain of the crepe paper runs vertically. This is key for shaping.
- Shape the Petals: Gently stretch the center of each petal with your thumbs. This will create a natural, cupped shape. You can also gently ruffle the top edges.
- Assemble the Flower: One by one, glue the base of each petal around the center of the flower, overlapping them as you go.
- Finish the Stem: Wrap the base of the flower and the entire floral wire stem with green floral tape or a thin strip of green crepe paper.
These stunningly realistic poppies are perfect for creating an everlasting bouquet, a wedding centerpiece, or a single, elegant decoration.

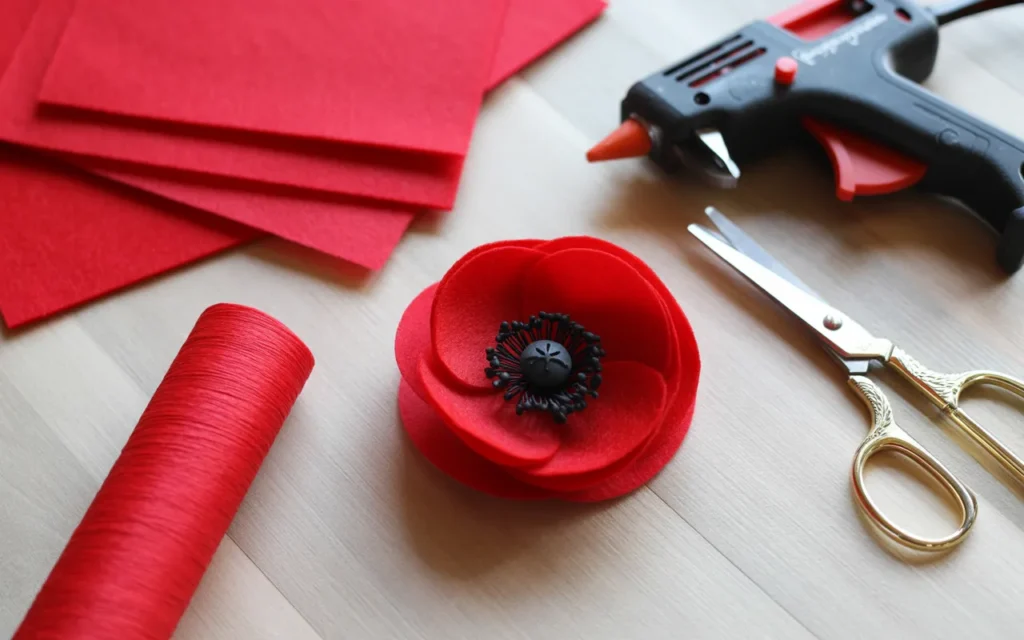
3. Simple and Sweet Felt Poppies
Felt is a joy to work with because it’s soft, easy to cut, and doesn’t fray. This makes it ideal for creating durable poppy crafts like brooches, hair clips, or garlands.
Materials:
- Red and black felt sheets
- A black button
- Fabric scissors
- Hot glue gun
- Pin backing or hair clip (optional)
Step-by-Step Instructions:
- Cut the Petals: Cut four circles out of the red felt, about 2-3 inches in diameter. They don’t have to be perfect.
- Shape the Petals: Take one circle and fold it in half, then in half again to form a quarter-circle. Place a dab of hot glue at the pointed tip to hold the fold. Repeat for all four circles. You now have four cone-shaped, ruffled petals.
- Create the Base: Cut a small circle from the black felt, about 1 inch in diameter. This will be the base you glue everything to.
- Assemble the Flower: Glue your four folded petals onto the black felt base, arranging them in a circle to form the flower shape.
- Add the Center: Glue a black button right in the middle.
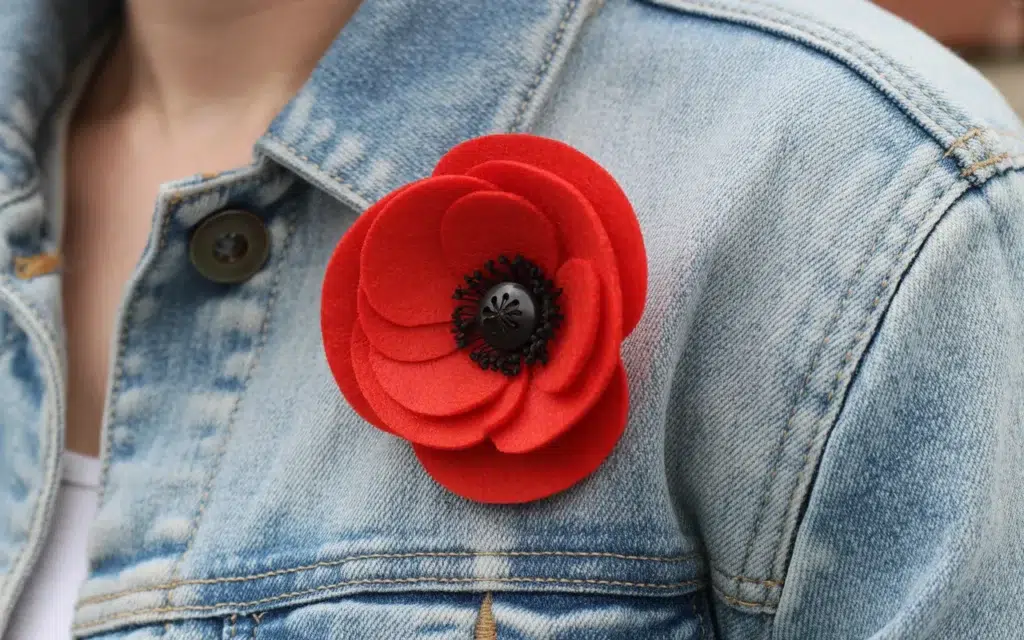
- Add a Backing: If you’re making a brooch or hair clip, simply glue the pin backing or clip to the black felt base on the back.
This is a quick, 10-minute craft that results in a charming and wearable piece of art.
4. Painted Coffee Filter Poppies
This poppy flower craft combines a bit of science and art, as you watch the colors bleed through the coffee filter. It’s a magical process, especially for kids.
Materials:
- Basket-style coffee filters (2-3 per flower)
- Red and black watercolor paint or washable markers
- A small spray bottle with water
- Green pipe cleaners
Step-by-Step Instructions:
- Color the Filters: Lay your coffee filters flat. Use your red marker to draw a thick band of color around the outer, ruffled edge. Use your black marker to draw a solid circle in the very center.
- Make the Colors Bleed: Lightly spritz the colored coffee filters with water. Watch as the colors start to bleed and blend, creating a beautiful, soft, watercolor effect. Let them dry completely.
- Assemble the Flower: Once dry, stack 2 or 3 filters on top of each other. Pinch them together in the center from underneath to bunch them up into a flower shape.
- Attach the Stem: Poke a green pipe cleaner through the center, then twist it around the pinched base to secure the flower shape and create the stem. Fluff out the “petals” to finish.

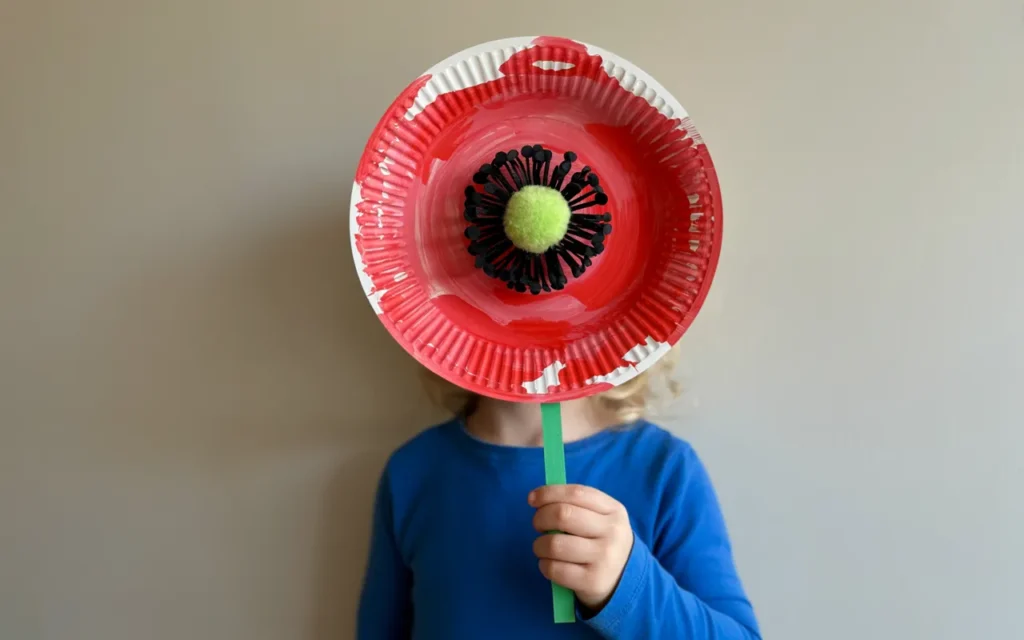
5. Paper Plate Poppies for Toddlers
This is one of the easiest poppy flower crafts, perfect for the littlest hands. It focuses on simple motor skills like painting and gluing.
Materials:
- Small paper plates
- Red paint and a paintbrush
- Black paper or a large black pom-pom
- Glue
- Green construction paper or a craft stick for the stem
Step-by-Step Instructions:
- Paint the Plate: Let your child paint the entire paper plate red. It’s okay if it’s messy!
- Shape the Petals (Optional for older kids): Once dry, you can help them cut a few wavy slits around the edge to give it a more petal-like shape.
- Create the Center: Glue a circle of black paper or a fluffy black pom-pom into the center of the plate.
- Add the Stem: Glue a green craft stick or a strip of green construction paper to the back of the plate.
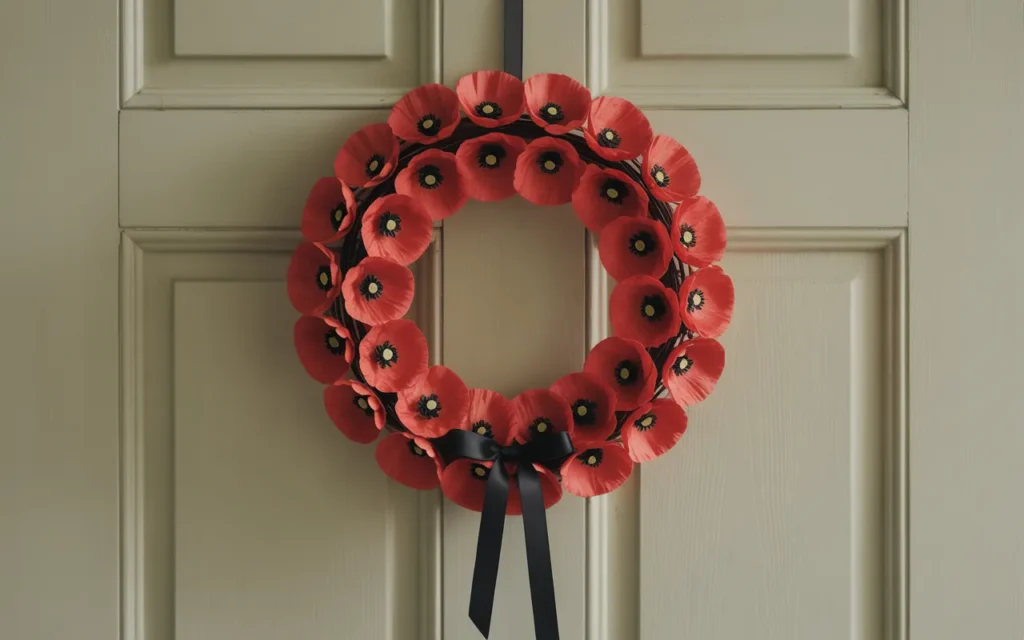
6. Remembrance Day Poppy Wreath
A poppy wreath is a beautiful and meaningful way to pay tribute on Remembrance Day, Veterans Day, or Memorial Day.
Materials:
- A paper plate or wreath form
- A large number of pre-made small poppies (you can make many using the cupcake liner or felt methods)
- Hot glue gun
- Black ribbon
Step-by-Step Instructions:
- Create the Wreath Form: Cut out the center of your paper plate, leaving just the outer rim.
- Attach the Poppies: One by one, glue your small poppies all around the paper plate rim. Pack them tightly together to create a full, lush wreath of flowers.
- Add a Hanger: Create a loop with a piece of black ribbon and glue it to the back of the wreath so you can hang it. You can also add a bow to the bottom for a finishing touch.
7. Egg Carton Poppies
Don’t throw away that cardboard egg carton! The individual cups are the perfect shape for creating the base of a poppy flower.
Materials:
- A cardboard egg carton
- Red paint
- Scissors
- A black button or pom-pom
- Glue
Step-by-Step Instructions:
- Cut the Cups: Carefully cut out the individual cups from the egg carton.
- Shape the Petals: Trim the edges of each cup to be wavy and more petal-like. You can cut four distinct rounded petals from the rim of each cup.
- Paint: Paint the inside and outside of your shaped cups with red paint and let them dry.
- Add the Center: Glue a black button or pom-pom into the bottom of the cup.
These little poppy cups are great for stringing together into a garland or using as place settings for a themed dinner.
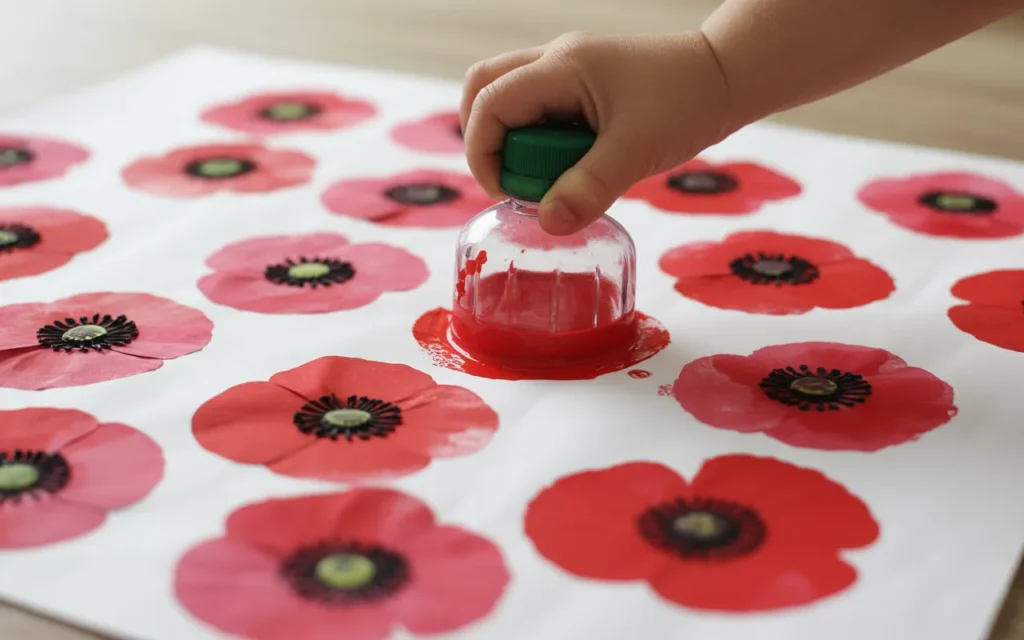
8. Stamped Poppy Art with a Bottle Bottom
This clever poppy flower craft uses a recycled plastic bottle to create the perfect poppy stamp.
Materials:
- A clean, empty plastic soda bottle (the kind with a 5-point base)
- A paper plate
- Red paint
- A large sheet of paper or canvas
- Black and green paint and a small paintbrush
Step-by-Step Instructions:
- Prepare Your Stamp: Pour a small puddle of red paint onto a paper plate.
- Stamp the Flowers: Dip the 5-point bottom of the plastic bottle into the red paint, making sure it’s evenly coated.
- Create Your Field: Press the bottle bottom firmly onto your large sheet of paper. Each stamp will create a perfect, five-petaled flower shape. Stamp as many poppies as you like to create a field.
- Add the Details: Once the red paint is dry, use a small paintbrush and black paint to add a dot in the center of each stamped poppy. Use green paint to add stems and leaves.
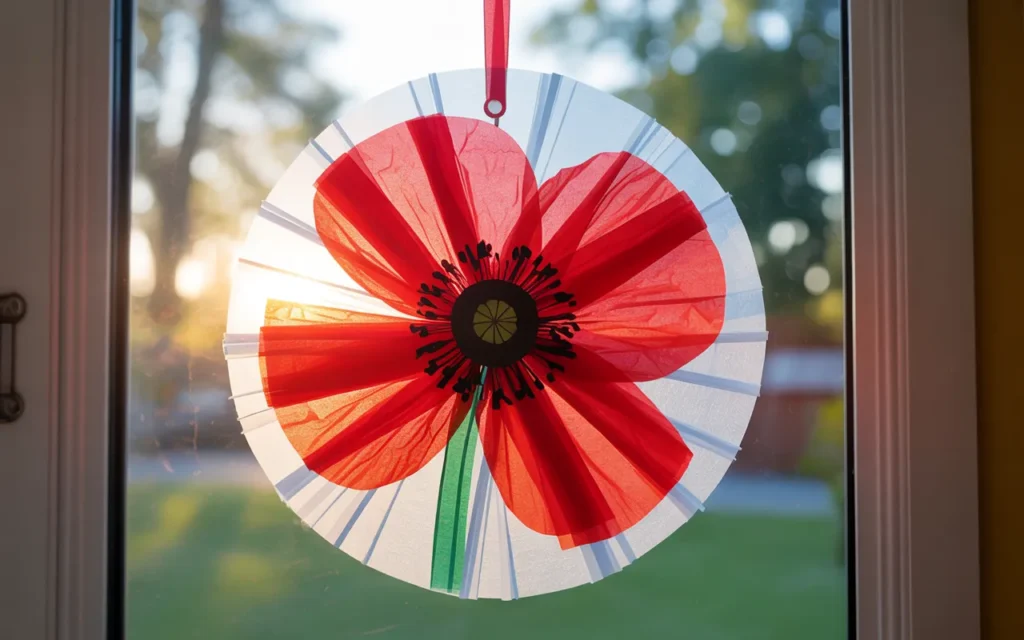
9. Tissue Paper Suncatcher Poppies
This craft creates a beautiful “stained glass” effect when hung in a window.
Materials:
- Clear contact paper or wax paper
- Red and black tissue paper, torn into small pieces
- Scissors
Step-by-Step Instructions:
- Prepare the Base: Cut two identical squares of contact paper. Peel the backing off one and lay it sticky-side up.
- Create the Design: Arrange the small pieces of red tissue paper on the sticky surface in a circular poppy shape. Use the black tissue paper pieces for the center.
- Seal the Suncatcher: Once you are happy with your design, peel the backing off the second piece of contact paper and carefully lay it over the first, sticky-side down, to seal the tissue paper inside.
- Cut and Finish: Cut around your poppy shape. Punch a hole at the top and thread a string through it to hang in a sunny window.
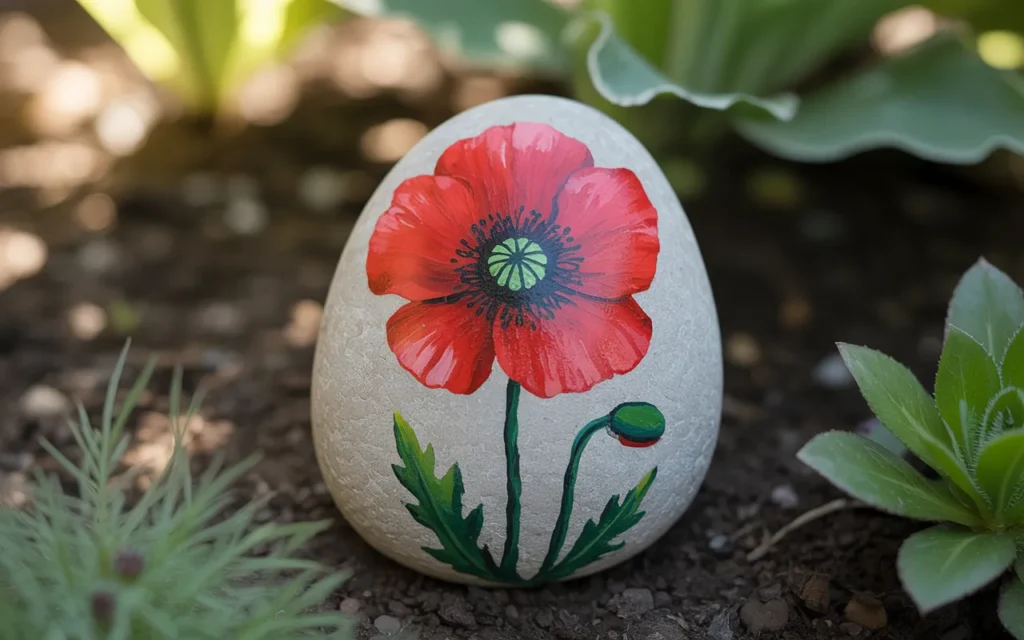
10. Poppy Painted Rocks
Turn ordinary rocks into beautiful little keepsakes or garden decorations.
Materials:
- Smooth, flat rocks, washed and dried
- Acrylic paint in red, black, and green
- Small paintbrushes
- Clear sealant spray (optional, for outdoor use)
Step-by-Step Instructions:
- Paint the Poppy: On your smooth rock, use a small brush to paint a simple red poppy design. Create the ruffled petals and then add a black dot for the center. You can add a green stem if your rock is long enough.
- Let It Dry: Allow the paint to dry completely.
- Seal It: If you plan to place your rock outside in the garden, spray it with a clear acrylic sealant to protect the paint from the elements.
These “poppy rocks” are perfect for leaving in parks for others to find (part of the kindness rocks project) or for adding a pop of permanent color to your garden beds.
Your Creative Journey Awaits
You are now armed with a bouquet of ten beautiful, simple, and fun poppy flower craft ideas. We’ve explored projects using paper, felt, paint, and even recycled materials. The common thread is the simple joy of making something with your own hands.
The next step is the most exciting one: choosing a project and getting started. Don’t worry about making it look exactly like the picture.
The beauty of a handmade item is in its unique charm and imperfections. So, gather your materials, put on some music, and enjoy the relaxing, rewarding process of crafting.
Recommended Crafting Supplies
Here is a quick summary of the versatile products that will help you get started on your poppy flower craft adventure.
| Product Name | Brand | Great For… |
|---|---|---|
| {Crepe Paper Streamers, Red & Black} | Aitoh | Creating stunningly realistic and shapely paper flowers. |
| {Felt Sheets Variety Pack} | BENECREAT | Forgiving, non-fraying material perfect for brooches/garlands. |
| {Gorilla Hot Glue Gun Kit} | Gorilla | Quickly and securely bonding all your craft materials. |
| {Assorted Black Buttons for Crafts} | Outus | The easiest and quickest way to create a classic poppy center. |
| {Arteza Watercolor Paint Set} | Arteza | Creating beautiful, soft color washes on paper crafts. |
| {Floral Wire and Floral Tape} | OokU | Making realistic, sturdy stems for bouquets and arrangements. |
| {Gingher Stork Embroidery Scissors} | Gingher | Making precise, clean cuts in paper and fabric. |