Is your nearly indestructible snake plant starting to look a little too powerful for its pot? Maybe the plastic nursery pot is bulging, or you’re seeing roots making a break for it.
If so, it’s time for a new home! This guide will show you exactly how to repot a snake plant, transforming a task that might seem daunting into a simple, satisfying project that will make your plant even happier.
Snake plants, also known as Sansevieria or mother-in-law’s tongue, are famous for being low-maintenance. They actually enjoy being a bit crowded in their pots. But eventually, every plant needs a fresh start.
We’ll cover the tell-tale signs it’s time for a move, how to pick the perfect pot and soil, and exactly what to do after the big move. Let’s give your tough and terrific plant the upgrade it has earned!
The “Why” Behind Repotting: More Than Just a New Look
Snake plants are slow growers and famously tolerant of neglect, which is why we love them. They would much rather be snug in their pot than have too much space. However, repotting every few years is essential for their long-term health.
Here’s why you can’t leave them in the same pot forever:
- They Get Too Strong for Their Pot: Snake plants grow powerful, thick roots called rhizomes. A mature plant can literally crack a ceramic pot or bust through a thin plastic one.
- Fresh Nutrients are Needed: Over time, the plant absorbs all the available nutrients from the soil. Fresh soil provides a new source of food for continued growth.
- They Become Root-Bound: Eventually, the roots and rhizomes will fill the entire pot, leaving no room for new growth. This can stunt the plant and make it difficult for the soil to hold any water.
- It’s Time to Propagate: A crowded pot is a sign that your snake plant has produced lots of new shoots or “pups.” Repotting is the perfect opportunity to divide the plant and create new ones to expand your collection or share with friends.
Spotting the Signs: Does Your Snake Plant Need Repotting?
Unlike some dramatic houseplants, snake plants won’t wilt to tell you they’re unhappy. You have to look for more physical clues. Because they like being tight, you should only repot when you see clear signs of distress.
- The Pot is Bulging or Cracking: This is the most urgent sign! If the force of the roots is physically deforming or breaking the pot, it’s a desperate cry for more space.
- Roots Are Growing Out of the Drainage Holes: If you see a thick network of roots making an escape out the bottom, the plant has nowhere else to grow.
- Water Sits on Top or Runs Straight Through: If the pot is so packed with roots that water can’t penetrate the soil, or if it runs out the bottom instantly, it’s time for a change.
- The Plant is Overly Crowded: If the pot is so full of leaves that there’s no visible soil and new pups have nowhere to go, it’s a good time to divide and repot.
- Growth Has Stopped: While they are slow growers, if your plant hasn’t shown any new growth in an entire growing season (spring/summer), it might be too root-bound to continue.
General Timeline: Plan to repot your snake plant every 2-5 years. Younger, faster-growing plants will be closer to the 2-year mark, while older, more established plants can happily wait much longer.
Choosing the Right Pot: Your Plant’s New Home
This is a critical decision. For a plant that is prone to root rot, the right pot is your best defense.
Material Matters Most
- Terracotta or Unglazed Clay: This is the number one best choice for a snake plant. These materials are porous, meaning they allow moisture to evaporate and air to circulate through the pot walls. This helps the soil dry out thoroughly between waterings, which is exactly what snake plants need.
- Ceramic or Plastic: These are acceptable, but riskier. Since they are non-porous, they hold moisture for much longer. If you use one of these, you must be an extremely careful waterer and have exceptionally well-draining soil.
Size It Up (But Not Too Much!)
This is where many plant parents make a mistake. Giving a snake plant a pot that is too large is a fast track to root rot.
- The Golden Rule: Choose a new pot that is only 1-2 inches larger in diameter than the current pot. For example, if your plant is in a 6-inch pot, its new home should be a 7- or 8-inch pot. That’s it!
- Why is this so critical? A huge pot contains a large amount of soil that the plant’s roots can’t reach. This unused soil stays wet for a long time, creating a swampy environment where the roots will rot. A small size increase ensures the roots can colonize the new soil quickly.
- Choose a pot that is wider than it is tall, if possible. Snake plants can be top-heavy, and a wider base provides more stability.
[Amazon Product: Set of 3 Modern Terracotta Planters with Drainage]
The Perfect Soil for a Snake Plant
Snake plants are succulents. They are native to arid regions of West Africa and need soil that mimics that environment. Using standard indoor potting soil is a recipe for disaster, as it holds far too much water. You need a mix that is gritty, airy, and drains with lightning speed.
You can purchase a commercial “cactus or succulent mix,” which is a great starting point. However, to make it even better, you should add more grit.
The Ultimate DIY Snake Plant Soil Mix:
For the happiest snake plant, create your own mix. It’s easy!
- 2 parts Cactus/Succulent Soil Mix
- 1 part Perlite or Pumice (these create air pockets and improve drainage)
- 1 part Coarse Sand or Small Gravel (adds weight and ensures fast drainage)
Mix these components together thoroughly. When you squeeze a handful, it should feel gritty and not clump together like mud. This is the texture you want.
[Amazon Product: Premium Succulent & Cactus Soil Mix with Perlite and Sand]
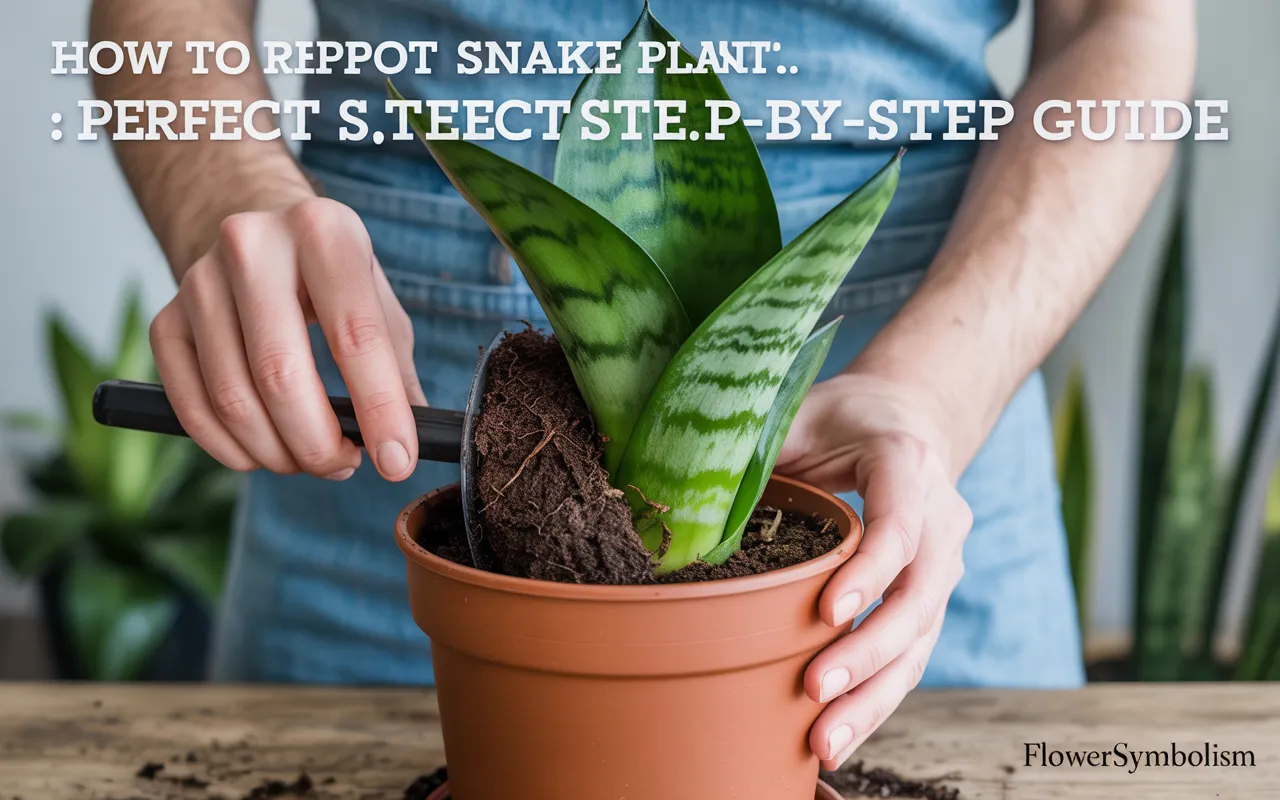
How to Repot a Snake Plant: The Step-by-Step Process
You’ve got your new pot and soil ready. It’s time to perform the operation. It’s best to do this outdoors or on a tarp to contain the mess.
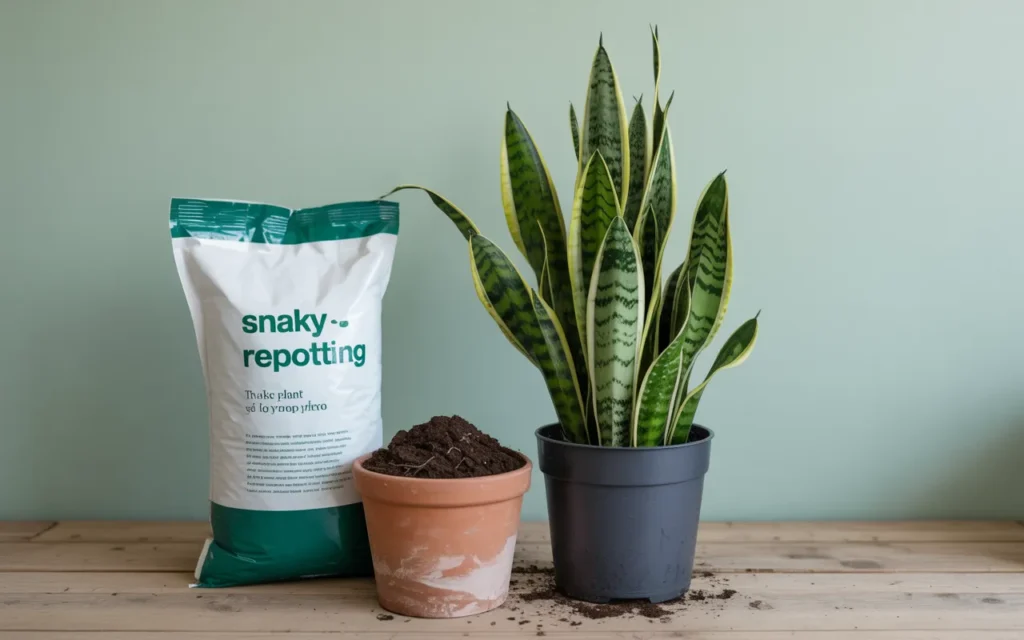
Step 1: Gather Your Supplies
- Your snake plant
- Your new, slightly larger pot
- Your prepared gritty soil mix
- Gardening gloves
- A butter knife or small trowel
- A clean, sharp knife or pruning saw (if you plan to divide the plant)
Step 2: The Great Escape
Removing a root-bound snake plant can be a workout. Their rhizomes are strong!
- Lay the pot on its side.
- Try to squeeze the sides of the pot (if it’s plastic) to loosen the root ball.
- If it’s in a clay or ceramic pot, you may need to run a butter knife around the inside edge to separate the roots from the pot wall.
- Grasp the base of the plant firmly and try to slide it out. You may need a friend to help pull the pot while you pull the plant. Do not give up! Sometimes you may even have to carefully break the old pot to free a severely root-bound plant.

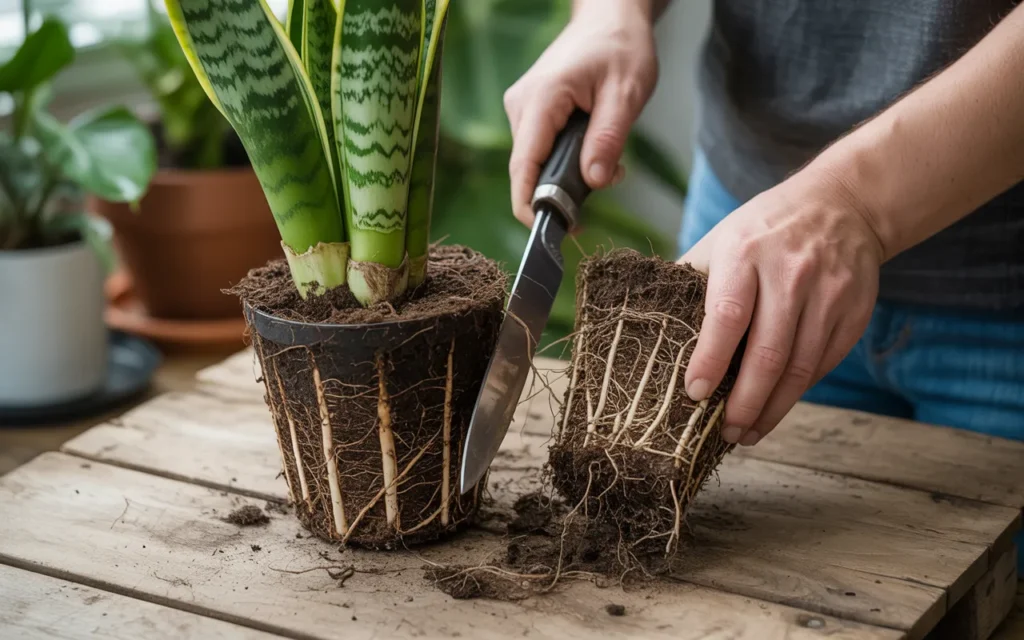
Step 3: Inspect the Roots and Divide (Optional)
Once the plant is free, you’ll likely see a solid mass of white or orange roots and thick, fleshy rhizomes.
- Inspect for Rot: Healthy roots are firm and pale. If you see any black, mushy, or foul-smelling roots, this is root rot. Trim them off with a clean knife.
- Decide if You Want to Divide: Now is the perfect time to create more plants. You can either:
- Pot the entire plant as one clump into the new pot.
- Divide it into smaller sections.
- How to Divide: Look for natural clumps or sections. Use a very sharp, sturdy knife or even a pruning saw to cleanly cut through the dense rhizomes, making sure each new section has both leaves and some roots. This will require some force!
Step 4: Prepare the New Pot
- Cover the drainage hole with a small piece of mesh or a coffee filter to prevent soil from washing out.
- Add a layer of your gritty soil mix to the bottom of the new pot.
- Position your snake plant (or one of the divisions) inside the pot. The goal is for the top of the root ball to sit about 1-2 inches below the rim of the new pot. Adjust the soil level at the bottom until the height is correct.
Step 5: Backfill and Settle
- Hold the plant steady in the center of the pot.
- Begin filling in around the sides with your fresh soil mix.
- Use your hands or a small trowel to work the soil down into all the gaps.
- Tap the pot on your work surface a few times to help the soil settle around the roots. Do not compact the soil with your hands; you want to keep it light and airy.
Post-Repotting Care: The Most Important Rule
You’ve successfully repotted your plant. Your first instinct will be to give it a nice drink of water. DO NOT DO IT!
Wait to Water
This is the single most important rule for repotting succulents, including snake plants.
- You must wait at least one full week before watering your newly repotted snake plant.
- Why? The roots and rhizomes will have sustained some minor cuts and bruises during the process. Watering immediately introduces moisture to these wounds and can lead to rot.
- Waiting a week gives these wounds time to callus over and heal, protecting them from infection when you finally do water.
Light and Location
- Place your repotted snake plant back in its original spot, as long as it receives bright, indirect light.
- They can tolerate lower light, but they are happiest where they can “see” the sky for several hours a day. Avoid harsh, direct sun, which can scorch their leaves.
First Watering and Beyond
- After the one-week waiting period is over, give the plant a thorough watering.
- Soak the soil completely until water runs freely from the drainage hole. This encourages roots to grow downward.
- After this initial soak, let the plant dry out completely. Do not water it again until the soil is 100% dry, all the way to the bottom of the pot. For snake plants, it’s always better to underwater than to overwater.
[Amazon Product: Soil Moisture Meter for Houseplants]
Conclusion
You’ve done it! You now know exactly how to repot a snake plant with confidence. By giving your plant a slightly bigger pot, the right kind of gritty soil, and—most importantly—by waiting to water, you have set it up for success.
This simple act of care ensures your tough, architectural plant will continue to thrive, purify your air, and look stunning for many years to come. Enjoy your happy plant and all the new divisions you may have created!
Frequently Asked Questions (FAQs)
1. How do I know when my snake plant needs a bigger pot?
Look for physical signs like the pot bulging or cracking, a dense mass of roots growing out of the drainage holes, or the plant being so crowded that water can’t get into the soil. As a general rule, repot every 2-5 years.
2. What kind of soil is best for snake plants?
You must use a fast-draining soil mix. A commercial cactus or succulent mix is a good base, but it’s even better if you amend it with extra perlite, pumice, or coarse sand to increase the grit and drainage.
3. Why do you wait to water a snake plant after repotting?
You must wait at least a week to allow any damaged roots or cut rhizomes to heal and form a callus. Watering immediately after repotting can introduce bacteria to these wounds and cause devastating root rot.
4. Can I use a pot without a drainage hole for my snake plant?
No, this is not recommended under any circumstances. Snake plants are extremely susceptible to root rot, and a pot without a drainage hole will almost certainly lead to the plant’s death from overwatering.
5. How big of a pot should I use when repotting?
Only go up one size. Choose a new pot that is just 1-2 inches wider in diameter than the old one. Putting a snake plant in a pot that is too large is a common mistake that leads to root rot.
6. My snake plant is very tall. How do I keep it from falling over?
Choosing a pot that is wide and heavy, like terracotta, will provide a stable base. You can also add some rocks or gravel to the bottom of your soil mix to add more weight and help anchor the plant.
7. Is it okay to divide my snake plant when I repot it?
Yes, repotting is the perfect time to divide your plant. Use a very sharp, clean knife to cut through the thick rhizomes, making sure each new division has both leaves and roots. This is a great way to get new plants for free