Has your beloved Monstera gone from a cute houseplant to a jungle giant that seems to be taking over your living room? Are you seeing roots making a great escape out the bottom of the pot? If so, don’t panic! It just means your plant is happy, healthy, and ready for an upgrade.
This ultimate guide will walk you through every single detail of how to repot a Monstera plant, transforming a task that might feel intimidating into a simple, fun, and incredibly satisfying project.
Repotting is one of the most important things you can do for your plant’s long-term health. It provides fresh nutrients and, most importantly, more room for the roots to grow, which directly translates to bigger, healthier leaves with those iconic splits and holes.
We’ll cover everything from the tell-tale signs it’s time for a new pot to the perfect soil mix and aftercare. Let’s give your green friend the spacious new home it deserves!
The “Why” Behind Repotting: More Than Just a Bigger Pot
Before we grab our shovels, it helps to understand why repotting is so crucial for a Monstera. These plants are native to tropical rainforests, where they grow as epiphytes, climbing up massive trees.
Their roots are designed to seek out space, moisture, and nutrients. When confined to a pot, they eventually use up all the available resources.
Here’s what happens when a Monstera becomes root-bound:
- Nutrient Depletion: The plant has absorbed all the good stuff from the existing soil. No new nutrients mean growth will stall.
- Compaction: The roots become so dense that they compact the soil, making it difficult for water and oxygen to penetrate. This can ironically lead to both underwatering (water runs right through) and root rot (the dense root ball stays soggy).
- Stunted Growth: With no room to expand its root system, the plant can’t support new foliage growth. You’ll notice fewer new leaves, and they may be smaller and without the classic splits (fenestrations).
By repotting, you are essentially hitting the reset button, providing a fresh, nutrient-rich environment and the physical space your plant needs to continue its journey to becoming a magnificent specimen.
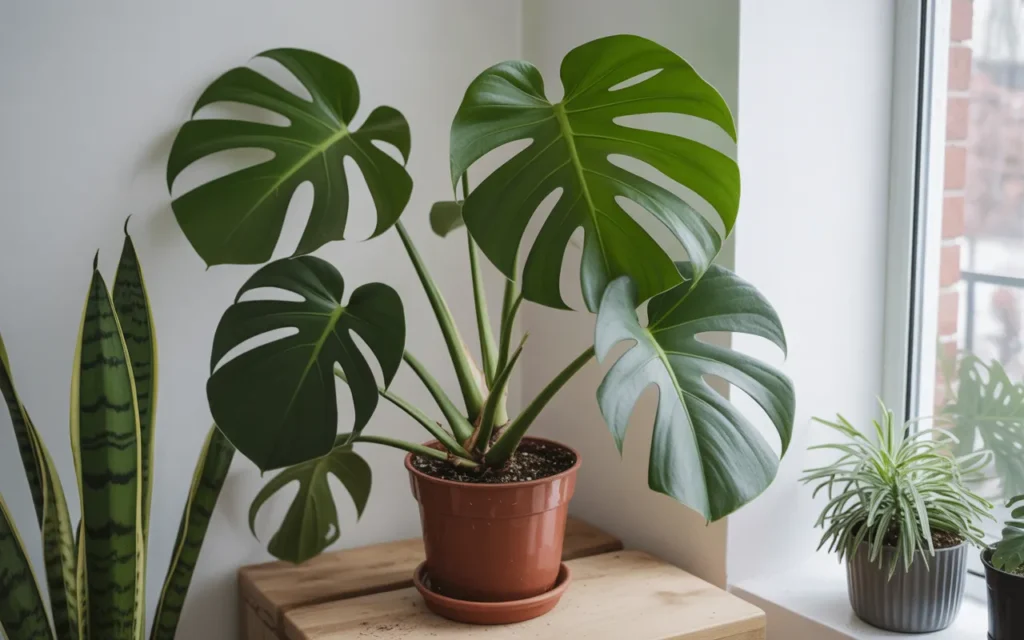
Is It Time? Decoding the Signs Your Monstera Needs Repotting
Your Monstera will give you some very clear signals when it’s feeling cramped. It’s better to repot based on these signs rather than on a strict schedule, as every plant’s growth rate is different.
The Obvious Clues:
- Escaping Roots: This is the #1 most obvious sign. If you see a network of roots emerging from the drainage holes at the bottom of the pot, your Monstera is actively searching for more space.
- Surface Roots: Are roots becoming visible on the surface of the soil, circling the top of the pot? This is another clear indicator that the pot is packed full underneath.
- The “Lift-Off”: A severely root-bound plant will sometimes push itself up and out of the pot as the dense root ball expands.
The More Subtle Hints:
- Drastically Slowed Growth: Remember when your Monstera was putting out a new leaf every few weeks? If it has been months with no new activity during the spring or summer growing season, it’s likely run out of resources and space.
- Watering Woes: You may notice one of two things. Either the water runs straight through the pot and out the bottom almost instantly (because there’s little soil left to absorb it), or the soil seems to stay wet forever (because the root ball is so dense it can’t dry out).
- A Droopy, Sad Plant: If your Monstera looks consistently thirsty or droopy no matter how well you care for it, its cramped roots may be unable to absorb the water and nutrients it needs to stay perky.
- Yellowing Leaves: While yellow leaves can be a sign of many things (like over or underwatering), a consistent yellowing of lower, older leaves can indicate that the plant is sacrificing them because it can’t support all of its foliage with its limited root system.
General Timeline: As a loose guideline, plan to repot a young, fast-growing Monstera every 12-18 months. A larger, more mature plant may only need repotting every 2-3 years.
Choosing the Perfect New Home: A Guide to Pots
This step is critical for your plant’s future health. Bigger is not always better when it comes to pots!
The Golden Rule of Sizing Up
The most common mistake plant parents make is choosing a pot that is way too big. You must follow this rule: Only go up one size.
- This means selecting a new pot that is just 1 to 2 inches larger in diameter than the current pot.
- For example: If your plant is currently in an 8-inch pot, its new home should be a 10-inch pot. No larger!
- Why is this so critical? A huge pot contains a large volume of soil that the plant’s current root system can’t reach. This excess soil stays wet for a long time after watering, creating a soggy environment. This is the perfect breeding ground for fungus and bacteria that cause root rot, which can quickly kill your Monstera. A smaller jump in size ensures the roots can colonize the new soil quickly and absorb the water efficiently.
Drainage, Drainage, Drainage!
This is non-negotiable. Your new pot must have drainage holes. Without them, water will pool at the bottom of the pot, saturating the roots and leading to certain death by root rot.
What if you find a beautiful decorative pot with no holes? No problem! Use it as a “cachepot.” Keep your Monstera in a slightly smaller plastic nursery pot (with holes), and simply place that pot inside the decorative one. When you water, you can take the inner pot out, let it drain completely, and then put it back.
The Great Debate: Pot Materials
- Terracotta (Clay): These classic pots are porous, meaning air and water can pass through the walls. This helps the soil dry out more evenly and quickly, which is a huge plus for preventing overwatering. They are a fantastic and safe choice for Monsteras.
- Glazed Ceramic or Plastic: These materials are non-porous, so they hold moisture in the soil for much longer. They are fine to use, but you must be a more careful waterer. Always check the soil moisture deep down before watering again.
- Fabric Grow Bags: These are an interesting option that provides excellent aeration for the roots, making it very difficult to overwater. They are a great functional choice, though perhaps less decorative.
[Amazon Product: Modern White Ceramic Planter (10-Inch) with Drainage and Saucer]
The Perfect “Aroid” Soil: What Monsteras Really Want
In their native habitat, Monsteras aren’t growing in dense garden dirt. Their roots are clinging to tree bark, moss, and leaf litter. You need to replicate this airy, chunky, well-draining environment in your pot. Standard potting soil is too heavy and will suffocate the roots.
You can buy a specialty “aroid mix,” or you can easily and cheaply create a superior blend yourself. This is the recipe for success.
DIY Ultimate Monstera Soil Mix:
Gather these ingredients and mix them in a large bucket or on a tarp.
- Part 1: The Base (40%) – [Indoor Potting Mix]
- Use a high-quality indoor plant potting mix as your foundation. This will provide the main structure and some nutrients.
- Part 2: The Aeration (30%) – [Perlite]
- These little white volcanic rocks are essential. They create air pockets throughout the soil, preventing compaction and allowing roots to breathe.
- Part 3: The Chunk (30%) – [Orchid Bark]
- This is the secret ingredient! Orchid bark provides the large, chunky texture that Monstera roots love to weave through. It creates significant air pockets and mimics the tree bark they would cling to in the wild.
Mix them all together, and you have a perfect, well-draining, airy medium for your Monstera to thrive in!
[Amazon Product: Super Chunky Orchid Bark and Perlite Soil Amendment Bundle]
How to Repot a Monstera Plant: The Complete Step-by-Step Process
Alright, it’s go time! Set aside about 30-60 minutes. It’s best to do this outdoors or on a large tarp or old sheet to contain the mess.
Step 1: Gather Your Supplies & Prep
- Your Monstera
- Your new, slightly larger pot
- Your fresh soil mix
- A tarp or newspaper
- Gloves (optional, but helpful)
- A trowel
- Clean, sharp pruning shears or scissors
- A moss pole or trellis (optional, but highly recommended)
If you’re using a new terracotta pot, let it soak in water for about 30 minutes beforehand. This prevents the dry clay from wicking all the moisture out of your new soil.
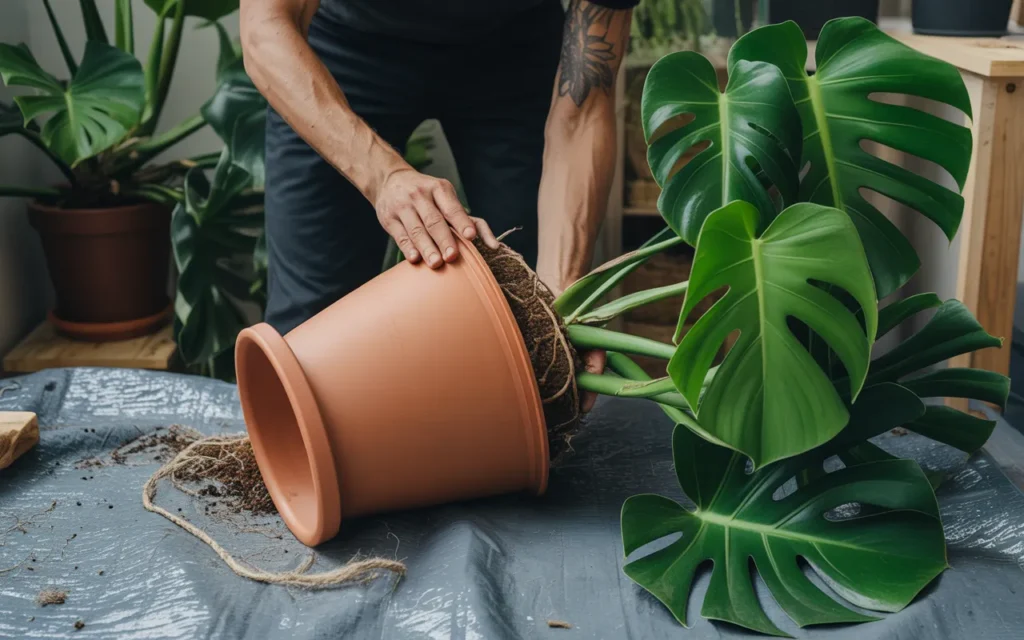
Step 2: The Great Extraction
This can be the most physically challenging part. It’s helpful to have a friend assist if your plant is large.
- Lay the plant and its pot on its side.
- Gently press and squeeze the sides of the pot to loosen the root ball. You can also tap the sides and bottom.
- Grasp the base of the plant’s stems firmly with one hand and gently slide the plant out. Do not pull on the leaves or a single stem!
- If it’s really stuck, use a long, dull knife (like a butter knife) and run it around the inside edge of the pot to separate the roots from the pot wall.
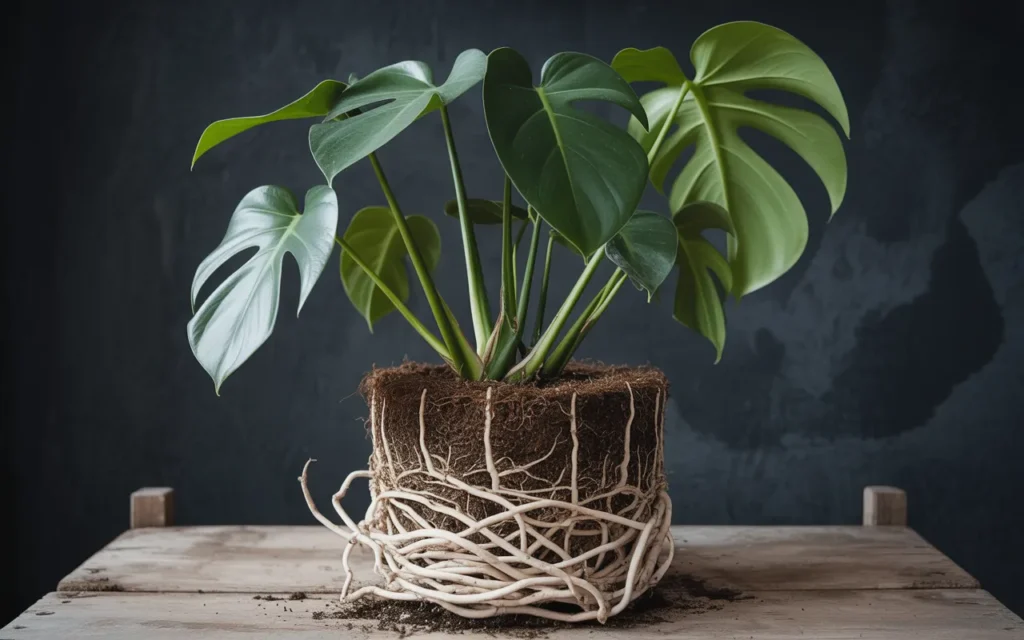
Step 3: Root Inspection and a Haircut
Now that the root ball is exposed, it’s time to play doctor.
- Gently Loosen: If the roots are a solid, tangled mass, gently massage the root ball with your fingers to loosen it up. Unwind any roots that are circling the bottom. This is crucial for encouraging them to grow outwards into the new soil.
- Look for Rot: Healthy roots are firm and typically white or light tan. Look for any roots that are black, brown, mushy, or have a foul smell. This is root rot.
- Trim Away the Bad: Using your clean shears, confidently trim away all rotted roots. Be thorough! Leaving any behind can allow the rot to spread in the new pot.
Step 4: Prepare the New Pot
- Add a layer of your fresh, chunky soil mix to the bottom of the new pot.
- The goal is to add enough soil so that when you place the plant inside, the top of its root ball sits about 1-2 inches below the rim of the new pot. This gap at the top is important for watering.
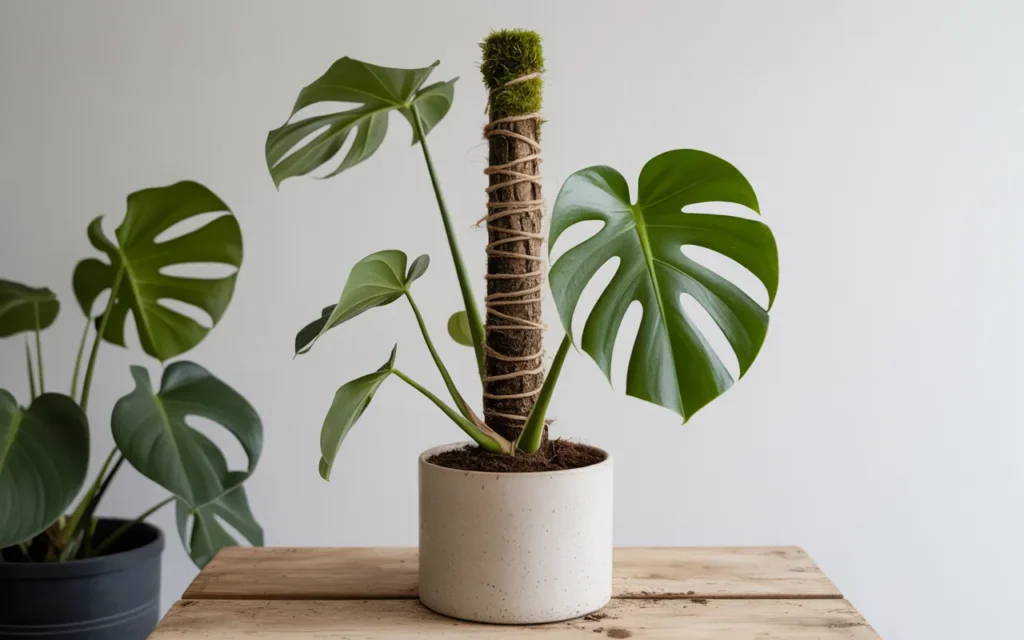
Step 5: Position the Plant and Add Support
- Carefully place your Monstera into the new pot, making sure it’s centered.
- Now is the perfect time to add or upgrade a moss pole or trellis. Monsteras are natural climbers. Giving them a support to attach their aerial roots to will result in a stronger plant with much larger, more mature leaves.
- Insert the pole firmly into the soil at the back of the plant, being careful not to stab through the main root ball. [Amazon Product: Extendable Coco Coir Moss Pole Kit]
Step 6: Backfill with Soil
- While holding the plant and pole steady, begin filling in the sides with your new soil mix.
- Use your hands or a trowel to work the soil down into all the gaps around the root ball.
- Gently pat the soil down to eliminate major air pockets, but do not compact it. You want to keep it light and airy.
Post-Repotting Care: The Recovery Room
Your plant has just been through a major operation! The next few weeks are all about gentle care and recovery.
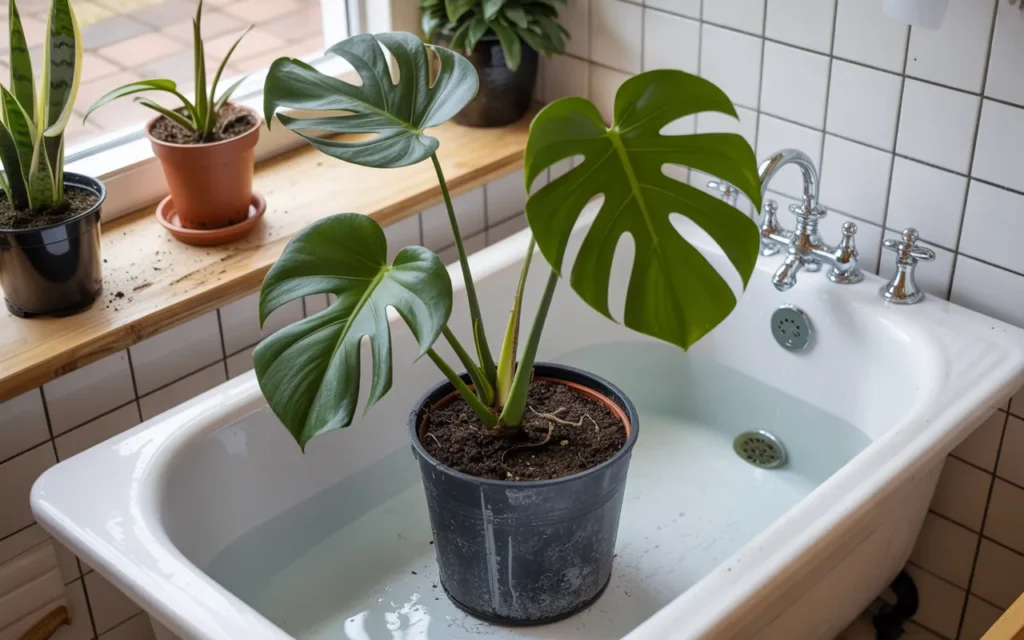
The First Big Drink
- Once the plant is potted, take it to a sink, shower, or outside and give it a very thorough watering.
- Saturate the entire pot until water flows freely from the drainage holes. This helps the new soil settle around the roots and eliminates any remaining air pockets.
Light and Location
- Place your Monstera back in its happy place, where it receives plenty of bright, indirect sunlight.
- Avoid moving it to a new location or exposing it to harsh direct sun while it’s recovering from transplant shock.
Understanding Transplant Shock
It is completely normal for your plant to look a bit sad, droopy, or wilted for the first week or two. It might even lose a lower leaf. This is called transplant shock. The plant is focusing all its energy on repairing and growing its root system. Don’t panic! Just be patient.
Watering for the Next Few Weeks
- After the initial deep watering, be very careful not to overwater. The new, larger volume of soil will hold moisture for longer.
- Wait until the top 2-3 inches of soil are completely dry before watering again. You can check this by sticking your finger deep into the soil.
Hold the Fertilizer!
Do not fertilize your repotted Monstera for at least 4-6 weeks, or even longer. The fresh soil you used is full of nutrients. Fertilizing too soon can burn the plant’s sensitive, damaged roots and do more harm than good. [Amazon Product: Gentle Liquid Indoor Plant Fertilizer]
Conclusion
Congratulations, you are now a Monstera repotting expert! You have successfully learned how to repot a Monstera plant and have given it the best possible chance to thrive.
This simple act of care is a profound investment in your plant’s future, paving the way for more growth, more health, and more of those stunning, iconic leaves. Watching your plant recover and then burst forth with new life in its spacious new home is one of the most rewarding experiences in all of plant ownership.
Frequently Asked Questions (FAQs)
1. How do I know for sure if my Monstera is root-bound?
The surest way is to look for roots coming out of the drainage holes. Another way is to gently slide the plant out of its pot. If you see more roots than soil, and the roots are in a dense, circling mass, it is definitely root-bound and ready for a new pot.
2. What happens if I put my Monstera in a pot that’s too big?
This is a very common and dangerous mistake. A pot that is too large holds a massive amount of soil that the plant’s roots can’t use. This extra soil stays soggy for a long time, leading to root rot, which can quickly kill your plant. Always stick to a pot that is only 1-2 inches larger in diameter.
3. My Monstera’s leaves are droopy after repotting. Is it dying?
No, don’t panic! This is very normal and is called “transplant shock.” The plant is stressed from the move and is putting all its energy into its roots. Keep it in bright, indirect light, be careful not to overwater, and it should perk back up within a week or two.
4. Can I reuse the old soil when I repot my Monstera?
It is not recommended. The old soil is likely depleted of nutrients and may have a buildup of mineral salts from tap water and fertilizer. Using fresh, new soil gives your plant the best possible start in its new home.
5. How long should I wait to fertilize after repotting a Monstera?
You should wait at least 4-6 weeks, and possibly up to 2-3 months, before you start fertilizing again. The new soil has fresh nutrients, and applying fertilizer too soon can burn the delicate, recovering roots.
6. Do I have to use a moss pole when I repot?
You don’t have to, but it is highly recommended. Monsteras are natural climbers. Providing a support like a moss pole encourages the plant to grow stronger and produce larger, more mature leaves with more splits and holes (fenestrations). Repotting is the easiest time to add one.
7. Can I repot my Monstera in the winter?
It’s best to avoid it if possible. The plant is dormant or resting in the winter and has less energy to recover from the stress of repotting. The ideal time is during the active growing season of spring and summer. If it’s an emergency (like a broken pot or severe root rot), you can, but be extra careful with aftercare.