Love your rubber plant and wish you had more of them? You’re in luck! Making new baby rubber plants from your existing one is super easy and fun. This guide will show you exactly how to propagate rubber plant cuttings to fill your home with more of these beautiful, glossy-leaved beauties or to share them with friends.
You don’t need to be a plant expert to do this. We’ll break down two simple methods water propagation and soil propagation into easy-to-follow steps.
It’s a magical process to watch a single leaf or stem cutting grow its own roots and become a whole new plant. Let’s get started on this fun DIY project!
Understanding Your Rubber Plant (Ficus elastica)
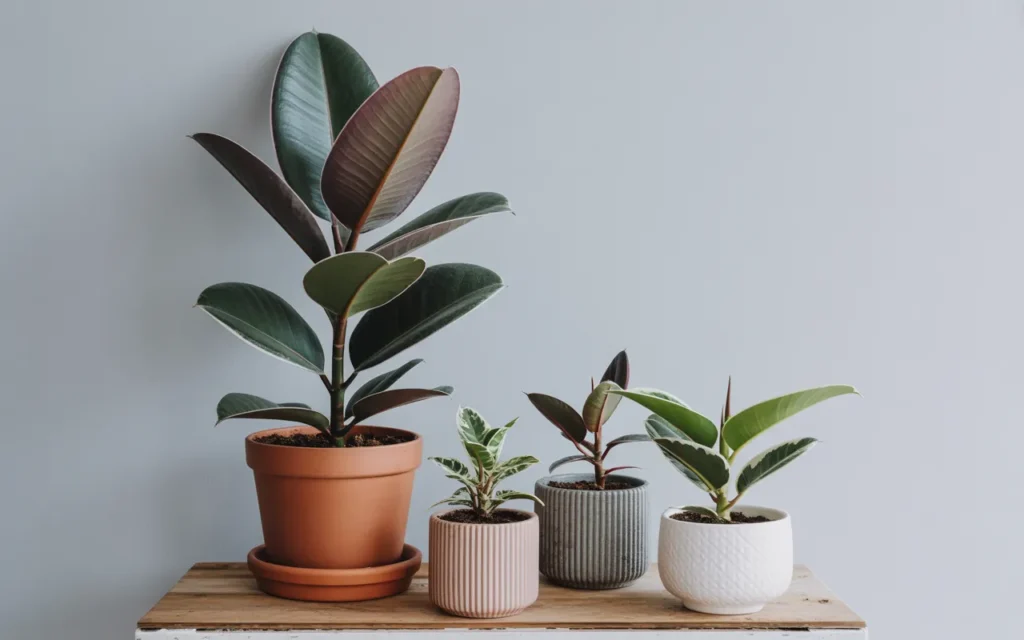
Before we start snipping, let’s get to know the star of the show. The rubber plant, or Ficus elastica, is a popular houseplant known for its big, shiny, dark green leaves. In the wild, they can grow into huge trees! As houseplants, they are much more manageable but can still get tall and a little “leggy” over time.
Propagating your rubber plant is a great way to make it fuller. When you take a cutting from the top, it often encourages the mother plant to branch out from below the cut, creating a bushier look. It’s a win-win: you get new plants, and your original plant looks even better!
The sap of a rubber plant is milky white and can be irritating to the skin, so it’s a good idea to wear gloves when you’re taking cuttings.
What’s the Best Time to Propagate?
You’ll have the most success if you propagate your rubber plant during its growing season.
- Best Time: Spring and Summer are the absolute best times to take cuttings. The plant is in active growth mode, full of energy, and the longer, warmer days help the cuttings root much faster.
- Can You Propagate in Fall or Winter? You can try, but it will be a much slower process. The plant is resting during these cooler, darker months, and cuttings will take a very long time to root, if they root at all. For the best chance of success, wait for spring.
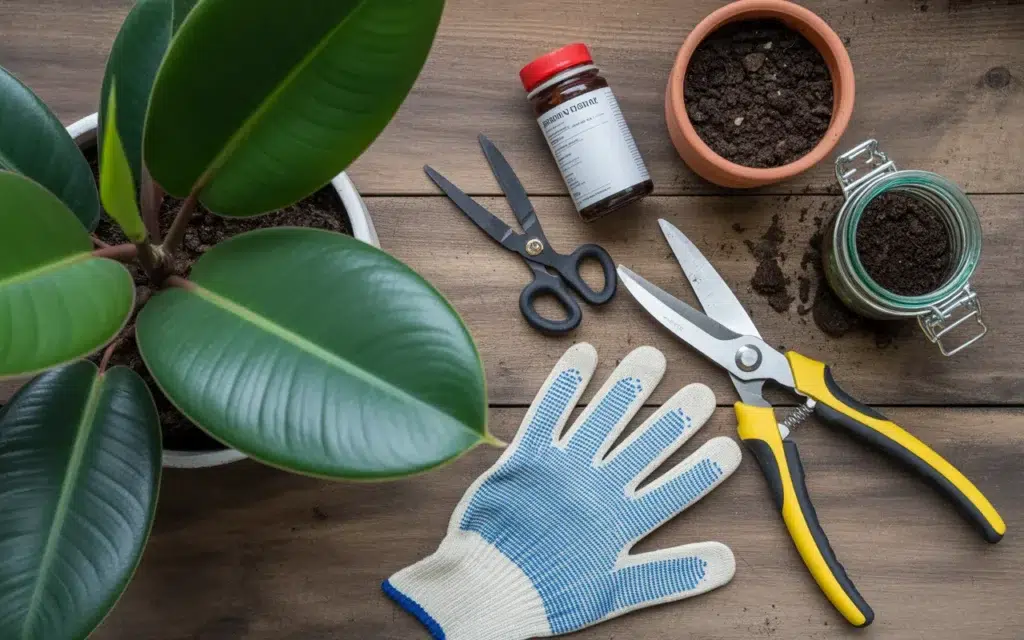
What You’ll Need: Gathering Your Tools
Before you make the first cut, let’s get all your supplies ready. This will make the process smooth and easy.
Essential Toolkit:
- A Healthy Mother Plant: Choose a mature, healthy rubber plant to take cuttings from.
- Sharp, Clean Pruning Shears or Knife: This is very important! A clean cut helps the plant heal and prevents disease. You can wipe your blade with rubbing alcohol to sterilize it. Amazon Shop: Precision Micro-Tip Pruning Shears
- Gloves: To protect your hands from the milky white sap.
- A Glass Jar or Vase: For water propagation. A clear one is best so you can watch the roots grow!
- A Small Pot with Drainage Holes: For soil propagation.
- Fresh Potting Mix: A well-draining indoor plant or succulent mix works great.
- Rooting Hormone (Highly Recommended): This is a powder or gel that helps encourage root growth and protects the cutting from rot. It significantly increases your success rate. Amazon Product: Garden Safe TakeRoot Rooting Hormone
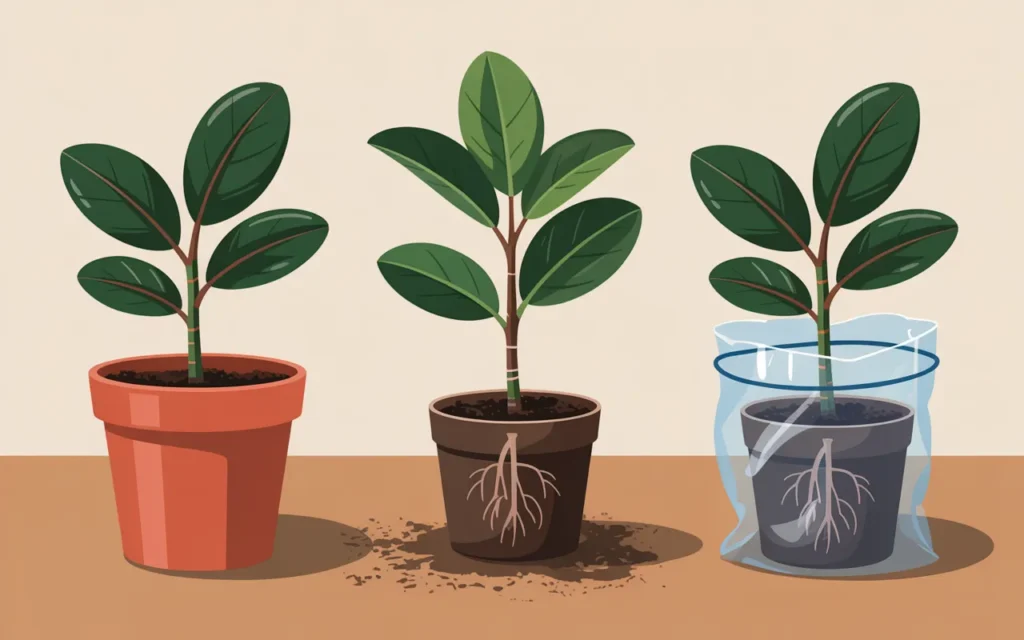
How to Propagate Rubber Plant: Two Easy Methods
We’ll cover the two most popular and successful ways to propagate a rubber plant: in water and directly in soil. Both methods start with the same first step: taking a good cutting.
Step 1: Taking the Perfect Cutting
This is the most important step for both methods.
- Find a Good Stem: Look for a healthy, strong stem on your mother plant. You want a cutting that is about 4 to 6 inches long and has at least 2 to 3 leaves at the top.
- Make the Cut: Using your clean, sharp shears, make a cut about a half-inch below a leaf node. A leaf node is the little bump on the stem where a leaf grows from. This is where the new roots will form.
- Prepare the Cutting:
- Once you have your cutting, carefully remove the bottom leaf or two. You want a few inches of bare stem at the bottom.
- You will see a milky white sap ooze from the cut. Gently wipe it away with a paper towel or rinse it under cool water until it stops.
Now your cutting is ready! You can choose to root it in water or soil.
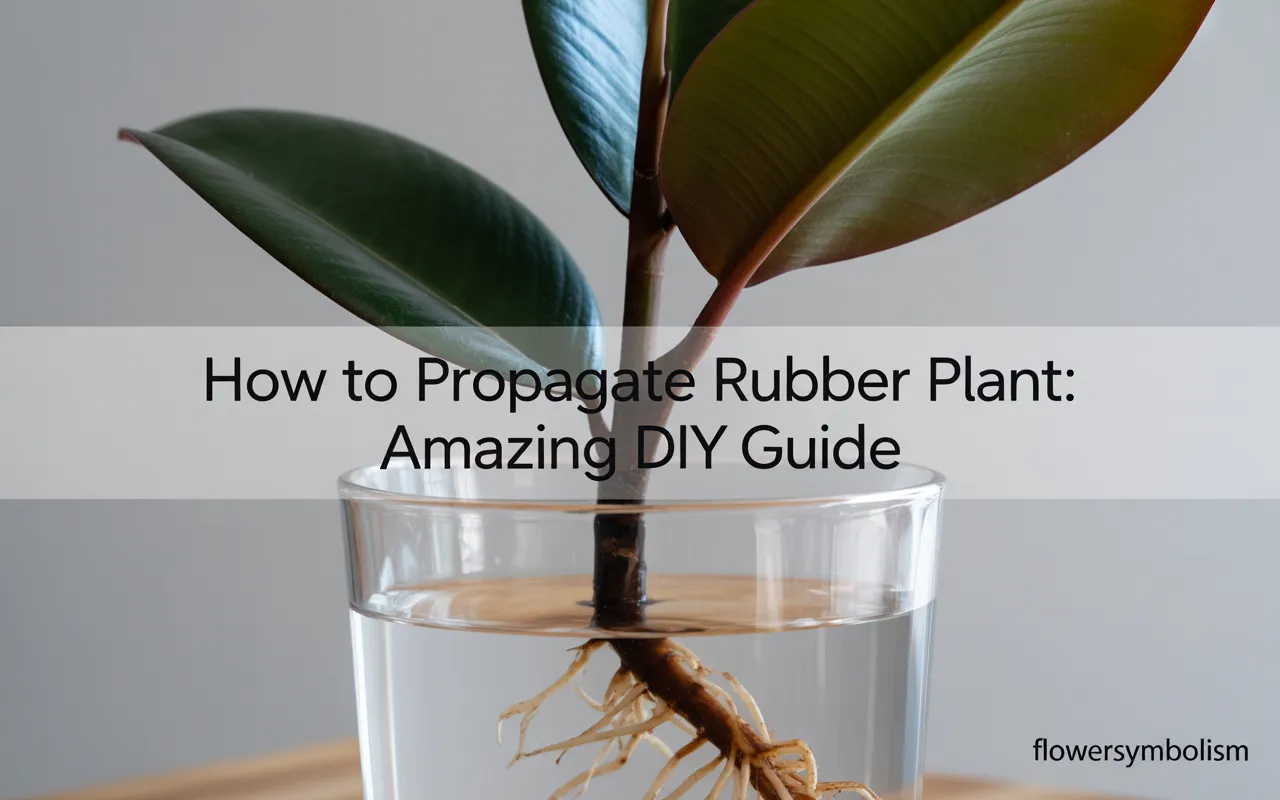
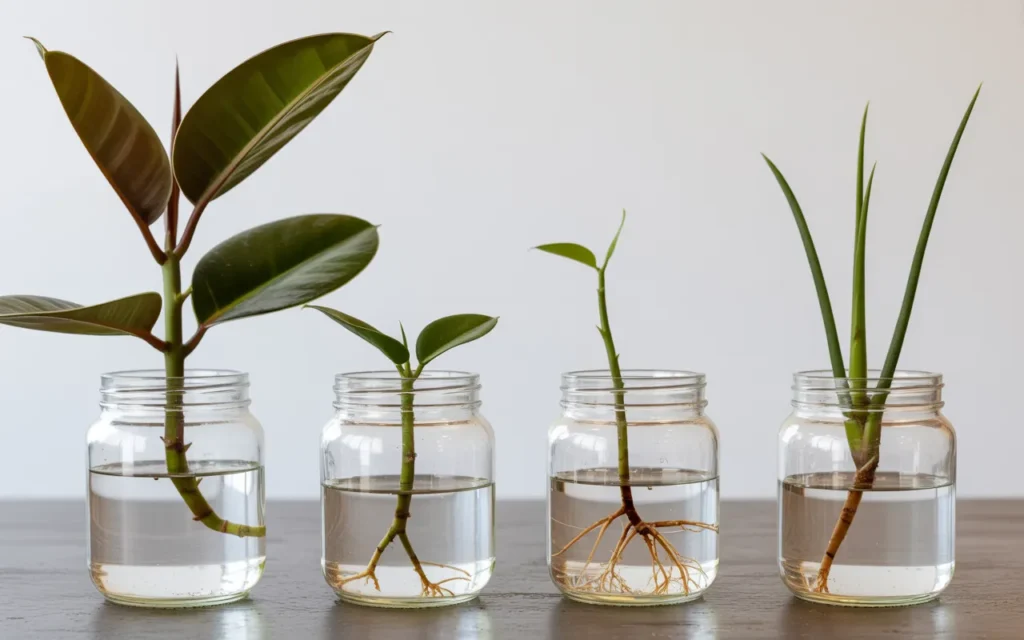
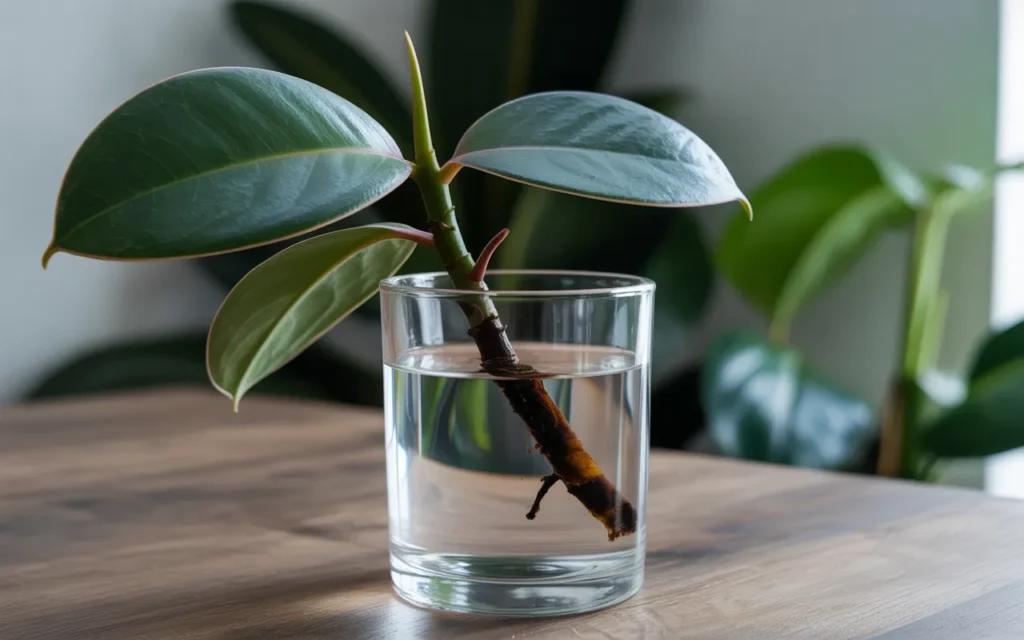
Method 1: Propagating in Water (The Visual Method)
This method is super popular because it’s exciting to watch the roots grow day by day!
Step 2: Place in Water
- Fill a clear glass jar or vase with room-temperature water.
- Place your cutting into the jar, making sure the bare stem and the nodes are submerged but that the remaining leaves are staying dry above the water.
Step 3: Find a Sunny Spot
- Put the jar in a spot that gets lots of bright, indirect light. A spot near an east-facing window is perfect. Avoid direct, hot sun, which can scorch the leaves.
Step 4: Be Patient and Change the Water
- This is the waiting game! Roots can take anywhere from 4 weeks to a few months to appear.
- CRUCIAL: Change the water every 3-5 days, or whenever it starts to look cloudy. Fresh water provides oxygen and prevents bacteria from growing, which can cause your cutting to rot.
Step 5: Pot Your Rooted Cutting
- Wait until the new roots are at least 1 to 2 inches long.
- Fill a small pot with fresh, well-draining potting mix.
- Gently plant your rooted cutting into the soil.
- Water it thoroughly and place it back in its bright, indirect light spot.
Method 2: Propagating in Soil (The Direct Method)
This method can be a little faster and involves less shock for the plant since it grows its “soil roots” right away.
Step 2: Prepare the Cutting with Rooting Hormone
- Take your prepared cutting (with the bottom leaves removed).
- Moisten the bottom inch of the bare stem with water.
- Dip the moistened stem into the rooting hormone powder, tapping off any excess. You just need a light coating.
Step 3: Plant the Cutting
- Fill a small pot with a well-draining potting mix. Lightly moisten the soil beforehand.
- Use a pencil or your finger to poke a hole in the center of the soil. This prevents the rooting hormone from being wiped off when you plant the cutting.
- Gently place your cutting into the hole and pat the soil down around it to hold it upright.
Step 4: Create a Humid Environment
- To help the cutting root, you can create a mini-greenhouse. Place a clear plastic bag over the top of the pot. This traps humidity, which the cutting loves.
- Secure the bag around the pot with a rubber band, but make sure the bag isn’t touching the leaves.
- Open the bag for an hour every few days to let in fresh air.
Step 5: Wait for New Growth
- Place the pot in a spot with bright, indirect light.
- Keep the soil lightly moist, but do not overwater.
- You’ll know the cutting has rooted when you see new leaf growth on top, or if you give the stem a very gentle tug and it feels anchored in the soil. This can take 4-8 weeks.
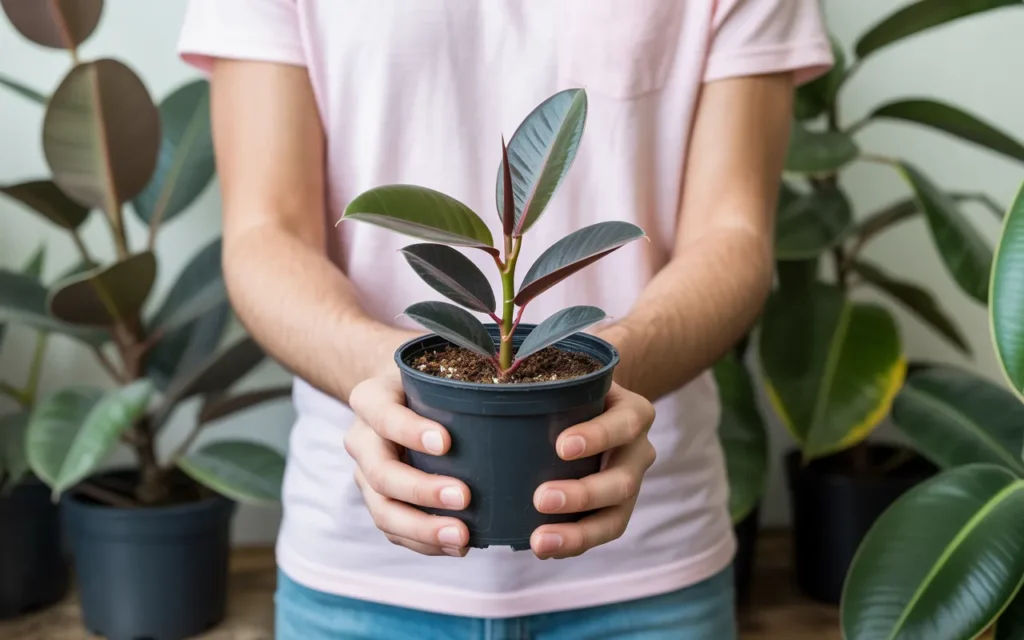
Caring for Your New Baby Rubber Plant
Congratulations, you have a new plant! The care for a newly propagated rubber plant is simple.
Watering
- For the first few weeks after potting, keep the soil consistently moist (but not soggy) to help the new roots get established.
- After that, let the top 1-2 inches of soil dry out between waterings. Overwatering is the most common way people kill houseplants!
- A small watering can is perfect for giving your little plant a gentle drink. Amazon Product: Small Indoor Plant Watering Can
Sunlight
- Baby rubber plants love bright, indirect light. Too much direct sun can burn their delicate leaves. An east-facing window is ideal.
- Rotate the pot every week or so to ensure all sides of the plant get light, encouraging it to grow straight.
Fertilizer
- Wait to fertilize your new plant for at least a few months. The fresh potting soil has plenty of nutrients to get it started.
- Once it’s actively growing, you can feed it with a balanced liquid houseplant fertilizer diluted to half-strength once a month during the spring and summer. Amazon Product: Liquid Indoor Plant Food
Common Propagation Problems and How to Fix Them
Sometimes things don’t go as planned. Here are a few common issues.
- Cutting is Getting Mushy or Black: This is rot, and it’s almost always caused by too much water or bacteria.
- In Water: Change the water more frequently! If you catch it early, you can sometimes cut off the rotting part and try again.
- In Soil: You are likely overwatering. Let the soil dry out more. Unfortunately, if the base is rotted, it’s hard to save.
- Leaves are Turning Yellow and Falling Off: This is common, especially for the lower leaves. The cutting is putting its energy into making roots, not supporting old leaves. As long as the stem is firm, don’t worry.
- Nothing is Happening!: Patience is the most important tool in propagation! It can take months. As long as the cutting isn’t rotting, just give it more time. Make sure it’s in a warm spot with bright, indirect light.
Conclusion
Now you know how to propagate rubber plant cuttings like a pro! It’s a simple, rewarding, and budget-friendly way to multiply your houseplant collection. Whether you choose the visual fun of water propagation or the direct approach of soil propagation, you’ll feel a huge sense of accomplishment when you see those first new roots and leaves appear.
Don’t be afraid to experiment. Take a few cuttings and try both methods to see which one you like best. Happy propagating!
Frequently Asked Questions (FAQs)
1. Can you propagate a rubber plant from just a leaf?
While a single rubber plant leaf can grow roots in water, it very rarely will grow a new plant. This is because the leaf cutting usually doesn’t have a piece of the main stem (and a node) attached, which is needed for a new shoot to grow. For best results, always take a stem cutting.
2. How long does it take to propagate a rubber plant?
Patience is key! It can take anywhere from 4 weeks to 3 months for a cutting to develop a healthy root system. It’s usually faster in the spring and summer.
3. Is it better to propagate a rubber plant in water or soil?
Both methods work great! Water propagation is fun because you can see the roots grow, but the plant can experience some shock when moved to soil. Soil propagation can be more stable, and the plant develops stronger roots from the start. Try both and see what works best for you!
4. Why are my rubber plant cuttings not rooting?
This could be due to a few reasons: it’s not the growing season (it’s too cold), the cutting isn’t getting enough light, or you’re not using rooting hormone. Make sure you’re propagating in spring/summer in a warm, bright spot. Using rooting hormone will dramatically increase your chances.
5. How do you make a rubber plant bushy?
Propagating is a great way to do this! When you prune the top of your main plant to take a cutting, it often encourages the plant to send out new branches from the nodes below the cut, making it look fuller and bushier.
6. Do you need rooting hormone to propagate a rubber plant?
You don’t need it, and cuttings can root without it. However, using rooting hormone significantly speeds up the process and increases your success rate by helping to prevent rot. It’s a small investment that makes a big difference.
7. What kind of soil is best for rubber plants?
Rubber plants need a soil that drains well to prevent root rot. A high-quality indoor potting mix is perfect. You can also mix in some perlite or orchid bark to improve the drainage even more.