
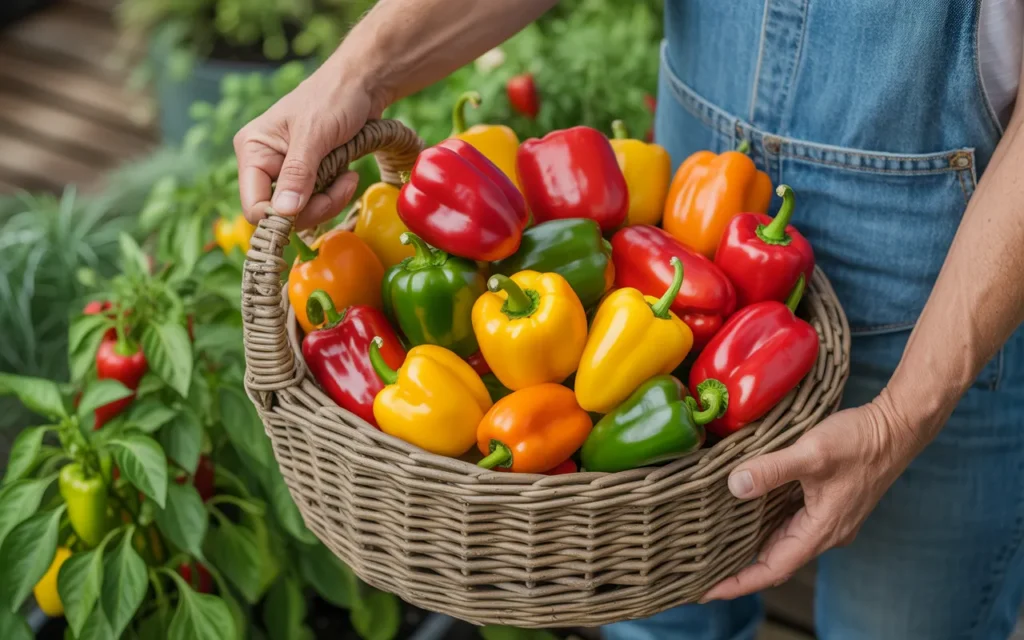
Have you ever dreamt of walking out to your garden and picking a crisp, sweet bell pepper or a fiery jalapeño for your meal? It’s a wonderful feeling, and it’s so much easier to achieve than you might think!
This guide is here to show you everything you need to know about how to plant peppers, turning a few small seeds into a bountiful harvest of colorful, delicious fruit.
Peppers are one of the most rewarding vegetables to grow. They come in an incredible rainbow of colors, shapes, and heat levels, from sweet and mild to scorching hot.
We’ll break down every single step of the process, from starting seeds indoors to harvesting your beautiful peppers. Let’s get ready to grow something amazing!
The Wonderful World of Peppers: Choosing Your Perfect Variety
The first and most exciting step is deciding what kind of peppers you want to grow. There are thousands of varieties! They all belong to the Capsicum genus, but they are generally divided into two main categories: sweet and hot.
Sweet Peppers
These peppers have no heat (or very, very little) and are loved for their sweet, fruity flavor, especially when they ripen to their final color.
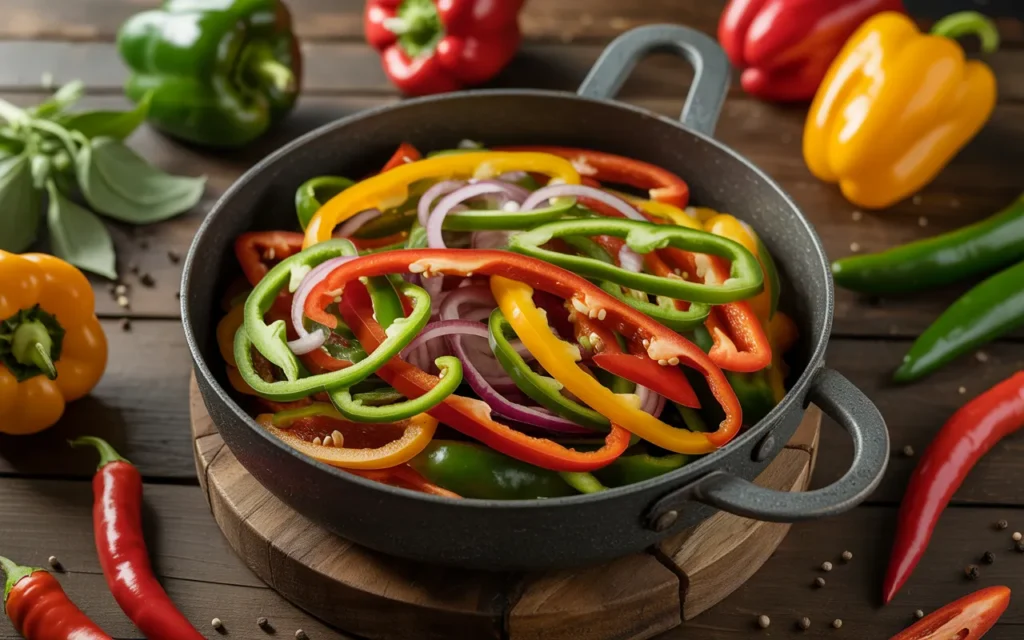
- Bell Peppers: The classic! These large, blocky peppers are perfect for stuffing, slicing for salads, or sautéing. They start green and ripen to red, yellow, orange, or even purple. Red bells are simply green bells that have been left on the plant to fully ripen and get sweeter.
- Banana Peppers: These long, tapered peppers are sweet and tangy. They are fantastic for pickling or adding to sandwiches.
- Pimento Peppers: Small, heart-shaped red peppers that are incredibly sweet and aromatic. They are the classic pepper used to stuff green olives.
- Shishito Peppers: A popular Japanese variety. These small, thin-walled peppers are mostly mild, but about one in ten will have a surprising kick of heat! They are amazing when quickly blistered in a hot pan.
Hot Peppers
These peppers get their heat from a compound called capsaicin. Their spice level is measured in Scoville Heat Units (SHU).
- Jalapeño (2,500 – 8,000 SHU): The perfect “entry-level” hot pepper. Great for adding a mild kick to salsas and poppers.
- Serrano (10,000 – 23,000 SHU): A step up from the jalapeño, with a thinner skin and a brighter, hotter flavor.
- Cayenne (30,000 – 50,000 SHU): The classic pepper for drying and grinding into cayenne pepper powder.
- Habanero/Scotch Bonnet (100,000 – 350,000 SHU): Now we’re getting into serious heat! These peppers have a fruity, citrus-like flavor beneath their intense fire.
- Ghost Pepper & Beyond (1,000,000+ SHU): These are the super-hots. They are incredibly pungent and should be handled with extreme care (gloves are a must!).
Beginner’s Tip: For your first time, try growing one reliable sweet pepper like a red bell pepper and one easy-to-manage hot pepper like a jalapeño. This gives you a great taste of both worlds!
[Amazon Product: Ultimate Pepper Seed Vault – 15 Sweet & Hot Varieties]
The Importance of an Early Start: Seeds vs. Transplants
Peppers are tropical plants that need a long, warm growing season. In most climates, you cannot simply plant a pepper seed in the garden and expect a harvest. The season just isn’t long enough. This is why you need to give them a head start.
You have two options: start your own seeds indoors or buy young plants (transplants) from a nursery.
Starting Seeds Indoors (The Most Rewarding Method)
- Why do it? The variety of pepper seeds you can buy is almost endless compared to the limited selection of plants at a nursery. It’s also much cheaper and incredibly satisfying.
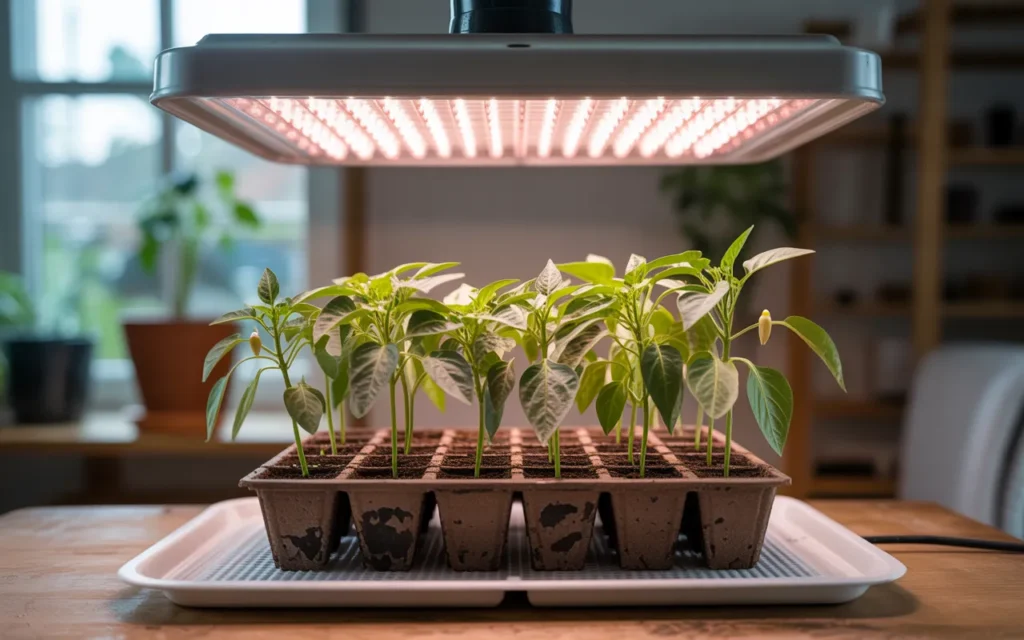
- When to start? You need to start your pepper seeds indoors 8 to 10 weeks before your average last frost date. This is a critical timeframe.
- What you’ll need:
- Pepper seeds
- A seed starting tray with a humidity dome [Amazon Product: Seed Starter Tray Kit with Dome and Vents]
- Seed starting mix (a special light, sterile soil)
- A heat mat (peppers need warmth to germinate!)
- A grow light (a sunny window is not enough!)
Buying Transplants (The Easiest Method)
- Why do it? This is the simplest way to get started. All the hard work of germination and early growth has been done for you.
- What to look for: When buying pepper plants, look for ones that are short, stocky, and have dark green leaves. Avoid plants that are already flowering or have yellow leaves.
How to Plant Peppers: Starting Seeds Indoors Like a Pro
Let’s walk through the process of starting your own pepper empire from tiny seeds.
Step 1: Prepare Your Trays and Soil
- Fill your seed starting cells with a light, pre-moistened seed starting mix. Don’t use heavy garden soil.
- Make a small hole in the center of each cell about ¼ inch deep.
Step 2: Plant the Seeds
- Drop two seeds into each hole. Planting two is insurance in case one doesn’t sprout.
- Gently cover the seeds with soil and pat it down lightly.
Step 3: Add Heat and Water
- Place the clear plastic humidity dome over your tray.
- Place the entire tray on a heat mat. This is the secret weapon for pepper seed germination. Peppers need soil temperatures between 80-85°F to sprout reliably. Without a heat mat, germination can be very slow and spotty.
- Water the soil so it’s moist but not soaking wet.
Step 4: Wait for Sprouts and Add Light
- Be patient! Peppers can take anywhere from 7 to 14 days (or even longer for super-hots) to sprout.
- As soon as you see the very first green sprout emerge, you must do two things:
- Remove the humidity dome.
- Turn on your grow light. Place the light just a few inches above the seedlings and keep it on for 14-16 hours per day.
Step 5: Thin Your Seedlings
- Once your seedlings have their first set of “true leaves” (the second set of leaves), you need to choose the stronger-looking seedling in each cell and snip the weaker one off at the soil line. It’s tough, but necessary!
Hardening Off: Preparing Your Plants for the Great Outdoors
About 1 to 2 weeks before you plan to plant them outside, you must “harden off” your pepper plants. You can’t take them from their cozy indoor setup and throw them into the harsh sun and wind. You need to acclimate them gradually.
- Day 1: Place your seedlings outside in a shady, protected spot for just 1 hour, then bring them back in.
- Day 2: Give them 2 hours of shade.
- Day 3: Give them 3 hours of shade, with maybe 30 minutes of gentle morning sun.
- Over the next week: Gradually increase the amount of time they spend outside and the amount of direct sun they receive.
- By the end of the process, your plants should be able to handle a full day of sun and are ready for their permanent home in the garden.
Preparing the Perfect Pepper Patch
Peppers are sun-loving and hungry plants. Creating the right environment is key to a big harvest.
Location, Location, Location!
- Full Sun: Peppers need a spot that gets at least 8 hours of direct, bright sunlight per day. They are not a shade-loving plant.
- Warm Soil: Wait to plant your peppers outside until the weather is truly settled and warm. Nighttime temperatures should be consistently above 55°F. Planting in cold soil will stunt their growth significantly.
The Best Soil for Peppers
Peppers thrive in soil that is:
- Rich in organic matter.
- Well-draining. They hate having “wet feet.”
- Slightly acidic, with a pH between 6.0 and 6.8.
To create this, amend your garden bed by mixing in 2 to 3 inches of high-quality compost. Compost adds nutrients, improves soil structure, and helps with moisture retention. You can also add a balanced, all-purpose granular fertilizer at this time.
[Amazon Product: Premium Organic Compost for Vegetable Gardens]
Step-by-Step Planting Guide
The day has finally arrived! It’s time to plant your hardened-off peppers.
Step 1: Dig the Hole
- Dig a hole that is as deep as the pot the pepper plant is in and a little bit wider.
- Space your holes about 18 to 24 inches apart. Peppers need good air circulation to prevent disease.
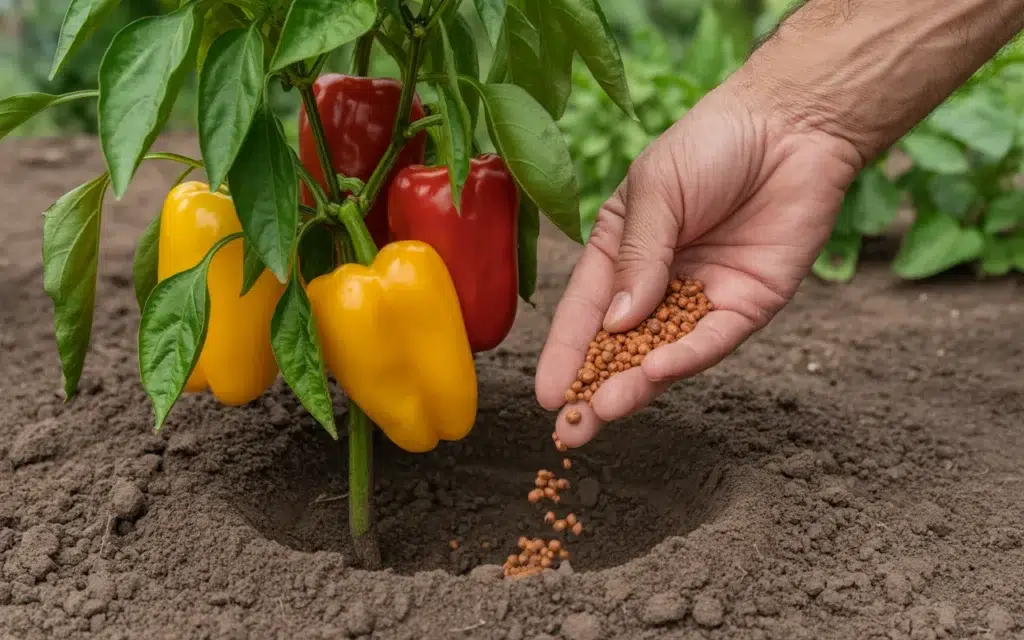
Step 2: A Special Trick for Peppers
- Before you plant, here’s a pro tip: toss a small handful of bone meal or a balanced organic fertilizer into the bottom of the planting hole. This gives the roots a direct source of nutrients to get started.
Step 3: “Pinching” Your Plant (Optional but Recommended)
- If your pepper plant is about 8 inches tall and has a “Y” shape where it branches, consider “pinching” or “topping” it. This means snipping off the very top of the plant’s growth tip.
- This encourages the plant to stop growing tall and instead put its energy into branching out, resulting in a bushier plant with more side shoots for producing peppers.
Step 4: Plant Your Pepper
- Gently remove the pepper plant from its pot. If the roots are a bit tangled, gently loosen them with your fingers.
- Place the plant in the hole. Unlike tomatoes, you should plant peppers at the same depth they were growing in their pot.
- Backfill the hole with soil and gently pat it down around the base of the plant.
Step 5: Water and Mulch
- Give your newly planted pepper a deep drink of water to help settle the soil and reduce transplant shock.
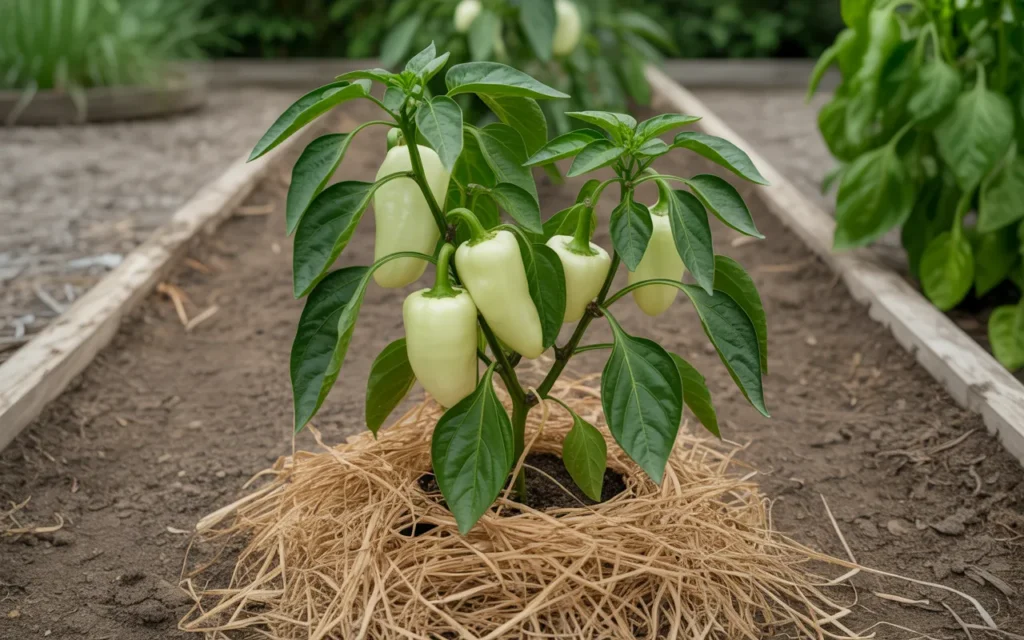
- Apply a 2-inch layer of organic mulch (like straw or shredded leaves) around the base of the plant. Mulch is a gardener’s best friend! It suppresses weeds, conserves soil moisture, and keeps the soil cool.
Caring for Your Growing Pepper Plants
Watering
- Peppers need consistent moisture, about 1 to 2 inches of water per week.
- Water deeply a few times a week rather than giving a light sprinkle every day.
- Inconsistent watering, especially when the fruit is forming, can lead to a problem called blossom end rot (dark, sunken spots on the bottom of the pepper).
Fertilizing
Peppers are heavy feeders.
- Side-Dressing: About a month after planting, you can “side-dress” your plants. This means scratching a small amount of balanced fertilizer into the soil around the plant.
- Liquid Feed: Once the plants start setting fruit, you can feed them every 2-3 weeks with a liquid fertilizer that is high in potassium and phosphorus, like a tomato fertilizer. Avoid high-nitrogen fertilizers, which will give you lots of green leaves but very few peppers. [Amazon Product: Liquid Tomato & Vegetable Fertilizer]
Common Problems
- Blossom Drop: It can be alarming when pepper plants drop their flowers before making fruit. This is usually caused by temperature stress (either too hot or too cold) or inconsistent watering.
- Aphids: These tiny pests love to congregate on new growth. A strong blast of water from the hose can often knock them off.
- Sunscald: This looks like a pale, papery, burnt spot on the side of a pepper that gets intense afternoon sun. The plant’s own leaves are the best protection, which is why encouraging a bushy plant is so helpful.
Harvest Time: Picking Your Peppers
This is the best part!
- When to Harvest: You can harvest most peppers when they are green, but the flavor will be much sweeter and the nutritional content (especially Vitamin C) will be much higher if you let them fully ripen to their mature color (red, yellow, orange, etc.).
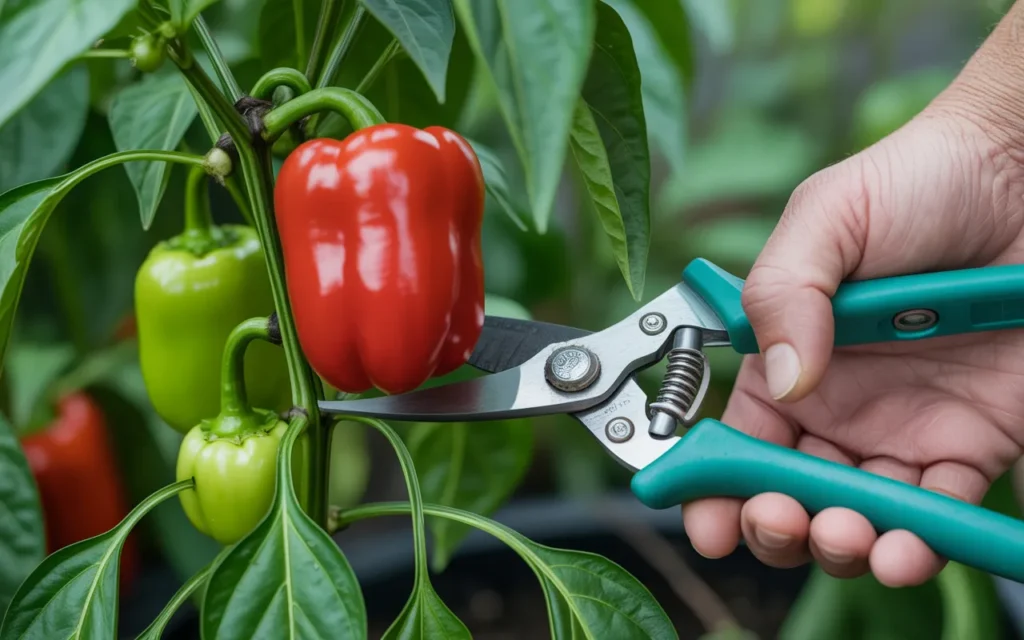
- How to Harvest: Use a pair of clean pruning shears or sharp scissors to snip the pepper from the plant, leaving a small piece of the stem attached. Pulling them by hand can damage the brittle branches of the plant.
- Keep on Picking! The more you harvest, the more the plant will be encouraged to produce new flowers and fruit.
Conclusion
Congratulations! You now have all the knowledge you need on how to plant peppers from a tiny seed all the way to a delicious harvest. Growing peppers is a journey of patience, especially during the long indoor-starting phase, but the reward of picking a sun-ripened, colorful pepper that you grew yourself is absolutely worth it. Enjoy the incredible flavors and the satisfaction of your gardening success!
Frequently Asked Questions (FAQs)
1. What is the best month to plant peppers?
You should plant your pepper transplants outside in the spring, but only after all danger of frost has passed and the nighttime temperatures are consistently above 55°F. For many people, this is in May or early June. Remember to start your seeds indoors 8-10 weeks before that!
2. How long does it take to grow peppers?
From the time you plant a transplant in the garden, it typically takes 60-90 days to get your first harvest, depending on the variety. If you’re starting from seed, add another 8-10 weeks to that timeframe.
3. Do pepper plants need a cage or stake?
It’s a very good idea! Many pepper varieties, especially bell peppers, can get so heavy with fruit that their branches can break. A simple stake or a small tomato cage provides excellent support.
4. Can you plant peppers and tomatoes together?
Yes, peppers and tomatoes are excellent garden companions. They are in the same family (nightshades) and enjoy very similar growing conditions: full sun, rich soil, and consistent water.
5. How many peppers do you get from one plant?
This varies wildly by variety. A single bell pepper plant might produce 5-10 large peppers. A productive jalapeño or shishito plant can produce dozens and dozens of smaller peppers throughout the season.
6. Why are my pepper plant leaves turning yellow?
Yellow leaves are most often a sign of a watering issue (either too much or too little) or a nutrient deficiency, usually nitrogen. Check your soil moisture first. If the soil is soggy, you’re overwatering. If it’s bone dry, you need to water more.
7. Can you grow peppers in a pot?
Absolutely! Peppers do wonderfully in containers. Choose a pot that is at least 5 gallons in size, use a high-quality potting mix, and make sure it has excellent drainage. This is a great option for people with limited garden space.