Planting a tree is a hopeful and powerful act. It’s a gift to your future self, your community, and the planet. A well-chosen, properly planted tree can provide decades of shade, beauty, and even food.
This guide is dedicated to teaching you how to plant a tree the right way.
Following these essential steps ensures your new tree doesn’t just survive its first year but establishes deep roots and thrives for generations to come, becoming a beautiful and permanent fixture in your landscape.
Many people think planting a tree is as simple as digging a hole and dropping it in, but a little extra knowledge and effort can make all the difference.
We’ll walk you through everything from choosing the perfect spot to the long-term care that guarantees a healthy, magnificent tree. Let’s create a legacy, one tree at a time.
Before You Dig: Planning for a Lifetime of Growth
The most critical work happens before your shovel ever hits the ground. Proper planning is the single best predictor of a tree’s long-term health and success. A tree is a permanent investment, and thinking through these key factors will prevent future headaches and ensure it becomes a cherished part of your property.
1. Choosing the Right Tree for the Right Place
This is the golden rule of tree planting. You need to match the tree’s mature characteristics to your site’s conditions.
- Size Matters: The most common mistake is planting a tree that will grow too large for its location. Look up! Are there overhead power lines? How close is your house, your sidewalk, or your neighbor’s property? A cute little oak sapling will one day become a 70-foot giant with a massive canopy and root system. Research the tree’s mature height and spread.
- Sunlight Needs: How much sun does the location get? Most flowering and fruit trees need full sun (6-8+ hours per day). Other trees, like Dogwoods or Japanese Maples, prefer partial shade or dappled sunlight, especially protection from the hot afternoon sun.
- Soil Conditions: What is your soil like? Is it sandy and drains quickly, or is it heavy clay that stays wet? While you can amend the soil in the planting hole, it’s best to choose a tree that is naturally adapted to your soil type.
- Hardiness Zone: You must select a tree that is rated for your climate. The USDA Plant Hardiness Zone map tells you the average lowest winter temperature for your area. A tree must be hardy to your zone or a lower number (colder zone) to survive the winter. For example, if you are in Zone 6, you can plant trees rated for Zones 1 through 6.
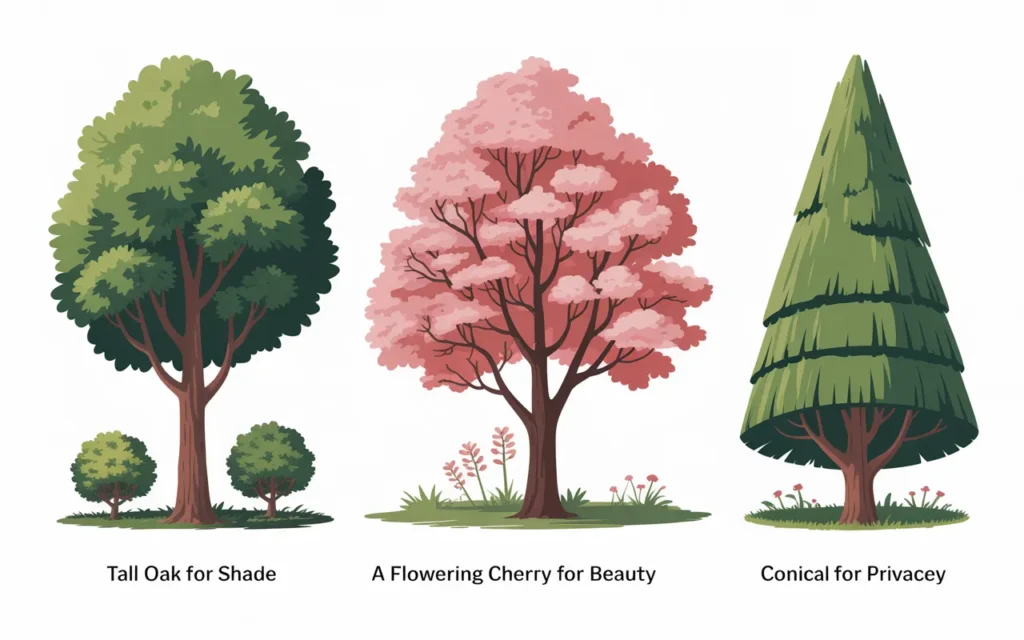
- Purpose and Function: What do you want from the tree?
- Shade: Look for trees with a wide, dense canopy like Maples or Oaks.
- Privacy: Choose evergreens that hold their needles year-round, like Arborvitae or Spruce.
- Flowers: Consider ornamental trees like Cherry, Crabapple, or Magnolia.
- Fall Color: Sugar Maples, Ginkgos, and Red Oaks put on a spectacular autumn show.
- Fruit: Apple, Peach, or Pear trees can provide a delicious harvest.
2. When is the Best Time to Plant a Tree?
The ideal time to plant a new tree is during its dormant season. This gives the roots time to establish themselves before the stress of summer heat or the demands of producing leaves and flowers.
- Fall: This is often considered the best time to plant. The warm soil encourages root growth, while the cooling air temperatures reduce water loss from the leaves. The tree has all fall and spring to establish roots before summer.
- Spring: The second-best option. Plant after the ground has thawed but before the tree has begun to leaf out. The main challenge with spring planting is ensuring the tree gets enough water during its first hot summer.
You can plant container-grown trees anytime during the growing season, but avoid planting during the peak heat of mid-summer if possible, as it puts extreme stress on the tree.
Understanding Tree Types: Balled, Container, and Bare-Root
When you purchase your tree, it will likely come in one of three forms. The planting technique varies slightly for each.
| Tree Type | Description | Pros | Cons |
|---|---|---|---|
| Balled & Burlapped (B&B) | The tree was grown in the ground, then dug up with a large ball of soil around its roots. The ball is wrapped in burlap and often a wire cage. | Can plant larger, more mature trees. | Very heavy. Potential for significant root loss during digging. |
| Container-Grown | The tree has been grown in a plastic pot for its entire life at the nursery. | Lightweight and easy to handle. Root system is fully intact. | Roots can become pot-bound (circling), which must be corrected. |
| Bare-Root | A young, dormant tree with no soil around its roots. Usually shipped while dormant in late winter/early spring. | Most affordable. Lightweight. Roots establish very quickly. | Must be planted immediately upon arrival. Only available for a short time each year. |
For most homeowners, container-grown trees offer the best balance of availability, ease of handling, and success rate. A high-quality Flowering Dogwood Tree Sapling is a great example of a popular container-grown choice.
The Best Way to Plant a Tree: A Step-by-Step Guide
Proper planting technique is crucial for root establishment and long-term health. Forget the old advice of digging a deep hole and adding lots of amendments. Modern research shows that a wide, shallow hole is far better.
Step 1: Call 811 Before You Dig
This is a critical safety step. Before any digging project, call 811 or visit your state’s 811 website. This free service will arrange for local utility companies to come and mark the approximate location of any underground lines (gas, electric, water, etc.) on your property. This can prevent a dangerous and costly accident.
Step 2: Dig a Wide, Saucer-Shaped Hole
The number one mistake people make is digging a hole that is too deep. The hole should be 2 to 3 times wider than the root ball, but no deeper than the height of the root ball itself.
- Why wide? Most of a tree’s critical roots grow out horizontally in the top 12-18 inches of soil. A wide hole loosens the surrounding soil, making it easy for roots to expand and establish themselves.
- Why not deep? Planting a tree too deep is one of the leading causes of tree failure. It can suffocate the roots and lead to trunk rot. It’s better to plant a tree slightly too high than even an inch too deep.
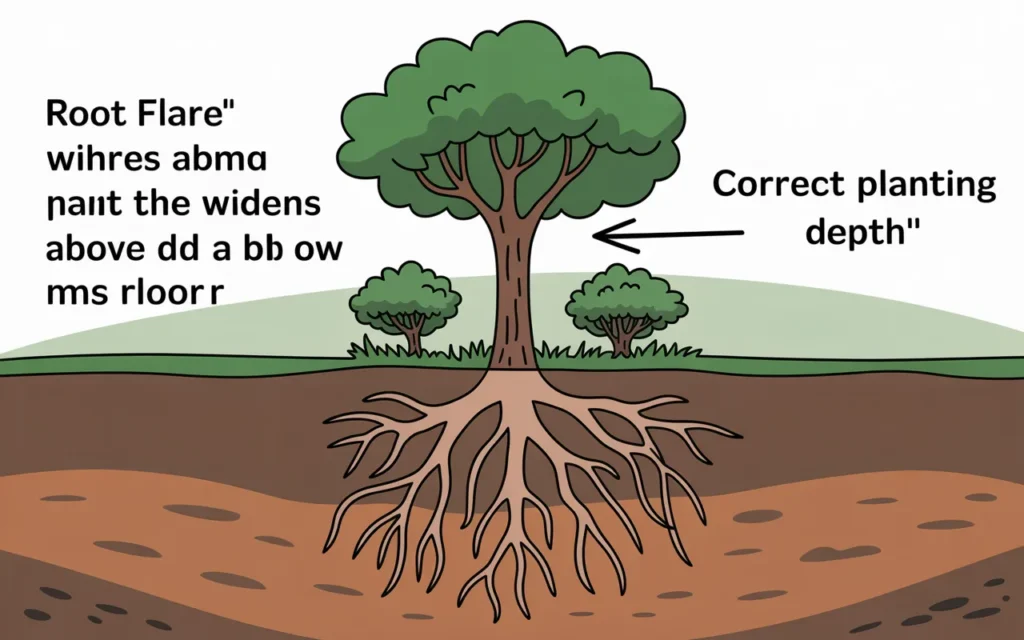
Step 3: Identify the Root Flare
The root flare (or trunk flare) is the area at the base of the trunk where it begins to widen and the first major roots emerge. This area must be visible and sit slightly above the surrounding ground level after planting. If you can’t see the flare on your tree, you may need to gently remove excess soil from the top of the root ball until you find it.
Step 4: Prepare the Tree and Place it in the Hole
- For Container-Grown Trees: Carefully remove the tree from its pot. If it’s stuck, you may need to cut the pot away. Examine the root ball. If roots are circling the outside of the ball (pot-bound), you must correct this. Use a sharp knife like a Hori Hori Garden Knife or your hands to cut or tease apart the circling roots. Make 4-5 vertical slices around the root ball and an “X” across the bottom to encourage outward growth.
- For B&B Trees: Place the entire ball in the hole. Once it’s positioned correctly, cut and remove all twine, wire, and as much of the burlap as possible. Remove the entire wire cage if you can. Any burlap or twine left on can girdle the trunk and roots as they grow.
- Placement: Gently place the tree in the center of the hole. Use the shovel handle laid across the hole to check the depth. The root flare should be at or slightly above the level of the surrounding soil.
Step 5: Backfill the Hole
Use the native soil you originally dug out of the hole to backfill around the root ball. Do not add significant amendments like peat moss or compost directly into the backfill. This can create a “potted” effect where roots are reluctant to grow out into the less-fertile native soil.
- Fill the hole about halfway, then gently tamp the soil to remove air pockets.
- Water thoroughly to help settle the soil.
- Finish backfilling until the soil is level with the base of the root flare. Avoid piling soil or mulch up against the trunk.
Step 6: Water Thoroughly
Water is the most critical element for a newly planted tree. Create a small soil berm or “moat” around the outer edge of the planting hole to help hold water. Water the tree deeply right after planting, giving it 10-15 gallons of water (or letting a hose run on a slow trickle for 30 minutes).
Step 7: Mulch, Mulch, Mulch!
Apply a 2-4 inch layer of organic mulch (like wood chips or shredded bark) over the entire planting area. Mulch is incredibly beneficial:
- It retains soil moisture.
- It suppresses weeds that compete for water and nutrients.
- It moderates soil temperature.
- As it breaks down, it improves the soil.
Crucially, do not let the mulch touch the trunk. Pull it back a few inches to create a “donut” shape, not a “volcano.” Mulch piled against the trunk can cause rot and hide pests.
Tree Care Guide: The First Few Years
Your work isn’t done after planting day. Proper care during the first 2-3 years is vital for the tree’s long-term survival.
- Watering: This is the most important task. A new tree needs consistent water for its first few seasons.
- Frequency: Check the soil every few days. Water deeply when the top 2-3 inches of soil are dry. This may mean watering 2-3 times a week in hot, dry weather and less often in cool weather.
- Amount: Provide a slow, deep soaking. A Tree Watering Bag is an excellent tool that releases water slowly and directly to the roots.
- Fertilizing: Do not fertilize a tree in its first year. The tree needs to focus its energy on root growth, not top growth. In the second or third year, if growth seems slow, you can apply a slow-release fertilizer designed for trees. Use a Slow-Release Tree Fertilizer Spike in the spring.
- Pruning: At planting time, only prune branches that are broken, dead, or diseased. Avoid significant structural pruning for the first year. Let the tree use all its leaves to generate energy for root growth
. - Staking (If Necessary): Most trees do not need to be staked. A tree develops a stronger trunk and root system if it is allowed to sway in the wind. Only stake a tree if it is in a very windy location, is top-heavy, or cannot support itself. If you must stake, use wide, flexible straps and allow for movement. Remove all stakes after one year. Stakes left on for too long can damage the trunk and weaken the tree.
Frequently Asked Questions (FAQ)
Q1: How deep should I plant my tree?
This is the most critical question! The hole should be no deeper than the height of the root ball, from its base to the root flare. Planting a tree too deep is a very common and fatal mistake. It is always better to plant it an inch or two high than an inch too deep.
Q2: Should I add compost or fertilizer to the planting hole?
No. Current best practices recommend backfilling with only the native soil that was removed from the hole. Creating a highly amended “super-soil” in the planting hole can discourage roots from growing out into the surrounding native soil, effectively confining them to the original hole.
Q3: Is it okay to plant a tree close to my house?
It depends on the tree’s mature size. A small, ornamental tree like a Japanese Maple might be fine 10-15 feet away. A large shade tree like a Silver Maple, which has an aggressive root system, should be planted at least 30-50 feet away from foundations, sidewalks, and septic systems.
Q4: My container-grown tree has a lot of circling roots. What should I do?
You must address this before planting. Circling roots, if not corrected, will continue to grow in a circle and can eventually girdle and kill the tree. Use a sharp knife to make several vertical cuts down the side of the root ball and prune any large, circling roots. Be aggressive; the tree will regrow new, healthy roots that spread outward.
Q5: How much water does a new tree need?
A newly planted tree needs deep, consistent watering for its first 1-2 growing seasons. A general rule is to provide about 10 gallons of water for every inch of trunk diameter, 1-3 times per week, depending on temperature and rainfall. The goal is to keep the soil consistently moist, but not waterlogged.
Planting a tree is a profoundly rewarding experience. By following these essential tree planting tips, you are not just beautifying your yard; you are contributing to the environment and leaving a lasting legacy for the future. Happy planting