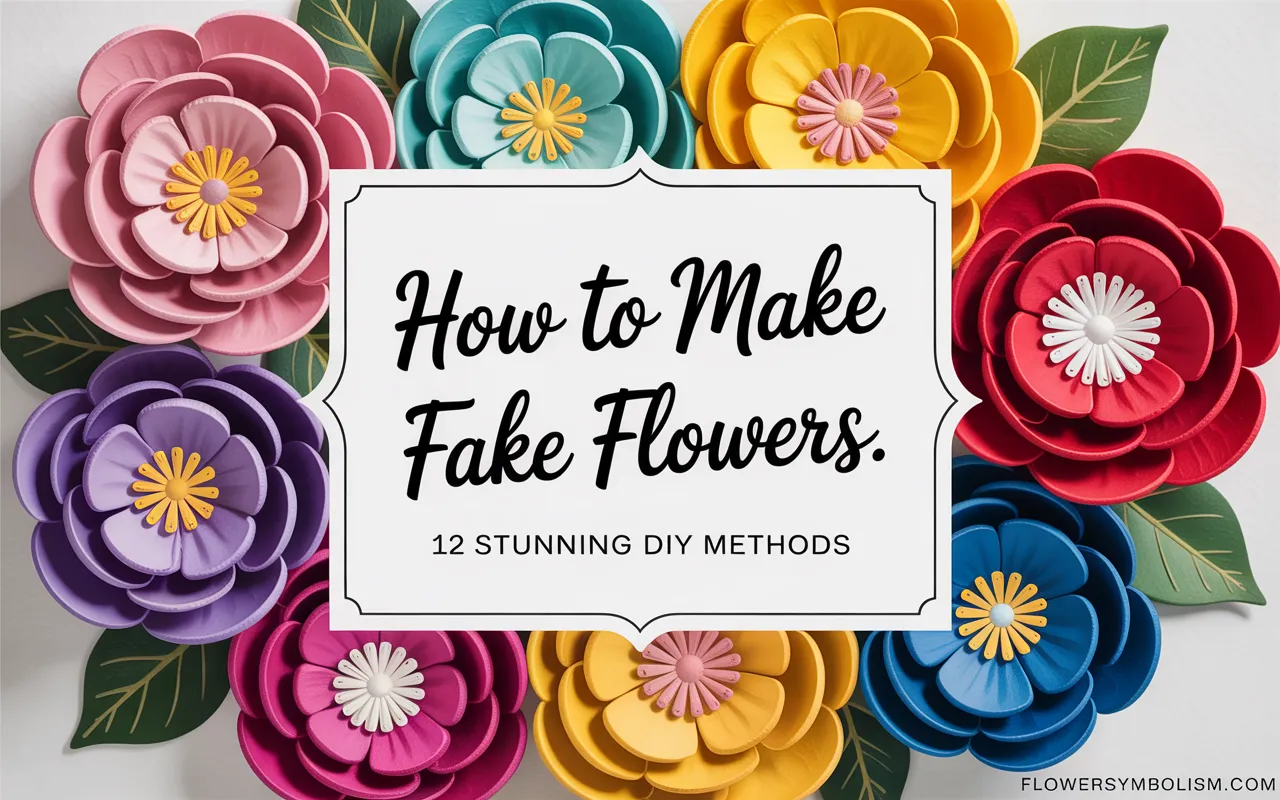
There is something truly special about crafting something beautiful with your own two hands. Creating your own home decor brings a personal touch that you just can’t buy in a store. If you love the look of flowers but want a project that will last, learning how to make fake flowers is a wonderfully rewarding skill to pick up.
You don’t need to be an expert crafter to make stunning, lifelike blooms. With a few simple materials and a bit of creativity, you can create everything from delicate paper roses to rustic crepe paper peonies. Ready to dive into this fun and relaxing craft? Here are some stunning DIY methods for making your own fake flowers.
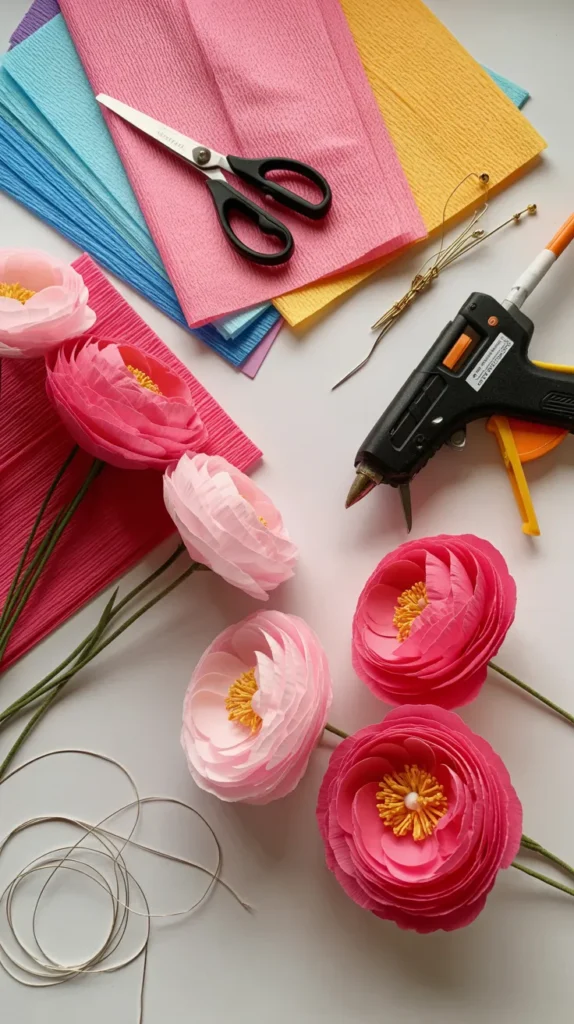
Method 1: Classic Crepe Paper Peonies
Crepe paper is a fantastic material for beginners because it’s forgiving and has a natural texture that mimics real petals. Peonies are a great first project because their fluffy, multi-layered look is easy to achieve.
Step 1: Gather Your Materials
First, you’ll need heavy-gauge crepe paper in your desired petal color (like pink or white) and a bit of green for the leaves. You’ll also need floral wire for the stems, green floral tape, scissors, and a hot glue gun. Using a high-quality crepe paper, like the {Lia Griffith Heavy Crepe Paper}, is key as its stretchiness allows you to shape realistic-looking petals.
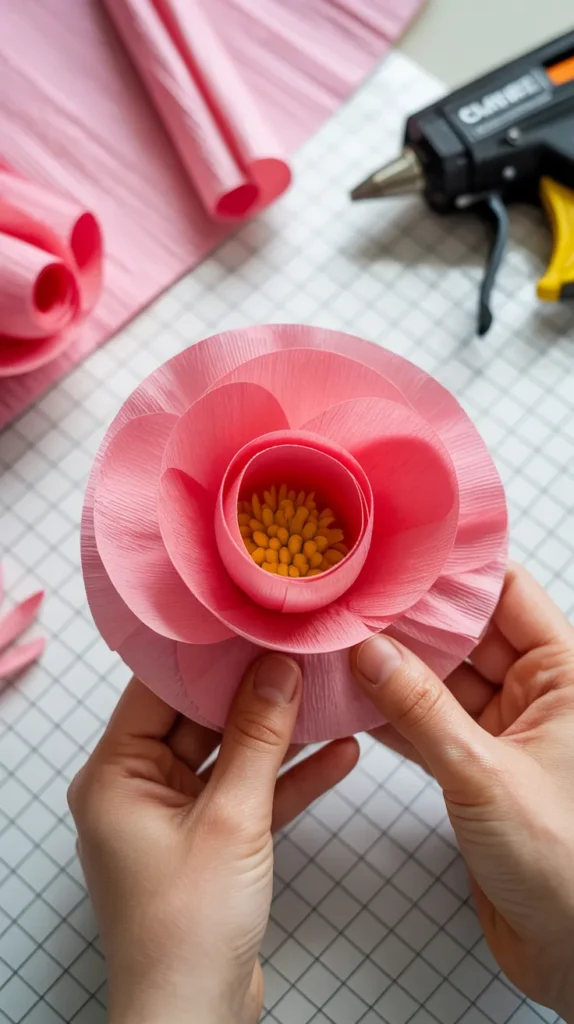
Step 2: Cut Your Petals
Cut your pink crepe paper into two different petal shapes: about 15 smaller, heart-shaped petals for the center and 20 larger, more rounded petals for the outside. Make sure the grain of the crepe paper runs vertically on each petal. This is crucial for shaping them later.
Step 3: Shape the Petals
Gently stretch the center of each petal outwards with your thumbs to create a cupped shape. This is called “cupping.” Then, gently curl the top edges of the larger petals backward around a pencil or your finger to mimic how real peony petals unfurl.
Step 4: Build Your Flower
Take a piece of floral wire and create a small loop at one end. Start by hot-gluing the smaller, heart-shaped petals around this loop, overlapping them to create a tight bud. Continue adding the larger, cupped petals around the center, gluing them one by one. Stagger the petals to create a full, natural look.
Step 5: Add the Stem and Leaves
Once all your petals are attached, wrap the base of the flower and the entire length of the wire stem with green floral tape. This tape sticks to itself when stretched. Cut out a few simple leaf shapes from your green crepe paper, glue them to a small piece of wire, and then attach them to the main stem by wrapping them on with more floral tape.
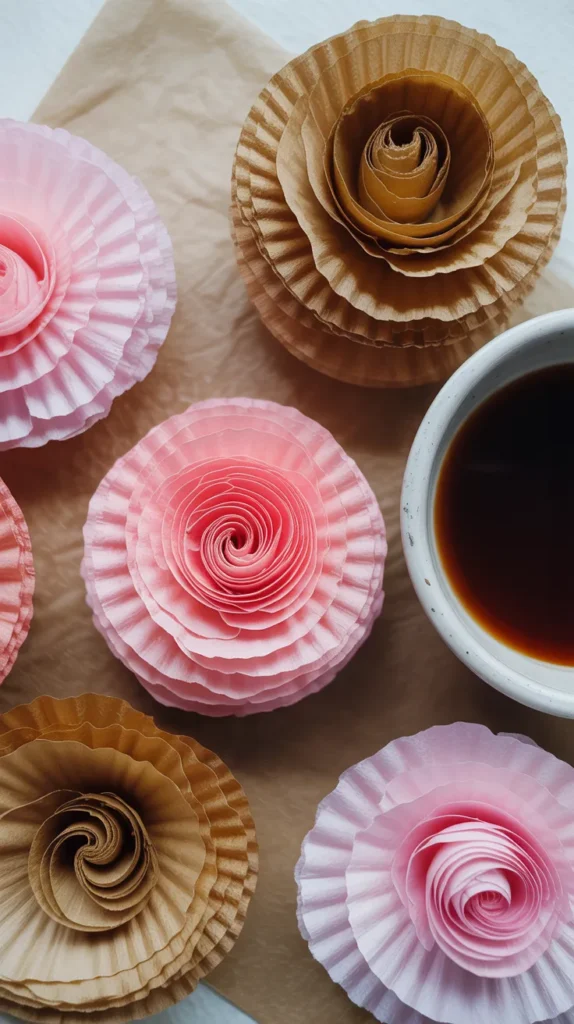
Method 2: Delicate Coffee Filter Roses
Believe it or not, simple coffee filters can be transformed into the most delicate, romantic-looking roses. Their slightly translucent and textured paper is perfect for mimicking soft rose petals.
Step 1: Dye Your Filters
This is the fun part where you can customize your colors. Brew some strong coffee or tea for a vintage look, or use watercolor paints or food coloring mixed with water for other shades. Dip your stack of coffee filters into the dye bath and let them soak up the color. Squeeze out the excess and lay them flat to dry completely.
Step 2: Cut and Shape
Once dry, take a single coffee filter and cut a spiral into it, starting from the outside edge and working your way to the center, leaving a small circle in the middle. The wavier you make your cuts, the more ruffled your rose petals will be.
Step 3: Roll the Rose
Starting from the pointy outer end of the spiral, begin rolling the paper strip tightly. As you roll, it will naturally start to form a rose shape. Keep rolling until you reach the small circle at the center.
Step 4: Secure Your Bloom
Use the center circle of the coffee filter as a base. Apply a generous dot of hot glue from a {Gorilla Dual Temp Mini Hot Glue Gun} to this circle and press the rolled-up rose onto it to secure everything in place.
Step 5: Add a Stem
Poke a piece of floral wire through the center of the glue base. Bend the top of the wire into a small hook to keep it from pulling out. Wrap the base of the rose and the wire stem with green floral tape to finish your delicate flower.
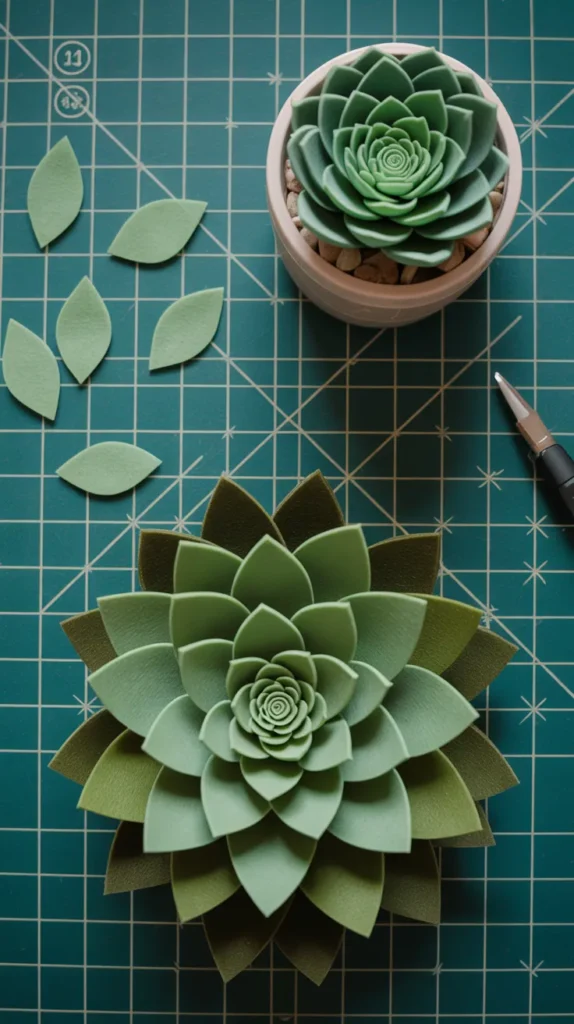
Method 3: Simple Felt Succulents
Felt is a wonderful material for creating stylized, modern-looking plants like succulents. They are quick to make, require no sewing, and are perfect for creating a maintenance-free terrarium or arrangement.
Step 1: Collect Your Felt and Tools
You’ll need several sheets of felt in various shades of green, gray, or even purple. A good pair of sharp scissors is crucial for getting clean cuts. The {Fiskars Premier Easy Action Scissors} are fantastic because they are sharp and spring-loaded, which reduces hand strain when cutting lots of shapes. You will also need a hot glue gun.
Step 2: Cut the “Petals”
For a classic echeveria-style succulent, cut out three to four sets of petals in graduating sizes. Cut about 5-6 small petals, 7-8 medium petals, and 9-10 large petals. They should be a simple, pointed oval shape.
Step 3: Create the Center Bud
Take one of your smallest petals and roll it into a tight cone, securing it with a dot of hot glue. This will be the center of your succulent.
Step 4: Build the Layers
Glue your remaining small petals around the central cone, overlapping them slightly. Continue with the medium petals, placing them to cover the seams of the layer before. Finish by adding the largest petals around the outside, flaring them out slightly to create an open, blooming look.
Step 5: Finish the Base
Once all your petals are attached, you can glue the finished succulent head onto a small circle of felt for a flat base, or attach it directly to a piece of floral wire if you want to add it to a bouquet.
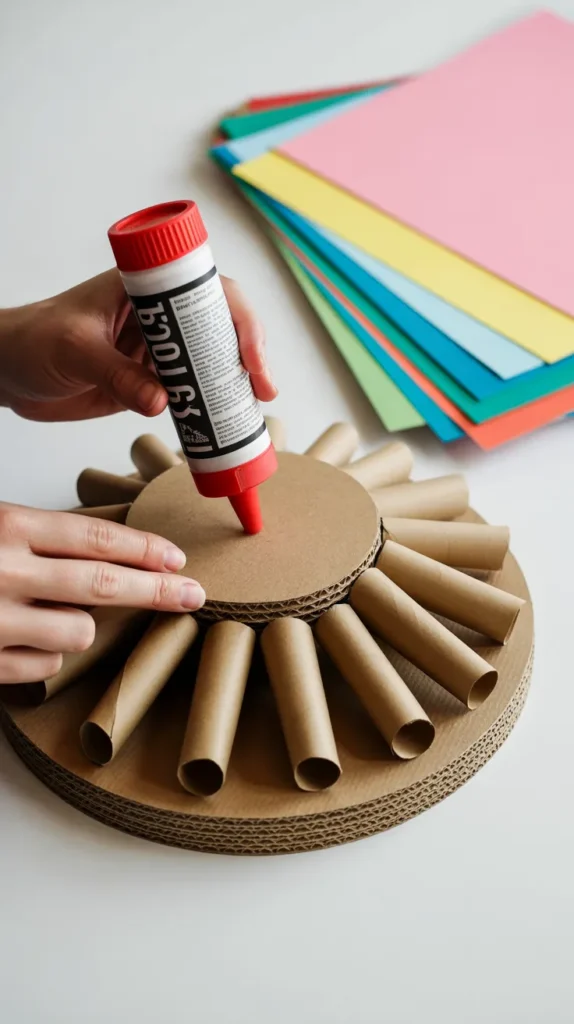
Method 4: Modern Paper Dahlias
This method uses simple cardstock and a bit of rolling to create a stunning, geometric dahlia. This is a great project for using up scrapbooking paper and looks amazing as wall decor.
Step 1: Gather Your Paper and Tools
Choose cardstock in your desired color. You’ll also need a paper trimmer or scissors, a ruler, and a hot glue gun. A pencil or a thin dowel is needed for rolling. To create a sturdy base for your dahlia, you’ll also want a compass or a round object to trace a circle onto a piece of cardboard. A kit like the {Mr. Pen Professional Compass Set} is very helpful for this.
Step 2: Cut Your Paper
Cut your cardstock into many squares of three different sizes (e.g., 3-inch, 2.5-inch, and 2-inch squares). You will need about 20-30 squares of each size, depending on how large you want your dahlia to be.
Step 3: Roll the Cones
Take one square and roll it diagonally to form a cone shape. Secure the edge with a small dot of hot glue. Repeat this process for all of your paper squares. This is the most time-consuming part, so put on some music and enjoy the process!
Step 4: Build the Outer Layer
Take your cardboard circle base. Start by gluing the largest cones around the outer edge of the circle, with the points meeting in the center.
Step 5: Add the Inner Layers
Once the first layer is complete, begin gluing the medium-sized cones on top, staggering them to cover the gaps from the first layer. Finish by gluing the smallest cones in the very center to create a full, dimensional flower.
The finished dahlia can be hung on a wall or used as a unique centerpiece. To make hanging easier, you can attach a {Command Picture Hanging Strip} to the back of the cardboard base.
Must-Have Tools for Your DIY Flowers
| Product | Use Case |
|---|---|
| {Lia Griffith Heavy Crepe Paper} | Its superior stretch is perfect for shaping realistic crepe paper petals. |
| {Gorilla Dual Temp Mini Hot Glue Gun} | Provides a strong, reliable bond for all types of paper and felt flowers. |
| {Fiskars Premier Easy Action Scissors} | Reduces hand fatigue when cutting many felt or paper petal shapes. |
| {Mr. Pen Professional Compass Set} | Helps you create a perfect circular base for geometric paper dahlias. |
| {Command Picture Hanging Strip} | An easy, damage-free way to hang your finished paper dahlia wall art. |
Crafting Your Own Everlasting Garden
Learning how to make fake flowers is a delightful journey into creativity that leaves you with beautiful, lasting decor for your home. Each method offers a different style, from the romantic softness of coffee filter roses to the modern structure of a paper dahlia.
Don’t be afraid to experiment with different colors, papers, and shapes. The most beautiful arrangements come from playing and discovering what you love. So gather your supplies and start crafting your very own garden of handmade blooms.