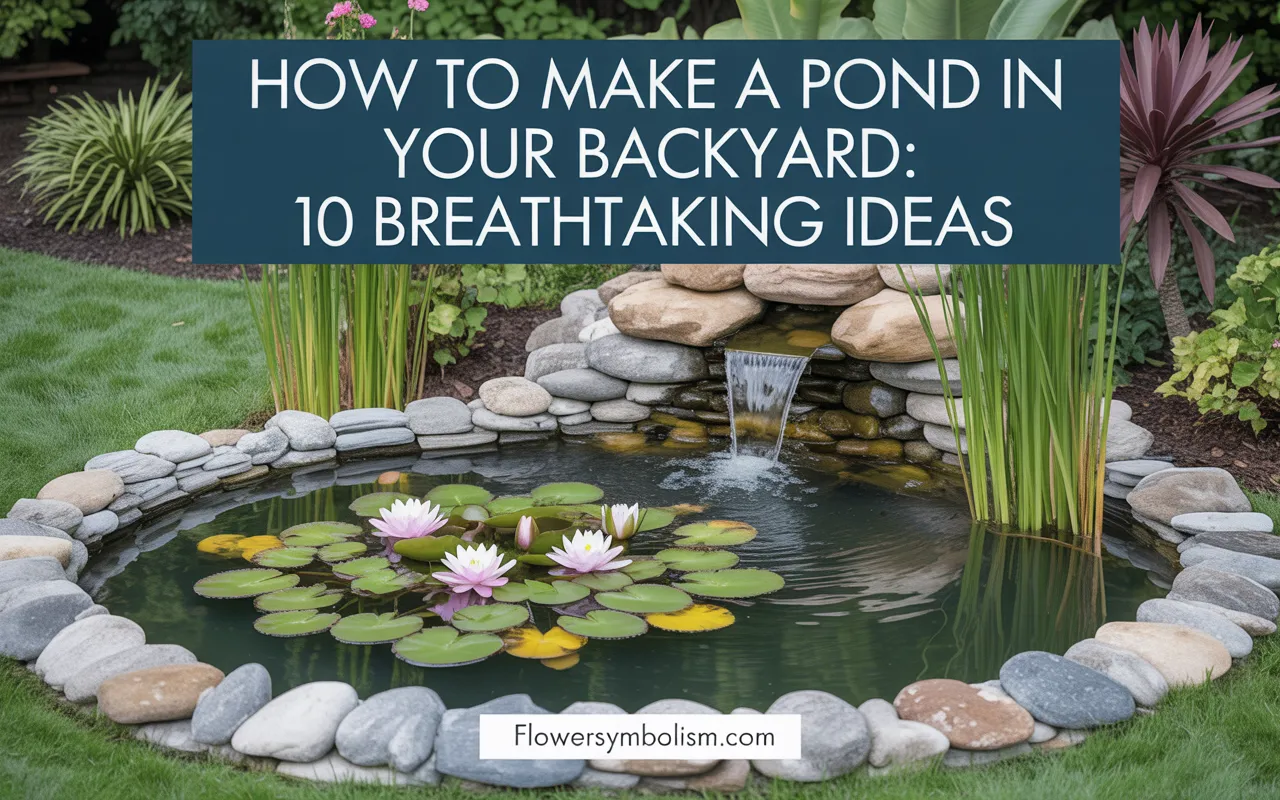
Adding a pond to your backyard is like giving your home its own living heart.
It’s a source of endless fascination and deep tranquility, a place where you can escape the daily grind and connect with nature.
You might think learning how to make a pond in your backyard is a complicated, expensive process, but it’s more achievable than you imagine.
It’s a rewarding project that lets you create a personal oasis, and there are designs to fit every space, budget, and skill level.
This guide is designed to empower you with 10 breathtaking ideas and the confidence to get started.
We’ll walk through each concept, showing you step-by-step how to make a pond in your backyard that you’ll be proud of.
We’ve filled this guide with beginner-friendly tips, creative inspiration, and helpful product suggestions to make your project a fun and successful adventure.
Let’s get our hands dirty and create a stunning water feature that will bring you joy for years to come.
Getting Started: Planning Your Backyard Pond
The secret to successfully learning how to make a pond in your backyard is a little bit of planning.
Thinking through a few key details before you start will save you time, effort, and potential headaches down the road. This is the fun part where you get to be the architect of your own personal paradise.
Key Planning Tips for Beginners:
- Location is Everything: Find a spot that receives about four to six hours of sunlight per day. This is perfect for most aquatic plants but won’t overheat the water. Try to place it where you can enjoy the view and sound from a window or your favorite patio chair. Avoid placing it directly under messy trees to reduce cleanup.
- Decide on a Style: Do you envision a naturalistic in-ground pond that looks like it’s always been there, or a raised feature like a container pond that requires no digging? The ideas below will help you decide on the perfect style.
- Power It Up: If you want a fountain, filter, or waterfall (which is highly recommended for water health and ambiance), you’ll need access to a GFCI (Ground Fault Circuit Interrupter) protected outdoor electrical outlet. Plan your pond’s location with this in mind for safety and convenience.
- Start Small: For your first pond project, it’s wise to start with a manageable size. You can always go bigger later! A smaller pond is easier to build and maintain as you learn the ropes of water gardening.
With these points in mind, you’re ready to explore some amazing and completely doable ideas.
10 Breathtaking Ideas for Your Backyard Pond
Ready to find the perfect project? Here are 10 stunning and beginner-friendly ideas that explain how to make a pond in your backyard.
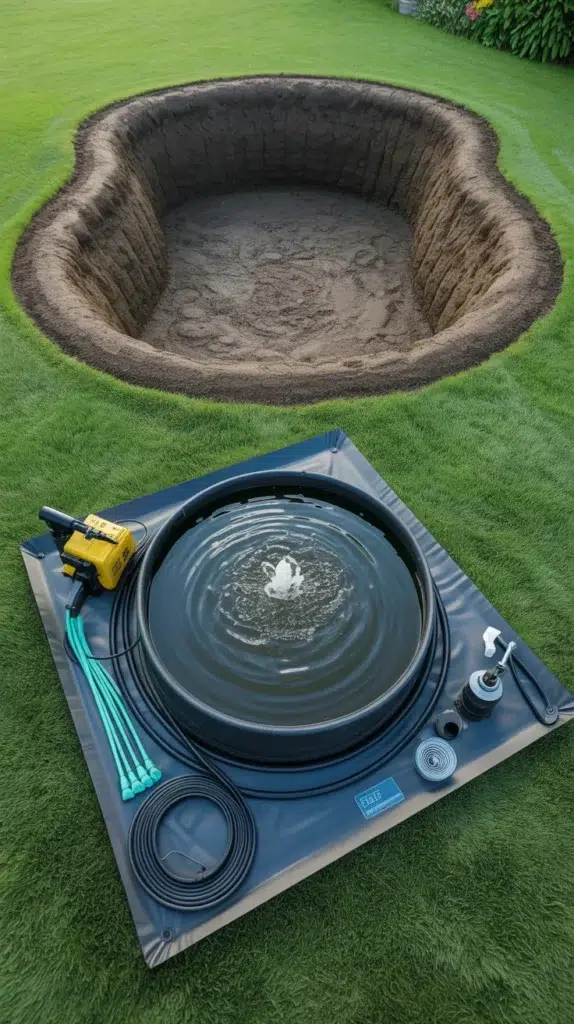
1. The Pond-in-a-Box Kit: The Easiest Start
For the absolute beginner, there is no simpler way to learn how to make a pond in your backyard than with an all-in-one kit.
These kits take all the guesswork out of the process because they include all the essential, correctly matched components.
You get a flexible liner, a protective underlayment, a pump, a filter, and all the necessary tubing. The instructions guide you through each step, from excavating the hole to installing the liner and setting up the equipment. It’s a foolproof method to achieve a professional-looking result on your first try.
A complete set like the {TotalPond Pond Kit} is fantastic because it provides everything you need to get your pond up and running over a single weekend.
How to Do It:
- Choose a Spot: Lay out the liner on the ground to get a sense of the size.
- Dig the Hole: Following the kit’s instructions, dig a hole with one or two shallow shelves for plants.
- Install Liner: Lay down the protective underlayment, then place the flexible liner in the hole, smoothing out wrinkles.
- Set Up Equipment: Place the pump and filter in the pond and run the tubing.
- Finish and Fill: Add a layer of rocks to the bottom, place stones around the edge to hide the liner, and fill with water.
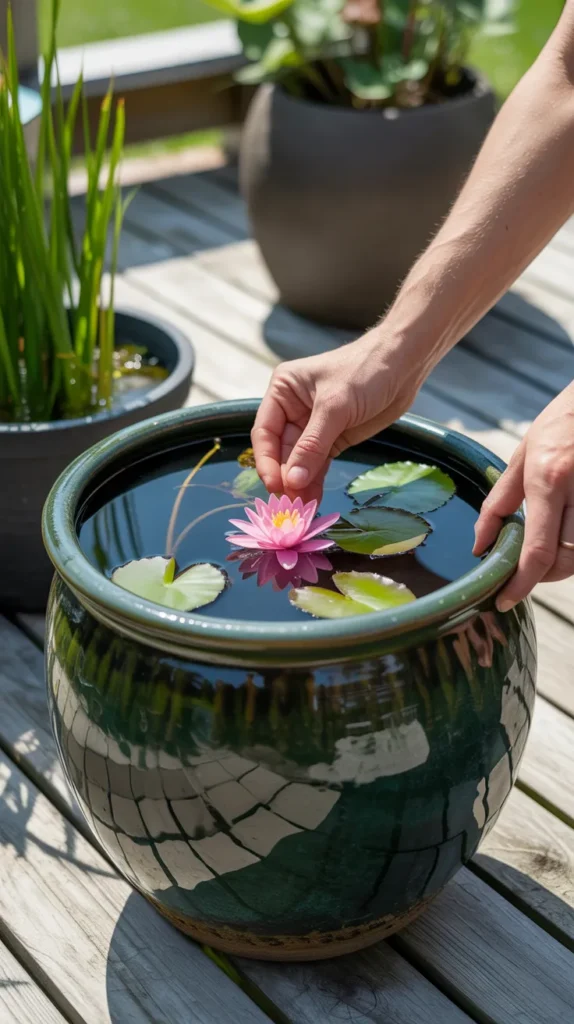
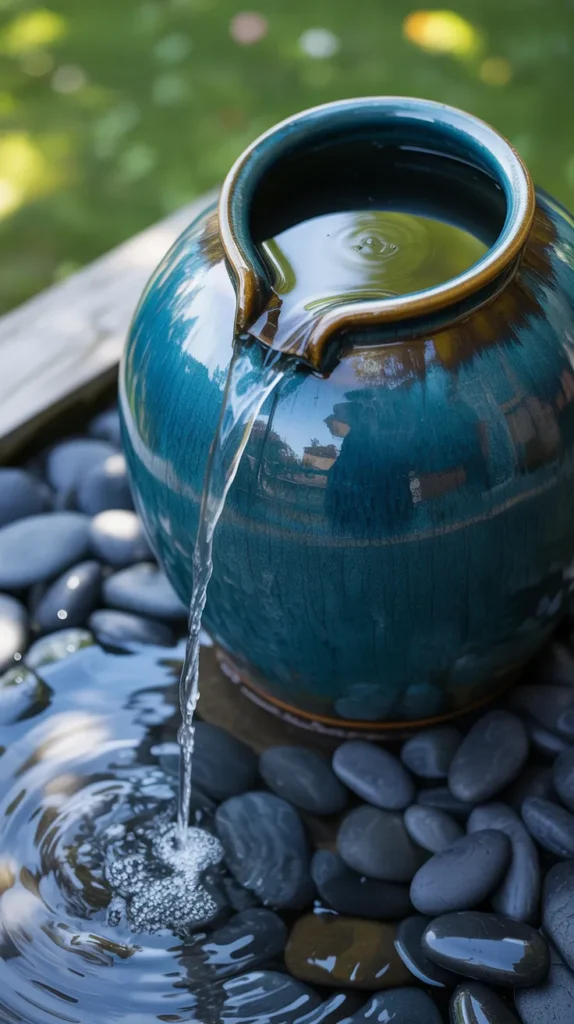
2. The Simple Container Pond: No Digging Required
This is the ultimate entry-level project, perfect for patios, balconies, or any small space where digging isn’t an option.
The project is simple: find a large, watertight container and turn it into a miniature aquatic world.
You can use a glazed ceramic pot, a galvanized stock tank, or a rustic half-whiskey barrel.
Just add water, a few small aquatic plants like a dwarf water lily and some floating water hyacinth, and you’re done!
For a little extra magic and vital aeration, add a small pump for sound and movement.
A compact, all-in-one unit like the {TetraPond Submersible Flat Box Filter} is perfect, as it provides both filtration and a small fountain spray in one easy-to-place device, keeping your mini-pond clean and beautiful.
How to Do It:
- Select Your Container: Choose any watertight pot or tub that’s at least 15-20 gallons.
- Position It: Place your container in its final location before you fill it with water.
- Add Plants: Use bricks inside to create shelves of different heights for your potted aquatic plants.
- Install Pump: Place the pump/filter unit at the bottom.
- Fill and Enjoy: Fill with water and enjoy your instant pond!
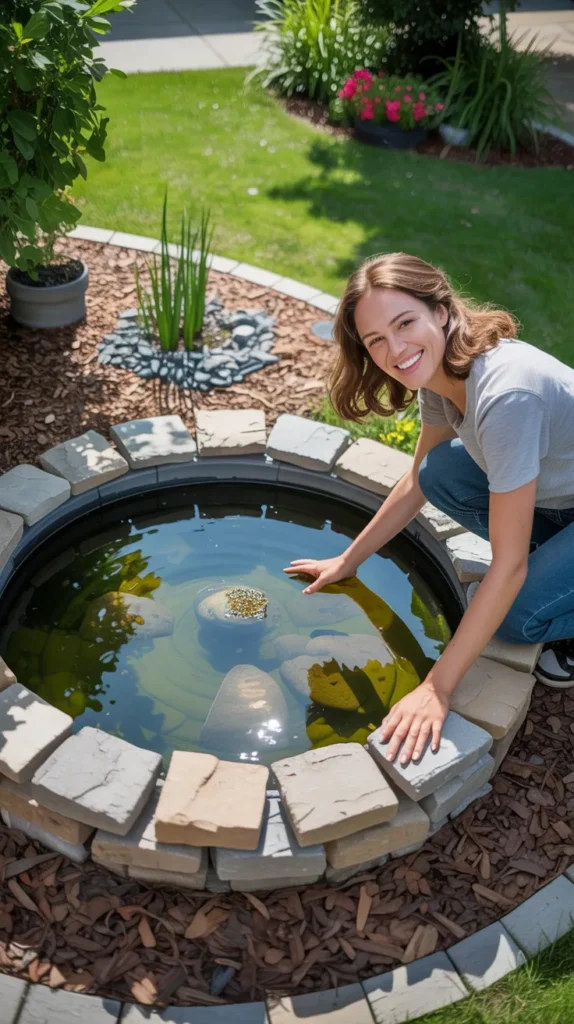
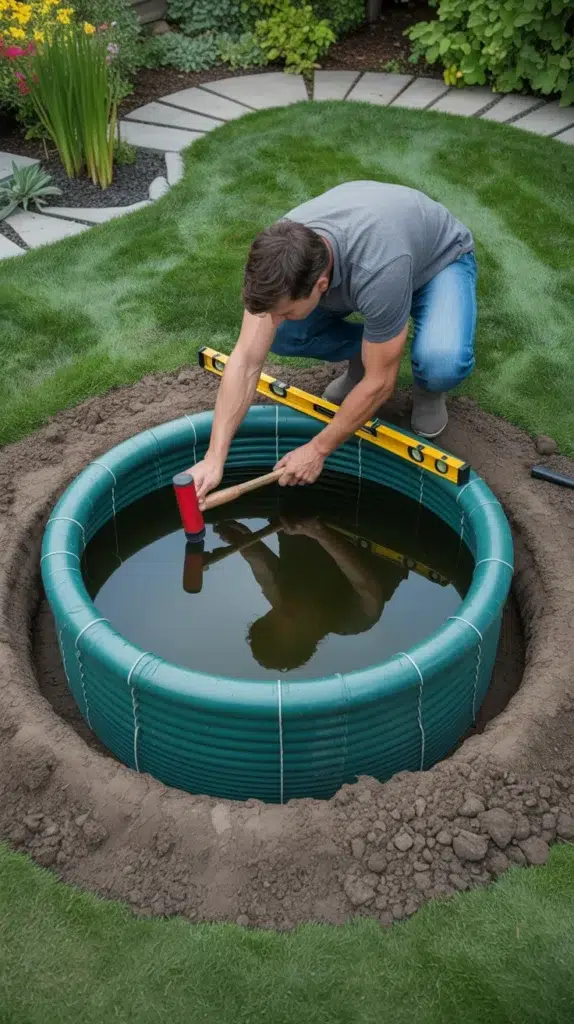
3. The Pre-Formed Liner Pond: Foolproof Shape
If you like the look of an in-ground pond but feel intimidated by shaping a flexible liner, a pre-formed shell is your best friend.
This is a very direct way to learn how to make a pond in your backyard. These rigid, molded plastic liners come in a variety of small, organic shapes.
Your job is simply to trace the shape on the ground, dig a hole to match the form, and drop the shell in. Make sure it’s level, then backfill the soil around the edges.
The final, and most fun, step is hiding the plastic rim with an overlapping border of flat stones or mulch for a natural look. This method simplifies the most challenging part of an in-ground pond build.
How to Do It:
- Trace and Dig: Place the shell upside down and trace its outline. Dig the hole to match the contours of the shell.
- Level the Shell: Place a layer of sand in the bottom of the hole for leveling. Set the shell in and use a level to ensure it’s perfectly flat.
- Backfill: Fill the gaps around the outside of the shell with soil or sand.
- Finish the Edge: Arrange rocks or flagstone around the rim to hide the plastic edge.
- Fill with Water: Add water and get ready to introduce plants.
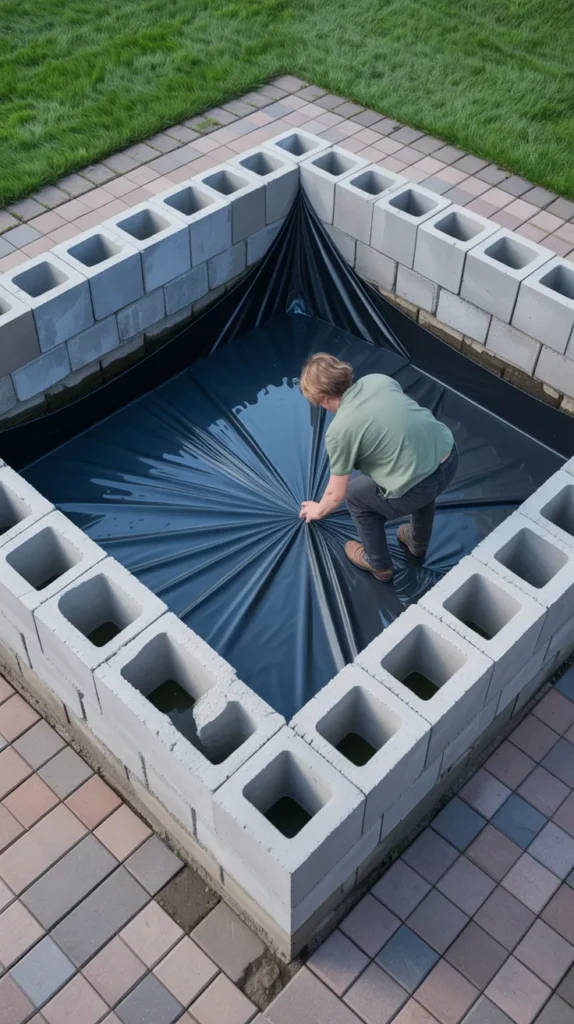
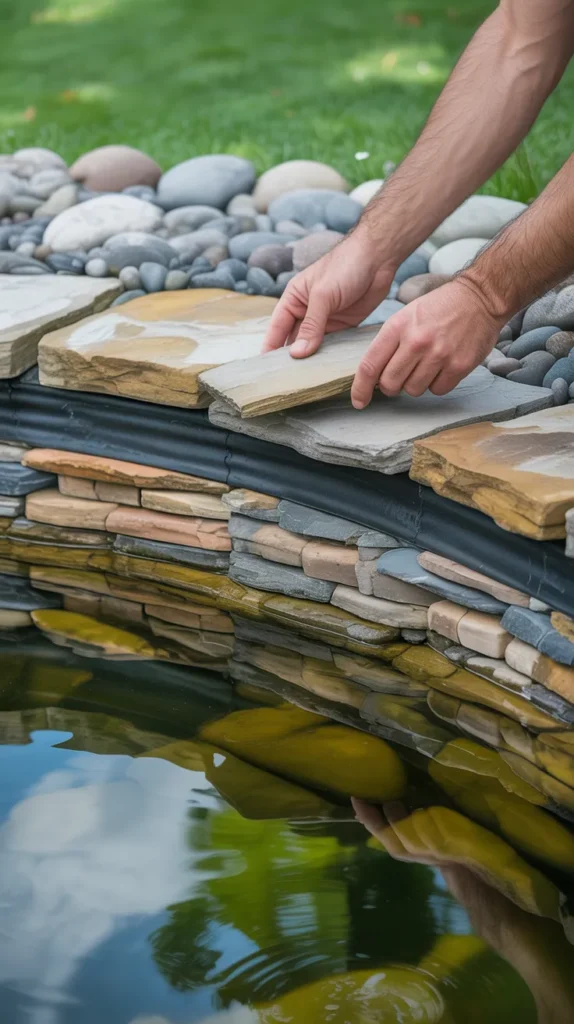
4. The Raised Block and Liner Pond: Lego for Adults
Building a raised pond is a fantastic project that requires no major digging and is a surprisingly easy way to learn how to make a pond in your backyard. It’s like building with giant Lego bricks!
You can use inexpensive concrete blocks or decorative retaining wall blocks to build a perimeter wall for your pond on any level surface.
Once your walls are built, you simply place a flexible pond liner inside the structure, folding it neatly at the corners and securing it under the top capstones.
This method allows you to create a formal, architectural feature that can also serve as a seating wall. For a project like this, a durable liner is essential.
The {Firestone 45mil EPDM Pond Liner} is a great choice because it’s thick, puncture-resistant, and flexible enough to fit neatly into the corners of your block structure.
How to Do It:
- Build the Walls: On a level base, lay your first course of blocks. Continue building up the walls to your desired height, using construction adhesive between layers.
- Line the Pond: Drape the liner inside the walls, folding it neatly at the corners.
- Secure the Liner: Place your capstones on top of the wall, using adhesive to secure them over the liner’s edge.
- Trim and Fill: Trim any excess liner and fill your new pond with water.
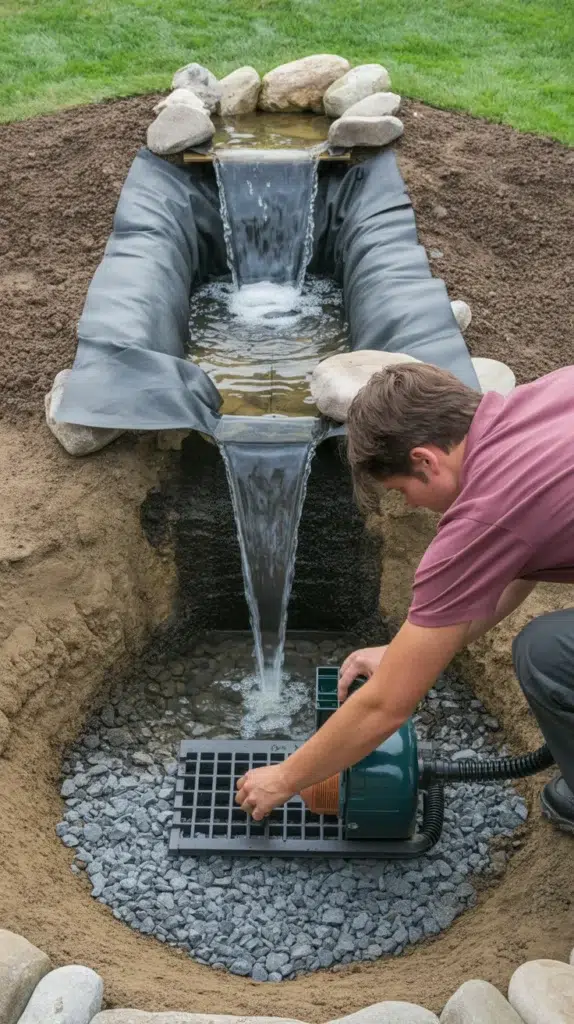
5. The DIY Pondless Waterfall: All Sound, No Open Water
Love the sound of a waterfall but not the idea of an open pond? A pondless waterfall is a brilliant alternative.
You dig a hole for an underground basin, place a pump inside a protective vault, and fill the basin with gravel.
Then you build a small hill for your waterfall, cover it with a liner that directs water into the basin, and stack rocks to create the cascade.
The water circulates from the hidden basin up to the top of the waterfall and back down, so you get all the beauty and sound with enhanced safety.
These are perfect for front yards or homes with small children and are a unique way to approach how to make a pond in your backyard.
To keep your waterfall flowing beautifully, a powerful pump is key. The {TotalPond 1200 GPH Waterfall Pump} is a workhorse, providing plenty of power for a small to medium-sized waterfall.
How to Do It:
- Dig the Basin: Excavate a hole for your underground reservoir.
- Install Basin and Pump: Place the reservoir and pump vault in the hole and attach the tubing.
- Build the Waterfall: Create a small mound of earth for your waterfall. Cover it with a liner that directs water into the basin.
- Stack Rocks: Arrange rocks and boulders to create your waterfall cascade. Use waterfall foam sealant to direct the water over the rocks.
- Finish and Activate: Cover the basin with gravel and turn on the pump.
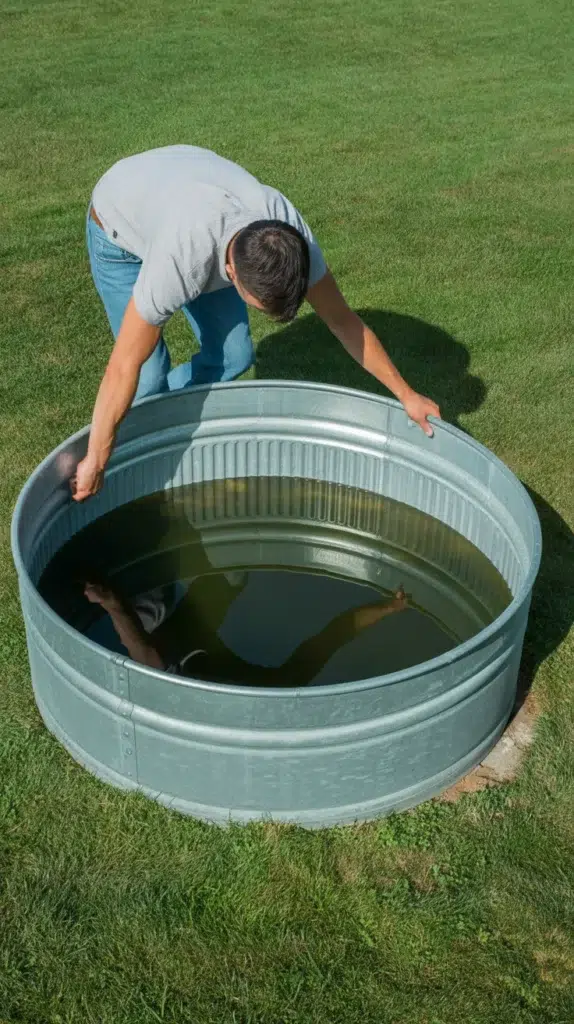
6. The Buried Stock Tank Pond: Modern and Tough
For a modern, industrial, or farmhouse look, a galvanized steel stock tank makes a fantastic and durable pond.
You can use it as a simple container pond above ground, or you can dig a hole and bury it for a sleek, in-ground look with a perfect circular or oval shape.
Just dig a hole slightly larger than the tank, set the tank inside, and backfill the gap. The metal rim provides a clean, contemporary edge.
These tanks are incredibly tough and offer an instant, perfectly shaped pond.
Keeping the water clear is easy with a simple filter. An in-pond filter like the {Goplus Pressure Bio Filter} can be placed at the bottom, offering powerful filtration that’s easy to access for cleaning.
How to Do It:
- Dig the Hole: Trace the shape of the stock tank and dig a hole that is slightly wider and deeper.
- Level the Tank: Add a layer of sand to the bottom of the hole. Place the tank inside and use a level to ensure it’s perfectly flat.
- Backfill: Carefully fill the gap around the outside of the tank with soil.
- Add Water and Plants: Fill your new, perfectly round pond and add your favorite aquatic plants.
7. The Disappearing Fountain in a Pot: A Touch of Magic
This is a magical and easy DIY project that adds a high-end look and soothing sound to any small space. You create a fountain that seems to vanish into the ground.
You’ll need an underground basin (a simple pond basin kit works well), a pump, and a large, decorative pot. The pot sits on a stand over the basin, which is covered with mesh and decorative gravel.
The pump pushes water up through the pot, causing it to overflow and trickle down its sides, where it “disappears” into the gravel and back into the basin.
How to Do It:
- Install the Basin: Dig a hole and place the underground water basin in it.
- Set Up Pump and Pot: Place the pump in the basin, run the tubing up through the gravel and the pot.
- Cover the Basin: Place a strong mesh over the basin and cover it with decorative river stones or gravel.
- Turn It On: Fill the basin with water and turn on the pump to enjoy the magical effect.
8. The Stacked Stone and Liner Pond: A Natural Look
Create a natural, rustic-looking pond by building the walls with stacked flagstone or fieldstone. This method involves digging a shallow basin and then building up the edges with carefully stacked, flat stones.
As you stack the stones, you drape the flexible liner over them, using the weight of the next layer of stone to hold the liner in place.
This creates a beautiful, textured stone interior that looks incredibly natural. It’s a bit like putting together a puzzle, but the result is a one-of-a-kind feature.
To keep algae from growing on your beautiful stones, it helps to keep the water moving.
A simple aeration kit, like the {TetraPond Aeration Kit} adds essential oxygen and circulation, which helps to inhibit algae growth and keeps the pond healthy.
How to Do It:
- Dig a Basin: Excavate a shallow hole for the base of your pond.
- Lay the Liner: Place the liner in the hole with plenty of excess around the edges.
- Start Stacking: Begin laying your first course of stones on the liner inside the pond. As you build up, drape the liner over the back of the wall and secure it with the next course of stones.
- Finish and Fill: Continue stacking to your desired height, trim the liner, and fill with water.
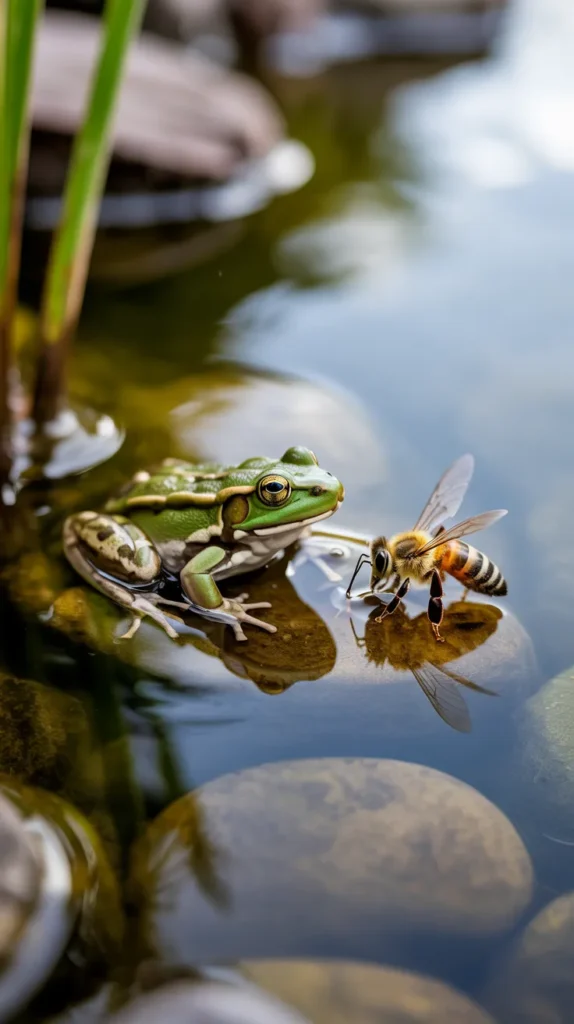
9. The Mini Wildlife Pond: Help Your Local Critters
You can make a huge difference for local wildlife with even a tiny pond. The most important feature is creating a sloping “beach” on one side.
After digging your pond and laying the liner, simply create a gentle ramp on one side using a pile of pebbles and small, flat stones.
This allows bees, birds, and other critters to safely get a drink or take a bath without falling in. Don’t add fish, as they will eat the eggs and larvae of frogs and insects you want to attract.
This is a wonderfully rewarding project that turns your garden into a lively habitat.
Making tap water safe is important for delicate amphibians. A bottle of {API Pond Stress Coat} is great to have; it removes chlorine and heavy metals, making the water safe for all visitors.
How to Do It:
- Dig a Shallow Hole: Dig a small basin with varying depths.
- Install Liner: Place a flexible liner in the hole.
- Create a Beach: On one side, create a long, gentle slope using sand and pebbles over the liner.
- Add Plants and Water: Add some native marginal plants and fill with dechlorinated water.
- Wait for Visitors: Be patient, and soon wildlife will discover your new oasis.
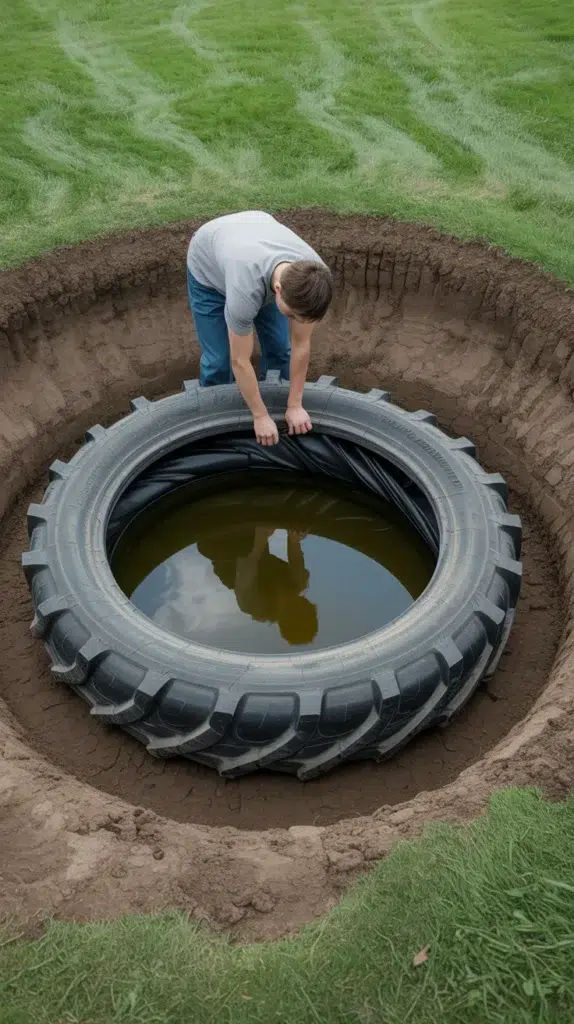
10. The Tractor Tire Pond: A Clever Upcycle
For a tough, recycled, and virtually free pond form, look no further than an old tractor tire. With a bit of effort, you can turn this piece of rubbish into a fantastic backyard pond.
You’ll need a jigsaw with a strong blade to cut the top sidewall off the tire. Then, dig a hole, drop the tire in, and line it with a piece of flexible pond liner.
The tire’s shape creates a perfect, durable pond form with a built-in planting shelf.
It’s a brilliant upcycling project that results in a surprisingly beautiful and natural-looking pond once you landscape the edges with rocks and plants.
This is a truly creative answer to the question of how to make a pond in your backyard.
How to Do It:
- Source and Cut the Tire: Find an old tire and carefully cut off one sidewall.
- Dig the Hole: Dig a hole deep enough to bury the tire up to its rim.
- Line the Tire: Place a piece of pond liner inside the tire, pressing it into the form.
- Finish the Edge: Hide the liner and tire rim with decorative rocks.
- Fill and Plant: Add water and place aquatic plants on the tire’s inner rim.
Recommended Products for Your DIY Pond Project
The right supplies can make all the difference in a DIY project. Here’s a summary of the helpful products mentioned to help you build your dream backyard pond.
| Product Name | Brand | Best For |
|---|---|---|
| Complete Pond Kit | TotalPond | The easiest all-in-one solution for beginners |
| Submersible Flat Box Filter | TetraPond | Simple, effective filtration for container ponds |
| 45mil EPDM Pond Liner | Firestone | A durable, flexible liner for custom-shaped ponds |
| 1200 GPH Waterfall Pump | TotalPond | Powering a small waterfall or pondless feature |
| Pressure Bio Filter | Goplus | Keeping the water clear in a stock tank pond |
| Pond Aeration Kit | TetraPond | Adding oxygen and circulation to inhibit algae |
| Pond Stress Coat | API | Making tap water safe for plants and wildlife |
Your Backyard Paradise Is a Weekend Away
Learning how to make a pond in your backyard is one of the most satisfying projects you can undertake for your home. It adds beauty, sound, and a connection to nature that you’ll enjoy every single day.
As you’ve seen, you don’t need a huge budget or professional skills to build a breathtaking water feature. All it takes is a good idea, a little bit of planning, and the willingness to get your hands dirty.
We hope these 10 ideas have sparked your imagination and given you the confidence to start your own project.
Whether you choose a simple container pond or an in-ground kit, the process of creating your own oasis is part of the fun. So pick an idea that speaks to you, gather your supplies, and get ready to enjoy the peace and tranquility of your very own backyard pond.