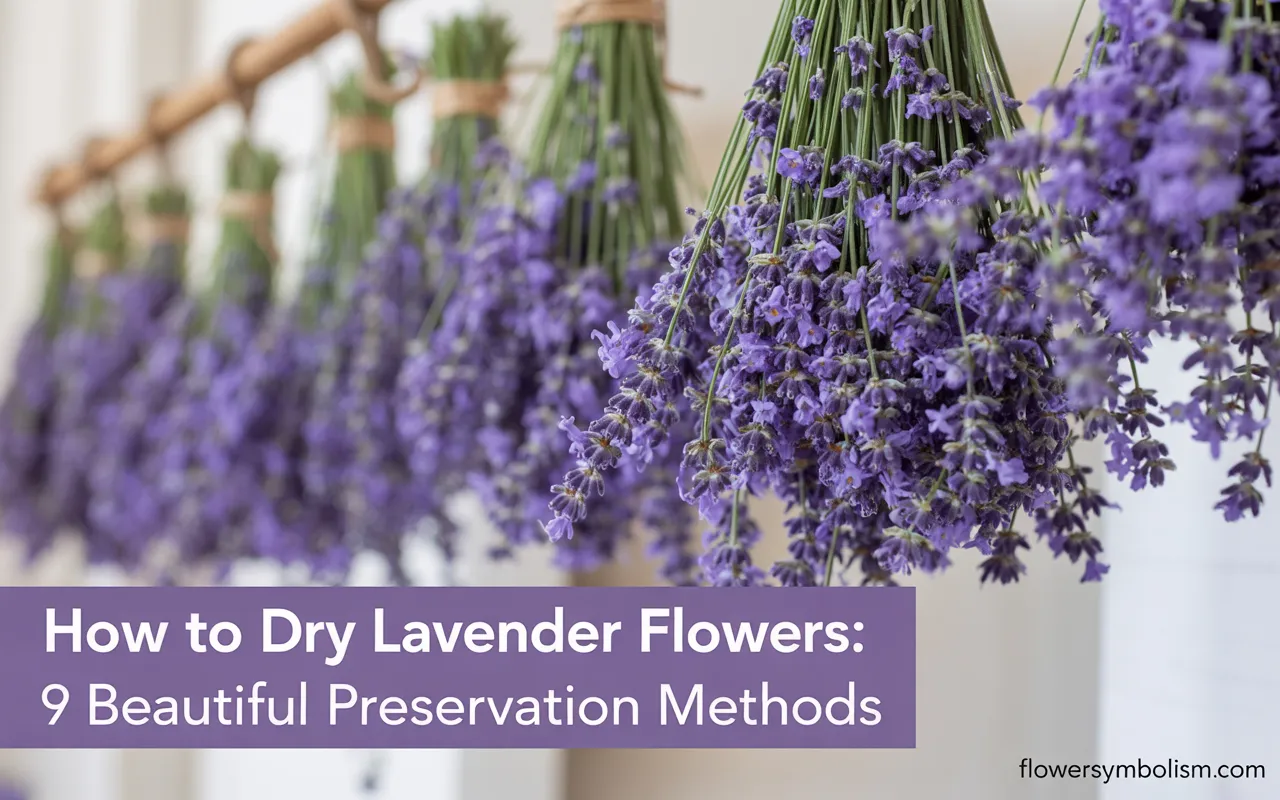
There is no scent quite like lavender. It’s the smell of calm summer evenings, clean linens, and a peaceful state of mind.
If you’re lucky enough to have this fragrant herb growing in your garden, you know that its beauty and aroma are things you wish you could capture and enjoy all year long.
The wonderful news is, you absolutely can. Learning how to dry lavender flowers is a simple, rewarding process that allows you to preserve their iconic scent and beautiful purple hue for months to come.
Drying lavender is a tradition that goes back centuries. People have long understood the value of preserving this versatile herb for use in everything from home decor and crafts to culinary creations and natural cleaning products.
A bundle of dried lavender can perfume a room, a sachet can freshen a drawer, and the dried buds can add a delicate floral note to your favorite recipes.
This guide is here to be your friendly companion on your preservation journey. We will explore nine different methods for drying your lavender harvest, from the classic and simple to the surprisingly quick and modern.
We’ll provide clear, step-by-step instructions for each technique, discuss the pros and cons, and offer creative ideas for what to do with your beautiful dried blooms.
So, grab your gardening shears and get ready to learn how to dry lavender flowers and fill your home with their timeless charm.
Before You Begin: Harvesting Lavender for Drying
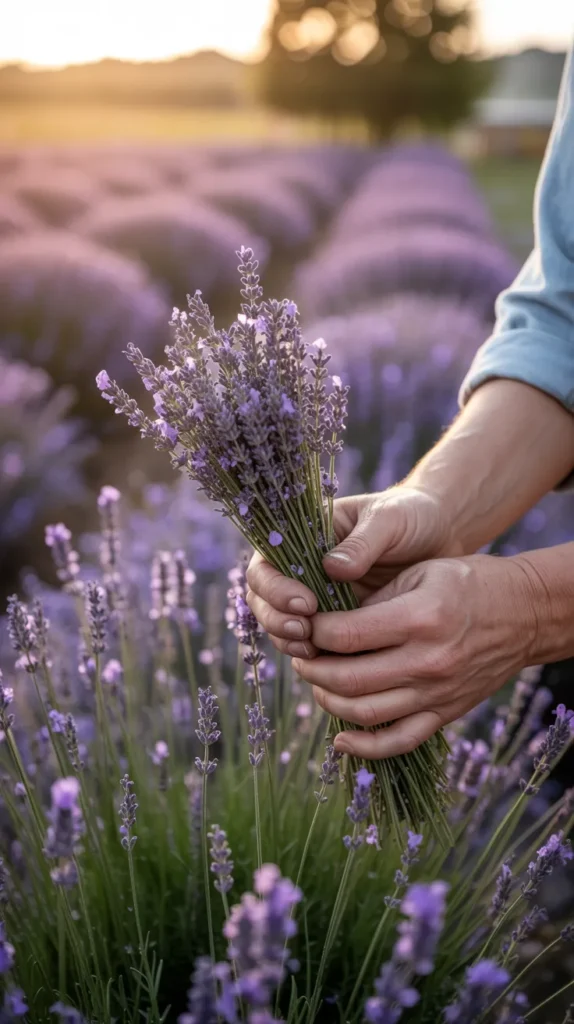
The secret to perfectly dried lavender starts in the garden. The timing of your harvest is crucial for ensuring maximum color, fragrance, and longevity.
- When to Harvest: The ideal time to harvest lavender for drying is when the tiny individual flowers are just beginning to open on the flower head. Look closely at the spike—you want to see that about 25-50% of the buds have bloomed. If you wait until all the flowers are open, the dried buds will be more likely to fall off the stem (shatter).
- Time of Day: Harvest your lavender in the morning, after the dew has evaporated but before the sun’s heat has become too intense. This is when the plant’s essential oils are at their most concentrated, which means a more powerful and lasting fragrance.
- How to Harvest: Using a sharp pair of pruning shears or scissors, cut the flower stems as long as possible. Gather the stems into your hand as you cut, forming a small bundle.
Now that you have your fresh harvest, let’s explore the best ways to preserve it.
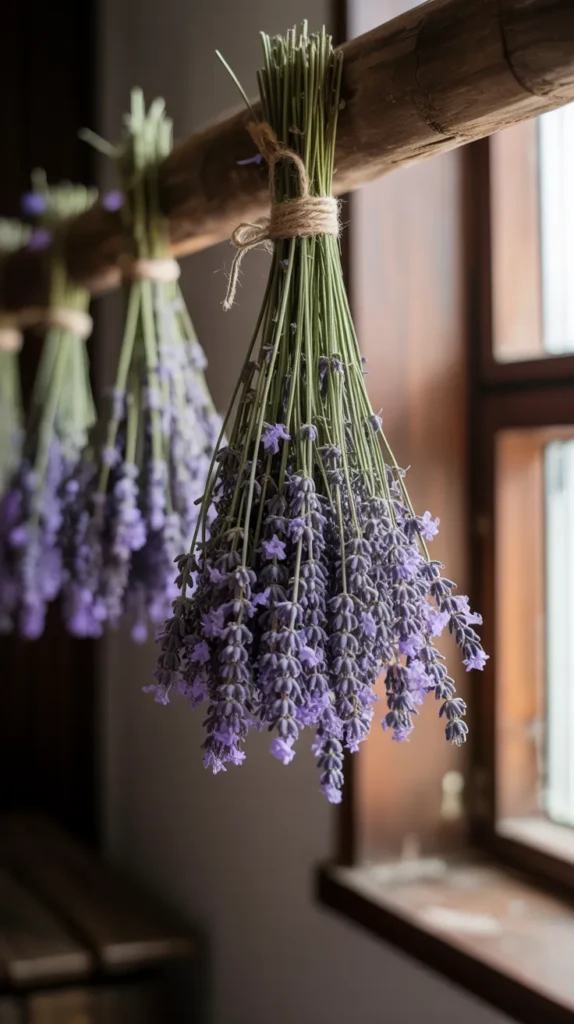
1. The Classic Air-Drying Method
This is the most traditional and widely used technique for anyone learning how to dry lavender flowers. It’s simple, effective, and requires no special equipment.
The image of lavender bunches hanging upside down in a dark room is iconic for a reason—it works beautifully, preserving the deep purple color and locking in that beloved fragrance.
Pros:
- Completely free and easy for beginners.
- Results in beautiful, rustic-looking bundles perfect for decor.
- Allows you to dry a large harvest at once.
Cons:
- Takes 2-4 weeks to complete.
- Requires a suitable space that is dark, dry, and has good air circulation.
Step-by-Step Instructions:
- Gather Your Bundles: Once harvested, remove any discolored or damaged leaves from the stems. Gather the long stems into a small bundle, about 1-2 inches in diameter. Don’t make the bundles too large, as the stems in the center need airflow to prevent mold.
- Secure the Stems: Wrap a rubber band tightly around the base of the bundle. A rubber band is superior to string for this step, as it will contract as the stems shrink during the drying process, ensuring the bundle remains tight.
- Find the Perfect Spot: The ideal drying location is dark, dry, and has good airflow. A closet, an attic, a pantry, or even a spare room with the curtains drawn will work perfectly. Darkness is essential for preventing the beautiful purple color from fading.
- Hang and Wait: Use the rubber band to hang your bundle upside down from a hook, a clothes hanger, or a rod. The upside-down position uses gravity to ensure the stems dry straight and the flower heads remain upright.
- Check for Dryness: Let the lavender hang for 2 to 4 weeks. You’ll know it’s ready when the buds are easily plucked from the stem and the stems snap cleanly when bent.
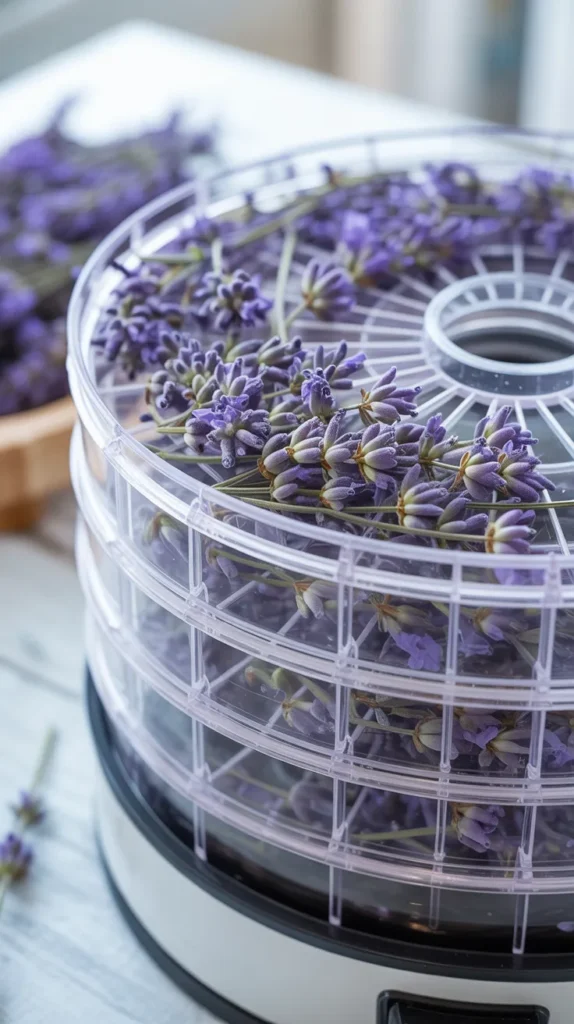
2. The Dehydrator Method
For those who want to speed up the process, a food dehydrator is an excellent tool for drying lavender. This method is particularly useful if you live in a humid climate where air-drying can be challenging, or if you want to dry just the buds for culinary use or sachets.
Pros:
- Much faster than air-drying (a few hours vs. several weeks).
- Great for drying large quantities of buds efficiently.
- Excellent retention of color and fragrance due to the controlled environment.
Cons:
- Requires a food dehydrator.
- Best for drying loose buds, not for creating decorative bundles with long stems.
Step-by-Step Instructions:
- Prepare the Lavender: For this method, you can either lay the whole stems on the dehydrator trays if they fit, or you can “strip” the buds from the fresh stems. To do this, hold the stem over a bowl and gently run your fingers down the flower head.
- Arrange on Trays: Spread the lavender buds or stems in a single, even layer on the dehydrator trays. Ensure there is plenty of space for air to circulate. A dehydrator with multiple trays and adjustable temperature, like the {COSORI Food Dehydrator}, is a fantastic investment for any home preserver. Its precise temperature control is key for delicate herbs.
- Set the Temperature: This is the most important step. Set your dehydrator to its lowest possible temperature, typically around 95-105°F (35-40°C). High heat will “cook” the lavender, diminishing its fragrance and color.
- Dry and Check: Let the dehydrator run for 2 to 4 hours. The lavender is done when the buds feel completely dry and brittle to the touch. Let them cool completely before storing them in an airtight container.
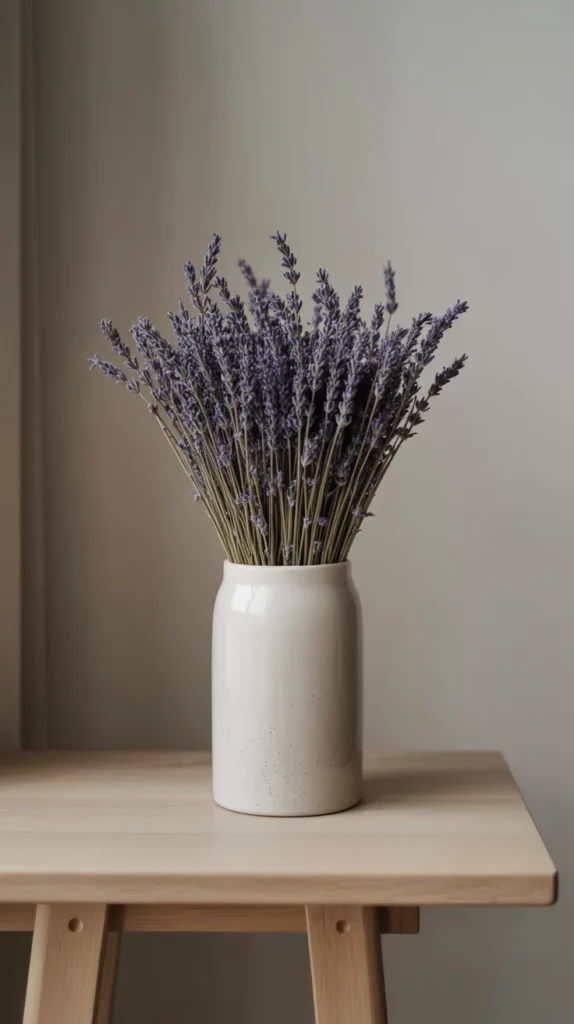
3. The “Lazy” Vase Drying Method
This is by far the easiest method for anyone wondering how to dry lavender flowers with minimal effort. It sounds counterintuitive, but you simply arrange the fresh lavender in a vase without water and let it dry naturally in an upright position.
Pros:
- Requires almost zero effort.
- The lavender dries in a beautiful, upright arrangement, ready for display.
- No need for hanging space.
Cons:
- The stems may curve slightly as they dry.
- Color retention may not be as vibrant as the dark air-drying method.
Step-by-Step Instructions:
- Arrange Your Bouquet: Take your freshly cut lavender stems and arrange them in a vase just as you would a fresh bouquet.
- No Water!: This is the key. Do not add any water to the vase.
- Find a Spot: Place the vase in a location away from direct sunlight and high humidity. A spot on a mantelpiece, a bookshelf, or a side table works perfectly.
- Let Nature Take Its Course: Simply leave the lavender alone. Over the course of 2 to 3 weeks, it will slowly dry out, retaining its upright shape. The result is an instant, effortless dried flower arrangement.
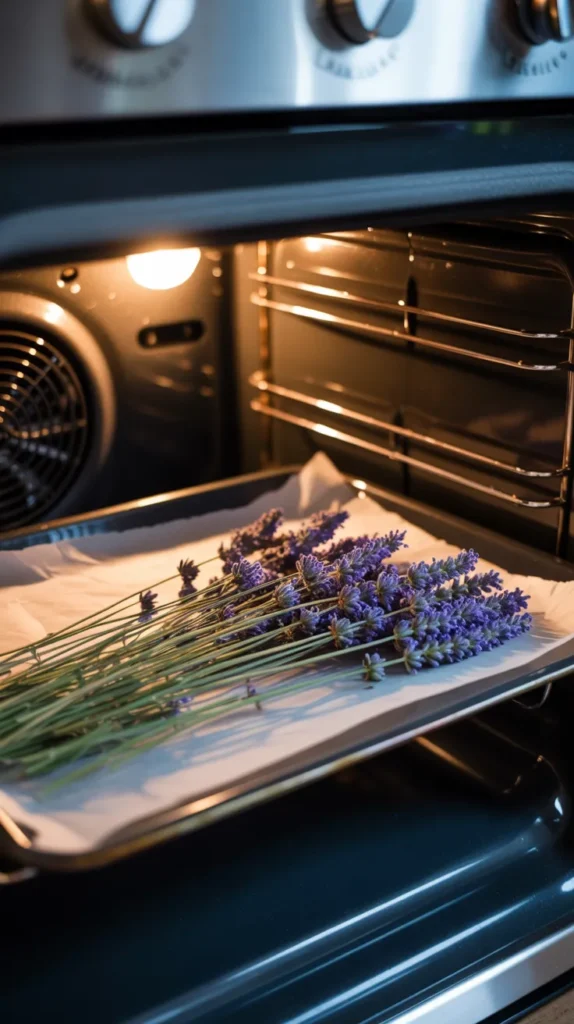
4. The Oven-Drying Method
If you don’t have a dehydrator but need your lavender dried quickly, your conventional oven can be used as a last resort.
This method requires very careful monitoring to ensure you don’t accidentally bake your delicate flowers, but it can be effective if done correctly.
Pros:
- Uses a common kitchen appliance.
- Much faster than air-drying.
Cons:
- Very high risk of burning or browning the lavender, destroying its color and fragrance.
- Requires constant attention and very careful temperature control.
Step-by-Step Instructions:
- Preheat Your Oven: Set your oven to its absolute lowest temperature, typically around 150-180°F (65-82°C). To ensure the temperature stays low and stable, it’s a good idea to prop the oven door open slightly with a wooden spoon. This allows heat to escape and air to circulate.
- Prepare a Baking Sheet: Line a baking sheet with parchment paper to prevent the lavender from sticking and scorching.
- Arrange the Lavender: Lay the lavender stems in a single layer on the parchment paper, making sure they don’t overlap.
- Bake and Watch Closely: Place the baking sheet in the oven. The drying time can be as short as 30 minutes or up to an hour. Check on them every 10-15 minutes. They are done when the buds feel crisp and completely dry. Let them cool completely on the baking sheet.
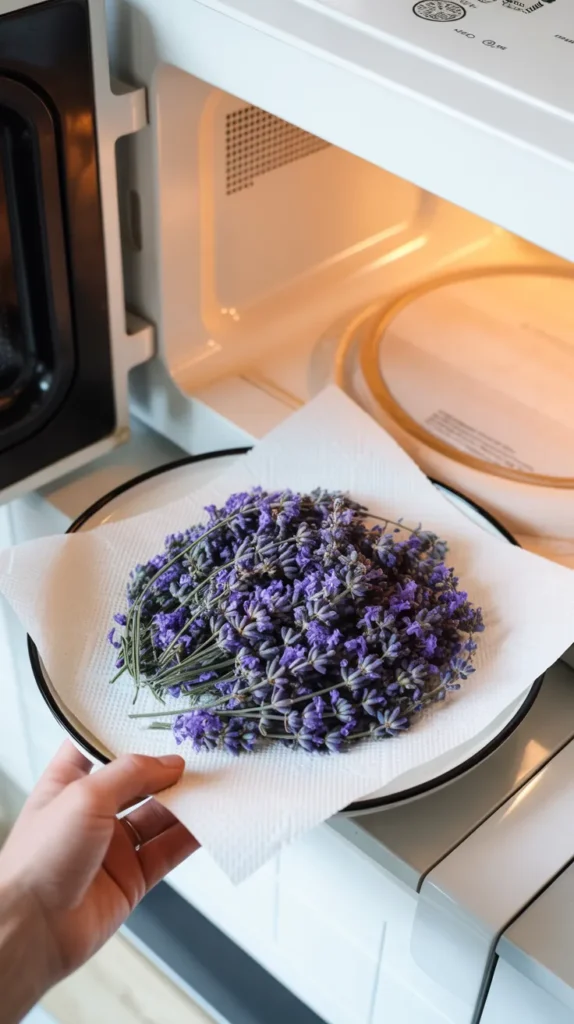
5. The Microwave Method for Quick Buds
For the truly impatient crafter, the microwave offers the fastest way to learn how to dry lavender flowers, specifically the buds.
This method is perfect if you need a small amount of dried lavender right away for a sachet, a recipe, or a craft project.
Pros:
- Incredibly fast—you get results in minutes.
- The quick drying can result in excellent fragrance release.
Cons:
- Only practical for drying small quantities of buds at a time.
- High risk of scorching if not done carefully.
Step-by-Step Instructions:
- Prepare a Plate: Place a single layer of paper towel on a microwave-safe plate.
- Spread the Lavender: Strip the fresh buds from the stems and spread them in a thin, even layer on the paper towel.
- Cover: Place another paper towel on top of the buds.
- Microwave in Short Bursts: Microwave on high for 20-30 second intervals. After each burst, check the buds for dryness. They can go from damp to burnt very quickly.
- Cool and Check: The buds are done when they are fragrant and feel dry to the touch. Let them cool completely, as they will crisp up further as they cool.
6. The “Car Dehydrator” Hack
This is a quirky but surprisingly effective method if you live in a hot, sunny climate. Your car can act as a giant, passive solar dehydrator, creating the perfect warm, dry environment for preserving your lavender harvest.
Pros:
- Uses free solar energy.
- The intense, dry heat can dry lavender relatively quickly.
- Makes your car smell amazing!
Cons:
- Only works in specific climates and weather conditions.
- Sunlight can cause some color fading.
Step-by-Step Instructions:
- Prepare Your Trays: Lay your fresh lavender stems in a single layer on a baking sheet, in a shallow cardboard box, or on a clean cloth on your dashboard or back seat.
- Park in the Sun: Park your car in a spot where it will get direct, intense sun for most of the day.
- Close it Up: Roll up the windows to trap the heat inside. On a hot day, the interior of a car can easily reach well over 130°F (54°C).
- Wait and Check: Leave the lavender in the car for a full day or two. The intense heat should dry it out swiftly. Check for crispness before bringing it inside.

7. The Brown Paper Bag Method
This is a variation of the classic air-drying method that is particularly good for creating loose buds without the mess. The paper bag protects the lavender from dust and light while catching any buds that fall off during the drying process. This is the perfect how to dry lavender flowers technique for sachet-making.
Pros:
- Neat and tidy—catches all the falling buds.
- Protects the lavender from dust and light, aiding in color preservation.
- Easy and uses a common household item.
Cons:
- Slightly slower than open-air drying due to reduced airflow.
Step-by-Step Instructions:
- Prepare the Bag: Take a standard brown paper lunch bag and poke several holes in it with a skewer or hole punch to allow for ventilation.
- Bundle and Insert: Make a small bundle of fresh lavender and place it inside the bag with the flower heads down.
- Close and Hang: Gather the top of the bag around the stems and tie it securely with twine.
- Hang in a Dry Place: Hang the bag in a warm, dry, and dark location for 2 to 4 weeks.
- Harvest the Buds: Once dry, simply shake the bag. Many of the dried buds will fall off the stems and collect neatly in the bottom of the bag, ready to be used. For an even easier way to create sachets, use pre-made {Ounona Cotton Muslin Drawstring Bags}. Once your buds are dry, you can fill these breathable bags directly and cinch them shut for instant, beautiful sachets.

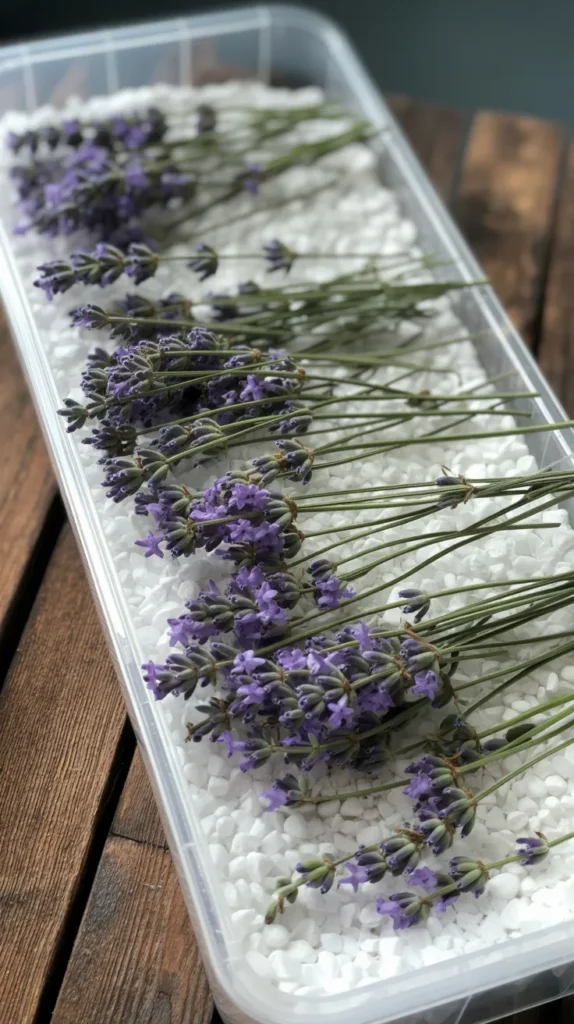
8. The Silica Gel Method for Perfect Color
While typically used for large, delicate flowers like roses, silica gel can also be used if you want to learn how to dry lavender flowers with the absolute best color retention. The rapid desiccation process locks in the deep purple color before it has a chance to fade.
Pros:
- Offers the best possible color preservation.
- Relatively fast compared to air-drying.
Cons:
- Requires purchasing silica gel.
- Can be messy and is not practical for very large harvests.
Step-by-Step Instructions:
- Prepare Your Container: Find a container that is long enough to lay your lavender stems down flat. An airtight plastic storage container works well.
- Pour a Base Layer: Pour a 1-inch layer of fine-grained {Activa Flower Drying Art Silica Gel} into the bottom of the container.
- Lay the Stems: Place a single layer of lavender stems on top of the silica gel.
- Gently Cover: Carefully pour more silica gel over the stems until they are completely buried.
- Seal and Wait: Seal the lid tightly and store the container in a cool, dark place for 4 to 7 days.
- The Reveal: Gently pour off the silica gel. Your lavender will be incredibly vibrant. You can use a soft brush, like a {AIT Art Select Paintbrush}, to gently dust off any clinging crystals.
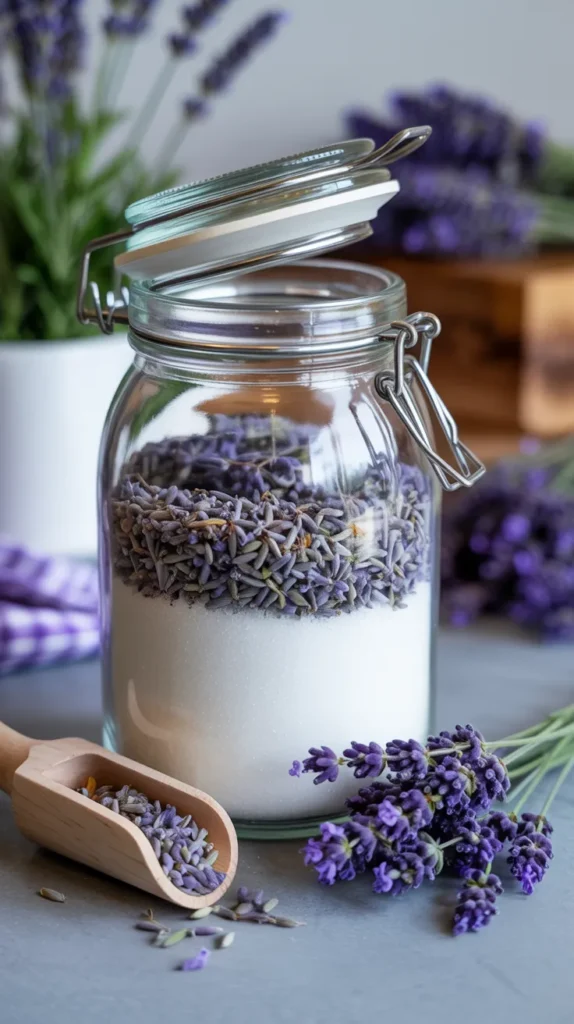
9. Creating Lavender Salt or Sugar with Fresh Buds
This isn’t a drying method in the traditional sense, but a preservation method that infuses the lavender’s floral aroma and flavor into salt or sugar. The salt/sugar acts as a desiccant, drying the buds while absorbing their essence.
Pros:
- Creates a delicious and fragrant culinary product.
- A wonderful way to use your lavender harvest creatively.
- Makes for a beautiful handmade gift.
Cons:
- Only preserves the buds, not the stems for decor.
Step-by-Step Instructions:
- Layer in a Jar: In a clean, dry glass jar, alternate layers of fresh lavender buds and granulated sugar or coarse sea salt.
- Seal and Shake: Fill the jar, seal it tightly, and give it a good shake to start distributing the buds.
- Wait and Infuse: Store the jar in a cool, dark place for 1 to 2 weeks, shaking it every couple of days.
- Sift or Use As-Is: After two weeks, the lavender will have infused its flavor and aroma. You can either sift out the dried buds for a purely flavored salt/sugar, or leave them in for a beautiful, speckled appearance. For gifting, a set of {Bormioli Rocco Swing Top Glass Bottles} provides an elegant, airtight storage solution that beautifully showcases your infused creation.
Your Lavender Preservation Toolkit
To elevate your lavender drying projects, having a few key supplies can make the process easier and the results even more beautiful. Here is a summary of the useful products mentioned in this guide.
| Product Name | Brand | Best Use |
|---|---|---|
| Food Dehydrator | COSORI | Quickly and efficiently dries large batches of lavender buds with precise low-temperature control. |
| Cotton Muslin Drawstring Bags | Ounona | Perfect for creating instant, breathable sachets with your freshly dried lavender buds. |
| Flower Drying Art Silica Gel | Activa | The best method for preserving the most vibrant purple color in your lavender stems. |
| Select Paintbrush Set | AIT Art | The soft, fine bristles are ideal for gently cleaning silica gel crystals off delicate dried flowers. |
| Swing Top Glass Bottles | Bormioli Rocco | An elegant and airtight way to store and gift your homemade lavender-infused sugars or salts. |
Conclusion: Enjoy Lavender’s Charm All Year Long
Learning how to dry lavender flowers is a simple pleasure that rewards you tenfold. It connects you to a timeless tradition and provides you with a beautiful, fragrant material that can be used in countless ways.
Whether you choose the slow, meditative process of air-drying a classic bundle or the quick satisfaction of using a dehydrator, you are capturing a piece of summer to enjoy throughout the year.
Don’t be afraid to try a few different methods to see which one fits your needs and lifestyle best. The beauty of this process is in its simplicity and its connection to nature.
So, the next time you’re admiring your fragrant lavender patch, you’ll know exactly how to preserve its magic. Which of these beautiful methods will you try first? Happy drying