Have you ever looked at a perfect, vibrant flower and wished you could freeze that moment in time? The slow, traditional methods of drying flowers, like pressing them in books or hanging them for weeks, are beautiful but require a lot of patience.
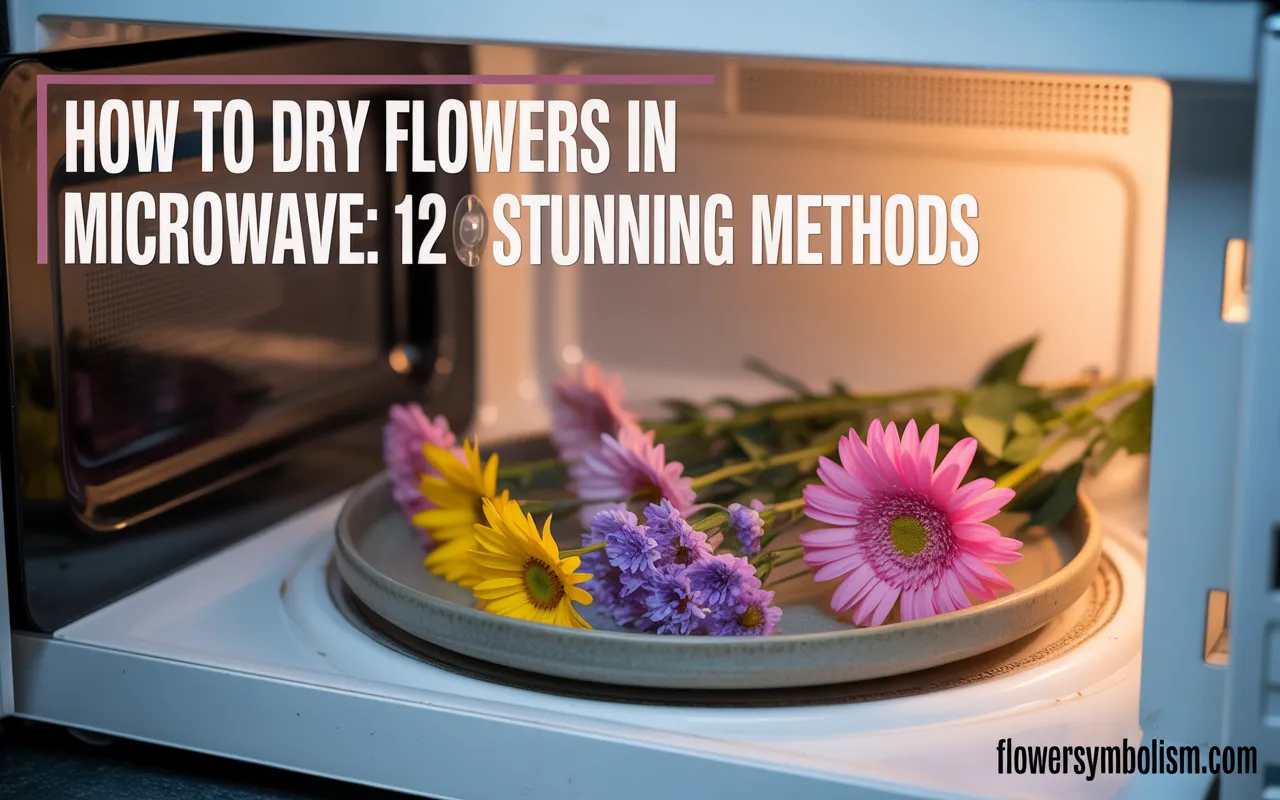
If you’re a modern crafter looking for instant gratification, your kitchen microwave holds the secret. Learning how to dry flowers in microwave ovens is a game-changing technique that can give you perfectly preserved blooms in minutes, not weeks.
This method is revolutionary because the quick, even heat preserves the flower’s color with incredible vibrancy, far better than slow air-drying.
It’s the ultimate hack for anyone eager to get started on a craft project, whether it’s making resin jewelry, framed art, or handmade cards.
You can pick a flower from your garden and have it ready to use in less time than it takes to drink a cup of coffee.
This comprehensive guide will explore 12 stunning methods and projects focused on how to dry flowers in microwave ovens.
We’ll cover everything from using dedicated microwave presses to DIY solutions with items you already own.
We’ll also provide step-by-step instructions, tips for success, and project ideas to inspire your creativity. Get ready to unlock the fastest way to create beautiful, everlasting botanicals.
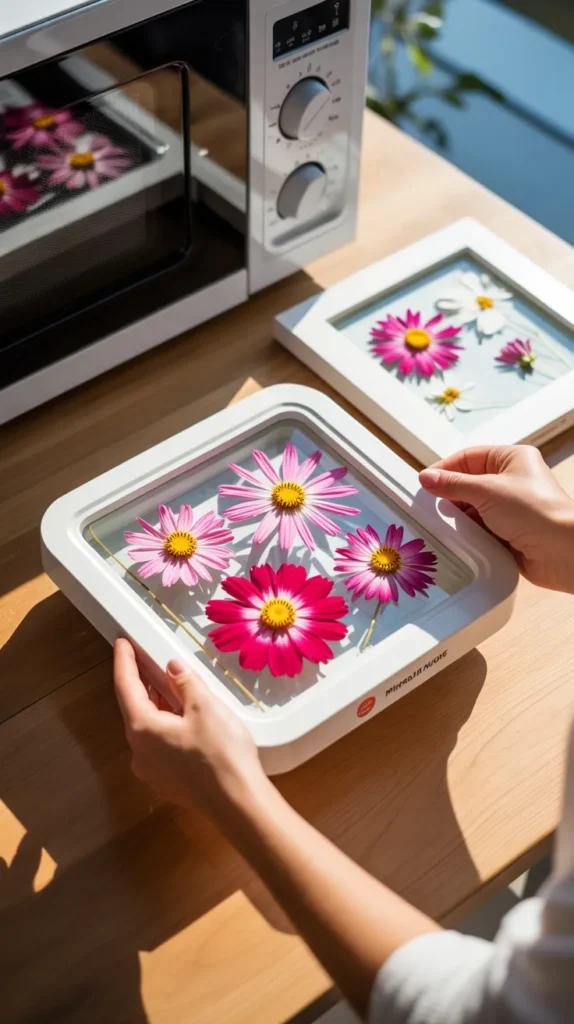
1. The Gold Standard: Using a Dedicated Microwave Flower Press
If you’re serious about learning how to dry flowers in microwave ovens with the best possible results, investing in a dedicated press is the way to go.
These presses are specifically designed to distribute pressure and heat evenly while allowing moisture to escape, resulting in perfectly flat, brilliantly colored flowers in minutes.
Why it works so well:
A dedicated press consists of two vented ceramic or terracotta plates, absorbent wool pads, and cotton liners.
The ceramic plates absorb heat from the microwave and press the flower evenly, while the pads and liners wick away moisture rapidly. This combination is the key to superior color retention.
Best for: Flowers with naturally flat faces or single layers of petals, like pansies, violas, cosmos, daisies, bougainvillea, and ferns.
Step-by-Step Instructions:
- Get Your Press: A popular and reliable option is the {Microfleur Max Microwave Flower Press}. It’s a high-quality tool that is reusable and consistently delivers excellent results.
- Assemble the Layers: Open the press. Place one felt pad on the bottom plate, followed by a cotton liner.
- Arrange Your Flowers: Carefully arrange your fresh flowers on the cotton liner. Ensure they are not overlapping, as this will cause them to stick together.
- Complete the Sandwich: Place the second cotton liner over the flowers, followed by the second felt pad and the top plate. Latch the press securely.
- Microwave in Short Bursts: This is the most crucial step. Place the press in your microwave and heat on a medium-low power setting for 20-30 seconds.
- Vent and Check: After the first burst, carefully open the press to let the steam escape. The flowers will still be moist. Let it cool for a minute.
- Repeat: Close the press and repeat the process of short heating bursts followed by venting. As the flowers get drier, you may reduce the heating time to 10-15 seconds. They are done when they feel papery and completely dry.
2. The DIY Ceramic Tile Press
Don’t have a dedicated press? No problem! You can create your own simple version of a microwave press using a few common household items.
This DIY method for how to dry flowers in microwave ovens is a great way to try out the technique before committing to a specialized tool.
What you’ll need:
- Two heavy ceramic tiles (ensure they have no metallic paint and are microwave-safe)
- Two pieces of cardboard cut to the same size as the tiles
- Two pieces of paper towel or parchment paper
- Several strong rubber bands
Step-by-Step Instructions:
- Build Your Press: Create a stack in this order: ceramic tile, cardboard, paper towel.
- Place Your Flowers: Arrange your fresh flowers on the paper towel.
- Complete the Stack: Place the second paper towel over the flowers, followed by the second piece of cardboard and the second ceramic tile.
- Secure Tightly: Use several strong rubber bands to bind the entire stack together as tightly as possible. The pressure is key to getting flat results.
- Microwave Carefully: Place your DIY press in the microwave. Heat on a low setting for 30-45 seconds.
- Cool and Check: Carefully remove the hot press and let it cool for a few minutes before un-banding it to check your flowers. Repeat the process if they are still damp.

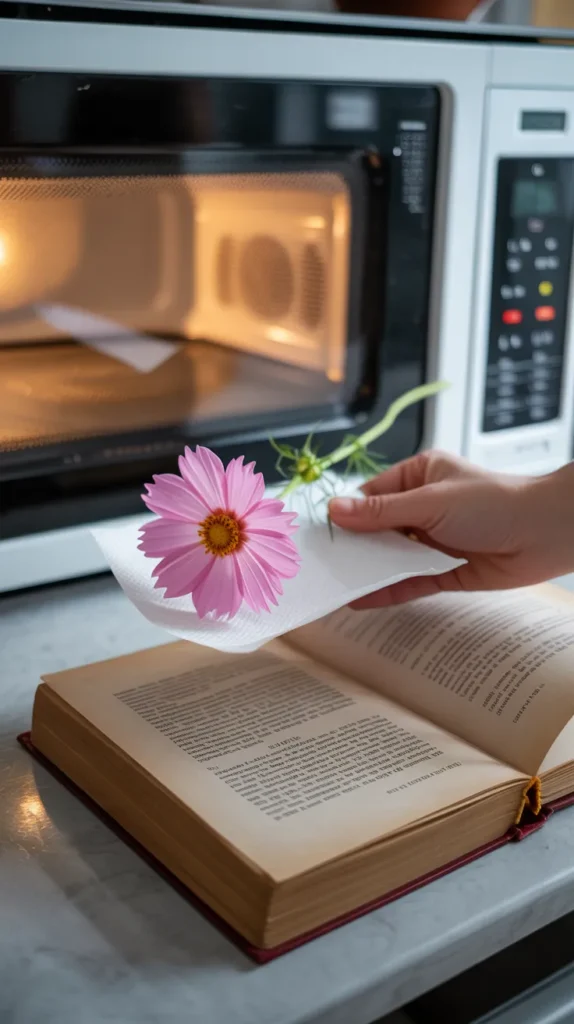
3. The Microwave and Book Method
This hybrid method combines the speed of the microwave with the classic book-pressing technique. It’s a quick way to get the bulk of the moisture out before finishing the flower in a book, and it’s another great entry-level approach for learning how to dry flowers in microwave ovens.
What you’ll need:
- A microwave-safe plate
- Two pieces of paper towel
- A heavy book
Step-by-Step Instructions:
- Initial Zap: Place a paper towel on the plate. Arrange your flowers on the towel, then cover them with the second paper towel.
- Microwave: Heat on a low setting for 20-30 seconds. This will wilt the flowers and remove a significant amount of moisture.
- Immediate Transfer: As soon as you take them out, carefully transfer the warm, wilted flowers from the paper towel into the pages of a heavy book (with parchment paper to protect the pages).
- Press: Close the book and place a weight on top. Because you removed most of the moisture in the microwave, the pressing time in the book will be much shorter—often just a day or two instead of weeks.
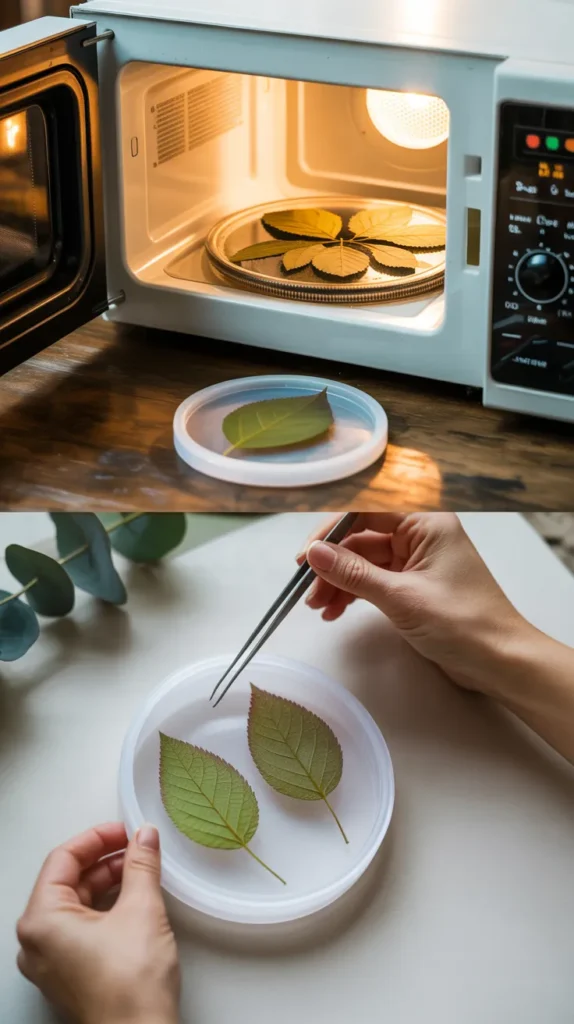
4. Microwave Drying with Silica Gel
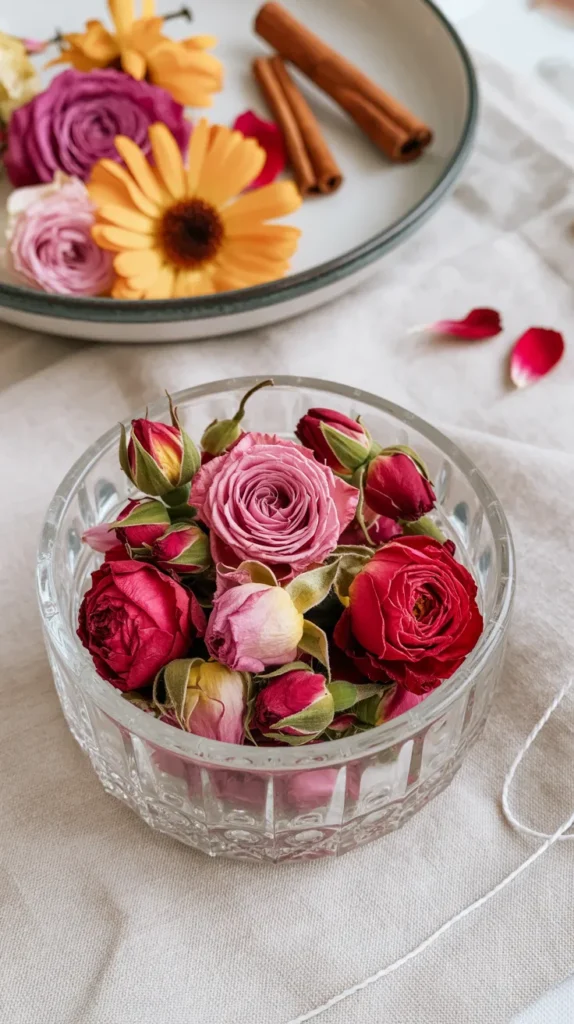
While a microwave is great for pressing flowers flat, what if you want to preserve their 3D shape? This advanced technique for how to dry flowers in microwave ovens uses silica gel to support the flower’s structure while the microwave speeds up the drying process from days to mere minutes.
Best for: Multi-petaled flowers where you want to preserve the 3D shape, like roses, carnations, and zinnias.
What you’ll need:
- A microwave-safe, non-metal container
- Flower drying silica gel
- A small cup of water
Step-by-Step Instructions:
- Prepare the Container: Pour about an inch of silica gel into the bottom of your microwave-safe container. For this method, a high-quality, fine-grained silica is essential. {Activa Flower Drying Art Silica Gel} is perfect as its fine texture supports delicate petals without leaving marks, and its reusability makes it a great investment for crafters.
- Place the Flower: Snip the flower’s stem to about an inch and place it upright in the silica gel. Gently pour more silica gel around and over the flower until it’s completely buried.
- Add the Water: Place the small cup of water in the microwave next to your container of silica. This is a critical safety step! The water absorbs some of the microwave energy, preventing the flower from cooking and burning. Never microwave silica gel without this cup of water.
- Microwave in Bursts: Microwave on a medium-low setting for 1-2 minutes. The exact time will depend on the flower’s size and density.
- Cool Completely: Remove the container from the microwave. It will be extremely hot! Let it cool to room temperature, which could take at least 30-60 minutes. Do not try to uncover the flower while it’s hot.
- The Reveal: Once completely cool, gently pour out the silica gel to reveal your perfectly preserved 3D flower.
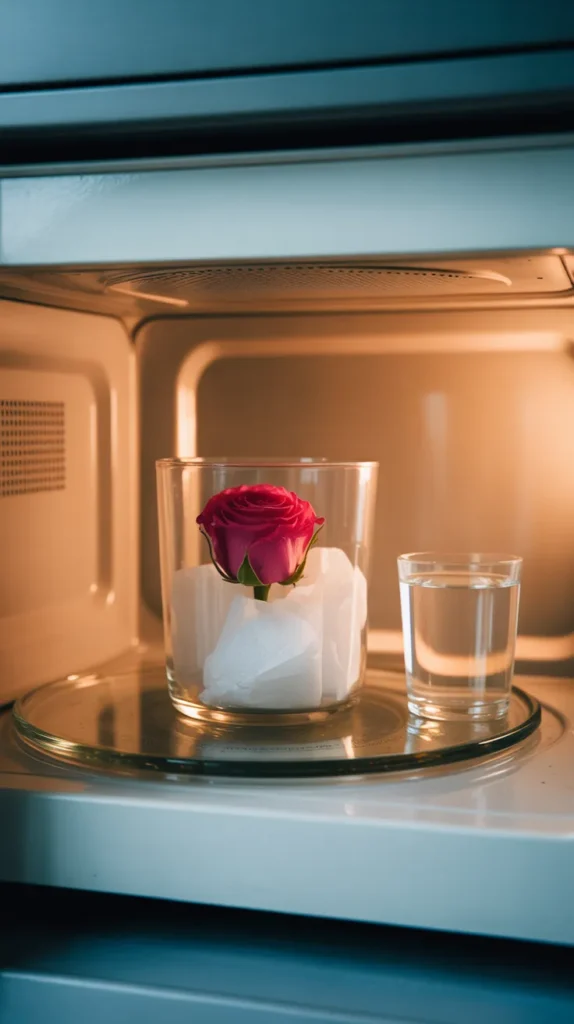
5. Microwave Drying with Salt
If you don’t have silica gel, common table salt can be used as a desiccant in a pinch. This DIY how to dry flowers in microwave technique is a very affordable way to try 3D flower preservation, though the results may not be as perfect as with silica gel.
What you’ll need:
- A microwave-safe container
- Fine-grain salt
- A cup of water
Step-by-Step Instructions:
- Create a Salt Bed: Pour a thick layer of fine-grain salt into your container.
- Nestle the Flower: Gently press your flower into the bed of salt, ensuring the salt supports the petals from underneath. You can sprinkle a little more salt around the sides, but avoid pouring it directly on top as it can be difficult to clean off.
- Microwave with Water: Place the container and the cup of water in the microwave.
- Heat in Bursts: Microwave on low for 30-second intervals, checking the flower’s progress during each break.
- Cool and Clean: Let the flower cool completely before removing it. Use a very soft, dry brush, like a makeup brush, to gently whisk away any salt crystals. A dedicated set of {AIT Art Select Paint Brushes} is a great addition to your craft kit, as the fine, soft bristles are perfect for this delicate cleaning task without damaging the petals.
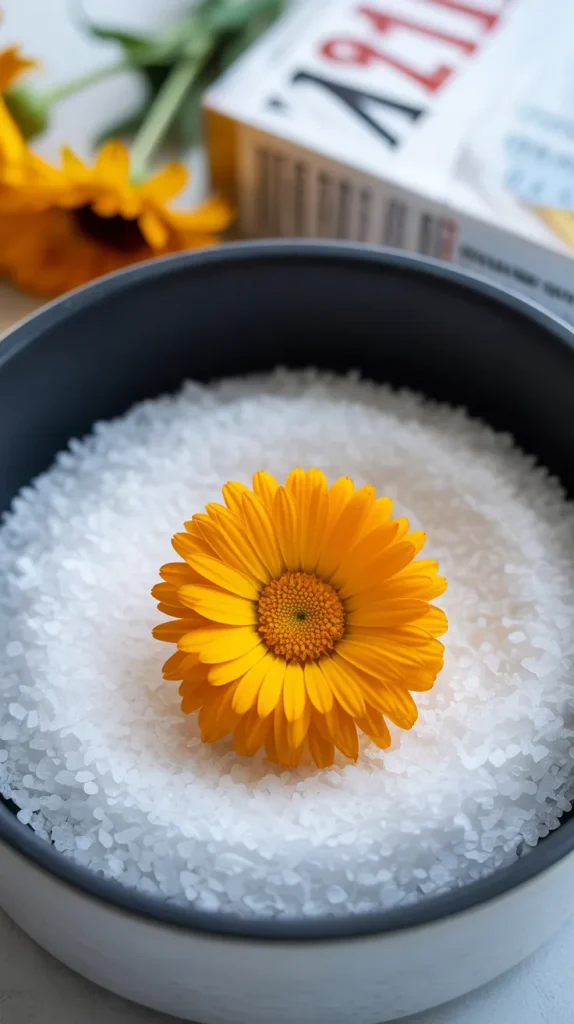
6. Making Microwave Potpourri
Your microwave is an excellent tool for quickly drying flower heads and petals to create fragrant potpourri. This how to dry flowers in microwave project is fun, easy, and fills your home with natural scents.
What you’ll need:
- A microwave-safe plate
- Paper towels
- Colorful flower heads (roses, calendula) and fragrant leaves (mint, rosemary)
- Whole spices (cinnamon sticks, star anise)
- Essential oils
Step-by-Step Instructions:
- Dry the Botanicals: Spread your fresh flower heads, petals, and leaves in a single layer between two paper towels on a plate.
- Microwave: Heat on high in 30-second intervals, checking each time, until the botanicals are completely dry and crisp.
- Combine and Scent: In a large bowl, combine your dried flowers with whole spices like cinnamon sticks and cloves.
- Add Essential Oils: Add a few drops of your favorite essential oils and toss gently to coat.
- Cure: For the best scent diffusion, let your potpourri “cure” in a sealed container for a few days before displaying it in an open bowl.
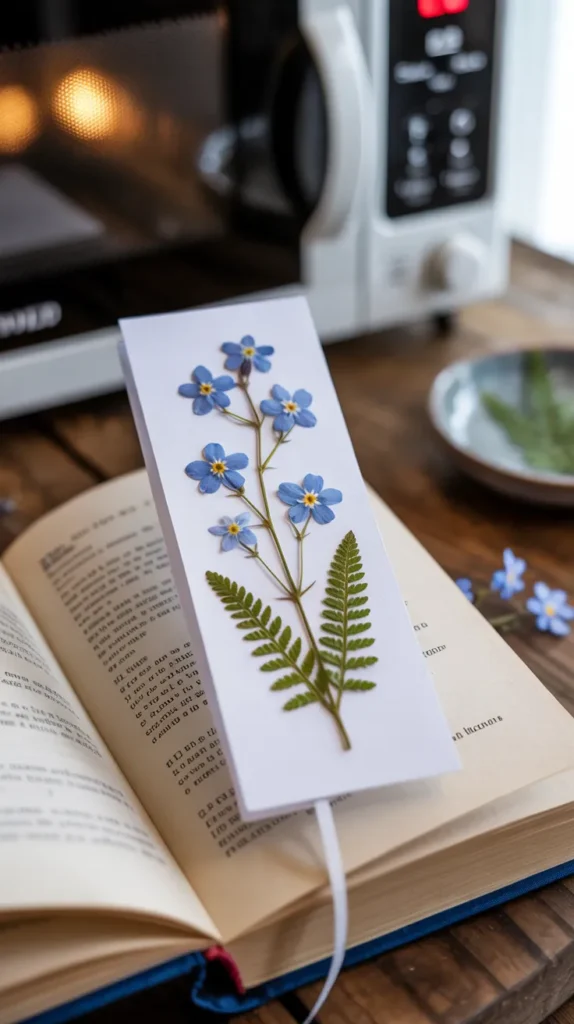
7. Microwave-Pressed Flower Bookmarks
This is a wonderful and practical project that shows just how fast learning how to dry flowers in microwave ovens can be. Create a beautiful, personalized bookmark in under an hour.
What you’ll need:
- A microwave flower press
- Small, flat flowers (forget-me-nots, verbena)
- Cardstock cut into a bookmark shape
- Clear self-laminating sheets or decoupage glue
Step-by-Step Instructions:
- Press Your Flowers: Use a microwave press (Method #1) to quickly press and dry a few small, delicate flowers. This should only take a few minutes.
- Arrange Your Design: Once the flowers are cool, arrange them on your cardstock bookmark.
- Seal Your Creation: The easiest way to protect your design is with self-laminating sheets. Simply place your bookmark on the adhesive side and smooth the top layer over it. Alternatively, you can use a decoupage glue like {Mod Podge Waterbase Sealer, Glue and Finish} in a matte or gloss finish. Paint a layer onto the cardstock, place your flowers, and then seal them with another thin layer on top.
- Finish: Trim the edges and punch a hole at the top to add a ribbon or tassel.
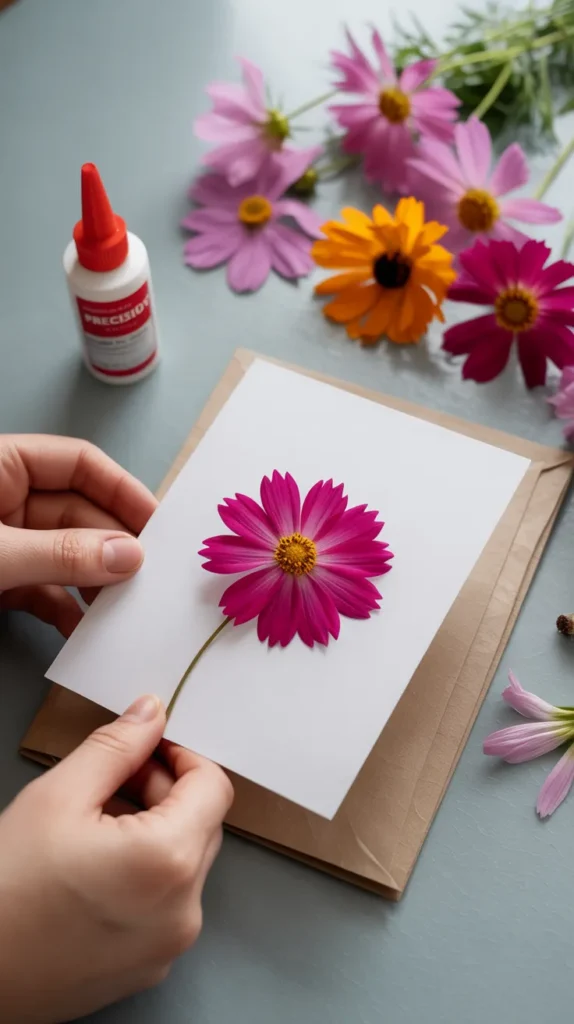
8. DIY Microwave-Pressed Greeting Cards
Handmade cards are always special. Using microwave-pressed flowers allows you to add a beautiful, natural, and personal touch to your cards in no time at all.
What you’ll need:
- A microwave flower press
- A variety of colorful, flat flowers
- Blank greeting cards
- Precision craft glue
Step-by-Step Instructions:
- Press a Selection: Use your microwave press to quickly dry a variety of flowers in different shapes and colors. This gives you a “palette” of botanicals to work with.
- Plan Your Design: Arrange your pressed flowers on the front of a blank greeting card. You could create a wreath, a small bouquet, or a simple single-flower design.
- Glue with Precision: Use a high-quality craft glue with a fine tip to attach the delicate flowers. {Bearly Art Precision Craft Glue} is a favorite among paper crafters because its fine metal tip allows you to apply a tiny, controlled amount of glue to the back of a stem or petal without any messy smudges, keeping your card looking clean and professional.
- Let it Dry: Let the glue dry completely before writing your message inside.
9. Quick-Dry Botanicals for Resin Art
Resin art requires perfectly dry botanicals—any moisture will cause the resin to cure improperly and the flower to rot. This makes learning how to dry flowers in microwave ovens an essential skill for resin artists who want to work quickly.
What you’ll need:
- Microwave flower press (for flat items) or microwave with silica gel (for 3D items)
- Small flowers, petals, and leaves
- Resin molds (for jewelry, coasters, etc.)
- Epoxy resin
Step-by-Step Instructions:
- Choose Your Method: Decide if you want flat (pressed) or 3D flowers for your resin project.
- Quick-Dry Your Flowers: Use the microwave press (Method #1) for flat items like ferns and petals. Use the microwave-silica gel method (Method #4) for 3D items like tiny rosebuds.
- Double-Check for Dryness: After microwaving, let the flowers sit out in the open air for an hour just to be certain that all residual moisture has evaporated before you encase them in resin.
- Create Your Resin Art: Proceed with your resin project as usual, confident that your botanicals are perfectly and quickly dried.
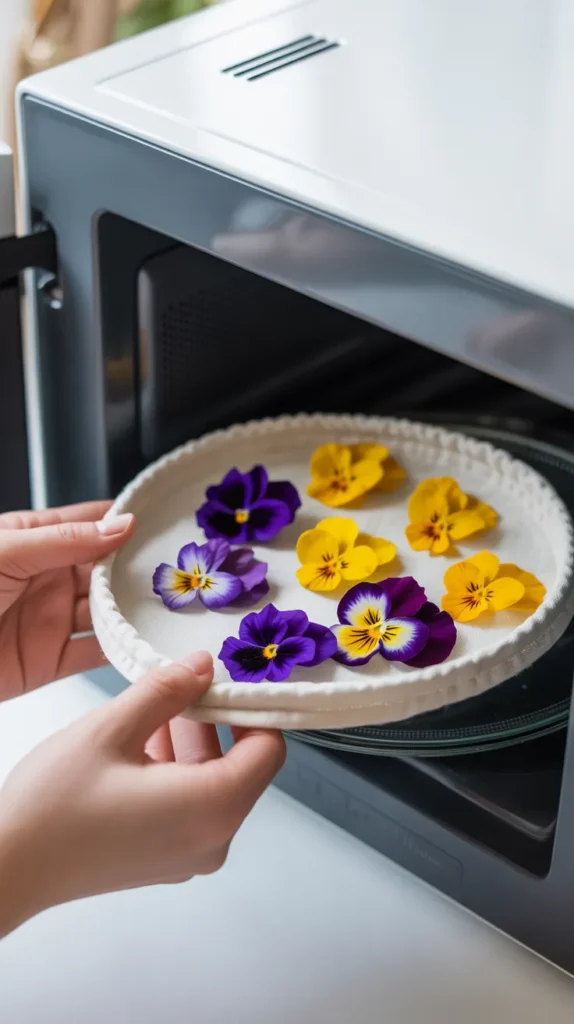
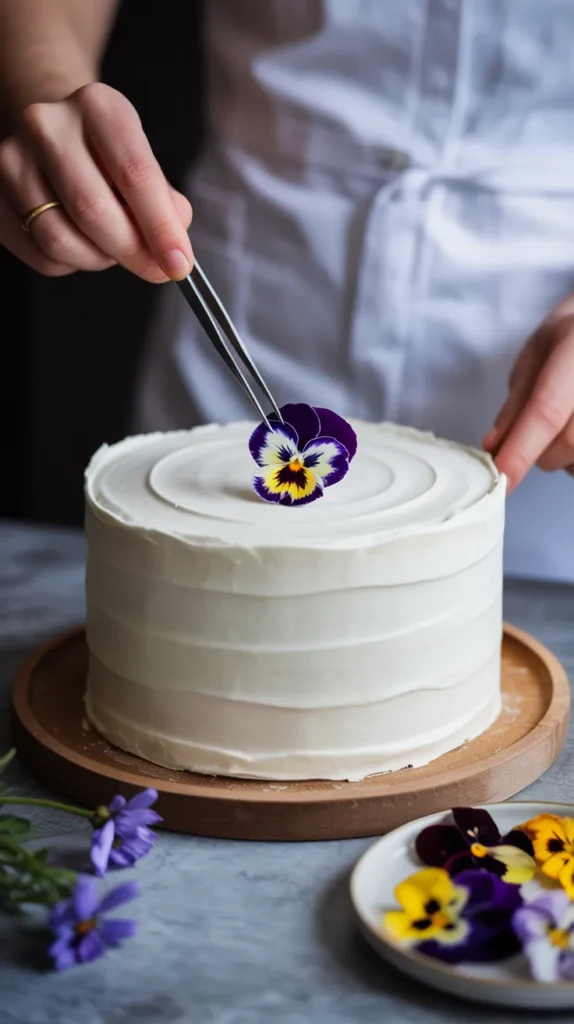
10. Making Edible Dried Flowers for Cake Decorating
Did you know you can use your microwave to dry edible flowers for decorating cakes and desserts? This how to dry flowers in microwave technique is a favorite among bakers for creating beautiful, natural cake toppers.
Important Note: Only use flowers that are certified edible and have been grown without pesticides. Common edible flowers include pansies, violas, and rose petals.
Step-by-Step Instructions:
- Press Gently: Place your clean, edible flowers between two paper towels.
- Microwave on Low: Heat on a very low power setting for 30-45 seconds. You want to dry them, not cook them.
- Check and Cool: The petals should feel dry and papery. Let them cool completely.
- Decorate: Use tweezers to gently arrange your beautiful, edible dried flowers on top of frosting on a cake, cupcakes, or cookies for a stunning, professional look.
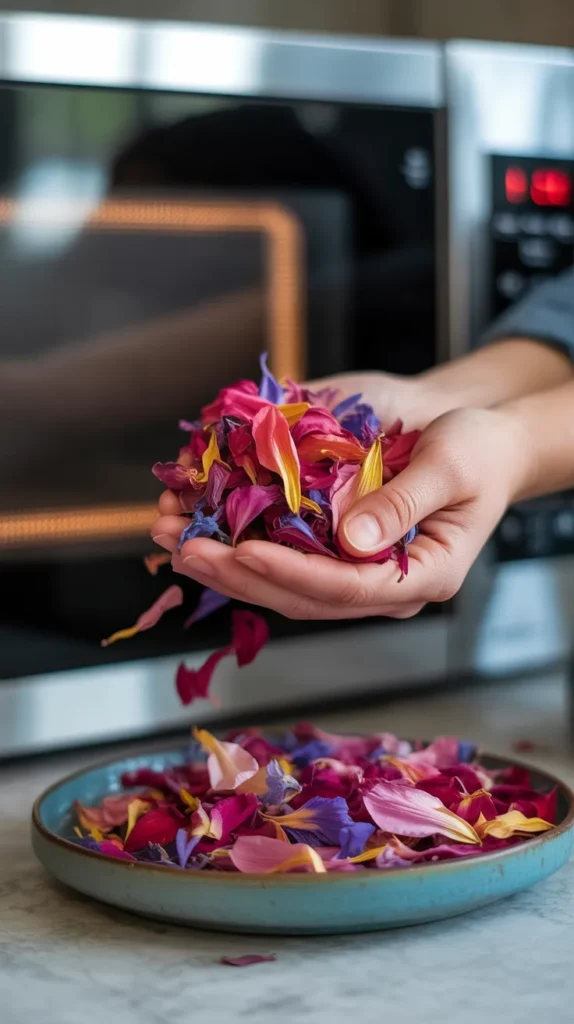
11. Microwave-Dried Flower Confetti
Create your own beautiful, biodegradable confetti for weddings, parties, or creative photoshoots. Using your microwave is the fastest way to prepare a large batch of colorful petals.
What you’ll need:
- A microwave-safe plate
- Paper towels
- A large quantity of colorful flower petals (roses, delphiniums, bougainvillea)
Step-by-Step Instructions:
- Layer the Petals: Spread a single layer of fresh petals on a paper towel on a plate. Cover with another paper towel. You can stack up to 3-4 layers of petals and paper towels.
- Microwave: Heat on high for 45-60 seconds.
- Check for Dryness: Carefully separate the layers. The petals should be dry and crisp. If not, heat for another 15-20 seconds.
- Store: Keep your dried petal confetti in a sealed bag or jar until you’re ready to celebrate.
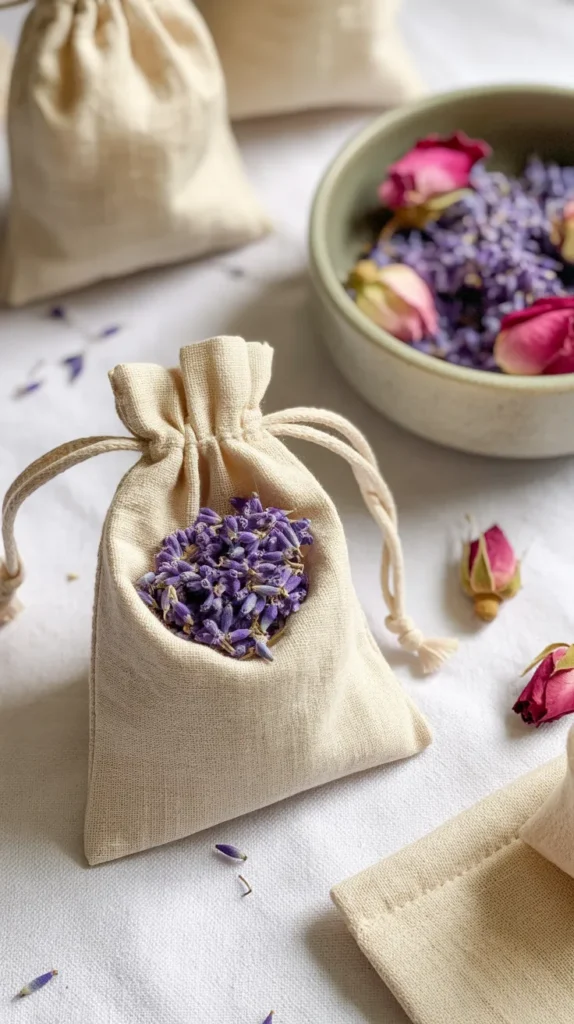
12. Scented Herbal Sachets with Microwave-Dried Herbs
Quickly dry fragrant herbs and flowers from your garden to create lovely scented sachets for your drawers and closets. This is a wonderful, practical how to dry flowers in microwave project.
What you’ll need:
- Microwave-safe plate and paper towels
- Fragrant flowers (lavender, rose petals) and herbs (rosemary, mint)
- Small muslin or linen drawstring bags
Step-by-Step Instructions:
- Dry Your Botanicals: Place your lavender buds, herbs, and rose petals between paper towels.
- Microwave: Heat in 30-second intervals until everything is completely dry and fragrant. The heat will release their essential oils, making your kitchen smell amazing.
- Cool and Mix: Let the dried mixture cool completely.
- Fill Your Bags: Fill your small drawstring bags with the aromatic mixture and pull the strings tight. Place them in drawers to keep your clothes smelling fresh.
Your Microwave Flower Drying Toolkit
To get the best results on your crafting journey, having the right tools can make all the difference. Here is a summary of the helpful products mentioned in this guide.
| Product Name | Brand | Best Use |
|---|---|---|
| Max Microwave Flower Press | Microfleur | The best tool for creating perfectly flat, colorful pressed flowers in just minutes. |
| Flower Drying Art Silica Gel | Activa | Essential for preserving the 3D shape and vibrant color of flowers using the microwave. |
| Select Paint Brushes | AIT Art | The soft, fine bristles are perfect for gently cleaning desiccants off delicate 3D dried flowers. |
| Waterbase Sealer, Glue and Finish | Mod Podge | Ideal for sealing and protecting pressed flower projects like bookmarks and cards. |
| Precision Craft Glue | Bearly Art | A must-have for paper crafts, allowing for clean, precise application of glue to delicate items. |
Conclusion: Embrace the Speed of Modern Flower Preservation
Learning how to dry flowers in microwave ovens opens up a new world of creative possibilities. It removes the long, patient wait from flower preservation, allowing your inspiration to flow directly from garden to finished craft in a single afternoon.
Whether you’re creating a quick gift, decorating a cake, or preserving a precious memory, your microwave is a surprisingly powerful tool in your artistic arsenal.
Don’t be afraid to experiment with different flowers, timings, and power levels. Each microwave is different, and you’ll quickly get a feel for what works best.
Start with a simple project like a pressed flower bookmark and see where this fast, fun, and rewarding hobby takes you.
So, the next time you see a flower that captures your heart, you’ll know exactly how to preserve its beauty in minutes. Which of these stunning microwave methods will you try first?