There is something undeniably enchanting about dry flowers. They capture a fleeting moment of nature’s beauty and freeze it in time, offering an everlasting charm that fresh blooms simply cannot match.
Whether you are looking to preserve a sentimental bouquet or simply want to add a touch of rustic elegance to your living space, decorating with dry flowers is a sustainable and stylish choice that has taken the interior design world by storm.
Gone are the days when dried florals were considered dusty or old-fashioned. Today, they are celebrated for their sculptural shapes, muted earthy tones, and incredible longevity.
From minimalist arrangements to elaborate installations, dry flowers offer endless possibilities for creativity.
They bring texture, warmth, and a connection to the seasons into your home without the maintenance of fresh water changes or the sadness of wilting petals.
In this guide, we will explore 12 stunning ways to incorporate these preserved beauties into your decor. We’ll cover everything from simple vase arrangements to creative DIY projects that transform dry flowers into works of art.
Whether you have a sprawling garden to harvest from or prefer to buy pre-dried bundles, these ideas are designed to be accessible, inspiring, and perfect for beginners. Let’s dive into the world of everlasting botanicals!
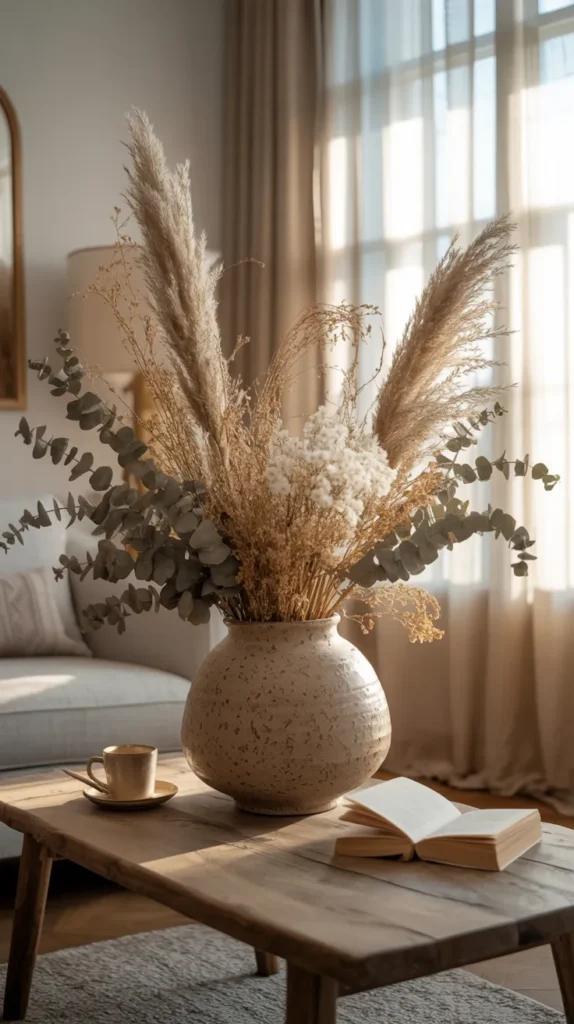
1. The Sculptural Statement Vase
One of the simplest yet most impactful ways to use dry flowers is to create a large, sculptural arrangement in a statement vase.
This approach relies on the unique shapes and heights of dried stems to create a focal point in a room. Think tall pampas grass, structured dried palm spears, or long branches of lunaria (honesty plant) with their iridescent, coin-like pods.
How to style it:
- Choose the Right Vase: Look for a heavy, opaque vase. Ceramic or stoneware works beautifully as it hides the messy stems and adds to the earthy aesthetic. A vase with a narrow neck helps keep tall stems upright.
- Play with Height: Use tall stems like pampas grass or dried reeds to draw the eye upward. This is perfect for filling empty corners or placing on a low console table.
- Keep it Monochromatic: Stick to a neutral palette of creams, beiges, and browns for a chic, modern look.
Pro-Tip: To keep fluffy stems like pampas grass from shedding all over your floor, give them a light misting with strong-hold hairspray.
Alternatively, use a specialized spray like {Aleene’s Spray Acrylic Sealer}. This clear spray provides a protective coating that locks in the fluff and prevents shedding without altering the natural look of the grass, keeping your arrangement neat and tidy

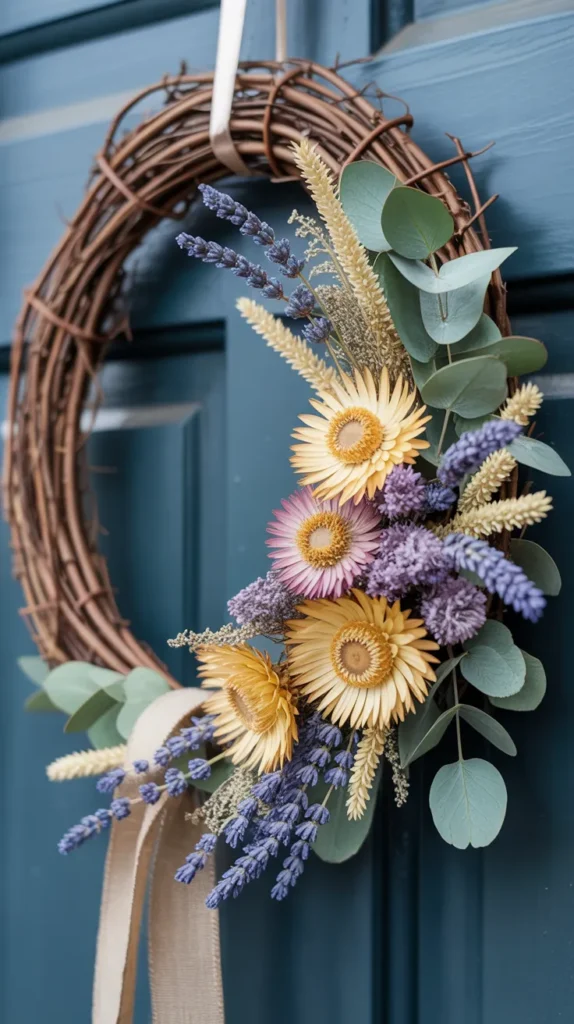
2. A Rustic Dried Flower Wreath
Wreaths aren’t just for the holidays! A dry flowers wreath is a beautiful way to add organic texture to your walls year-round.
Unlike fresh wreaths that dry out and crumble quickly, a wreath made with intentionally dried materials will last for months, or even years, if kept out of direct sunlight.
What you’ll need:
- A grapevine or metal hoop base
- A mix of dry flowers (strawflowers, lavender, statice)
- Greenery (dried eucalyptus, olive branches)
- Floral wire and a hot glue gun
Step-by-step:
- Start by creating small bunches of your base greenery.
- Wire these bunches onto your wreath form, overlapping them to hide the stems.
- Once you have a green base, use a hot glue gun to attach your colorful focal flowers. A tool like the {Gorilla Dual Temp Mini Hot Glue Gun Kit} is essential here. Its precision tip allows you to place glue exactly where you need it on delicate stems, and the strong bond ensures your beautiful arrangement won’t fall apart when hung.
- Focus on one area for an asymmetrical modern look, or cover the entire ring for a traditional feel.
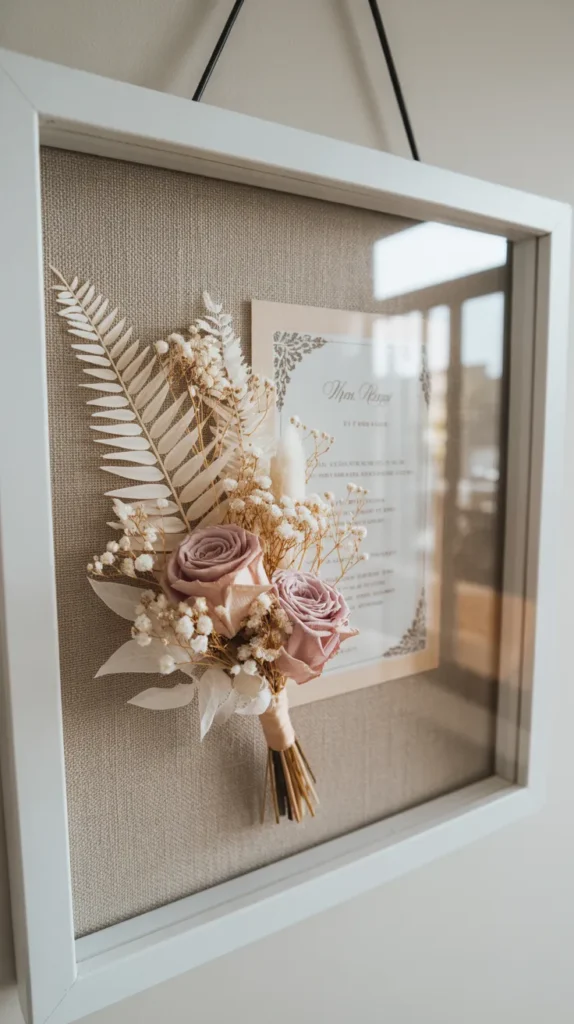
3. The “Floating” Shadow Box Display
Preserve your most precious dry flowers—perhaps from a wedding bouquet or a special anniversary—by creating a shadow box display.
This method protects the delicate blooms from dust and damage while turning them into a piece of framed art. It’s a wonderful way to showcase the intricate details of individual flowers.
How to create it:
- Select Your Flowers: Choose flowers that have dried well and retained their color. Roses, anemones, and ranunculus look stunning behind glass.
- Arrange with Care: Lay your shadow box flat and arrange the flowers inside. You can glue them to the backing or, for a more ethereal look, use pearl-headed pins to secure them, making them appear to float.
- Add Mementos: Incorporate other keepsakes like an invitation, a ribbon, or a photograph to tell a story.
Pro-Tip:
If you are drying your own flowers for this project, use silica gel to preserve their 3D shape. {Activa Flower Drying Art Silica Gel} is the gold standard for this.
Burying your fresh blooms in this fine sand-like desiccant draws out moisture rapidly, keeping the petals vibrant and the flower shape perfectly intact, unlike air drying which can cause shriveling.
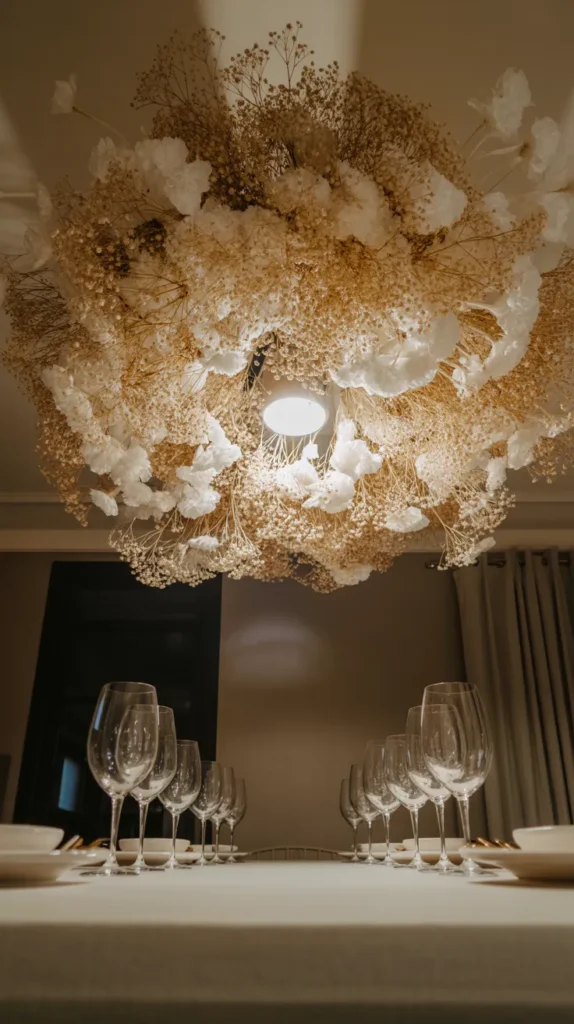
4. Hanging Flower Cloud
For a truly show-stopping installation, look no further than the “flower cloud.” This trend involves creating a suspended arrangement of dry flowers that hangs from the ceiling, creating a whimsical, cloud-like effect. It’s perfect for hanging over a dining table or in a nursery.
How to build it:
- The Structure: Use a ball of chicken wire as your base. The holes in the wire grid make it easy to insert stems from all angles.
- The Materials: Choose light, airy materials like baby’s breath (gypsophila), smoke bush, or dried hydrangeas. These create volume without adding too much weight.
- Assembly: Hang your chicken wire ball securely from the ceiling using fishing line. Start inserting your stems, working from the inside out until the wire is completely concealed.
- Styling: Keep it monochromatic white for a true “cloud” look, or mix in dried wildflowers for a meadow-in-the-sky vibe.
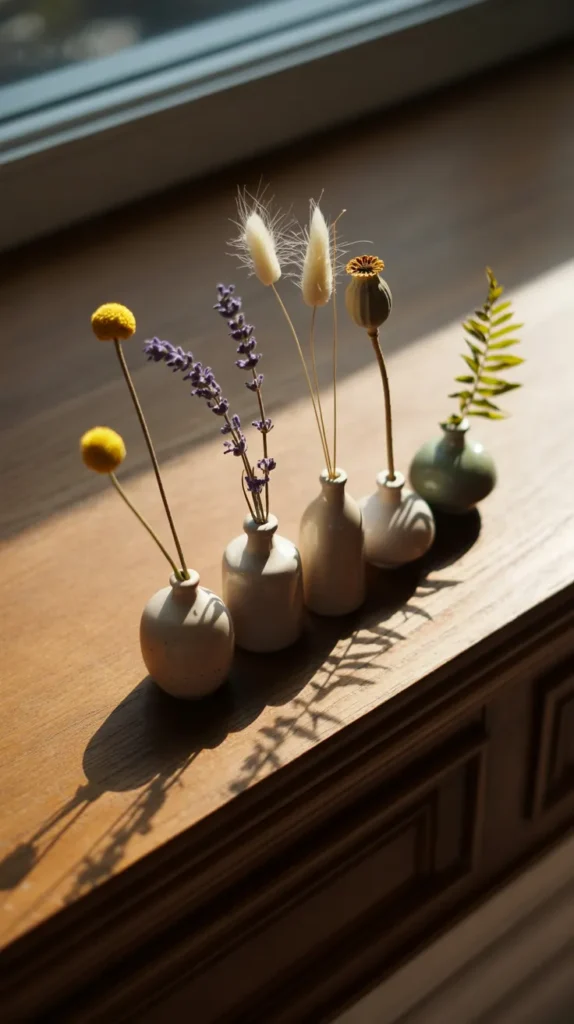
5. Minimalist Bud Vase Collection
Sometimes, less is more. Instead of one large arrangement, try scattering a collection of small bud vases across a mantelpiece, windowsill, or down the center of a dining table. This allows you to highlight the unique beauty of individual stems of dry flowers.
How to style it:
- Mix and Match: Use a variety of small bottles and vases in different shapes, heights, and materials (glass, ceramic, brass).
- Single Stems: Place just one or two stems in each vase. A single dried craspedia (billy button), a sprig of lavender, or a delicate bunny tail grass works perfectly.
- Groupings: Cluster the vases in odd numbers (groups of 3 or 5) for a visually pleasing arrangement.
Pro-Tip: To secure lightweight vases that might tip over with tall stems, use a tiny bit of museum wax on the bottom.
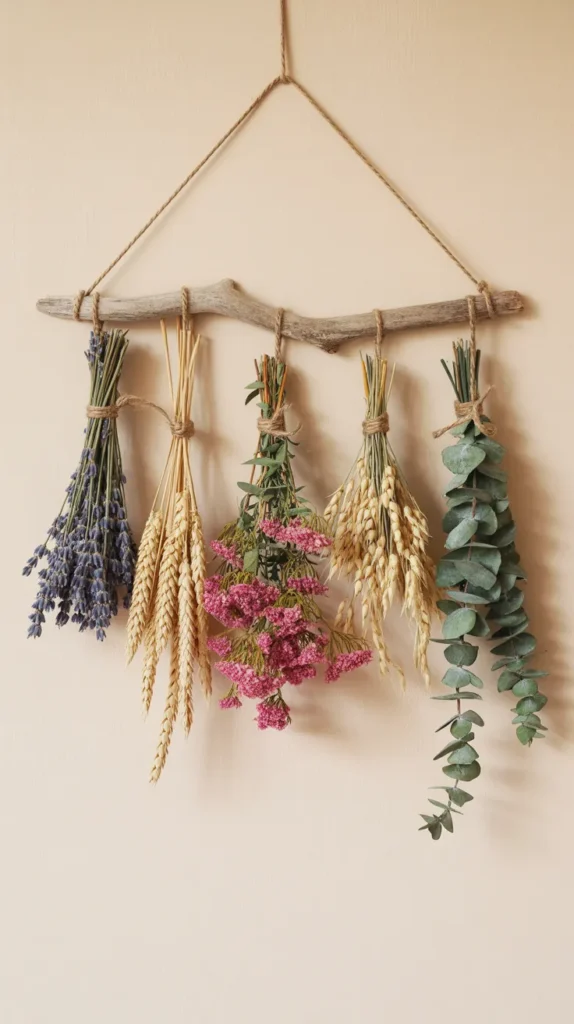
6. Dried Flower Wall Hanging
Create a boho-chic wall hanging that brings the outdoors in. This project uses a branch or dowel as a base, with bunches of dry flowers tied to it and hanging downwards. It’s a fantastic alternative to a traditional framed picture or canvas art.
How to make it:
- The Base: Find a beautiful piece of driftwood or a simple wooden dowel.
- The Bunches: Create small bouquets of dried flowers. Lavender, wheat, oats, and statice are great choices because they hang straight and look neat.
- The Assembly: Tie each bunch to the branch using jute twine or ribbon. You can hang them all at the same length for a uniform look, or vary the lengths for a cascading effect.
- The Finish: Tie a long piece of twine to both ends of the branch to hang it on the wall.
Pro-Tip: To ensure your hanging bunches are secure and easy to assemble, use a quality twine. {Kinglake Natural Jute Twine} is excellent for this rustic aesthetic. It’s strong, holds knots well, and the natural brown fiber complements the earthy tones of dried flowers perfectly.
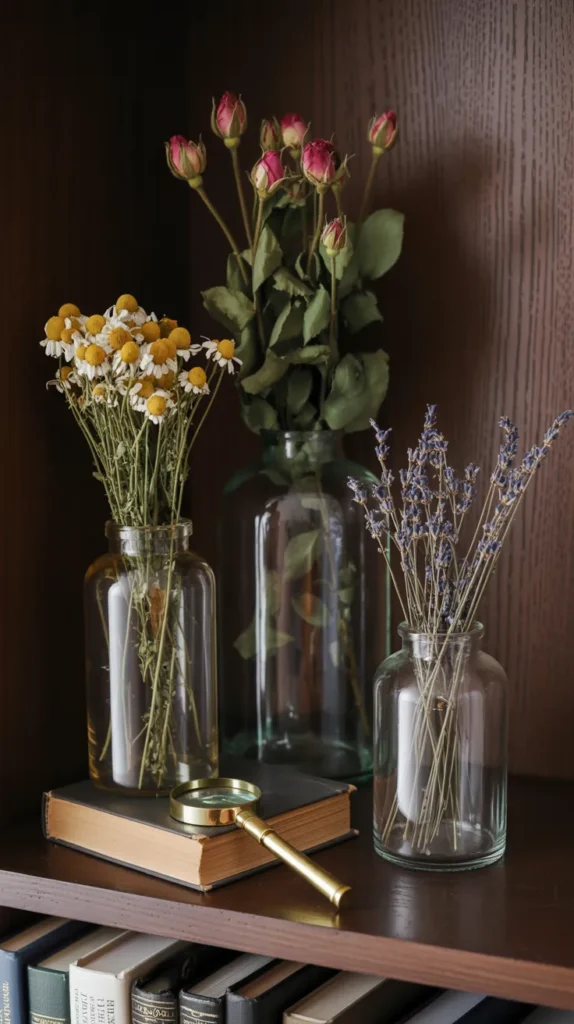
7. Apothecary Jar Displays
Channel a vintage scientific vibe by displaying your dry flowers in glass apothecary jars or bell jars (cloches). This method is excellent for protecting fragile specimens from dust and pets while creating a cabinet-of-curiosities aesthetic.
How to style it:
- The Jars: Look for jars with lids in various sizes. Amber glass adds a moody feel, while clear glass feels fresh and airy.
- The Contents: Fill the jars with dried rosebuds, chamomile flowers, or lavender buds. You can fill them to the brim for a block of color, or place a single, sculptural dried seed pod inside a cloche.
- Grouping: Arrange a cluster of jars on a shelf or sideboard. Mix them with vintage books and candles for a cozy vignette.
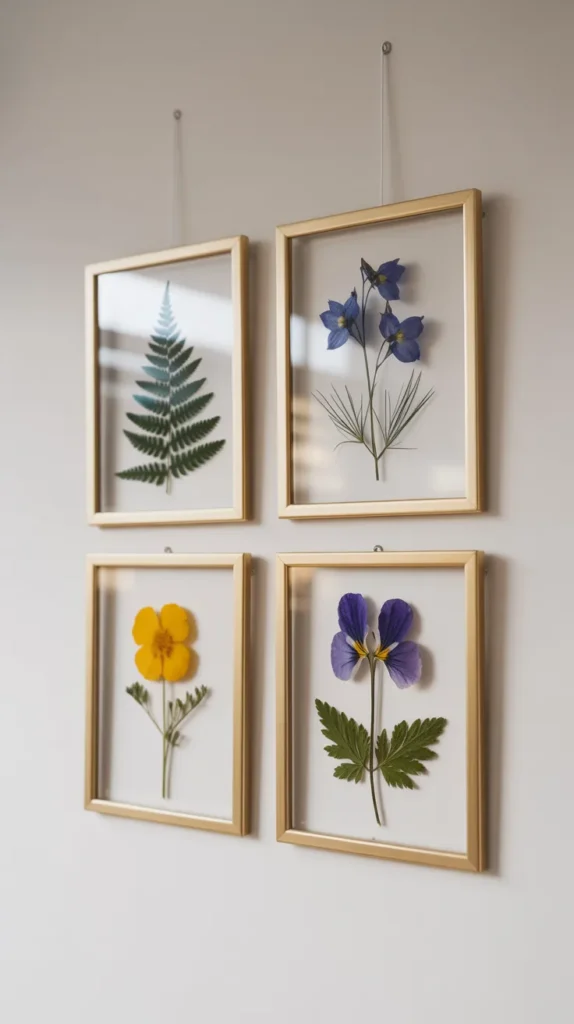
8. Pressed Flower Floating Frames
If you prefer a sleek, modern look, pressed dry flowers in floating glass frames are the way to go. The transparency of the glass allows the wall color to show through, making the flowers appear as if they are suspended in air.
How to create it:
- Pressing: You can press flowers in a heavy book or use a microwave flower press for speed. Pansies, ferns, and cosmos press beautifully flat.
- Framing: Open your floating frame (which has two panes of glass). Arrange your pressed flowers on one pane. Use a tiny dab of clear glue if they slide around, but usually, the pressure of the glass holds them.
- Display: Hang them in a grid pattern on a gallery wall or lean them on a picture ledge. They look especially stunning when backlit by a window.
Pro-Tip: For precise placement of tiny pressed petals without getting fingerprints on the glass, use a pair of craft tweezers.
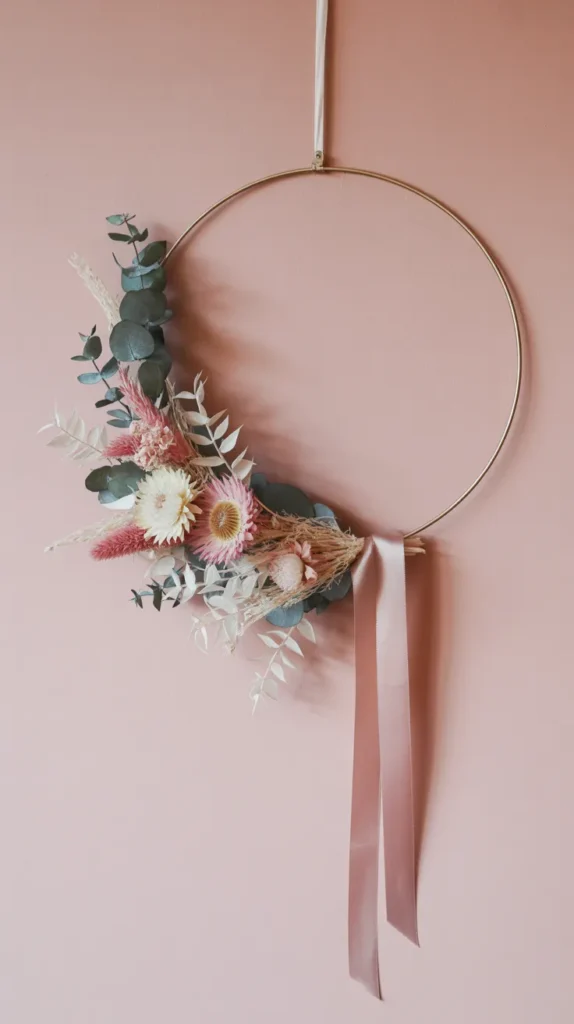
9. Dried Floral Hoop Art
A modern twist on the wreath, the floral hoop uses a simple metal ring (often gold or brass) as the base. Unlike a full wreath, the dry flowers usually cover only a portion of the hoop—typically the bottom third or one side—leaving the rest of the metal exposed for a clean, geometric look.
How to make it:
- The Hoop: Get a gold macrame hoop or embroidery hoop.
- The Mechanics: Use floral tape or wire to attach a few stems of greenery and focal flowers to the metal ring.
- The Design: Asymmetrical designs work best here. Let some vines or grasses trail off the side for movement.
- The Extras: Add a silk ribbon or a personalized wooden name sign for a nursery or wedding decoration.
Pro-Tip:
To attach stems securely to a slippery metal hoop, wrap the area with floral tape first. {Decora Floral Tape} is a must-have. It sticks to itself when stretched and provides a grippy surface that prevents your dried flower arrangement from sliding down the side of the metal ring.
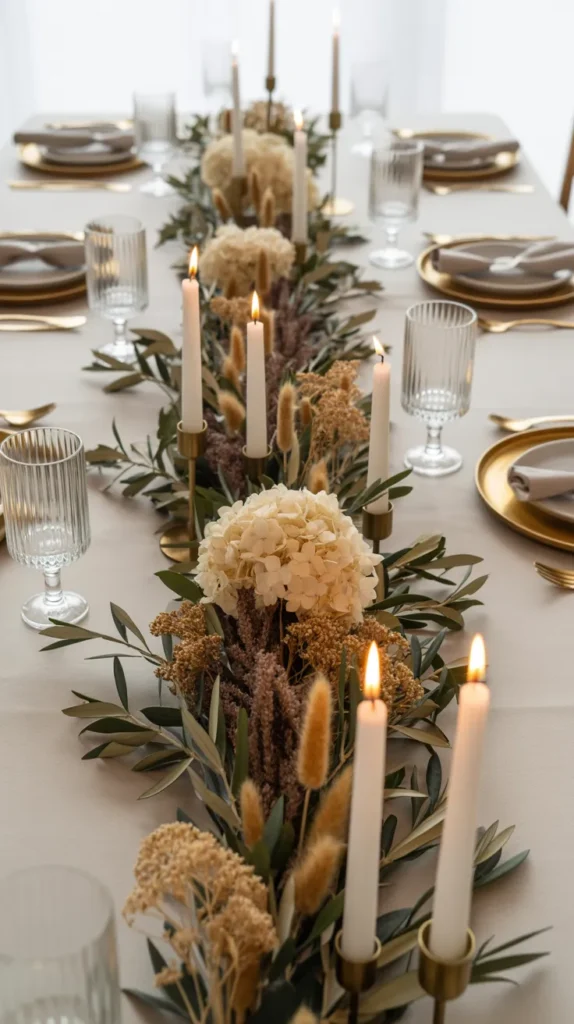
10. The Everlasting Centerpiece
Fresh flower centerpieces are lovely, but they wilt after a few days. A dry flowers centerpiece looks beautiful indefinitely. You can create a long, low arrangement for a dining table using a trough vase or a piece of floral foam.
How to create it:
- The Base: Use a long, rectangular vessel or a block of dry floral foam (specifically for dried flowers) wrapped in chicken wire.
- The Build: Start by inserting greenery and filler flowers to establish the shape. Keep the height low enough that guests can see over it across the table.
- The Texture: Mix different textures—spiky thistle, soft bunny tails, and round seed pods—to keep the eye interested.
- Seasonal Swaps: Because it’s dried, you can easily swap out a few stems to change the color palette with the seasons (orange for autumn, red for winter).
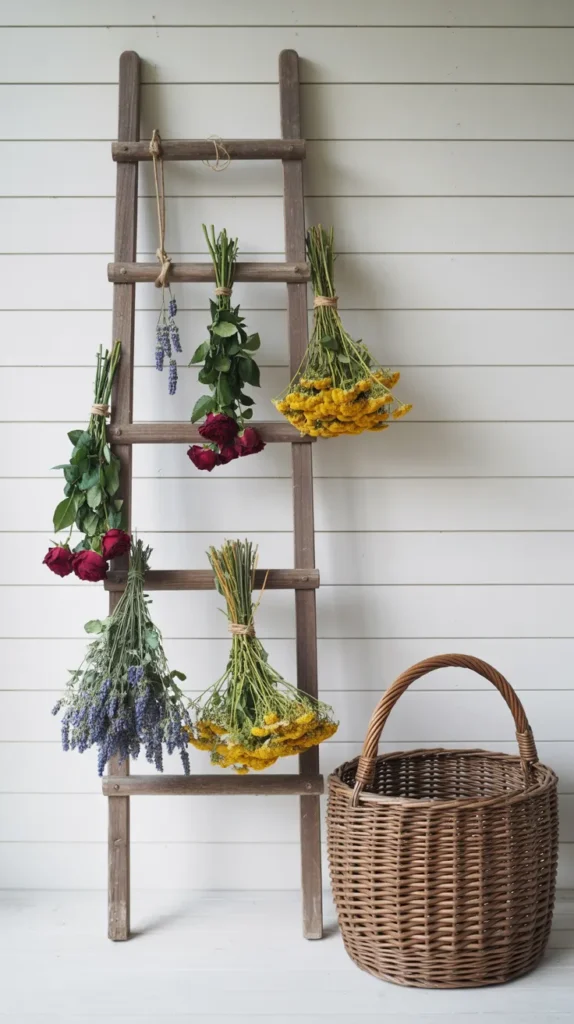
11. Botanical Ladder Display
If you have an old wooden ladder, turn it into a unique vertical garden for your dry flowers. This is a great way to display bunches of flowers that you are in the process of drying, or simply to show off a collection of finished bouquets.
How to style it:
- The Ladder: Lean a rustic wooden ladder against a wall.
- The Bunches: Tie medium-sized bunches of flowers with twine. Roses, larkspur, and globe thistle look beautiful hanging upside down.
- The Placement: Tie the bunches to the rungs of the ladder at varying heights.
- The Vibe: This creates a charming, farmhouse aesthetic that looks like a working florist’s studio.
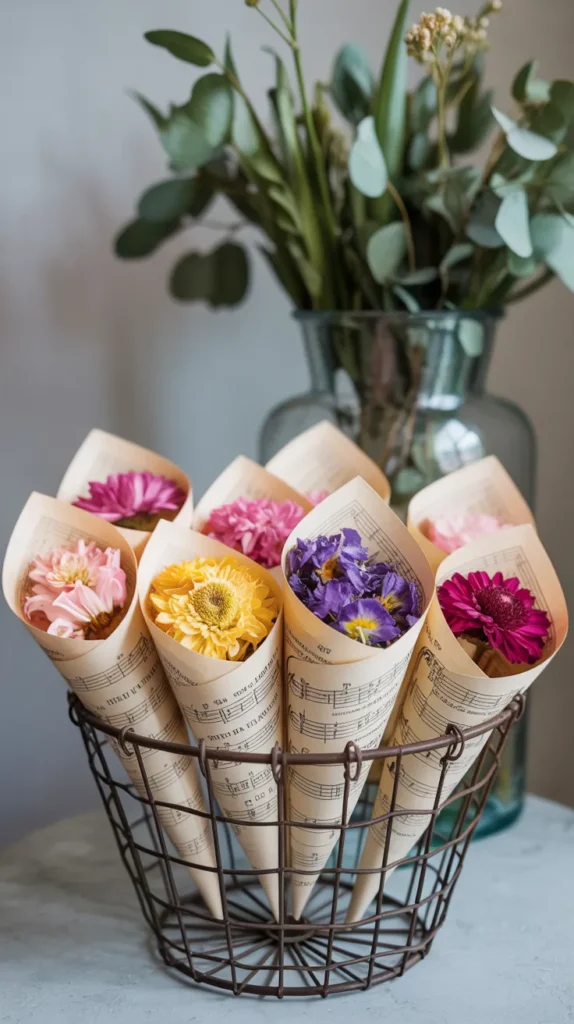
12. Dried Flower Confetti Cones
While often used for weddings, cones of dried flower petals make for beautiful decor when displayed in a basket or on a tray. They add a touch of romance and color to a room and can be used as potpourri that you can toss!
How to make it:
- The Petals: Use dried rose petals, lavender buds, or calendula petals.
- The Cones: Roll pages from old books, sheet music, or kraft paper into cone shapes and secure with tape or glue.
- The Display: Fill the cones with the petal mix. Stand them up in a vintage crate or lay them in a flat basket near your entryway. It’s a welcoming and fragrant touch.
Pro-Tip: To ensure your petal mix smells as good as it looks, add a few drops of essential oil to the petals before filling the cones.
Recommended Products for Your Dry Flower Projects
Having the right tools makes working with dried flowers much easier and ensures your creations last longer. Here is a summary of the products mentioned in this guide.
| Product Name | Brand | Use |
|---|---|---|
| Spray Acrylic Sealer | Aleene’s | Seals fluffy grasses like pampas to prevent shedding and mess. |
| Dual Temp Mini Hot Glue Gun Kit | Gorilla | Precision gluing for wreaths and shadow boxes; strong bond for delicate stems. |
| Flower Drying Art Silica Gel | Activa | Preserves the 3D shape and color of fresh flowers for shadow boxes and frames. |
| Natural Jute Twine | Kinglake | Perfect for tying bouquets, wall hangings, and adding a rustic touch. |
| Floral Tape | Decora | Essential for securing stems to slippery surfaces like metal hoops; provides grip. |
Conclusion: Embrace the Everlasting Beauty
Decorating with dry flowers is more than just a trend; it is a way to appreciate nature’s beauty in all its forms, even after the bloom has faded. From the dramatic impact of a pampas grass cloud to the subtle elegance of a single pressed fern, these preserved botanicals offer texture, warmth, and a timeless quality to any home.
By trying out these 12 ideas, you can transform your space with eco-friendly, low-maintenance decor that tells a story.
So, the next time you receive a bouquet or see wildflowers in the field, don’t just let them fade away. Dry them, preserve them, and turn them into something stunning.
Ready to get started? Grab a bundle of flowers, a vase, or a wreath form, and let your creativity bloom. Your everlasting garden awaits