
There’s a certain kind of joy in receiving a beautiful bouquet or seeing your garden in full bloom. The only bittersweet part is knowing that this burst of color and life is temporary.
But what if it didn’t have to be? Learning a few simple dry flowers DIY techniques can transform those fleeting moments of beauty into everlasting treasures you can enjoy for years to come.
Drying flowers is a wonderfully rewarding and accessible hobby. It allows you to preserve sentimental blooms from special occasions, create sustainable home decor, and connect with nature in a hands-on, creative way.
You don’t need a fancy studio or expensive equipment to get started; many of the best methods use items you already have around the house. The world of dry flowers DIY is open to everyone, regardless of skill level.
This guide will walk you through 12 stunning preservation techniques, from the classic methods our grandparents used to modern hacks that give you beautiful results in minutes.
We’ll cover the pros and cons of each, which flowers they’re best suited for, and provide clear, step-by-step instructions.
Get ready to unlock the secrets of preserving nature’s beauty and fill your home with a garden that never fades.
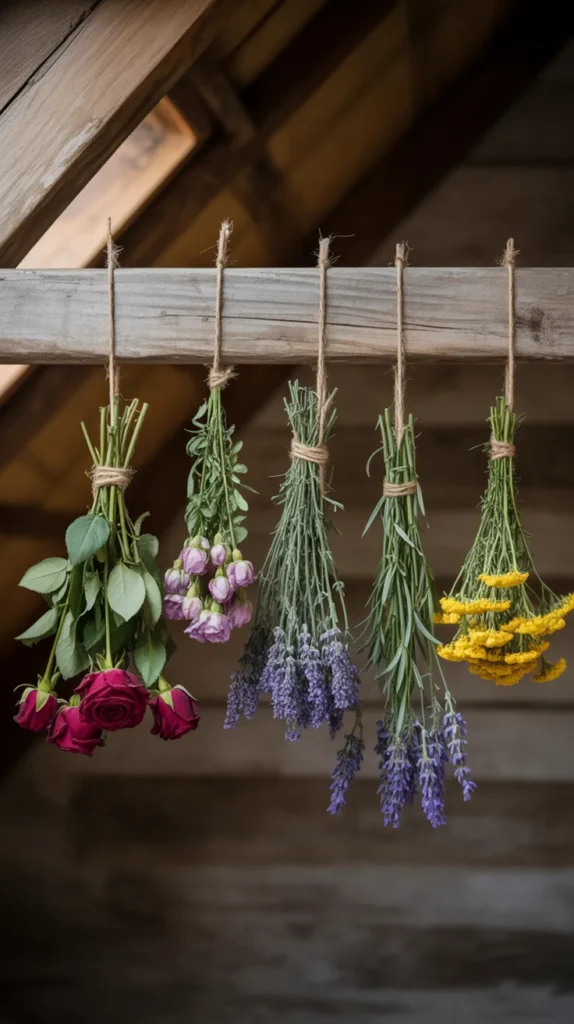
1. The Classic Air-Drying Method
This is the most iconic and simple dry flowers DIY technique, and for good reason. It requires no special equipment and results in that classic, rustic look with beautifully muted colors and sculptural forms. It’s the perfect starting point for any beginner.
Best for: Flowers with sturdy stems and low moisture content, such as roses, lavender, statice, strawflowers, yarrow, and ornamental grasses.
Pros:
- Completely free and easy to do.
- Creates natural, beautiful shapes.
- Perfect for making bouquets and hanging bunches.
Cons:
- Takes 2-4 weeks to complete.
- Colors will fade and darken.
- Not suitable for delicate flowers with high water content like lilies or tulips.
Step-by-Step Instructions:
- Harvest at Peak: For the best results, pick your flowers in the morning after the dew has evaporated but before they have been stressed by the afternoon sun. Choose blooms that are just about to open or have just fully opened.
- Prep the Stems: Strip off all the leaves from the lower two-thirds of the stems. Leaves retain a lot of moisture and can introduce mold or slow down the drying process.
- Bundle Them Up: Group 3-6 stems together into a small bunch. Secure them tightly with a rubber band. A rubber band is often better than twine for this step, as it will continue to grip the stems as they shrink and dry.
- Find a Dark, Dry Spot: This is the most crucial part! Sunlight is the enemy of color preservation. Find a location that is dark, dry, and has good air circulation, like a closet, an attic, or a spare room with the curtains drawn.
- Hang and Wait: Hang your bunches upside down from a clothes hanger, a rod, or a hook. The upside-down position ensures the stems dry straight. Leave them undisturbed for 2-4 weeks, or until the petals are crisp to the touch.
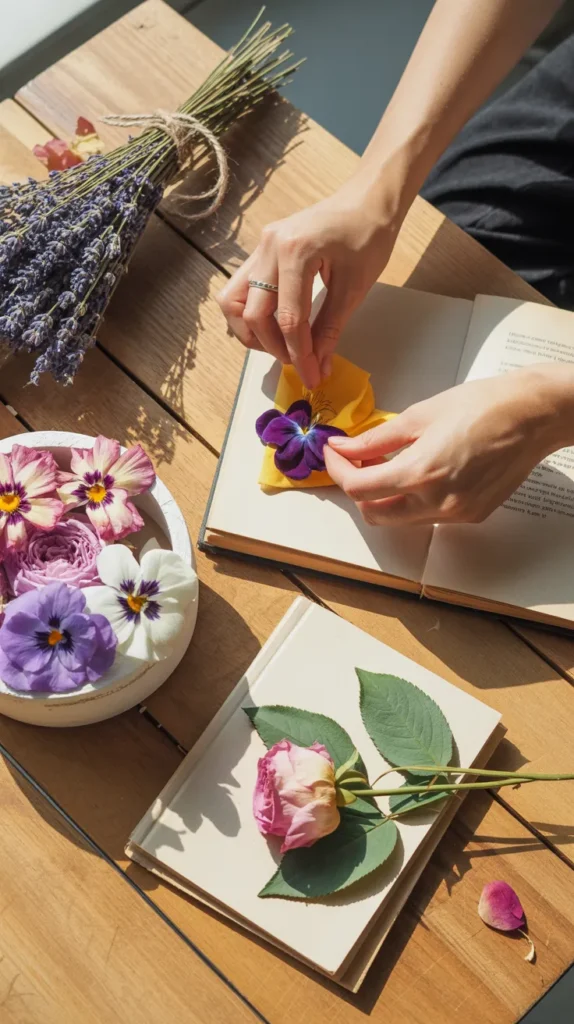
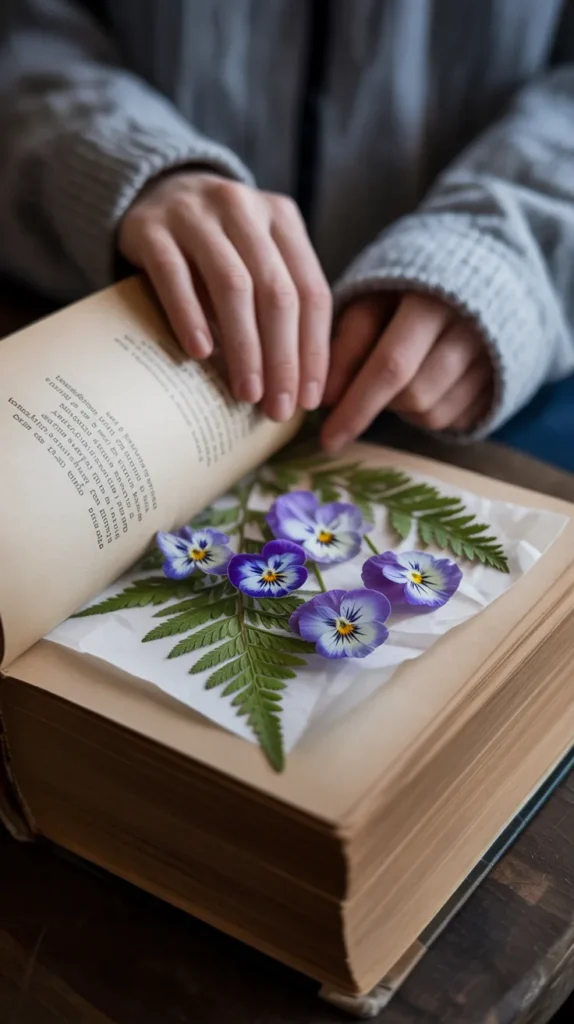
2. The Nostalgic Book-Pressing Method
If you’ve ever tucked a four-leaf clover into a book for good luck, you’re already familiar with this timeless dry flowers DIY technique. Pressing flowers flattens them completely, preserving their color and delicate details in a 2D form, perfect for framing or other paper crafts.
Best for: Flowers with naturally flat faces or single layers of petals. Pansies, violas, cosmos, daisies, bougainvillea, ferns, and individual rose petals are excellent choices.
Pros:
- Simple, free, and uses household items.
- Creates beautiful, paper-thin botanical specimens.
- Ideal for 2D art like bookmarks, cards, and framed art.
Cons:
- The flower loses its 3D shape entirely.
- The process can take several weeks.
- Not suitable for thick, bulbous flowers like dahlias or peonies.
Step-by-Step Instructions:
- Choose Your Book: Select a heavy book that you don’t mind getting slightly stained or warped. An old phone book, a dictionary, or a textbook is perfect.
- Create an Absorbent Layer: You need to sandwich your flower between sheets of absorbent paper to wick away moisture and protect the book’s pages. Parchment paper, coffee filters, or plain, un-textured paper towels work well.
- Arrange the Flowers: Open your book and place a sheet of absorbent paper on one page. Carefully arrange your flowers face-down on the paper, making sure none of them overlap.
- Complete the Sandwich: Place another sheet of absorbent paper over the top of the flowers.
- Press and Be Patient: Carefully close the book. Place several more heavy books or a brick on top to apply even pressure. Store it in a dry place and resist the urge to peek for at least 2-4 weeks.
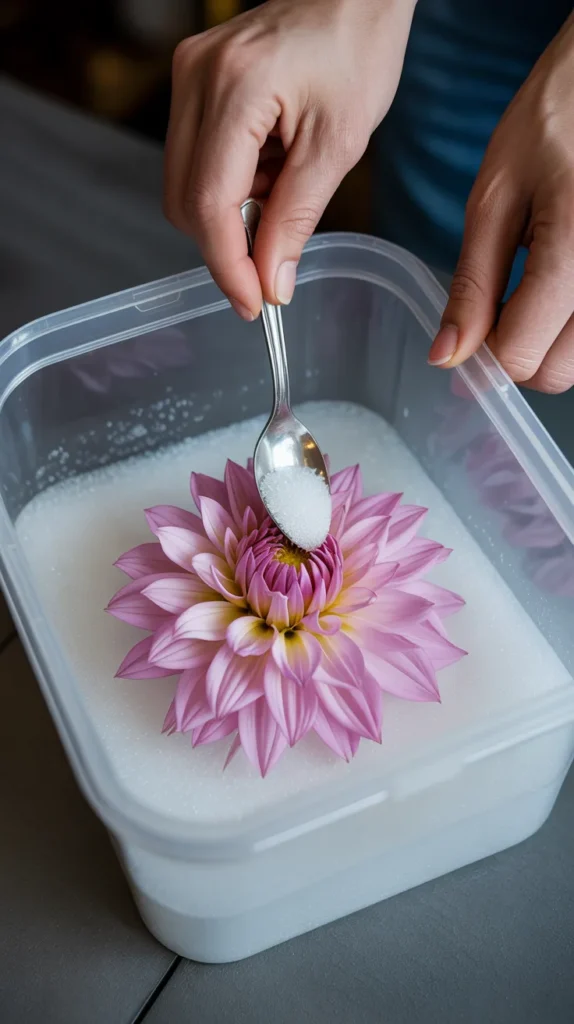
3. The Superior Silica Gel Method
If your main goal is to preserve a flower’s lifelike 3D shape and vibrant color, this is the ultimate dry flowers DIY method.
Silica gel is a granular desiccant that looks like sand and works by rapidly absorbing moisture from every part of the flower, locking in its form and color with stunningly realistic results. This is the preferred method for preserving special occasion flowers, like a wedding bouquet.
Best for: Delicate, multi-petaled flowers with complex shapes, such as roses, dahlias, peonies, zinnias, ranunculus, and carnations.
Pros:
- Preserves the flower’s 3D shape almost perfectly.
- Offers the best color retention of any home method.
- Relatively fast, taking days instead of weeks.
Cons:
- Requires purchasing silica gel.
- The process can be a bit messy.
- Stems must be removed and are often reattached with wire later.
Step-by-Step Instructions:
- Select Your Container: Find an airtight container that is large enough to hold your flowers without squishing the petals.
- Pour a Base Layer: Pour a 1- to 2-inch layer of silica gel into the bottom of the container. For the most delicate flowers, it’s best to use a fine-grained product. {Activa Flower Drying Art Silica Gel} is ideal because its fine consistency won’t leave impressions on or damage soft petals. It also has blue indicator crystals that turn pink when saturated, so you know when it’s time to “recharge” the gel in the oven.
- Place the Flower: Snip the flower head from the stem, leaving about an inch attached. Place the flower face-up on the bed of silica gel.
- Gently Bury the Flower: Using a small spoon or your hands, gently pour more silica gel around and over the flower. It’s crucial to get the crystals in between all the petals. Continue until the flower is completely submerged.
- Seal and Wait: Seal the container tightly and place it in a cool, dry place. A rose might take 5-7 days, while a smaller flower might only take 2-3 days.
- The Reveal: Gently pour out the silica gel to reveal your perfectly preserved bloom. Use a soft, fine-bristled paintbrush to dust off any remaining crystals.
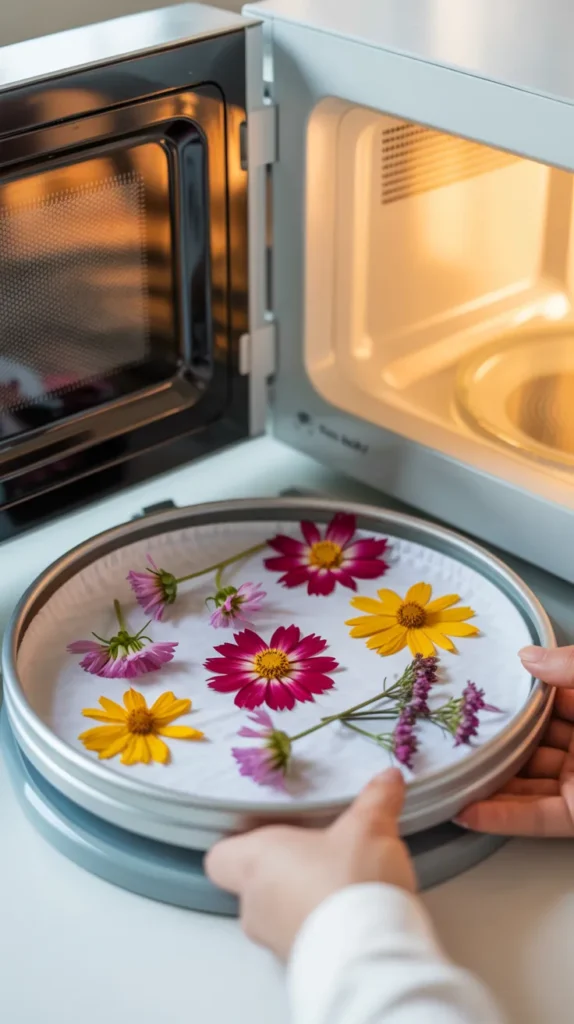
4. The Super-Fast Microwave Pressing Technique
For the impatient crafter who wants the beauty of pressed flowers without the weeks-long wait, the microwave press is a revolutionary dry flowers DIY tool.
This method can produce perfectly pressed and dried flowers in just a few minutes, and the rapid drying process offers excellent color retention.
Best for: The same flowers as traditional pressing (pansies, cosmos, ferns), but this method is particularly good at preserving vibrant colors like bright pinks and deep purples.
Pros:
- Incredibly fast—you get results in minutes.
- Excellent color retention, often superior to traditional pressing.
- The press is reusable.
Cons:
- Requires purchasing a special microwave flower press.
- There’s a learning curve to get the timing right and avoid “cooking” the flowers.
- You can only press a few flowers at a time.
Step-by-Step Instructions:
- Get a Microwave Press: You’ll need a press specifically designed for microwave use, like the {Microfleur Max Microwave Flower Press}. These typically consist of two vented ceramic plates, two felt pads, and two sheets of cotton fabric.
- Assemble the Press: Place one plate down, followed by a felt pad and a sheet of cotton.
- Arrange the Flowers: Arrange your fresh flowers on the cotton sheet, ensuring they do not overlap.
- Create the Top Layer: Place the second cotton sheet, the second felt pad, and the top ceramic plate over the flowers. Latch it closed.
- Microwave in Short Bursts: Place the press in the microwave. Heat it on a medium setting for short intervals of 20-30 seconds. After each burst, let the press cool for a minute before opening it to check on the flowers. The exact time will vary based on your microwave and the flower type.
- Cool and Dry: Once the flowers feel dry and papery, they are done. Let them cool completely before handling.
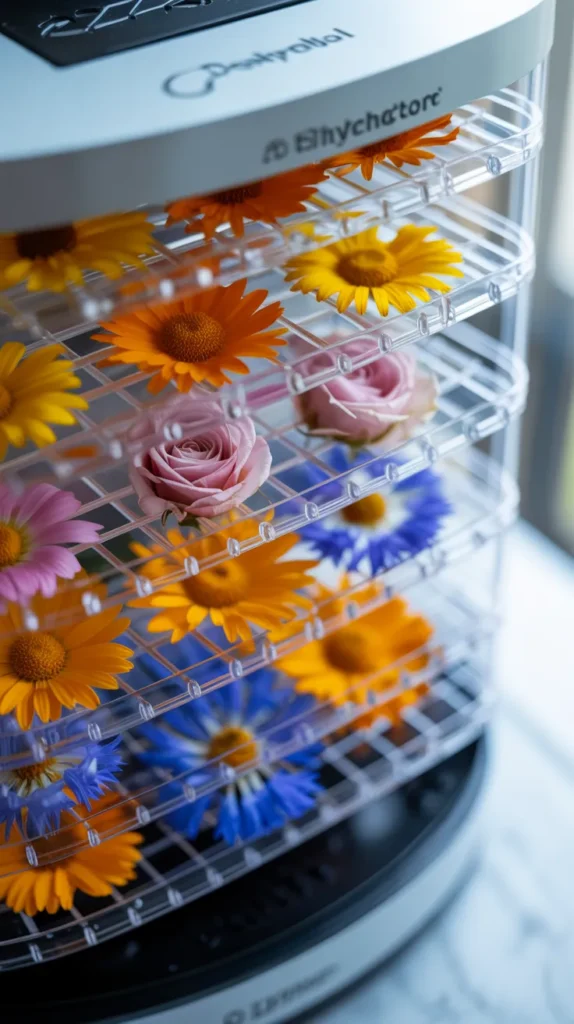
5. The Food Dehydrator Technique
If you already own a food dehydrator for making snacks, it can pull double duty as a fantastic dry flowers DIY tool. The combination of low, consistent heat and circulating air dries flowers quickly while preserving a good amount of their color and shape.
Best for: Whole flower heads and petals intended for potpourri, crafts, or culinary use. Roses, calendula, chamomile, and cornflowers work very well.
Pros:
- Much faster than air-drying (hours instead of weeks).
- Good retention of color and scent.
- Allows you to dry large batches at once.
Cons:
- Requires owning a food dehydrator.
- Can cause some flattening of more delicate 3D flowers.
Step-by-Step Instructions:
- Prepare the Flowers: Remove the flower heads from their stems.
- Arrange on Trays: Place the flowers in a single layer on the dehydrator trays, leaving enough space between them for air to circulate freely. A multi-tray dehydrator like the {COSORI Food Dehydrator} is great because its adjustable temperature settings give you precise control, which is essential for delicate flowers.
- Set the Temperature: Set your dehydrator to its lowest possible temperature, typically around 95-115°F (35-46°C). High heat will cook the flowers and cause them to turn brown.
- Dry and Check: Let the flowers dry for several hours. The time will vary greatly depending on the flower’s size and moisture content. Check on them periodically until the petals are crisp and completely dry to the touch.
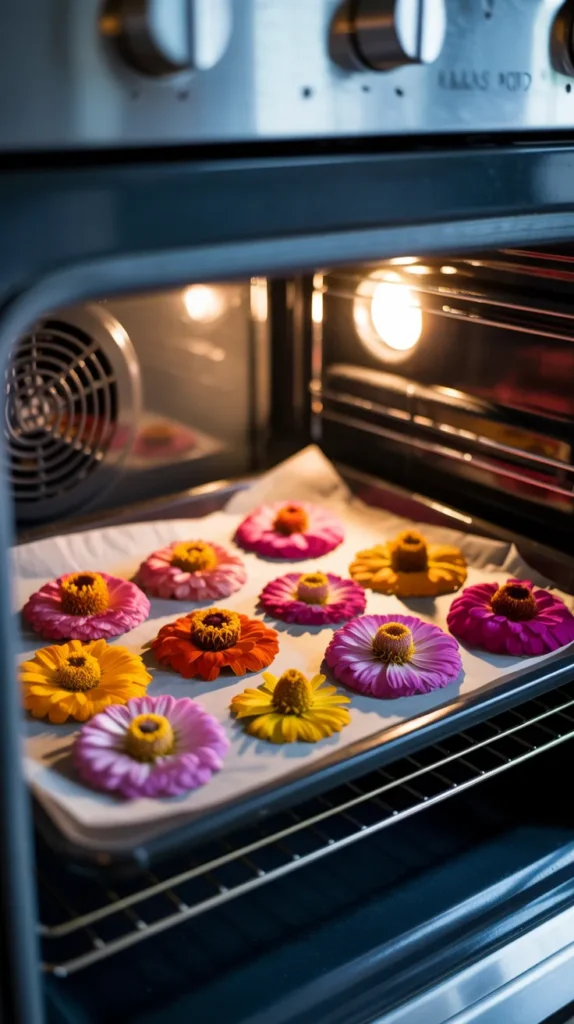
6. The Conventional Oven Method
If you don’t have a dehydrator, your home oven can be used as a last resort for this dry flowers DIY project. This method requires very careful monitoring to ensure you don’t accidentally bake your flowers, but it can be an effective way to speed up the drying process.
Best for: Sturdier flowers and botanicals like seed pods, pinecones, and citrus slices that you might use in wreaths and potpourri. It can also work for hardy flowers like zinnias and marigolds.
Pros:
- Uses a common kitchen appliance that everyone has.
- Significantly faster than air-drying.
Cons:
- Very high risk of burning or browning the flowers, destroying their color.
- Requires constant monitoring and very careful temperature control.
Step-by-Step Instructions:
- Preheat Your Oven: Set your oven to its absolute lowest temperature, ideally between 150-180°F (65-82°C). If your oven tends to run hot, you may need to prop the door open slightly with a wooden spoon to keep the temperature low and stable.
- Prepare a Baking Sheet: Line a baking sheet with parchment paper to prevent the flowers from sticking.
- Arrange the Flowers: Place your flower heads on the parchment paper in a single layer.
- Bake and Watch Closely: Place the baking sheet in the oven. The drying time can range from 30 minutes to a few hours. Check on them every 15-20 minutes. They are done when they feel crisp and completely dry.
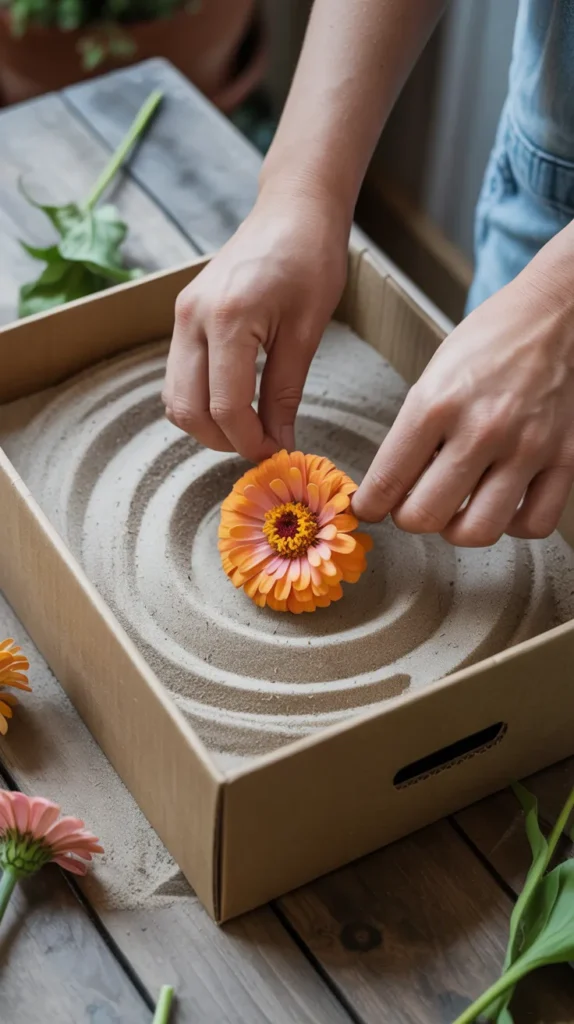
7. The Old-Fashioned Sand Drying Method
Long before silica gel became widely available, crafters used fine, dry sand for their dry flowers DIY projects. The sand works similarly to silica gel, wicking moisture away while providing physical support to the flower’s structure. It’s a very affordable, traditional alternative.
Best for: Sturdy, robust flowers like zinnias, marigolds, and daisies.
Pros:
- Extremely inexpensive—you can get a large bag of play sand for a few dollars.
- Preserves the 3D shape of flowers well.
Cons:
- Much slower than silica gel.
- Sand is heavy and can crush very delicate flowers.
- Can be messy and difficult to clean off the petals completely.
Step-by-Step Instructions:
- Ensure Your Sand is Dry: Your sand must be completely bone-dry to work. If it feels at all damp, spread it on a baking sheet and bake it in a low oven for an hour, then let it cool completely.
- Follow the Silica Gel Method: Use the exact same process as silica gel drying (Method #3). Pour a base layer of sand, place your flower, and gently bury it completely in sand inside an open container, like a cardboard box.
- Wait: Store the box in a warm, dry place for 1-3 weeks. When the flowers are dry, carefully pour out the sand and gently brush them clean with a soft brush.
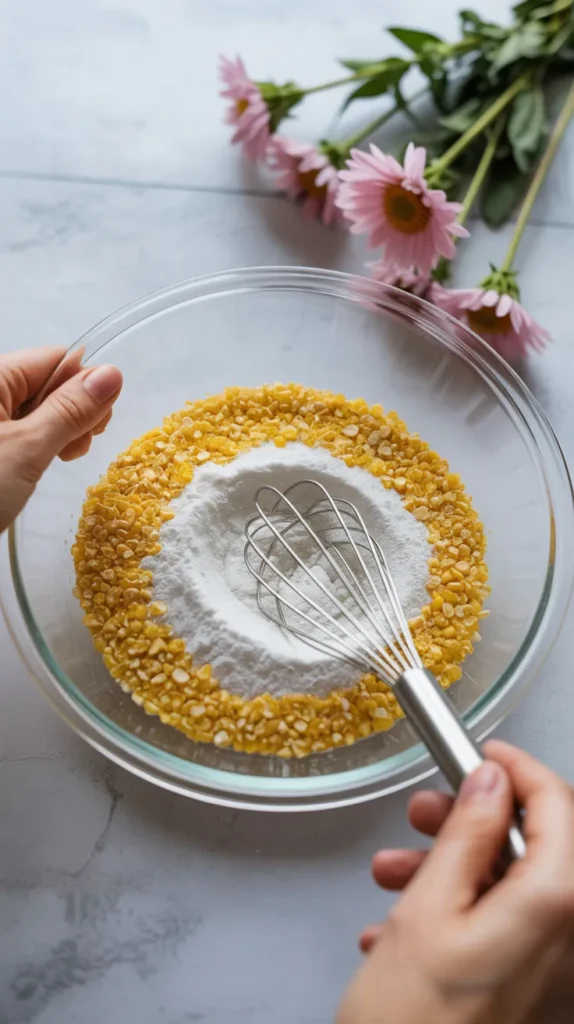
8. The Borax and Cornmeal Mixture
This is another traditional dry flowers DIY mixture that has been used for decades. The borax acts as the drying agent (desiccant), while the cornmeal provides support and helps to distribute the borax evenly, preventing “hot spots” that can burn the petals.
Best for: Similar to sand drying, it works well for flowers that aren’t overly delicate. It’s lighter than sand, making it a slightly better choice for flowers with more petals.
Pros:
- Uses inexpensive ingredients found at most grocery stores.
- Lighter than sand, so less likely to crush flowers.
Cons:
- Can be messy, leaving a fine powder on the flowers.
- Borax is a chemical and should be handled with care (it’s best to use gloves and wash hands thoroughly after use).
Step-by-Step Instructions:
- Create the Mixture: Combine one part borax with two parts white or yellow cornmeal in a bowl and mix well. A borax product like {20 Mule Team Borax} is a household staple that works perfectly for this purpose.
- Use the Burying Technique: Follow the same burying technique as with silica gel and sand. Use an open box, pour a base layer, place your flowers, and gently cover them completely with the mixture.
- Wait and See: Store the box in a warm, dry, and undisturbed place for about two weeks. The flowers are ready when they feel papery and dry. Gently brush off the excess powder with a soft artist’s brush.
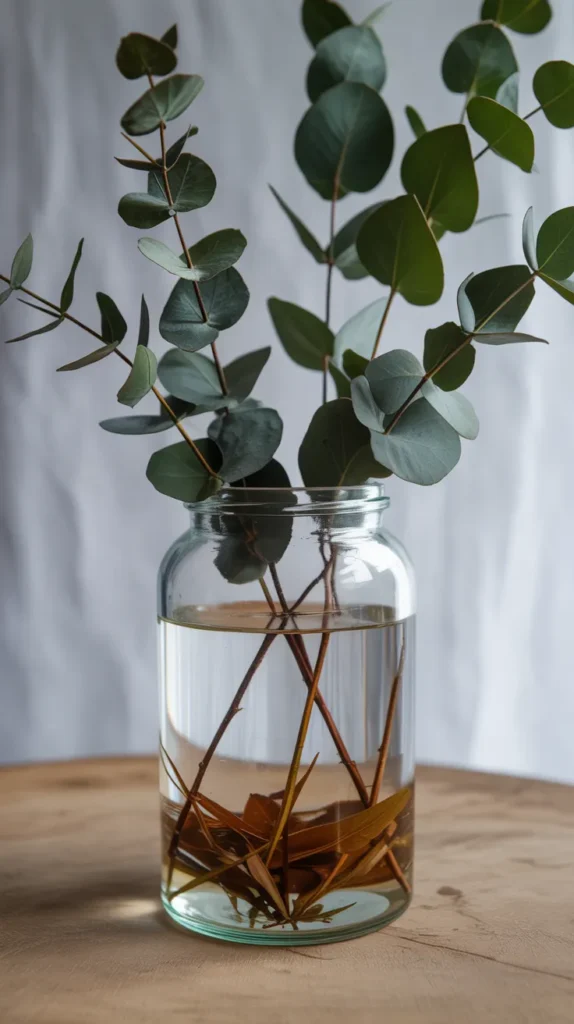
9. Glycerin Preservation for Everlasting Greenery
This unique dry flowers DIY method doesn’t technically “dry” the foliage but preserves it by having the plant’s vascular system draw up a glycerin solution, replacing the water in its cells. This results in soft, supple, and pliable leaves and stems that won’t crumble. It’s the secret to creating commercial “preserved eucalyptus.”
Best for: Foliage and greenery like eucalyptus, magnolia leaves, olive branches, and boxwood. It also works for some filler flowers like baby’s breath.
Pros:
- Keeps stems and leaves soft, flexible, and looking fresh.
- Creates very long-lasting, durable results.
Cons:
- Changes the color of the foliage, often turning it a deep, rich brown or bronze.
- Can be a slow and sometimes unpredictable process.
Step-by-Step Instructions:
- Prepare the Stems: Use fresh, healthy branches. Re-cut the stems at an angle and gently smash the bottom inch with a hammer. This damages the cells and helps them absorb the solution more effectively.
- Create the Solution: Mix one part vegetable glycerin with two parts very hot water in a jar or vase and stir until fully combined. A pure product like {NOW Solutions Vegetable Glycerine} is readily available and works perfectly for this.
- Place and Wait: Place your branches in the solution, ensuring the bottom 2-3 inches of the stems are submerged.
- Observe: Let the branches sit in a cool, dark place for 2-6 weeks, topping up the solution as needed. You’ll know the process is complete when the leaves have changed color and feel soft and slightly oily to the touch.
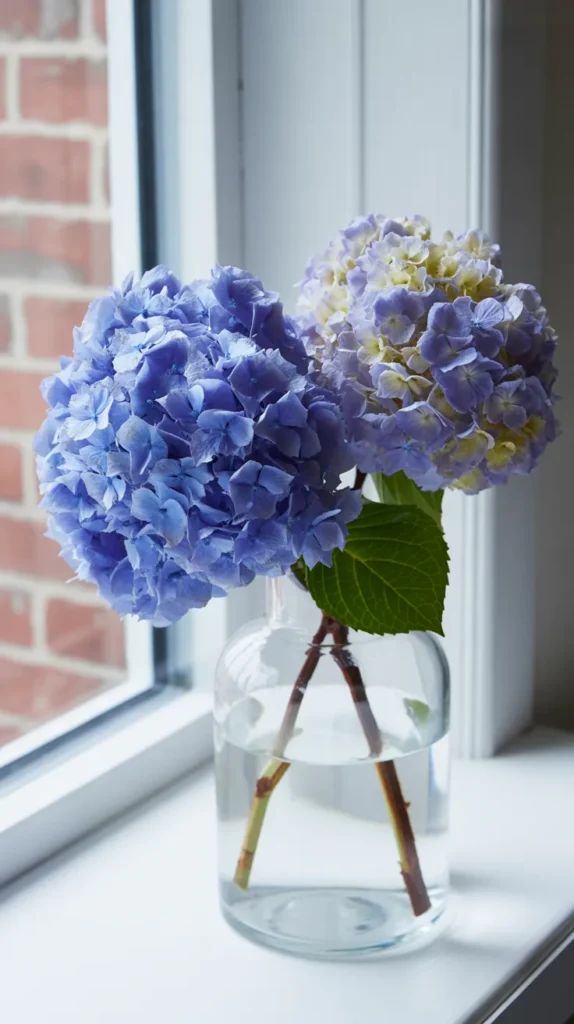
10. The Effortless “Vase Drying” Method
This is the ultimate lazy person’s guide to dry flowers DIY, and it works surprisingly well for certain types of flowers.
The technique is simple: arrange your flowers in a vase with a little water and then completely forget about them. As the water evaporates, the flowers will slowly dry in an upright position.
Best for: Flowers with very stiff, woody stems and large, structural heads that can support their own weight as they dry. Hydrangeas are the absolute best flower for this method. Baby’s breath, celosia, and allium also work well.
Pros:
- Requires absolutely zero effort.
- Flowers dry in a natural, upright position, perfect for arrangements.
Cons:
- Only works for a very limited number of flower types.
- Color retention can be unpredictable.
Step-by-Step Instructions:
- Arrange Your Flowers: Place your fresh hydrangeas (or other suitable flowers) in a vase with just an inch or two of water.
- Forget About Them: Place the vase in a cool spot away from direct sunlight and foot traffic.
- Let Nature Take its Course: Do not refill the water. As the flowers drink the initial water and it slowly evaporates, they will transition from fresh to dry. The process is complete when the petals feel papery to the touch, which can take 1-3 weeks.
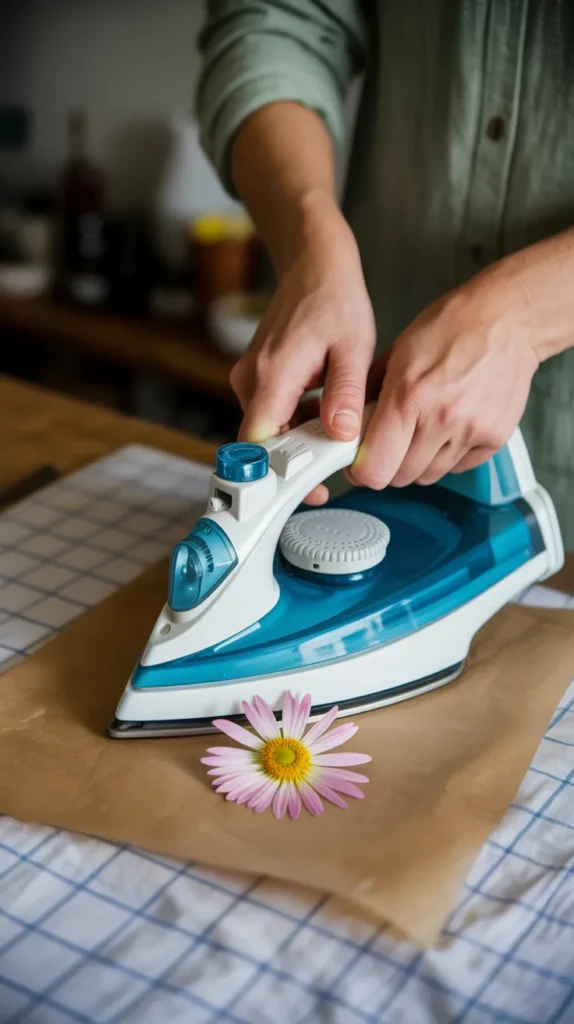
11. Quick Ironing for Pressed Flowers
If you need a pressed flower right now for a craft project and don’t have a microwave press, a clothes iron can do the trick. This dry flowers DIY method is fast but requires a delicate touch to avoid scorching the delicate petals.
Best for: Single-petal flowers and leaves, similar to traditional book-pressing.
Pros:
- Very fast—results in minutes.
- Uses a common household appliance.
Cons:
- High risk of burning the flower and turning it brown.
- Color retention may not be as good as other pressing methods.
Step-by-Step Instructions:
- Create the Flower Sandwich: Place your fresh flower between two sheets of absorbent paper (parchment paper is best).
- Flatten It: Briefly press the “sandwich” inside a heavy book to flatten the flower slightly.
- Prepare the Iron: Empty all water from your iron and set it to its lowest, dry heat setting.
- Iron the Flower: Place the paper sandwich on your ironing board. Press the warm iron onto the paper for 10-15 seconds. Do not glide the iron around. Lift it, let the paper cool for a moment, and then press again.
- Check and Repeat: Repeat this process until the flower is stiff and completely dry.
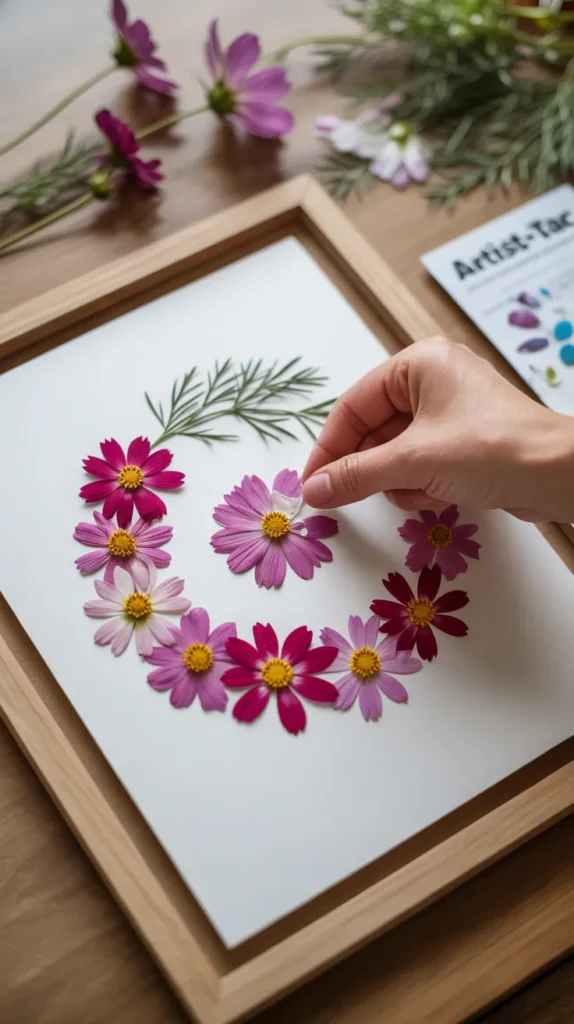
12. Using a Low-Tack Adhesive Sheet
This is a modern and less-messy approach to creating pressed flower art. Instead of using glue, you can use a sheet with a low-tack adhesive to hold your pressed flowers in place before framing them.
Best for: Creating intricate arrangements of pressed flowers for framing.
Pros:
- Allows you to easily reposition flowers.
- No messy glue.
- Creates a very clean, professional look.
Cons:
- Requires a specific product.
Step-by-Step Instructions:
- Press Your Flowers: Use any of the pressing methods (book, iron, or microwave) to get your flowers flat and dry.
- Use an Adhesive Sheet: A product like {Grafix Artist-tac} is a sheet of dry adhesive dots. You peel back the protective layer, place your flowers on your background paper, lay the adhesive sheet on top, and rub.
- Transfer the Adhesive: The adhesive transfers only to the back of your flower.
- Arrange and Stick: You can then lift your flower with its sticky back and place it perfectly in your final design.
Your Dry Flowers DIY Toolkit
While many methods are free, investing in a few key supplies can dramatically improve your results and open up new creative possibilities. Here is a summary of the useful products mentioned in this guide.
| Product Name | Brand | Use |
|---|---|---|
| Flower Drying Art Silica Gel | Activa | The best method for preserving the 3D shape and vibrant color of delicate, multi-petaled flowers. |
| Microfleur Max Microwave Flower Press | Microfleur | For pressing flowers in minutes instead of weeks, with excellent color retention for 2D art. |
| Food Dehydrator | COSORI | Quickly and efficiently dries large batches of flower heads and petals with precise temperature control. |
| 20 Mule Team Borax | 20 Mule Team | An inexpensive household product that can be mixed with cornmeal for a traditional 3D drying method. |
| Vegetable Glycerine | NOW Solutions | Used to preserve foliage like eucalyptus, keeping it soft and supple instead of dry and brittle. |
| Artist-tac Dry Adhesive | Grafix | A mess-free way to apply adhesive to the back of pressed flowers for clean, professional art projects. |
Conclusion: Start Your Preservation Journey
Learning these dry flowers DIY techniques is like discovering a secret superpower. It gives you the ability to stop time, hold onto precious memories, and fill your home with sustainable, natural beauty.
Each method offers a different outcome, from the flat, delicate charm of a pressed pansy to the vibrant, lifelike form of a silica-dried rose.
Don’t be afraid to experiment! Start with the simple air-drying or book-pressing methods and see how you enjoy the process.
As you gain confidence, you can try silica gel or a microwave press to take your craft to the next level. The most important thing is to have fun and enjoy creating beauty that lasts.
So, the next time you admire a flower, remember that its beauty doesn’t have to be fleeting. Which of these stunning preservation techniques will you try first?