There’s a special, quiet magic to dried flowers. They hold the sculptural beauty of a fresh bloom but offer an everlasting charm that brings warmth and texture to any space.
If you’re looking for a sustainable, stylish, and low-maintenance way to elevate your interiors, the world of dry flowers decoration is your answer.
It’s a design trend that has firmly taken root, celebrated for its connection to nature and its timeless, rustic elegance.
Forget any old-fashioned notions of dusty, faded arrangements. Modern dried floral decor is all about celebrating unique shapes, muted earthy tones, and incredible longevity.
From dramatic pampas grass displays to delicate, pressed-flower art, these preserved botanicals offer endless creative possibilities. They allow you to bring a piece of the garden indoors, a piece that won’t wilt or require constant care.
This guide will walk you through 12 breathtaking ways to transform your home using the beauty of dried flowers.
We’ll cover everything from simple styling tricks to creative DIY projects, ensuring there’s an idea for every skill level and aesthetic.
Whether you’re working with a sentimental bouquet or store-bought bundles, get ready to be inspired by the art of everlasting dry flowers decoration.
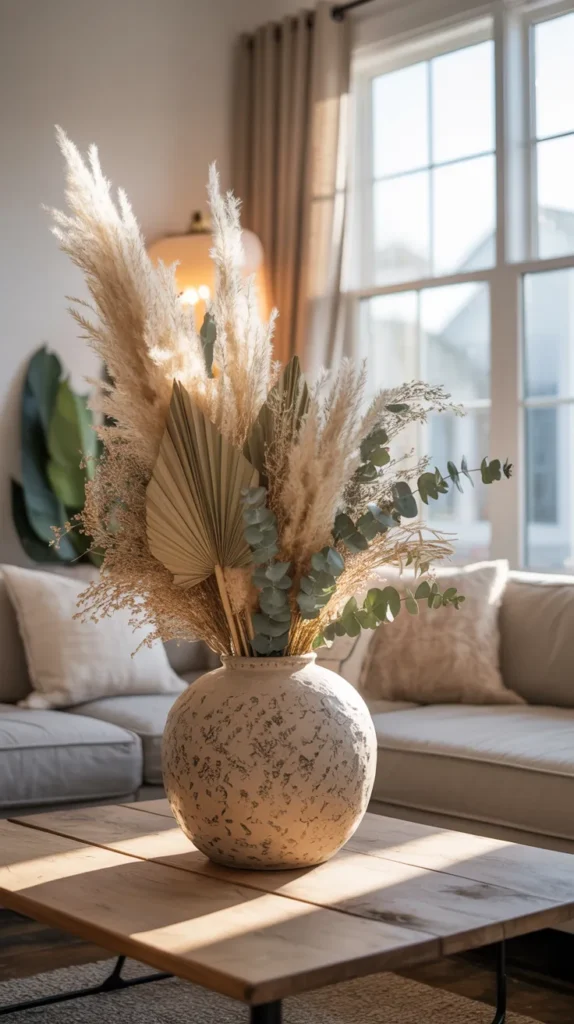
1. The Statement Vase Arrangement
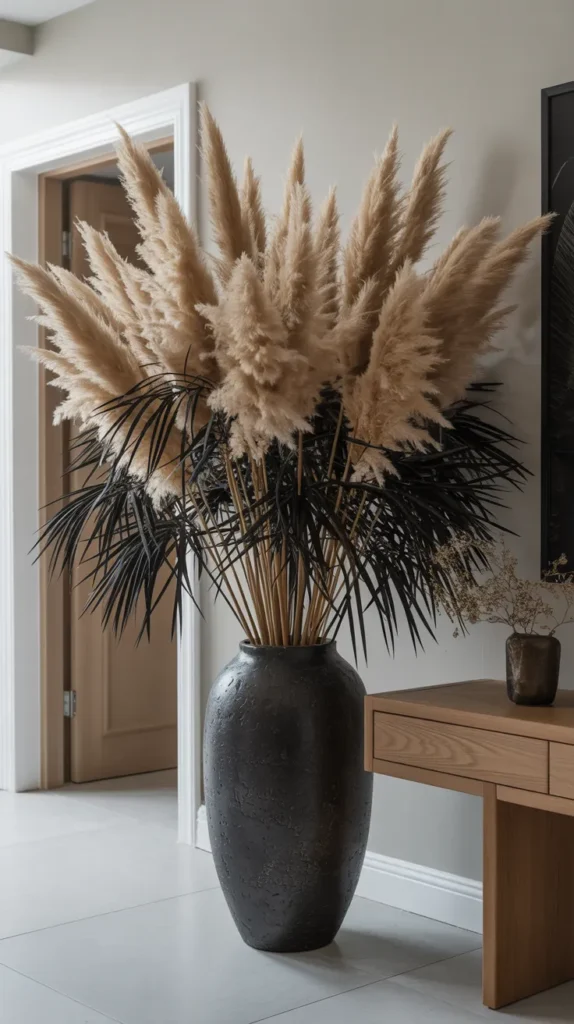
One of the most effortless yet impactful forms of dry flowers decoration is the statement vase. This is all about scale and sculpture.
A large, artfully arranged display can instantly create a focal point in a room, drawing the eye and adding a touch of drama. This approach is perfect for filling an empty corner, gracing an entryway table, or adding height to a living room vignette.
The key is to focus on botanicals with interesting shapes and heights. Think tall, feathery pampas grass, architectural dried palm spears, spiky thistle, or the papery, iridescent pods of the lunaria (honesty) plant.
How to get the look:
- Find the Right Vessel: Choose a substantial, opaque vase made of ceramic, stoneware, or colored glass. The weight will anchor the tall stems, and the opacity will hide the less-attractive lower parts of the arrangement. A vase with a narrower neck is also helpful for keeping stems clustered and upright.
- Play with Height and Scale: Don’t be afraid to go big. Use tall stems to create a sense of grandeur. A mix of heights adds visual interest and a more natural feel.
- Keep it Simple: For a chic, modern aesthetic, stick to a monochromatic or neutral color palette. A mix of creams, beiges, and soft browns feels both sophisticated and calming.
Pro-Tip: The one downside to fluffy grasses like pampas is their tendency to shed. To prevent a mess, you can give them a light misting of high-hold hairspray.
For a more permanent, non-sticky solution, use a product like {Aleene’s Spray Acrylic Sealer}.
This clear matte spray provides a protective coating that locks the delicate fluff in place without altering the natural look, keeping your arrangement looking perfect and your floors clean.
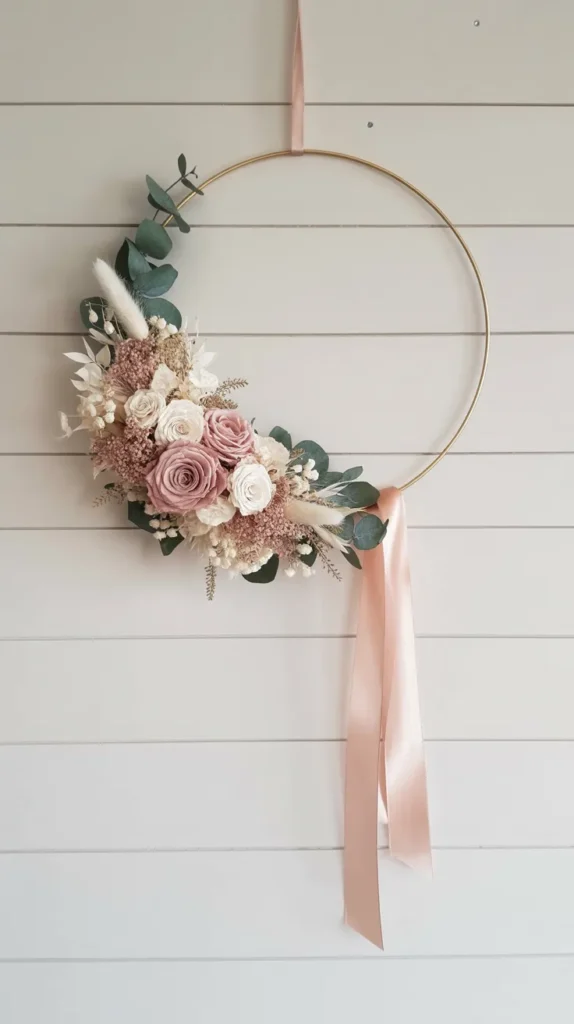
2. The Everlasting Wreath
Wreaths are not just for the holiday season anymore. A beautiful wreath made from dried flowers is a year-round celebration of nature that adds organic texture and charm to any door, wall, or mantelpiece.
Unlike a fresh wreath that quickly fades, a dried floral wreath becomes a lasting piece of dry flowers decoration.
What you’ll need:
- A wreath base (a natural grapevine wreath is perfect for a rustic look, while a gold metal hoop works for a modern aesthetic)
- A variety of dried flowers (strawflowers for color, lavender for scent, statice for texture)
- Dried greenery (eucalyptus, olive branches, or ruscus)
- Floral wire and a hot glue gun
Step-by-step:
- Begin by creating small, hand-held bunches of your greenery.
- Use floral wire to attach these bunches to your wreath base, overlapping them to hide the wire and stems as you work your way around.
- Once you have a lush green base, it’s time for the flowers. Use a hot glue gun to strategically place your focal flowers. A high-quality tool like the {Gorilla Dual Temp Mini Hot Glue Gun Kit} is essential here; its precision tip allows you to apply glue exactly where you need it on delicate stems, and its strong bond ensures your arrangement remains secure.
- You can cover the entire wreath for a classic, full look, or concentrate your flowers on one side for a trendy, asymmetrical design.
3. The “Floating” Pressed Flower Frame
For a more delicate and modern take on dry flowers decoration, consider pressed flowers.
By sandwiching paper-thin, pressed botanicals between two panes of glass in a “floating” frame, you create the stunning illusion that the flowers are suspended in mid-air. It’s a minimalist and elegant way to turn a simple flower into a piece of art.
How to create it:
- Press Your Flowers: You can press your own flowers the traditional way, inside a heavy book, which takes a few weeks. For much faster results that preserve color more vibrantly, a microwave flower press is a game-changer.
- Choose Your Frame: Select a floating frame with a metal or wooden edge that complements your decor.
- Arrange Your Design: Carefully clean both panes of glass. Use tweezers to arrange your pressed flowers (ferns, cosmos, and pansies work beautifully) on one of the glass panes.
- Assemble and Display: Place the second pane of glass on top, secure it within the frame, and your masterpiece is ready. These look wonderful hung in a grid or leaned on a picture ledge where light can shine through them.

4. Whimsical Hanging Flower Installations
For a truly breathtaking piece of dry flowers decoration, create a suspended floral installation or “flower cloud.”
This involves hanging a large, airy arrangement from the ceiling, creating a whimsical and romantic focal point. It’s an unforgettable feature to hang over a dining table, a bed, or in a nursery.
How to build it:
- The Base: A ball of chicken wire is the perfect, lightweight structure for this project. The grid allows you to easily insert stems from all directions to create a full, cloud-like shape.
- The Flowers: Choose lightweight, voluminous dried flowers. Dried hydrangeas, baby’s breath (gypsophila), smoke bush, and ferns are all excellent choices.
- The Assembly: Securely hang your chicken wire base from the ceiling using strong fishing line. Begin inserting your longest stems to create the overall shape, then fill in with shorter stems until the wire is completely hidden.
- The Styling: A monochromatic arrangement of white baby’s breath creates a true “cloud” effect, while mixing in colorful dried wildflowers gives the feeling of a floating meadow.

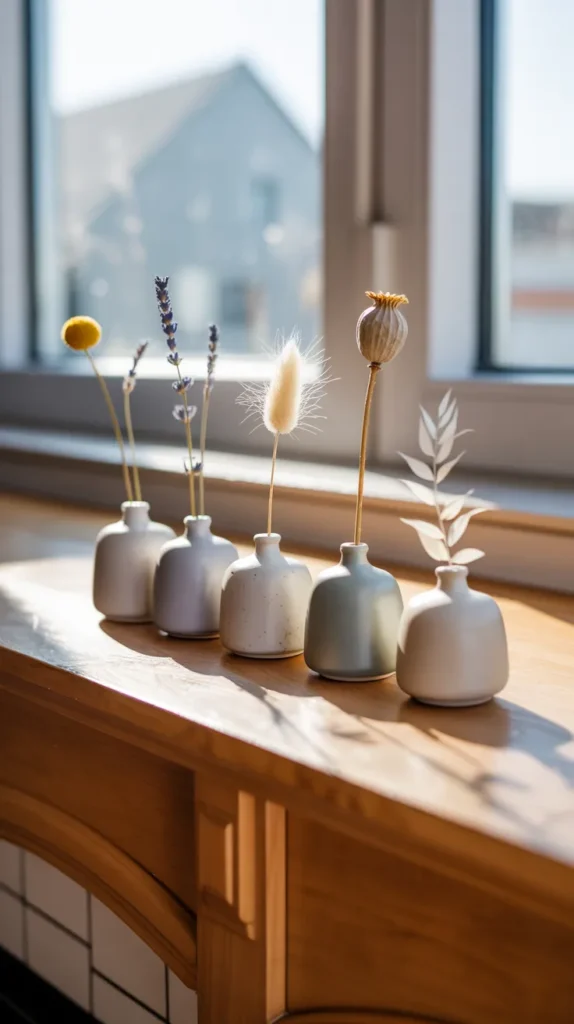
5. A Collection of Minimalist Bud Vases
You don’t always need a large bouquet to make an impact. A scattered collection of small bud vases, each holding a single, unique stem, can be just as beautiful.
This minimalist approach to dry flowers decoration allows you to appreciate the individual form and texture of each botanical.
How to style it:
- Gather Your Vases: Collect an assortment of small bottles and bud vases. Mix and match different shapes, heights, and materials—clear glass, colored glass, ceramic, and even small brass vessels look wonderful together.
- Select Single Stems: Choose your most interesting individual stems. A single dried craspedia (billy button) adds a pop of yellow, a sprig of lavender offers a touch of color and scent, and a fluffy bunny tail grass provides soft texture.
- Create Groupings: Arrange your bud vases in clusters on a mantelpiece, a windowsill, or down the center of a long table. Grouping them in odd numbers (like 3, 5, or 7) is a classic design trick that is pleasing to the eye.
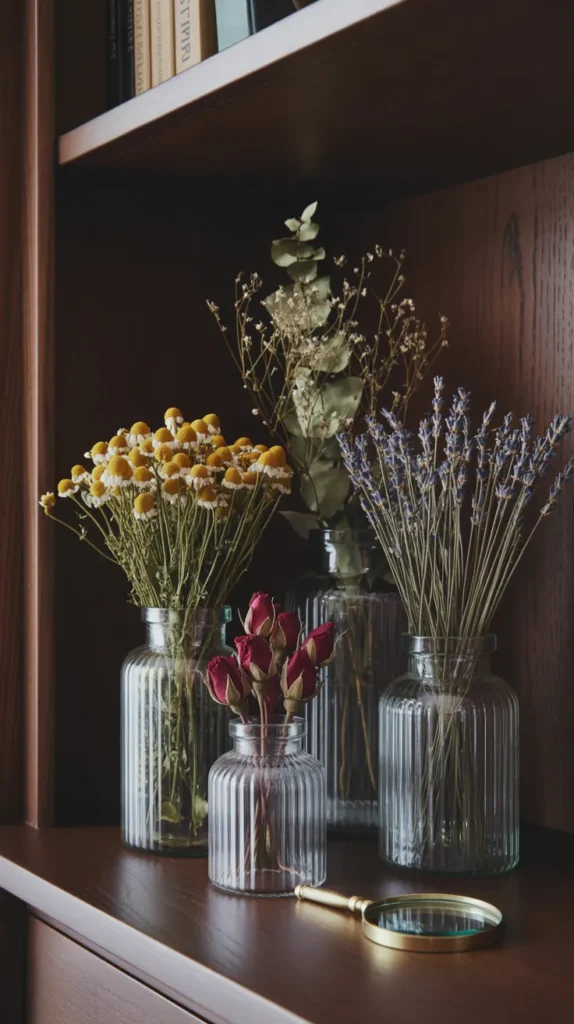
6. The Apothecary Jar Display
Channel a vintage, scientific aesthetic by displaying your dried flowers in glass apothecary jars or under glass cloches (bell jars).
This method not only looks incredibly stylish but also protects more fragile flowers from dust, creating a “cabinet of curiosities” feel. This is a wonderfully simple form of dry flowers decoration.
How to style it:
- Choose Your Jars: Look for jars with lids in various shapes and sizes. Clear glass is classic and fresh, while amber or green glass can add a moody, vintage vibe.
- Fill Them Up: Fill jars with loose dried rosebuds, chamomile flowers, or colorful petals for a mass of color. Alternatively, place a single, perfectly preserved 3D flower, like a silica-dried rose, under a glass cloche to give it specimen-like importance.
- Create a Vignette: Arrange a cluster of your filled jars on a bookshelf or sideboard. Mix them with antique books, candles, and other interesting objects to create a beautiful, curated display.
Pro-Tip: To get those perfectly shaped 3D flowers for your cloche, you need to dry them with silica gel. A product like {Activa Flower Drying Art Silica Gel} is perfect.
This fine, sand-like desiccant rapidly absorbs moisture, preserving the flower’s shape and vibrant color in a way that air-drying can’t match.
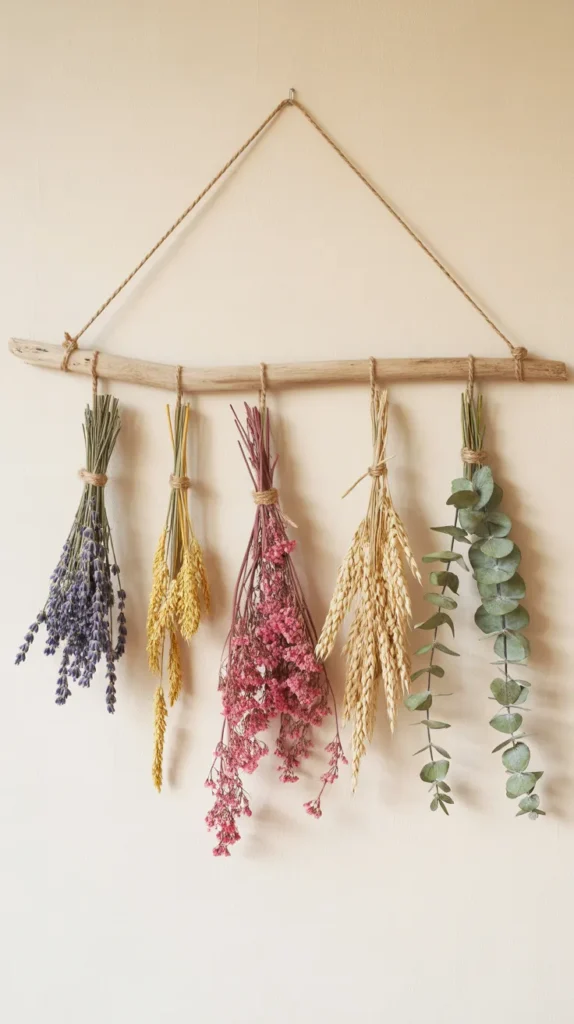
7. A Rustic Wall Hanging
Create a piece of bohemian-inspired art for your walls. This simple DIY project uses a found branch or a wooden dowel as a base, with bunches of dried flowers hanging down from it. It’s a fantastic, textural alternative to a traditional framed picture.
How to make it:
- Find Your Base: Use a beautiful piece of driftwood found on a walk, or a simple, clean wooden dowel for a more modern look.
- Create Your Bunches: Make small, hand-tied bouquets of dried flowers. Sturdy flowers that hang nicely, like lavender, wheat, oats, and statice, work particularly well.
- Assemble the Hanging: Tie each bunch to the branch using jute twine or ribbon. You can hang them all at the same length for a neat, uniform look, or vary the lengths to create a more organic, cascading effect.
- Hang it Up: Attach a long piece of twine to both ends of the branch and hang it on a prominent wall.
Pro-Tip: To ensure your bunches are securely tied and to enhance the rustic aesthetic, use a quality natural twine. {Kinglake Natural Jute Twine} is an excellent choice. It’s strong, holds knots well, and its natural brown fiber perfectly complements the earthy tones of dried botanicals.
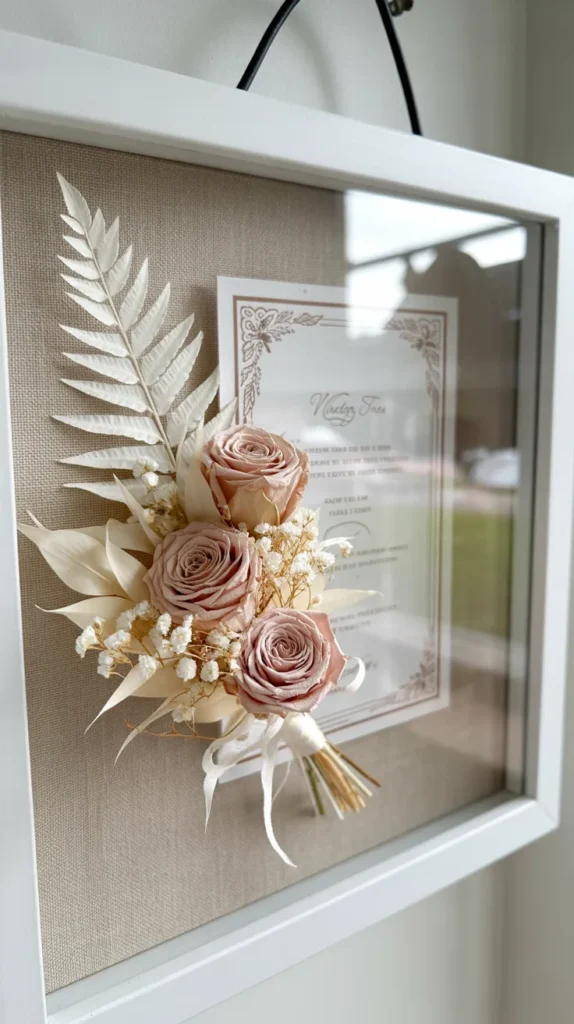
8. The Shadow Box Time Capsule
A shadow box is the perfect vessel for preserving your most sentimental dry flowers decoration project. It allows you to create a beautiful, multi-dimensional display that protects delicate blooms while telling a story. This is an ideal way to save flowers from a wedding, anniversary, or other special occasion.
How to create it:
- Choose Your Flowers: Select the most meaningful and well-preserved flowers from your bouquet.
- Add Mementos: Combine the flowers with other small keepsakes like a wedding invitation, a ribbon, a photo, or a piece of jewelry.
- Arrange Your Display: Lay your shadow box flat and arrange the items inside. Secure flat items first, then use a hot glue gun to carefully attach your 3D dried flowers. For an elegant touch, you can use decorative pearl-headed pins to secure the flowers, making them appear to float.
- Seal and Display: Once you’re happy with your composition, close up the box and hang your beautiful time capsule.
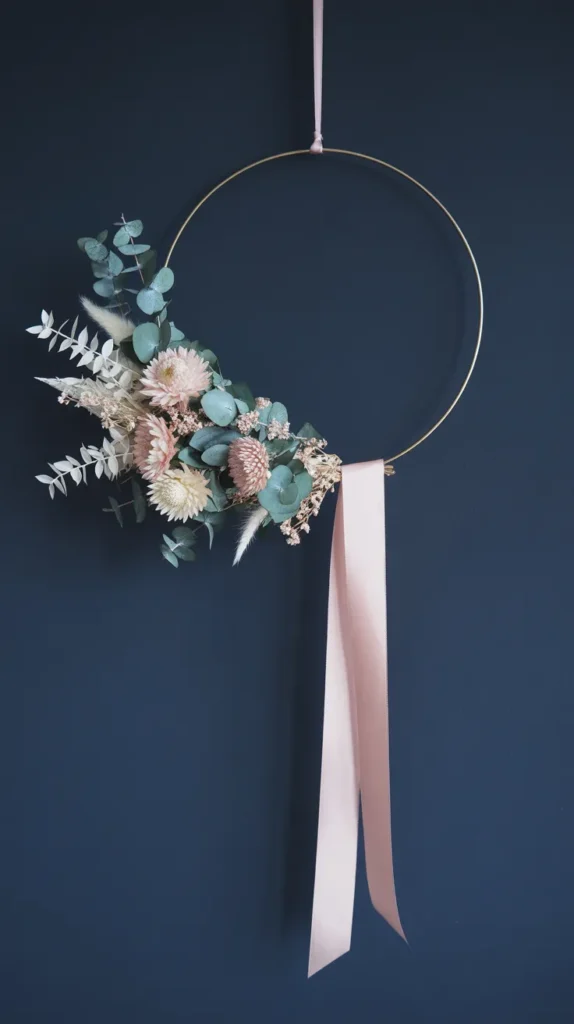
9. Modern Floral Hoop Art
A chic and modern twist on the traditional wreath, floral hoop art uses a simple metal ring as its base. Rather than covering the entire form, the dry flowers decoration is typically concentrated on one portion of the hoop—often the bottom third or one side—leaving the sleek metal exposed for a clean, geometric contrast.
How to make it:
- Select Your Hoop: Gold or brass macrame hoops or embroidery hoops are perfect for this project.
- Secure Your Flowers: The biggest challenge is attaching stems to a slippery metal hoop. The solution is floral tape. Before adding flowers, wrap the section you plan to decorate with tape. A product like {Decora Floral Tape} is a must-have; it sticks to itself when stretched and creates a grippy surface that prevents your arrangement from sliding.
- Create Your Design: Use floral wire to attach your base greenery and focal flowers over the taped section. Asymmetrical designs with trailing grasses or vines are particularly beautiful.
- Add a Finishing Touch: You can add a long, trailing silk ribbon or even a personalized wooden name sign for a nursery or wedding decoration.
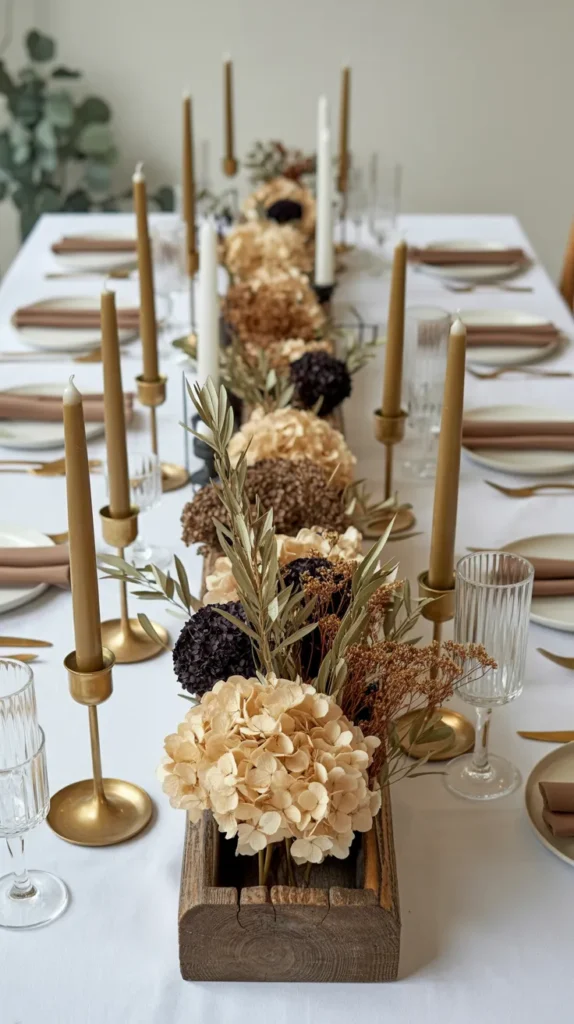
10. The Everlasting Centerpiece
While fresh floral centerpieces are lovely, they only last for a few days. A centerpiece made from dried flowers, on the other hand, will look beautiful indefinitely. This makes it a perfect, low-maintenance option for a dining table, coffee table, or console.
How to create it:
- Choose Your Base: For a long dining table, use a narrow, trough-style vase or a block of dry floral foam (specifically designed for dried, not fresh, flowers).
- Build Your Shape: Begin by inserting your greenery and filler flowers to establish the overall shape and size of the arrangement. For a dining table, keep the height low enough that guests can easily see and talk to each other over it.
- Add Texture and Color: Mix in your focal flowers and textural elements like spiky sea holly, soft bunny tails, and round poppy seed pods to create visual interest.
- Make it Seasonal: One of the best things about a dried centerpiece is that you can easily update it. Swap out a few stems to change the color palette with the seasons—add some dried orange slices for autumn or red-berried stems for winter.
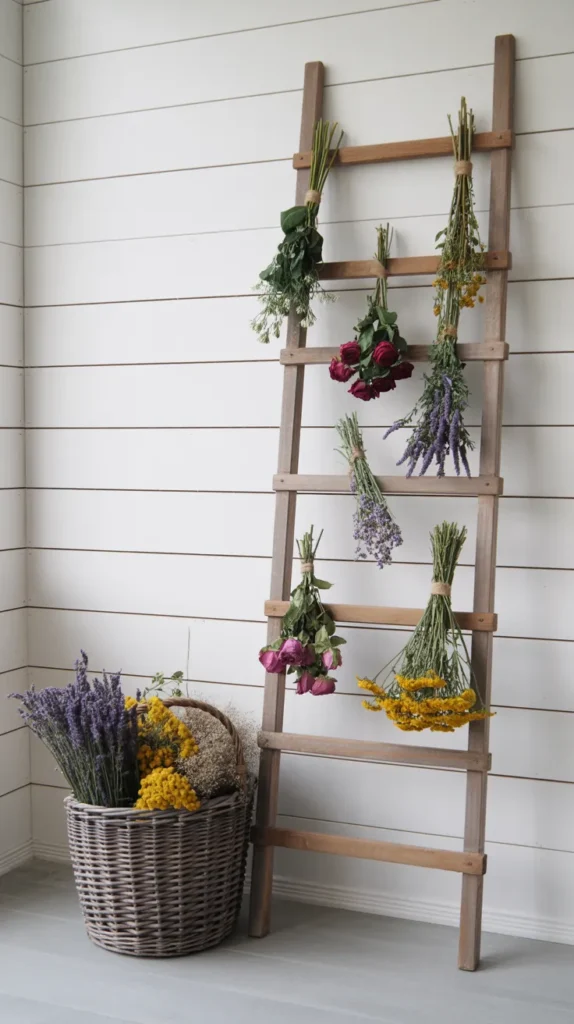
11. Botanical Ladder Display
If you have an old wooden ladder, don’t throw it out! Lean it against a wall and turn it into a unique, vertical display for your dried flower bunches. This creates a charming, farmhouse-chic aesthetic that feels like a working florist’s studio.
How to style it:
- Find a Ladder: A rustic, weathered wooden ladder works best for this look.
- Hang Your Bunches: Tie medium-sized bunches of dried flowers (roses, lavender, larkspur, and globe thistle all look beautiful) with twine.
- Arrange and Display: Tie the bunches to the rungs of the ladder, hanging them upside down at varying heights for a dynamic and visually interesting display. This is also a beautiful way to air-dry fresh flowers.
12. Confetti Cones as Decor
While often used for wedding exits, cones filled with dried flower petals can be a beautiful piece of dry flowers decoration in their own right. Displayed in a basket or on a tray, they add a touch of romance, color, and fragrance to a room.
How to make it:
- Gather Your Petals: Use a colorful mix of dried rose petals, lavender buds, calendula, or cornflower petals.
- Make Your Cones: Roll squares of paper into cone shapes and secure them with a small piece of tape or a dot of glue. You can use pages from old books, sheet music, or simple kraft paper for a rustic look.
- Display Your Creation: Fill the cones with your petal mixture. Stand them up in a vintage crate or lay them in a flat woven basket near your entryway. It’s a beautiful, welcoming touch that also serves as a natural air freshener.

Your Dried Flower Decoration Toolkit
Having the right tools can make your decorating projects easier and more professional. Here is a summary of the useful supplies mentioned throughout this guide.
| Product Name | Brand | Use |
|---|---|---|
| Spray Acrylic Sealer | Aleene’s | An essential spray to seal fluffy grasses like pampas, preventing shedding and mess. |
| Dual Temp Mini Hot Glue Gun Kit | Gorilla | Perfect for precision gluing on wreaths and shadow boxes, with a strong bond for delicate stems. |
| Flower Drying Art Silica Gel | Activa | The best method for preserving the 3D shape and vibrant color of fresh flowers for displays. |
| Natural Jute Twine | Kinglake | Ideal for tying bunches for wall hangings and adding a perfect rustic touch to any project. |
| Floral Tape | Decora | A florist’s secret weapon for securing stems to slippery surfaces like metal hoops. |
Conclusion: Embracing Everlasting Beauty
Decorating with dried flowers is more than just a passing trend; it’s a celebration of nature’s artistry in all its stages. It’s a way to bring sustainable, low-maintenance, and deeply personal beauty into your home.
From the dramatic sweep of a pampas grass arrangement to the delicate detail of a single pressed flower, these preserved botanicals offer a unique combination of texture, warmth, and timeless style.
We hope these 12 ideas have inspired you to look at dry flowers decoration in a new light. You don’t need to be a professional florist to create something stunning.
Start with a simple project, let your creativity guide you, and enjoy the process of transforming your home with the enduring charm of dried flowers.
Your everlasting garden awaits. Which of these breathtaking ideas will you try first?