There’s a certain kind of magic woven into the delicate, papery petals of a dried flower. It’s a quiet, gentle beauty that speaks of sun-drenched fields, cherished memories, and the art of slowing down.
The dry flowers aesthetic is more than just a home decor trend; it’s a lifestyle choice that celebrates sustainability, nature, and a timeless, rustic elegance.
It’s about finding beauty in imperfection and bringing a piece of the garden’s soul into your home to enjoy forever.
Forget any outdated ideas of dusty, faded florals. The modern dry flowers aesthetic is all about texture, sculptural forms, and a sophisticated, muted color palette.
It’s about creating spaces that feel calm, connected to nature, and deeply personal. Best of all, this aesthetic is incredibly low-maintenance—no watering, no wilting, just everlasting beauty.
This guide is your complete introduction to mastering the dry flowers aesthetic. We will explore 12 enchanting and easy ways to incorporate these preserved botanicals into your home.
From grand, sweeping statements to small, personal touches, there is an idea here for every style and skill level. Get ready to transform your space with the enduring charm of dried flowers.
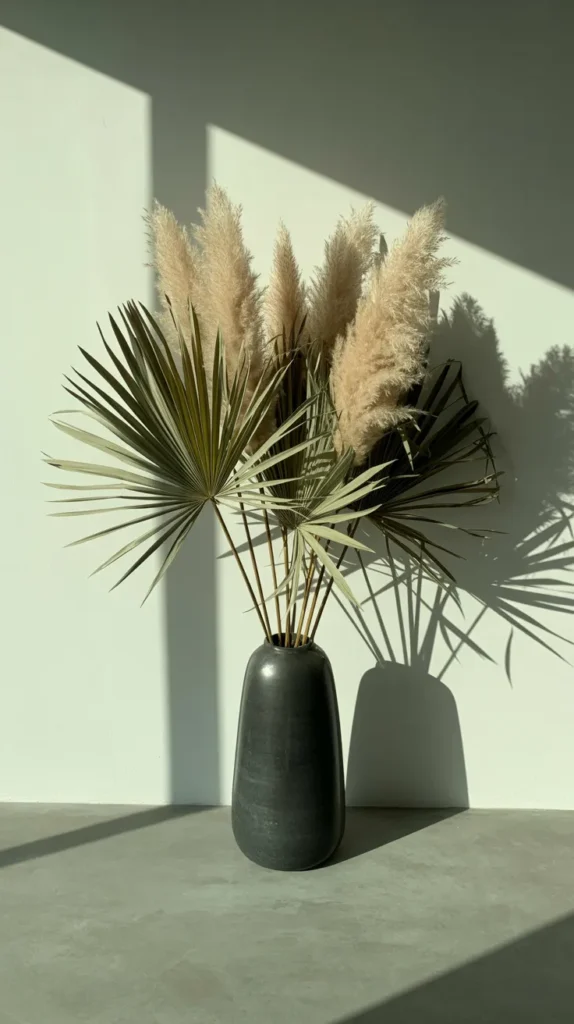
1. The Sculptural Statement Vase
This is the cornerstone of the dry flowers aesthetic. A single, large vase filled with dramatic, sculptural dried botanicals can instantly create a powerful focal point in any room. It’s an effortless way to add height, texture, and a touch of organic drama to a living room corner, an entryway, or a minimalist bedroom.
How to achieve this look:
- Go Big with Botanicals: Choose tall, structural stems. Fluffy pampas grass is a classic choice for its soft texture and impressive height. Dried palm spears, sun palms, and branches of lunaria (honesty plant) with their papery, iridescent pods also create a stunning visual impact.
- Select the Right Vessel: A heavy, opaque vase is your best friend here. Ceramic, stoneware, or terracotta vases not only provide the necessary weight to anchor tall stems but also add to the earthy, natural feel. A vase with a narrow neck can help keep the arrangement looking tidy and upright.
- Embrace Neutral Tones: For a chic, sophisticated take on the dry flowers aesthetic, stick to a palette of creams, beiges, soft whites, and sandy browns. This creates a calming, cohesive look that emphasizes shape and texture over color.
Pro-Tip: The only drawback to beautiful, fluffy pampas grass is its tendency to shed. To combat this, you can give the plumes a light misting of strong-hold hairspray.
For a more permanent, professional solution, a product like {Aleene’s Spray Acrylic Sealer} in a matte finish is perfect.
It provides a clear, protective coating that locks the delicate fibers in place without leaving a sticky residue, ensuring your statement piece stays beautiful and mess-free.
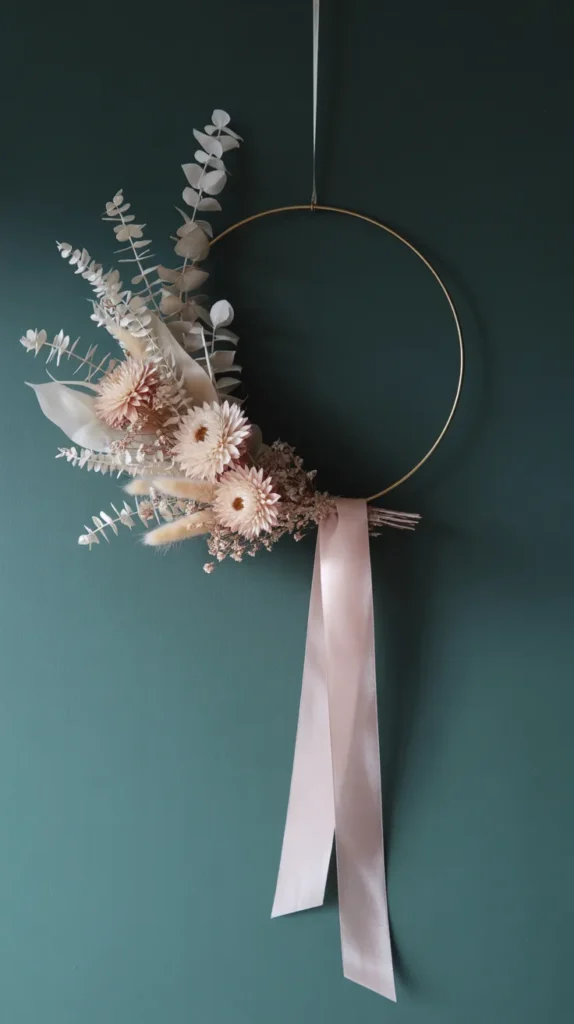
2. The Asymmetrical Hoop Wreath
The traditional wreath has been given a modern update within the dry flowers aesthetic. Instead of a full, dense ring, the modern floral hoop features an asymmetrical arrangement on a simple metal ring, leaving much of the hoop exposed.
This creates a beautiful contrast between the organic, rustic flowers and the sleek, geometric form of the hoop.
What you’ll need:
- A metal macrame hoop (gold, brass, or black)
- A selection of dried flowers (strawflowers, craspedia, ruscus)
- Dried greenery (eucalyptus, olive branches)
- Floral wire and green floral tape
Step-by-step:
- Prep Your Hoop: Attaching stems to a slippery metal hoop can be tricky. The secret is to wrap the section you plan to decorate with floral tape first. A product like {Decora Floral Tape} is essential; it sticks to itself when stretched and creates a grippy, non-slip surface for your flowers to adhere to.
- Create Small Bunches: Make a few small, hand-held bunches of your greenery and filler flowers.
- Attach to the Hoop: Use thin floral wire to attach your bunches to the taped section of the hoop. Typically, this is the bottom-left or bottom-right quadrant.
- Add Focal Flowers: Tuck in your more prominent flowers, like strawflowers or small roses, securing them with wire. Let some pieces, like eucalyptus or ruscus, trail off whimsically to enhance the asymmetrical look.
- Finish with a Ribbon: For an extra touch of elegance, tie a long, flowing silk or velvet ribbon to the floral cluster.
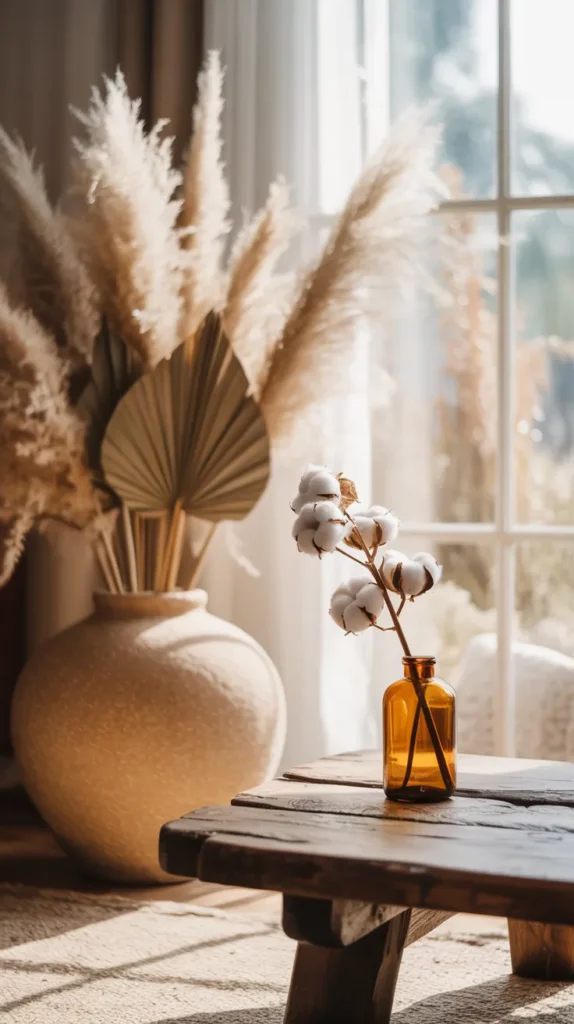
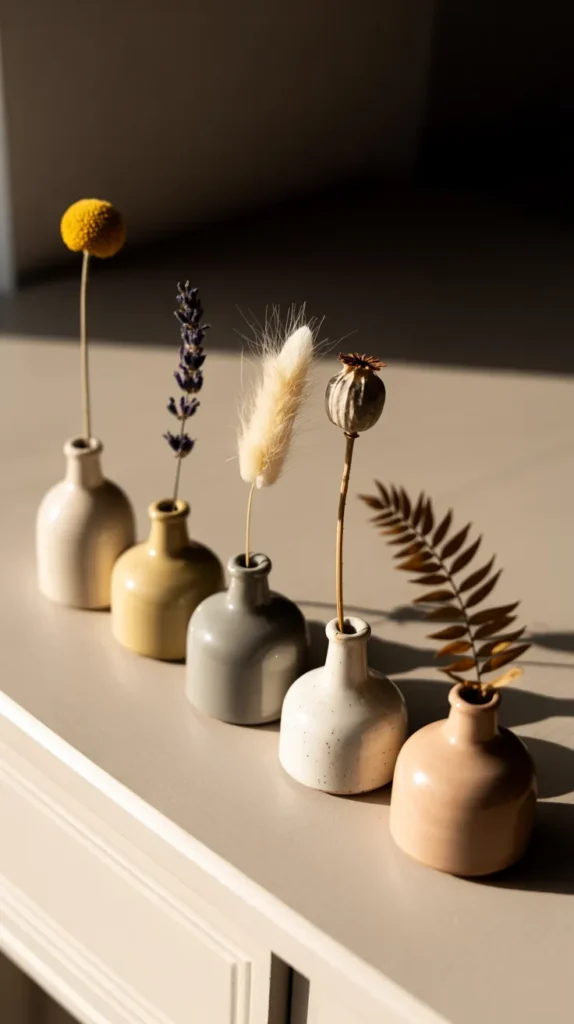
3. A Collection of Minimalist Bud Vases
The dry flowers aesthetic isn’t always about grand gestures. Sometimes, the most beautiful statements are the quietest.
A curated collection of small bud vases, each holding a single, unique dried stem, can create a stunning display on a mantelpiece, a windowsill, or scattered down the center of a dining table.
How to style this look:
- Gather Your Vessels: This is a perfect opportunity to showcase a collection of small bottles and vases. Mix and match different shapes, heights, and materials. Clear glass, amber glass, tiny ceramic pots, and even vintage brass vessels look wonderful together.
- Choose Individual Stems: Select your most interesting single stems. A single dried craspedia (billy button) offers a pop of color and a perfect spherical shape. A delicate sprig of lavender adds a hint of purple and a lovely scent. A fluffy bunny tail grass provides softness and texture.
- Arrange in Groupings: Cluster your bud vases in odd numbers—groups of 3, 5, or 7 are a classic design principle that feels balanced and natural. This simple styling trick creates a thoughtful and curated vignette.
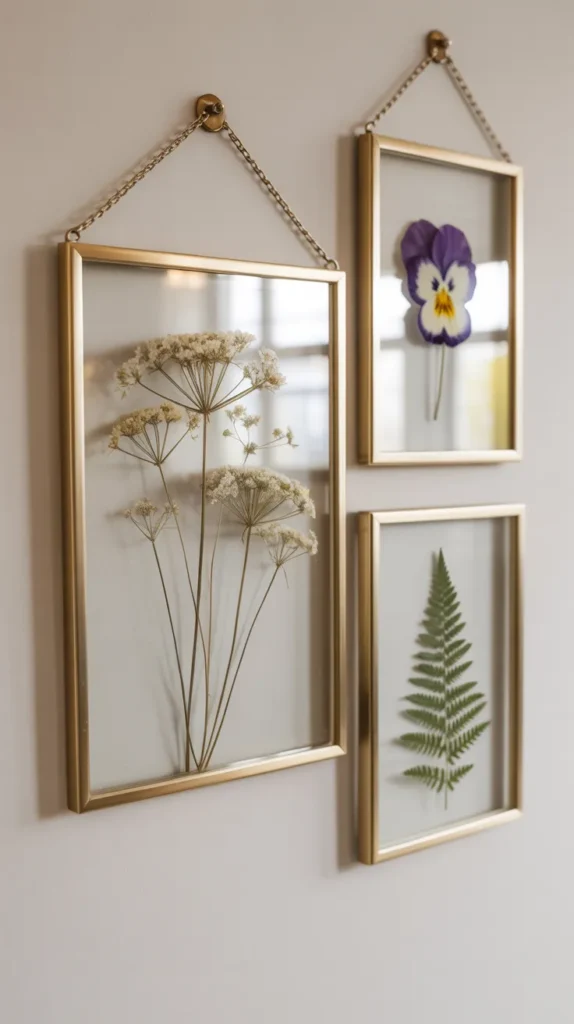
4. The “Floating” Pressed Flower Gallery
For a delicate, ethereal take on the dry flowers aesthetic, look no further than pressed flowers.
When sandwiched between two panes of glass in a “floating” frame, the botanicals appear to be suspended in mid-air. It’s a clean, modern, and sophisticated way to display the intricate, paper-thin beauty of individual petals and leaves.
How to create this:
- Press Your Flowers: You can press flowers the traditional way, inside a heavy book, but this can take weeks. For faster results and much better color retention, a microwave flower press is a fantastic tool. A press like the {Microfleur Max Microwave Flower Press} can dry flowers perfectly in just a few minutes, preserving their vibrant hues.
- Choose Your Frames: Select floating frames with thin metal or wood edges. Brass, gold, and black frames all complement this aesthetic beautifully.
- Arrange and Frame: Carefully clean both glass panes. Use tweezers for precise placement as you arrange your pressed flowers (ferns, cosmos, pansies, and Queen Anne’s lace are all stunning) on one of the panes. Place the second pane on top, secure it in the frame, and you’re done.
- Create a Gallery Wall: Hang a collection of these frames in a grid pattern to create a beautiful botanical gallery wall.
5. The Whimsical Hanging Flower Cloud
For a truly show-stopping piece of decor that embodies the dreamy side of the dry flowers aesthetic, create a hanging floral installation.
This “flower cloud” is a suspended arrangement that floats over a dining table, a bed, or in the corner of a room, creating a magical, fairytale-like atmosphere.
How to build it:
- The Foundation: A ball of chicken wire is the perfect lightweight base for your cloud. The open grid makes it easy to insert stems from all directions to achieve a full, rounded shape.
- The Flowers: The key is to use light, airy, and voluminous dried flowers. Dried baby’s breath (gypsophila) is the star here. Dried hydrangeas, smoke bush, and sea lavender also work well to add texture and volume without adding too much weight.
- The Assembly: Securely hang your chicken wire ball from the ceiling using strong, clear fishing line. Start by inserting your longer stems to establish the overall shape and size of your cloud. Then, fill in the gaps with shorter stems until the chicken wire is completely hidden.
- The Style: A monochromatic cloud of all-white baby’s breath is classic and ethereal. You can also mix in some colorful dried wildflowers for a “floating meadow” effect.

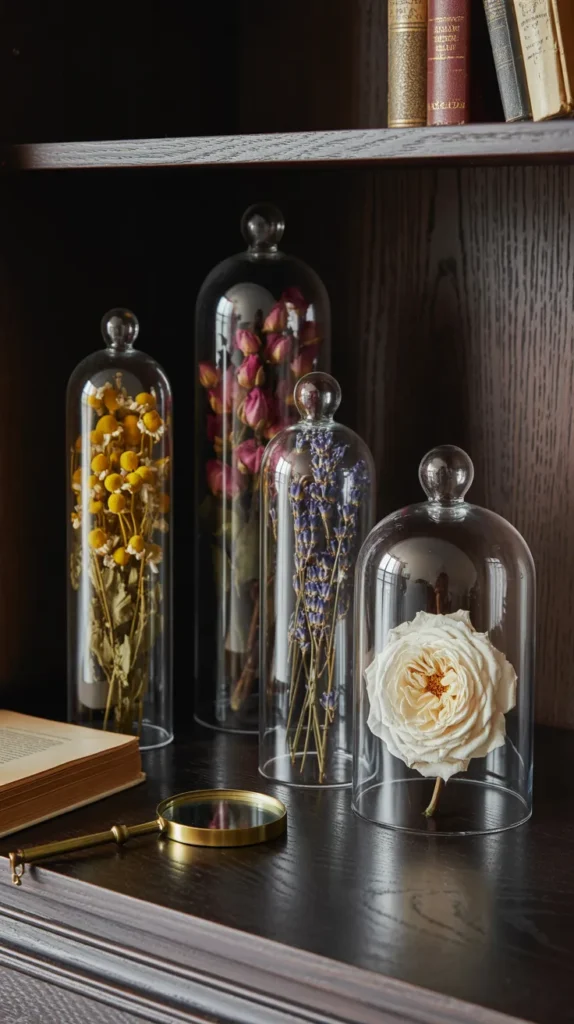
6. The Apothecary Jar Collection
Channel a vintage, scientific vibe by displaying dried botanicals in glass apothecary jars or under cloches (bell jars).
This method not only looks incredibly stylish but also protects more fragile specimens from dust and creates a “cabinet of curiosities” feel that is central to a layered dry flowers aesthetic.
How to style this:
- Select Your Glassware: Collect jars with lids in various shapes and sizes. Clear glass is classic, while amber or green glass adds a moody, vintage feel. A glass cloche with a wooden base is perfect for showcasing a single, special bloom.
- Choose Your Contents: Fill jars to the brim with loose dried flower heads like rosebuds, chamomile, or lavender for a block of color and texture. Alternatively, place a single, perfectly preserved 3D flower, like a silica-dried rose or dahlia, under a glass cloche to elevate it to the status of a scientific specimen.
- Create a Curated Vignette: Arrange a cluster of your filled jars on a bookshelf or sideboard. Style them with antique books, brass objects, and candles to create a beautiful, thoughtful display.
Pro-Tip: To get those flawlessly shaped 3D flowers for your cloche, you need to use silica gel. A product like {Activa Flower Drying Art Silica Gel} is a must-have.
This fine, sand-like desiccant draws moisture out of the petals rapidly, preserving the flower’s natural shape and vibrant color in a way that air-drying simply cannot match.
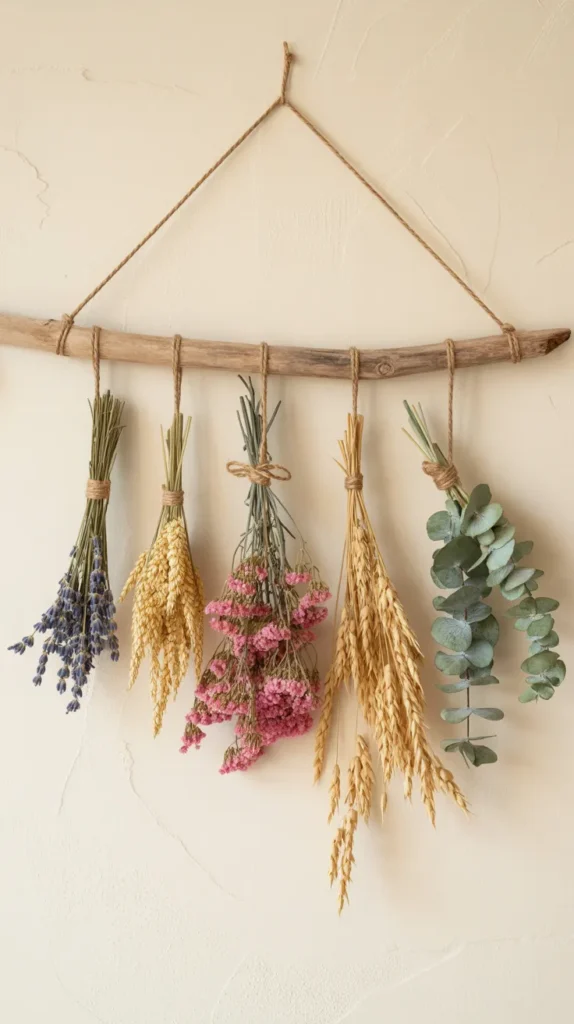
7. The Rustic Wall Tapestry
Create a piece of bohemian-inspired art for your walls with a hanging floral tapestry. This simple DIY project uses a found branch or a wooden dowel as a base, with bunches of dried flowers hanging down from it. It’s a fantastic, textural alternative to a traditional framed print.
How to make it:
- Find Your Base: A beautiful piece of driftwood found on a beach walk provides a natural, organic feel. A clean, simple wooden dowel works well for a more modern, Scandinavian take.
- Create Your Bunches: Make several small, hand-tied bouquets of dried flowers. Flowers with sturdy stems that hang straight, such as lavender, wheat, oats, statice, and eucalyptus, are ideal for this project.
- Assemble the Hanging: Tie each bunch to the branch using a natural fiber like jute twine. You can hang them all at the same length for a neat, uniform look, or vary the lengths to create a more dynamic, cascading effect.
- Hang Your Art: Attach a long piece of twine to both ends of the branch and hang it on a prominent wall.
Pro-Tip: To ensure your bunches are securely tied and to enhance the rustic dry flowers aesthetic, use a quality natural twine. {Kinglake Natural Jute Twine} is an excellent and affordable choice.
It’s strong, holds knots well, and its natural brown fiber perfectly complements the earthy tones of the botanicals.
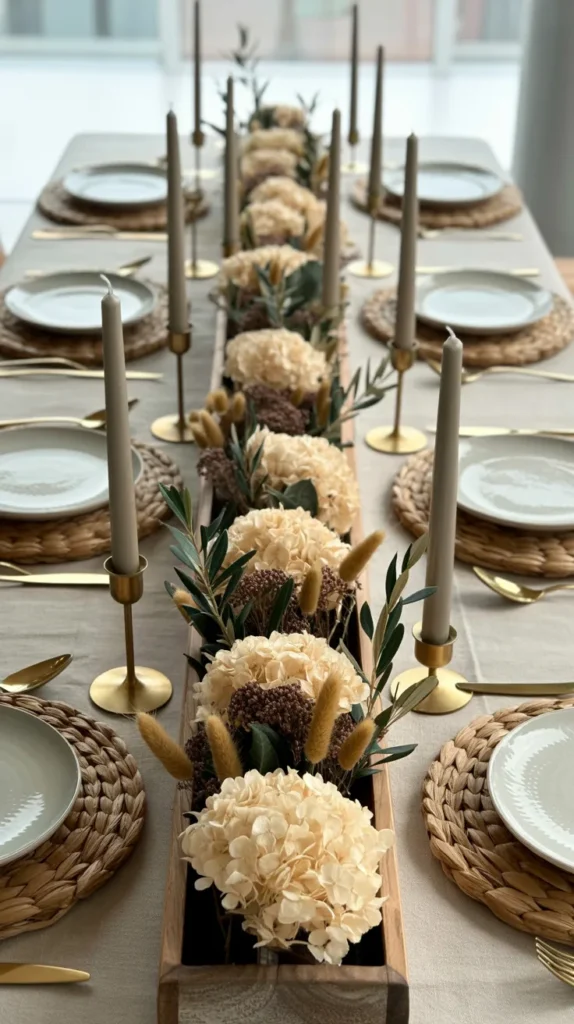
8. The Everlasting Centerpiece
A centerpiece made from dried flowers is a game-changer for home decor. It provides the beauty of a floral arrangement without any of the maintenance.
It will look stunning indefinitely, making it a perfect, sustainable option for a dining table, coffee table, or console.
How to create it:
- Choose a Low Vessel: For a dining table, a long, low trough-style vase or a rustic wooden box works well. This ensures guests can easily see and talk to each other across the table.
- Build Your Foundation: You can use a block of dry floral foam as your base. Start by inserting your greenery (like eucalyptus or olive branches) and filler flowers to establish the overall shape and size of the arrangement.
- Add Texture and Color: Once you have your shape, add your focal flowers and textural elements. Mix spiky sea holly, soft bunny tails, round craspedia, and fluffy pampas grass to create a rich, visually interesting composition.
- Make it Your Own: The beauty of a dried centerpiece is that it’s not static. You can easily add or swap out elements to match the seasons—add some dried orange slices for autumn or some red-berried stems for the holidays.
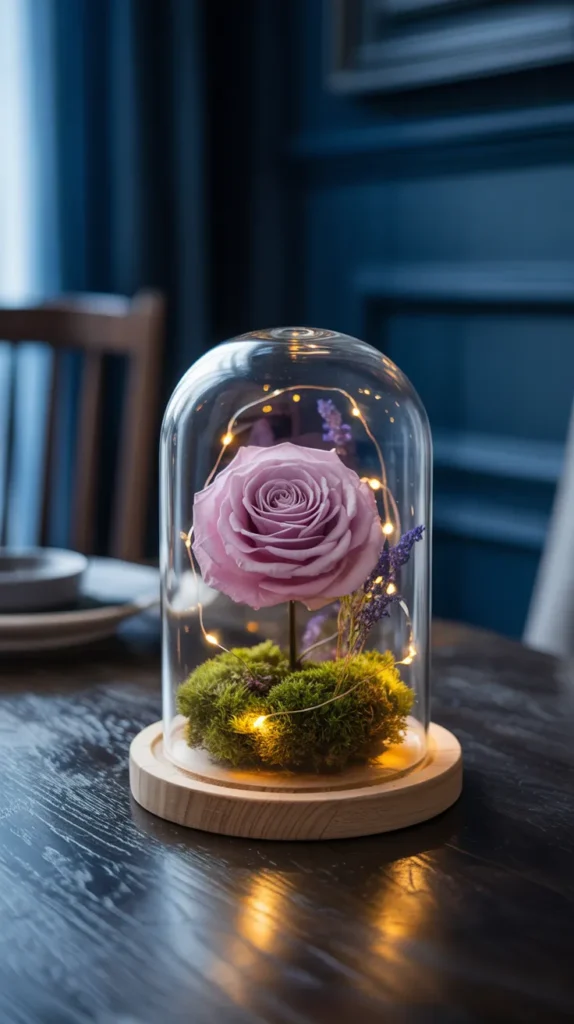
9. Dried Flower Cloches
A glass cloche, or bell jar, instantly elevates whatever it contains. Placing a small, curated arrangement of dried flowers under glass turns it into a precious, protected treasure.
It’s a small detail that perfectly captures the romantic and slightly scientific side of the dry flowers aesthetic.
How to create this:
- Choose Your Cloche: Find a glass cloche with a wooden or stone base.
- Build Your Scene: Use a hot glue gun to create a miniature landscape on the base. Start with a bit of preserved moss to create a natural ground cover.
- Place Your Flower: Secure a single, perfect 3D dried flower—like a silica-dried rose or ranunculus—in the center of the moss. You can add a few smaller buds or a dried mushroom for a whimsical touch.
- Add Magic (Optional): For an enchanting effect, weave a strand of tiny, battery-operated fairy lights in and around your arrangement before placing the glass dome over the top.
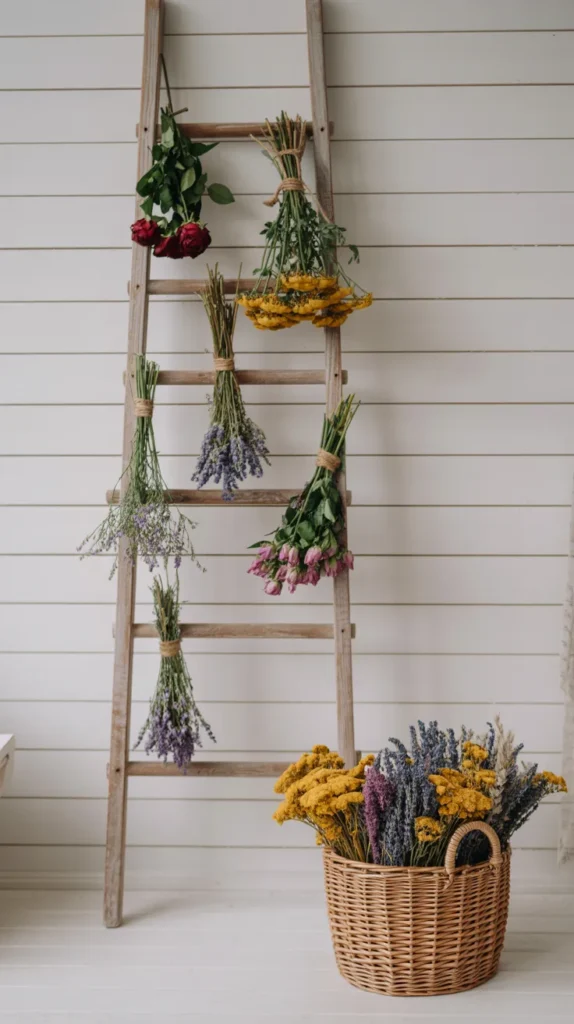
10. A Vertical Ladder Display
For a charming, rustic display that feels like a working artist’s or florist’s studio, use an old wooden ladder. Leaned against a wall, it becomes a unique vertical garden for displaying bunches of dried flowers.
How to style this:
- Find Your Ladder: A weathered, vintage wooden ladder is perfect for this look. The more rustic, the better.
- Hang Your Bunches: Tie medium-sized bunches of dried flowers (roses, lavender, yarrow, and globe thistle all look beautiful) with twine.
- Arrange Your Display: Tie the bunches to the rungs of the ladder, hanging them upside down at varying heights for a dynamic and visually interesting display. This is also a beautiful way to air-dry fresh flowers, combining function and decor.
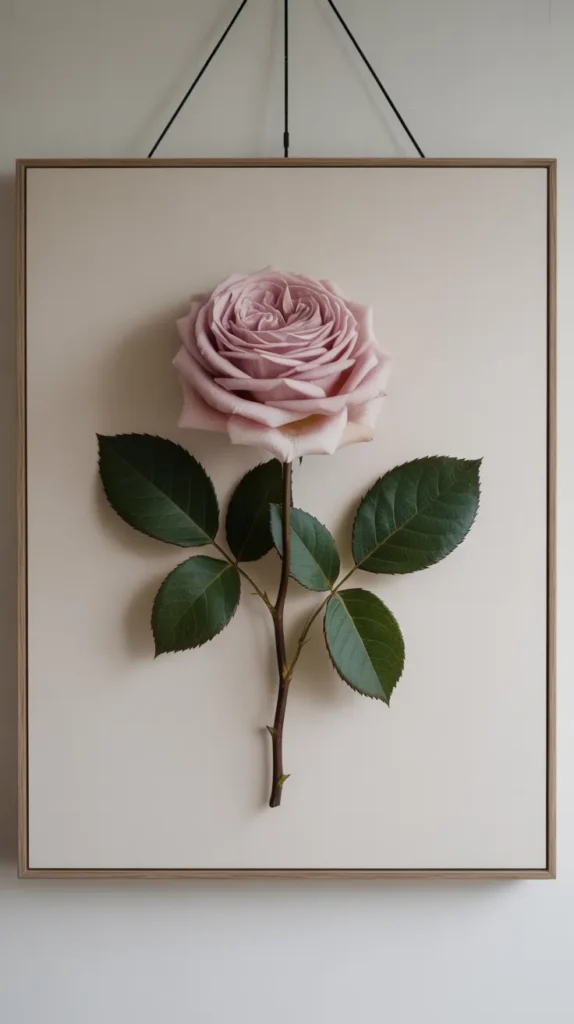
11. Framed Botanical Flat-Lays
This is a modern, graphic take on displaying dried flowers that feels like a piece of contemporary art. Instead of a traditional arrangement, this involves laying out pressed flowers in a neat, organized, or deconstructed fashion and framing the result.
How to create this:
- The Deconstructed Bouquet: Press all the flowers from a single bouquet. On a large piece of high-quality art paper, artfully arrange the pressed blooms to replicate the shape of the original bouquet, creating a flat, 2D version.
- The Specimen Grid: Press a variety of different flowers. Arrange them in a neat grid on your paper, and use a calligraphy pen to label each one with its scientific name for a vintage botanical chart look.
- Secure and Frame: Use a tiny dot of archival glue to secure each pressed flower to the paper. Frame your creation in a simple, modern frame. For this detailed work, a precision applicator glue like {Bearly Art Precision Craft Glue} is ideal. Its fine metal tip allows you to apply a minuscule, controlled amount of glue without any mess, keeping your artwork clean and professional.
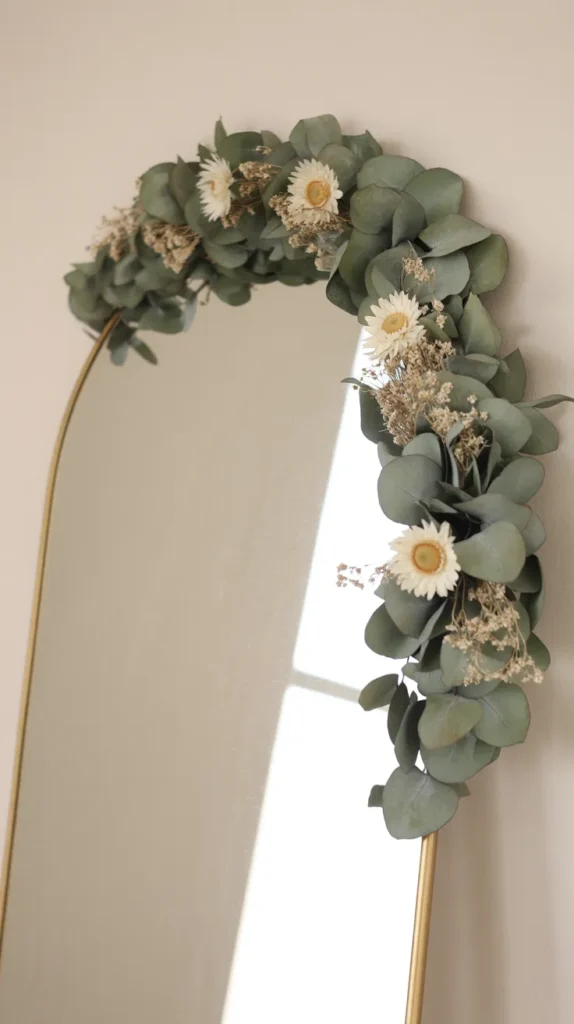
12. Textural Garland and Bunting
Drape a textural garland of dried botanicals over a mirror, a headboard, or a mantelpiece for a soft, romantic touch. This is a simple and forgiving project that adds a layer of natural beauty to any surface.
How to make this:
- The Base: Start with a long piece of jute twine or a flexible, pre-made garland base like faux eucalyptus.
- The Materials: Gather small, lightweight dried elements. Sprigs of lavender, small bundles of bunny tail grass, dried eucalyptus pods, and even dried orange slices work well.
- The Assembly: Use thin floral wire or a hot glue gun to attach your dried elements along the length of the twine or garland base. Overlap them to create a full, lush look.
- Drape and Enjoy: Drape your finished creation over a large mirror or window frame. The way it frames the object adds a beautiful, soft layer to your decor.
Your Dried Flower Aesthetic Toolkit
Having the right tools can make bringing your decorating ideas to life much easier and more enjoyable. Here is a summary of the helpful products mentioned throughout this guide.
| Product Name | Brand | Use |
|---|---|---|
| Spray Acrylic Sealer | Aleene’s | A matte spray that seals fluffy grasses like pampas, preventing shedding and mess. |
| Floral Tape | Decora | A florist’s essential for creating a non-slip surface on metal hoops for wreath making. |
| Microfleur Max Microwave Flower Press | Microfleur | For pressing flowers in minutes, not weeks, with superior color retention for framing projects. |
| Flower Drying Art Silica Gel | Activa | The best method for preserving the 3D shape and vibrant color of flowers for cloche displays. |
| Natural Jute Twine | Kinglake | Ideal for tying bunches for wall hangings and adding a perfect rustic touch to any project. |
| Precision Craft Glue | Bearly Art | A fine-tipped glue perfect for neatly securing delicate pressed flowers in framed art. |
Conclusion: Cultivate Your Own Timeless Style
The dry flowers aesthetic is a beautiful invitation to slow down, connect with the seasons, and fill your home with personal, meaningful objects.
It’s a sustainable and low-maintenance way to enjoy the beauty of botanicals year-round.
From a single stem in a bud vase to a dramatic hanging cloud, each of these ideas offers a unique way to express your creativity and love for nature.
We hope this guide has inspired you to see dried flowers not as a fleeting trend, but as a timeless medium for artistic expression.
Start small, find the projects that speak to you, and enjoy the process of creating a home that feels warm, authentic, and alive with everlasting beauty.
Your home is your canvas. Which of these enchanting ideas will you use to paint it with flowers?