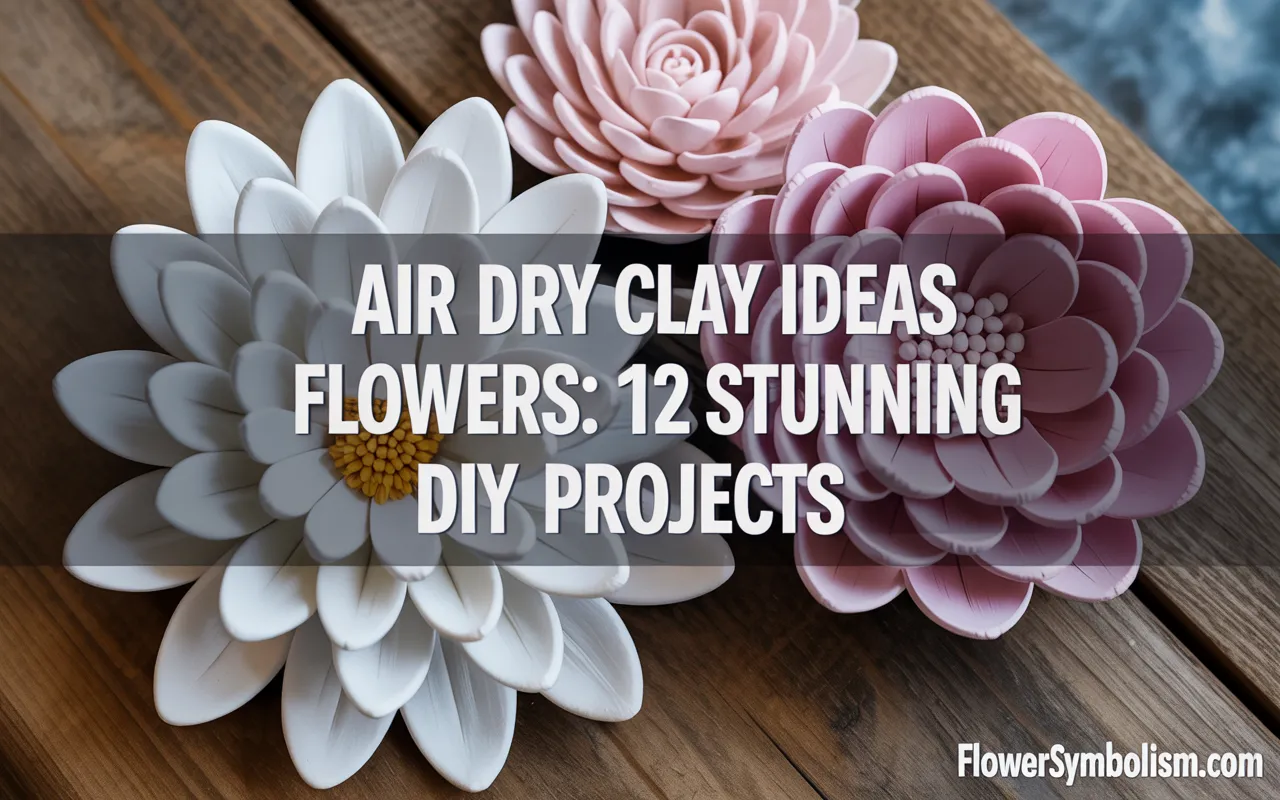
There is something deeply satisfying about taking a simple block of clay and transforming it into something beautiful. For nature lovers and crafters alike, the ability to create permanent blooms that never wilt is a magical skill.
If you have been scrolling through social media looking for inspiration, you have likely noticed that air dry clay ideas flowers are having a major moment.
From delicate jewelry to bold home decor, this versatile medium allows you to capture the beauty of the botanical world without needing a kiln or expensive equipment.
Air dry clay is the perfect medium for beginners. It is forgiving, affordable, and requires nothing more than air to cure.
Unlike polymer clay, which needs an oven, or ceramic clay, which needs a kiln, air dry clay simply sits out on your counter and hardens on its own.
This makes it incredibly accessible for a rainy day craft session or a weekend project. Whether you want to create a realistic bouquet for your dining table or a stylized floral accessory, the possibilities are endless.
In this guide, we are going to explore 12 stunning air dry clay ideas flowers projects that range from simple and minimalist to intricate and detailed.
We will walk you through the process step-by-step, recommend the best tools to use, and help you master the art of floral sculpting. Get ready to roll up your sleeves and grow a garden that lasts forever.

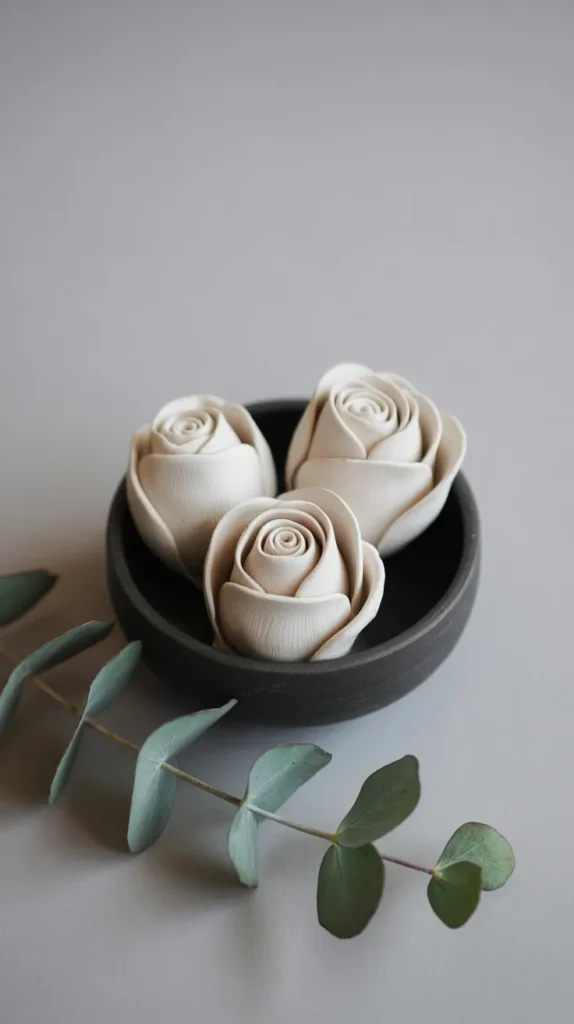
1. Minimalist Rosebud Vase Fillers
When starting out with air dry clay ideas flowers, it is best to begin with simple shapes. These minimalist rosebuds are elegant, easy to make, and look stunning when grouped together in a small vase.
They focus on the basic technique of layering petals, which is the foundation for almost all clay flower making.
Why this project is great:
- Beginner-Friendly: No complex tools needed.
- Elegant Aesthetic: Fits perfectly with modern or Scandinavian decor.
- Quick to Make: You can make a dozen in an hour.
Step-by-Step Instructions:
- Prepare the Clay: Start with a high-quality clay that allows for fine details. {Activa Plus Natural Self-Hardening Clay} is an excellent choice because it is exceptionally smooth and pliable, allowing you to roll petals quite thin without them cracking.
- Form the Center: Roll a small piece of clay into a teardrop shape. This will be the core of your rosebud.
- Create Petals: Pinch off small balls of clay and flatten them between your thumb and forefinger to create thin, oval petals. Make about 5-7 petals per bud.
- Layer: Wrap the first petal tightly around the teardrop center so it curls inward. Add the next petal opposite the first, slightly overlapping. Continue adding petals in a spiral pattern.
- Finish: Pinch the base to secure the layers and smooth it out. You can insert a wire into the base while it is wet if you want stems, or leave them as loose buds for bowl fillers.
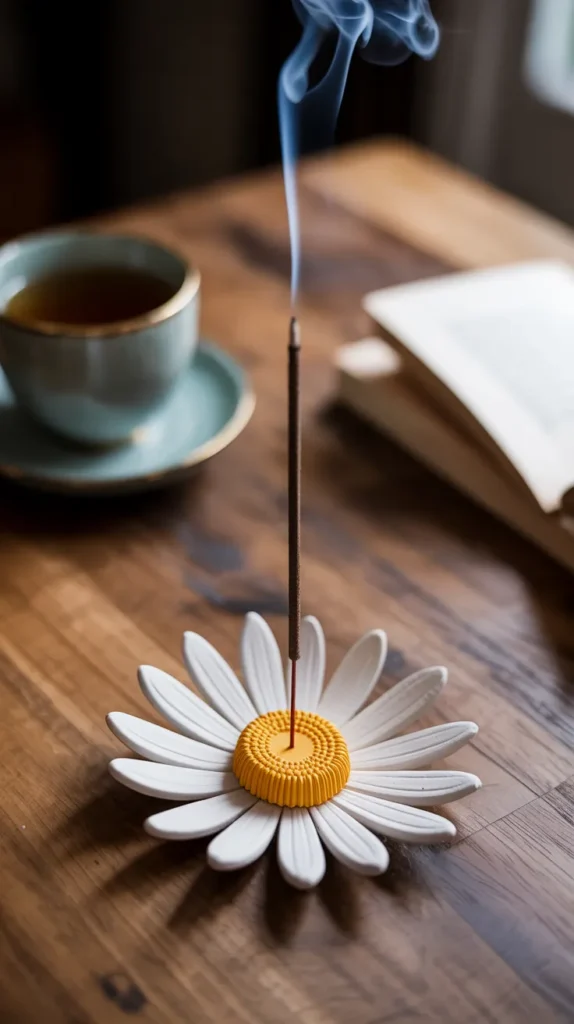
2. Textured Daisy Incense Holder
One of the most popular functional air dry clay ideas flowers is the incense holder. Shaping your clay into a wide, open flower like a daisy provides a perfect base to catch ash, combining beauty with utility.
What you will need:
- Air dry clay
- A rolling pin
- A toothpick or sculpting tool
- Acrylic paint (yellow and white)
Step-by-Step Instructions:
- The Center: Roll a ball of clay and flatten it into a thick disc. Use a toothbrush to stipple the surface, creating a pollen-like texture.
- The Petals: Roll a coil of clay and cut it into equal segments. Shape each segment into a long teardrop. Use a tool to press a line down the center of each petal for a vein.
- Assembly: Attach the petals to the underside of the center disc using a little water to bond the clay.
- The Function: While the clay is still wet, use an incense stick to poke a hole in the center of the textured disc at a slight angle.
- Dry and Paint: Let it dry completely, then paint the center sunny yellow and the petals crisp white. Seal with a varnish to protect it from ash.
3. Delicate Hydrangea Hair Pins
If you are looking for wearable air dry clay ideas flowers, hydrangeas are the perfect subject. Their blooms consist of clusters of tiny, four-petal flowers that are simple to sculpt but look intricate when grouped together.
How to make them:
- Tiny Balls: Roll four tiny balls of clay, each about the size of a peppercorn.
- Join: Press them together to form a square cluster.
- Shape: Use the end of a paintbrush or a ball tool to press into the center of each ball, flattening it outward to form a petal.
- Center Detail: Press a tiny seed bead or rhinestone into the center of the cluster.
- Attach: Once dry, glue the flowers onto bobby pins using a strong adhesive like {E6000 Craft Adhesive}. This industrial-strength glue creates a flexible, permanent bond that ensures your delicate clay creation won’t pop off the metal pin, even with daily use.
4. Realistic Succulent Pot
While technically not a flower in the traditional sense, succulents often form rosette shapes that mimic blooms. They are a staple in the world of air dry clay ideas flowers because they allow you to create greenery that never needs watering.
Step-by-Step Instructions:
- Color the Clay: Mix a little green acrylic paint into your white clay before you start sculpting. This gives a more realistic, uniform color than painting it afterward.
- Leaf Shapes: Create teardrop shapes of varying sizes.
- Build the Rosette: Start with a small cone of clay as a base. Attach small leaves at the top and work your way down, adding larger leaves in layers.
- Detail: Gently curve the tips of the leaves outward.
- Finish: Dust the tips with a little pink pastel chalk to mimic the sun-stress coloration often seen on real succulents. “Plant” your finished creation in a small terracotta pot filled with pebbles.
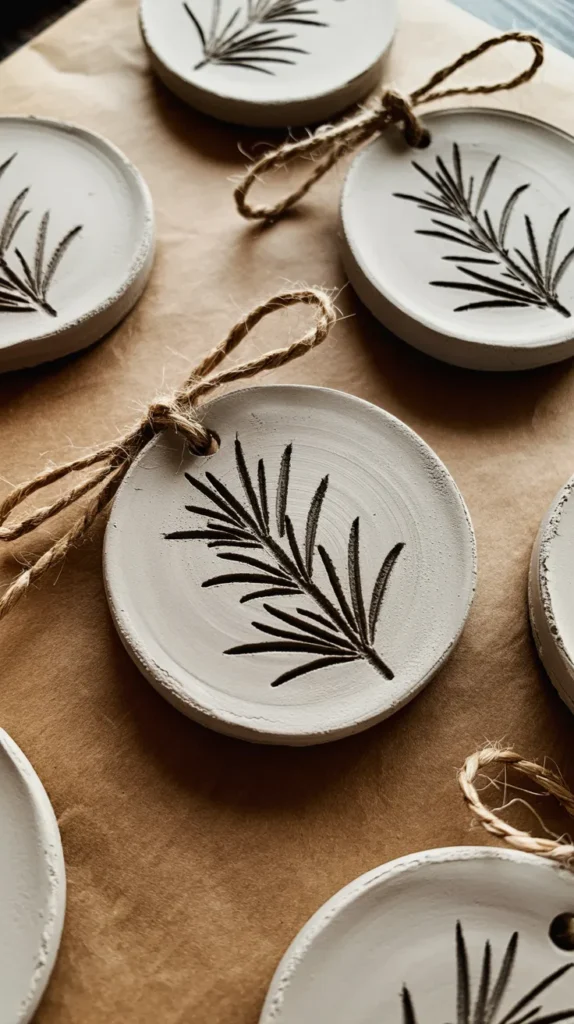
6. Stamped Botanical Coasters
Sometimes the best air dry clay ideas flowers involve using real nature to create the design. These coasters use an imprinting technique to capture the details of fresh blooms in the clay surface.
Why this works:
- Captures intricate veins and textures impossible to sculpt by hand.
- Creates a subtle, fossil-like appearance.
- Very beginner-friendly.
Step-by-Step Instructions:
- Roll: Roll your clay out to a thickness of about 1/4 inch.
- Forage: Find flowers or leaves with strong veins (lavender, fern, or rosemary work well).
- Press: Place the botanical on the clay and gently roll over it with your rolling pin to press it into the surface.
- Cut: Carefully peel the plant away, then use a round cutter to cut out the coaster shape.
- Seal: Because coasters need to be water-resistant, sealing is non-negotiable. {Mod Podge Dishwasher Safe Waterbased Sealer} is the perfect product for this. It cures to a hard, durable finish that protects your clay from condensation and spills, ensuring your coasters last a long time.

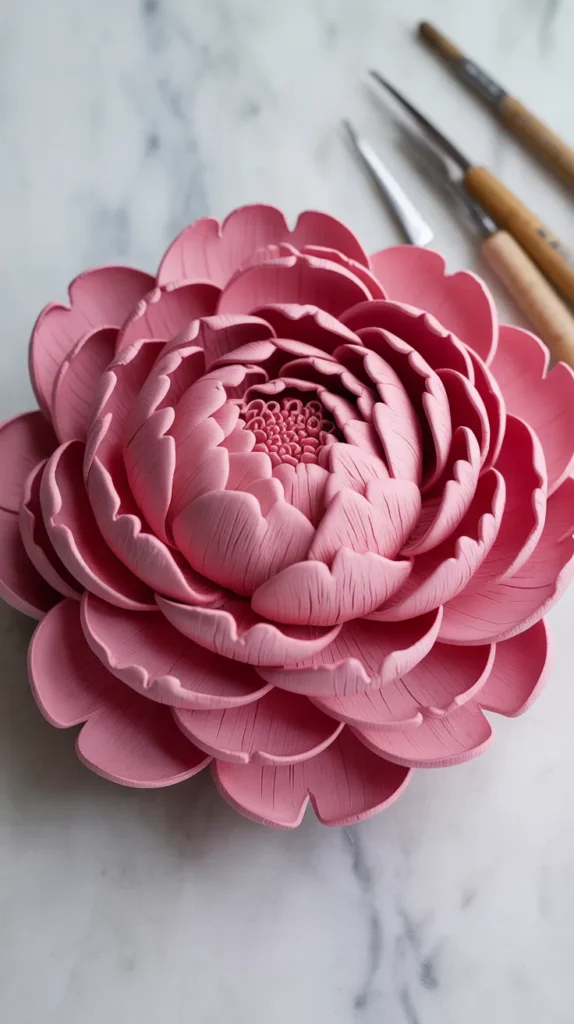
6. The “Forever” Peony
For those ready for a challenge, the peony is the queen of air dry clay ideas flowers. This project involves creating layers upon layers of ruffled petals to achieve a lush, full bloom that creates a massive impact.
Step-by-Step Instructions:
- The Core: Start with a tight ball of clay on a wire stem.
- Inner Ruffles: Create small, irregular petals with very thin, ruffled edges. Glue these tightly around the center ball.
- Outer Layers: Create larger, broader petals. Use a ball tool to thin the edges until they are almost transparent. Attach these layers, curving them outward to create volume.
- Smoothing: Because this is a larger flower, you might have seams or cracks. {Mont Marte Modeling Paste} is a fantastic aid here. You can use it to smooth out joins at the base or add extra texture to the petals before painting. It acts like a filler and helps create a seamless, professional finish.
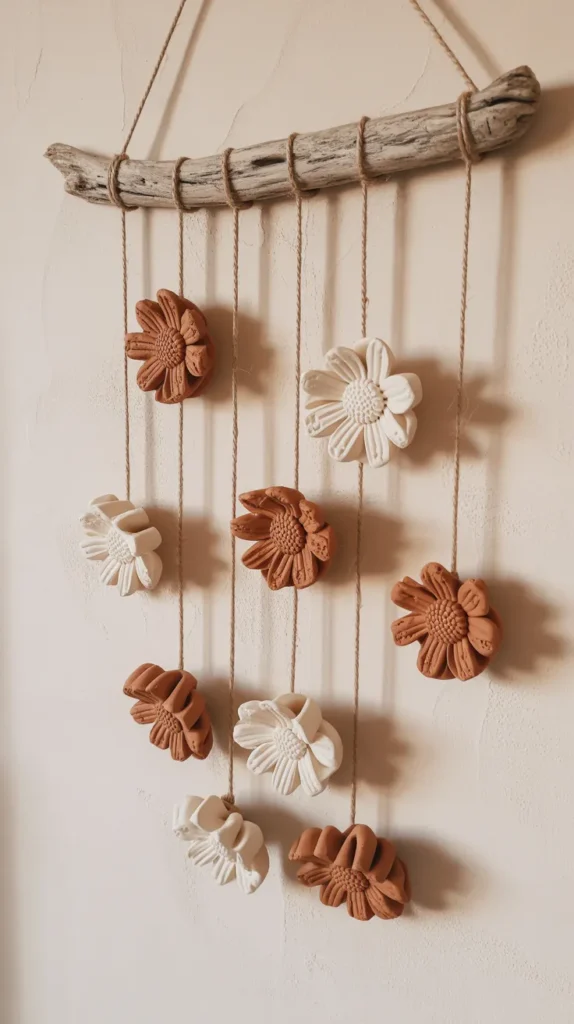
7. Clay Flower Wall Hanging
Combine your floral creations into a piece of bohemian wall art. This project allows you to showcase a variety of different air dry clay ideas flowers in one cohesive display.
How to assemble:
- Sculpt: Create a variety of flat-backed flowers (daisies, anemones, simple five-petal blooms).
- Pierce: Before they dry, poke two holes near the center of each flower using a skewer.
- String: Once dry and painted, thread the flowers onto lengths of jute twine. Knot the twine behind each flower to hold it in place.
- Hang: Tie the strings to a piece of driftwood or a copper pipe to create a cascading floral curtain.
8. Sculpted Tulip Pendant
Tulips have a clean, architectural shape that translates beautifully into jewelry. This project focuses on 3D hollow sculpting, a great skill to learn in your journey of air dry clay ideas flowers.
Step-by-Step Instructions:
- The Form: Start with a small ball of clay on the end of a pencil handle. This helps maintain the hollow cup shape.
- Inner Petals: Flatten three oval pieces of clay. Press them onto the core ball, smoothing the seams at the base but leaving the tops separate.
- Outer Petals: Add three more petals in the gaps between the first three.
- Finish: Gently slide the flower off the pencil. Insert a metal eye pin into the top before it dries so you can attach it to a chain later. Paint in vibrant spring colors.

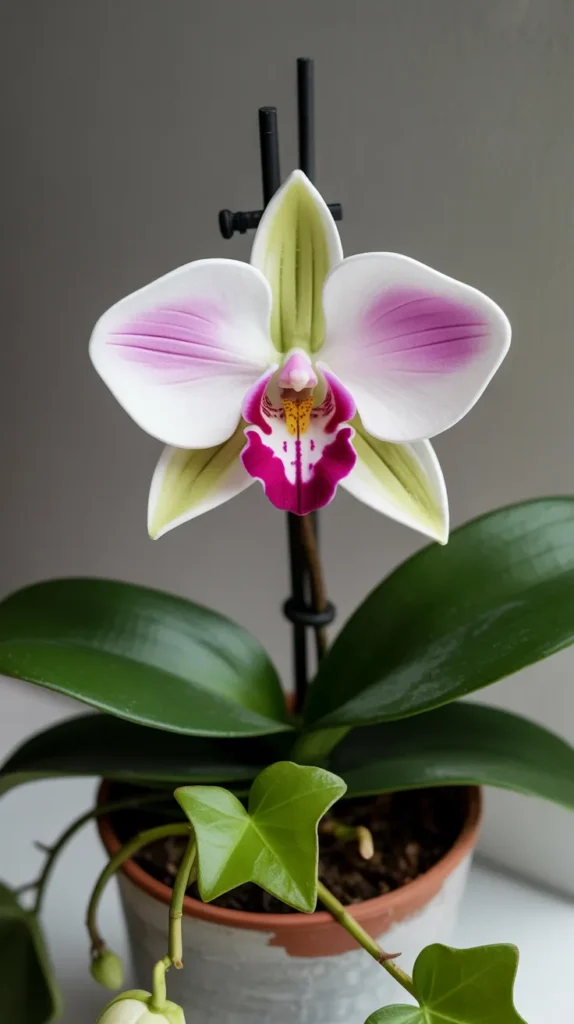
9. Orchid Pot Stake
Orchids are notorious for losing their blooms, leaving you with just a pot of green leaves for months. One of the cleverest air dry clay ideas flowers is to sculpt a permanent orchid bloom to attach to a stake, keeping your plant looking colorful year-round.
How to create it:
- Study the Anatomy: Orchids have specific symmetry—three sepals behind and three petals in front (one being the intricate “lip”).
- Wire Frame: Build the center column on a piece of wire.
- Attach Petals: Cut the specific petal shapes from thinly rolled clay and attach them to the center.
- Dry: Hang the wire upside down while drying so gravity helps the petals curve naturally.
- Paint: Use watercolor paints to achieve the translucent, spotted look of a real orchid. Attach the wire to a green wooden stake and insert it into your plant pot.
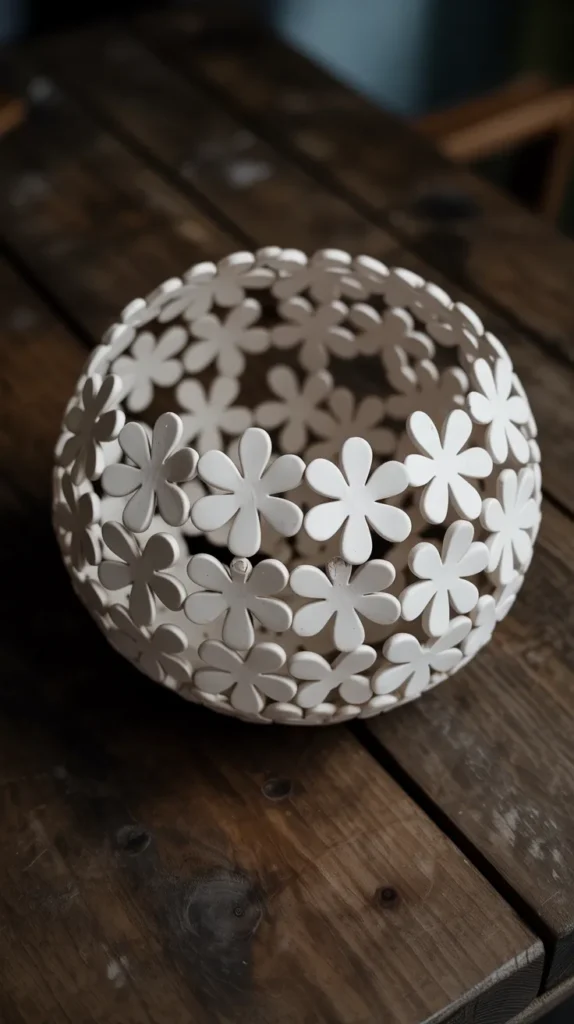
10. Textured Clay Flower Bowl
Instead of making a flower, why not make a bowl out of flowers? This intricate project involves joining many small blooms together to form a vessel, creating one of the most unique air dry clay ideas flowers.
Step-by-Step Instructions:
- The Mold: Cover a bowl with plastic wrap to use as a form.
- Mass Produce: Sculpt about 20-30 small, simple flowers.
- Assemble: Place the clay flowers onto the inverted bowl mold. Press the edges of the petals together where they touch.
- Secure: Ensure every flower connects to at least 2-3 others. Add small clay leaves to fill gaps and strengthen the structure.
- Dry: Let it dry completely on the mold before gently popping it off.
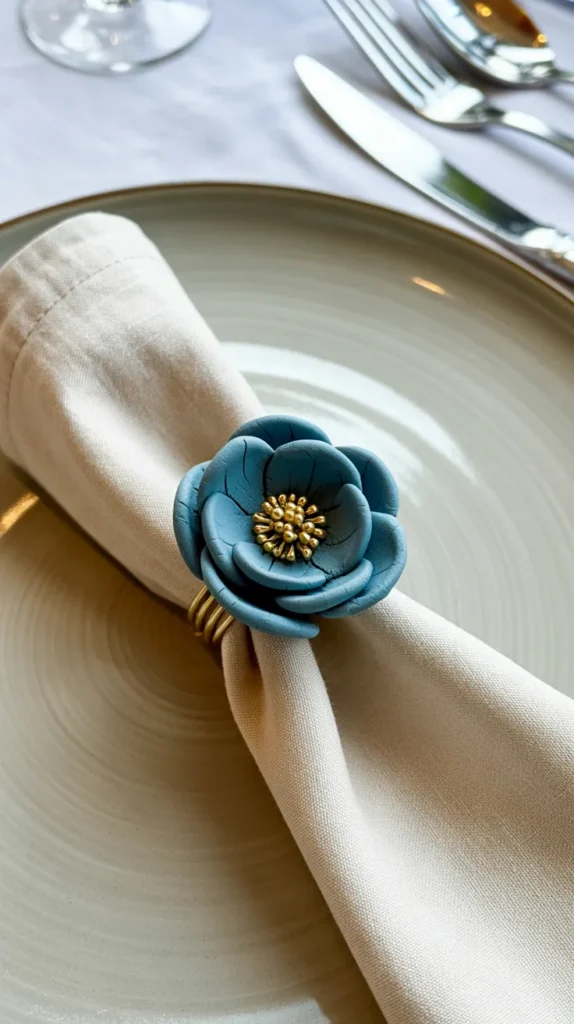
11. Botanical Napkin Rings
Elevate your dining table with these structured, elegant napkin rings. This is a functional application of air dry clay ideas flowers that adds a sophisticated touch to dinner parties.
How to make them:
- The Ring: Roll a thick snake of clay and form it into a ring. Use an empty toilet paper roll as a form to keep the circle shape while drying.
- The Flower: Sculpt a simple flat flower, like a sunflower or daisy.
- Join: Score the surface of the ring and the back of the flower. Apply a little water and press the flower firmly onto the ring.
- Seal: Paint and seal well to protect from food stains.
12. Imprinted Gift Tags
For a quick and satisfying project, create custom gift tags using botanical impressions. These little tags add a handmade touch to any present and are a wonderful way to use up scrap clay from your other air dry clay ideas flowers projects.
Step-by-Step Instructions:
- Roll: Roll out small medallions of clay.
- Impress: Press a small flower or leaf into the surface.
- Shape: Cut into a tag shape and poke a hole for string.
- Highlight: Once dry, paint the tag with diluted brown acrylic paint and immediately wipe it off. The paint will remain in the deep impressions, highlighting the botanical details. Use a set of {AIT Art Select Paintbrushes} for this step. Their fine tips allow you to get the dark wash exactly where you need it without making a mess, ensuring your intricate impressions pop.
Your Air Dry Clay Toolkit
To ensure your floral creations turn out perfectly, having the right supplies is essential. Here is a summary of the helpful products mentioned in this guide.
| Product Name | Brand | Best Use |
|---|---|---|
| Plus Natural Self-Hardening Clay | Activa | The best all-around clay for fine details; dries strong and smooth. |
| Craft Adhesive | E6000 | Industrial strength glue for attaching clay flowers to metal hair pins or jewelry findings. |
| Dishwasher Safe Waterbased Sealer | Mod Podge | Essential for waterproofing functional items like coasters. |
| Modeling Paste | Mont Marte | Great for smoothing seams on large flowers or adding extra surface texture. |
| Select Paintbrush Set | AIT Art | Ideal for applying fine details and washes to highlight botanical impressions. |
Conclusion: Let Your Creativity Bloom
There is no limit to what you can create once you master the basics of sculpting air dry clay ideas flowers. From the simplicity of a stamped coaster to the complex beauty of a peony, each project offers a chance to slow down and make something with your hands.
Remember, clay is a forgiving medium. If a petal doesn’t look right, simply roll it up and try again. Don’t be afraid to experiment with different paints, textures, and forms. As you practice, you will find your own unique style.
So, clear off your kitchen table, grab a pack of clay, and start sculpting. Which of these stunning floral projects will you try first?