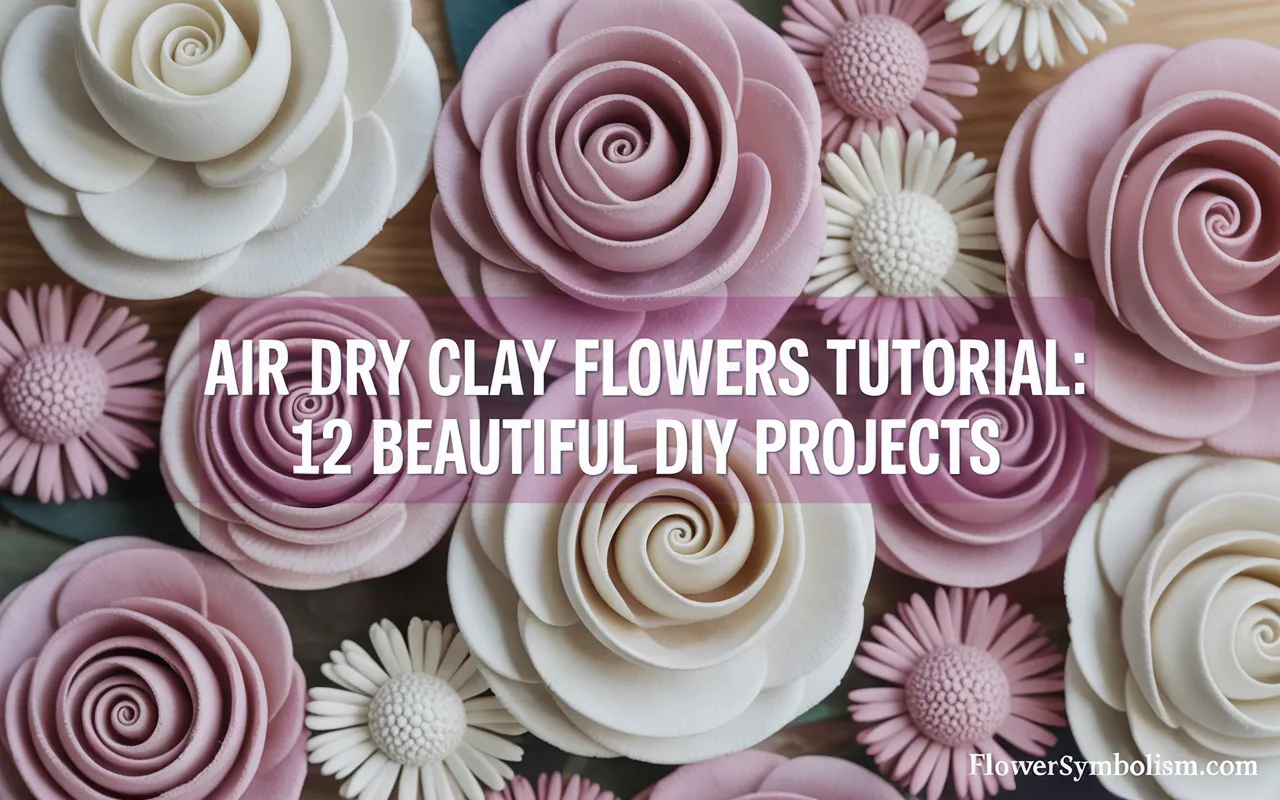
Have you ever walked past a pottery studio or scrolled through Instagram and marveled at delicate, ceramic-like flowers, wishing you could create something just as beautiful? The good news is, you don’t need a kiln, a pottery wheel, or years of experience to make stunning floral art.
With this air dry clay flowers tutorial, you can craft everlasting blooms right at your kitchen table.
Air dry clay is a magical medium. It’s accessible, affordable, and incredibly forgiving, making it perfect for beginners and seasoned crafters alike.
Unlike traditional polymer clay that requires baking or ceramic clay that needs firing, air dry clay simply hardens when exposed to air.
This means you can shape, mold, and texture your petals, let them sit overnight, and wake up to a permanent piece of art ready for painting.
In this comprehensive guide, we will walk you through 12 unique projects, ranging from simple minimalist designs to intricate, realistic bouquets.
Whether you want to make custom jewelry, home decor, or personalized gifts, this air dry clay flowers tutorial has something for everyone.
We’ll cover the best tools, techniques for creating lifelike textures, and tips for sealing your work to ensure it lasts for years. Grab your clay, roll up your sleeves, and let’s start sculpting a garden that never wilts.

Getting Started: The Essentials
Before we dive into the projects, let’s talk about the clay itself. Not all air dry clays are created equal. For flower making, you want a clay that is smooth, pliable, and capable of holding fine details without cracking as it dries.
We highly recommend {Activa Plus Natural Self-Hardening Clay}. It has a wonderfully fine grain that allows you to roll petals paper-thin, which is essential for a realistic look. It dries to a durable, hard finish and can be painted, sanded, and varnished easily.
You’ll also need a few basic tools:
- A rolling pin or a glass jar
- A small knife or clay sculpting tools
- A bowl of water (for smoothing cracks)
- Parchment paper (to work on)
- Acrylic paints and brushes
Now, let’s jump into our air dry clay flowers tutorial projects!
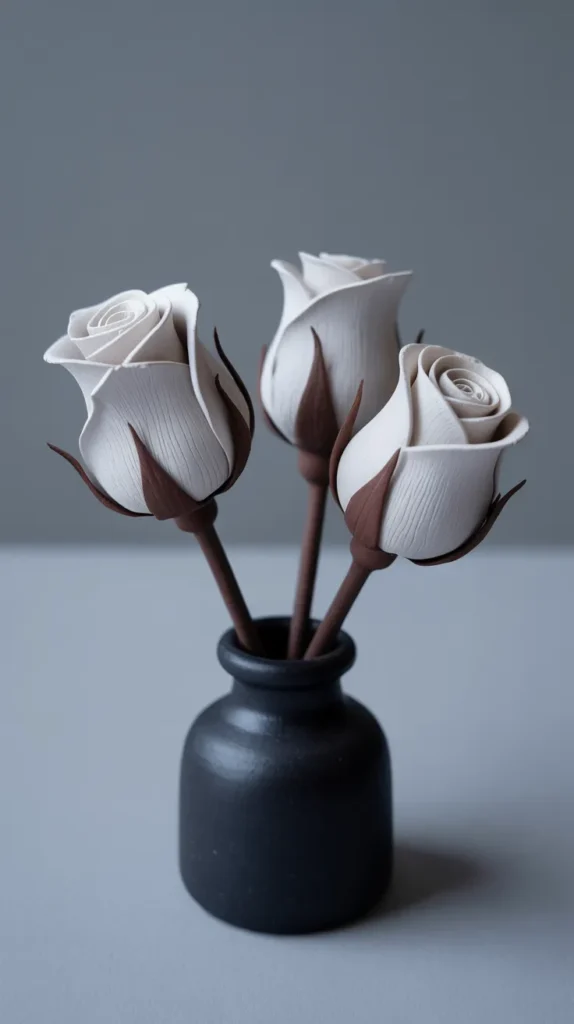
1. Minimalist White Rosebud Vase Filler
Let’s start with a classic. This project is the perfect introduction to our air dry clay flowers tutorial because it focuses on the fundamental technique of petal layering. These simple white rosebuds look incredibly chic when grouped together in a small bud vase.
Difficulty: Beginner
Why we love it:
- Teaches the basics of petal shaping.
- Looks elegant even without painting.
- Perfect for modern, minimalist decor.
Step-by-Step Instructions:
- Create the Center: Roll a small ball of clay into a teardrop shape. This will be the bud’s center.
- Form the Petals: Pinch off small pieces of clay and flatten them into thin, oval shapes. The edges should be thinner than the center of the petal.
- Layering: Wrap one petal tightly around the teardrop center. Take a second petal and wrap it opposite the first, slightly overlapping.
- Build the Bud: Continue adding petals, creating a spiral pattern. For a tight bud, use 3-5 petals.
- Secure and Dry: Pinch the base of the flower to secure the layers together. Insert a piece of floral wire into the base while the clay is still wet if you want stems, or simply let them dry flat to use as table scatter.
- Smooth: Use a drop of water on your finger to smooth out any fingerprints. Let dry for 24 hours.
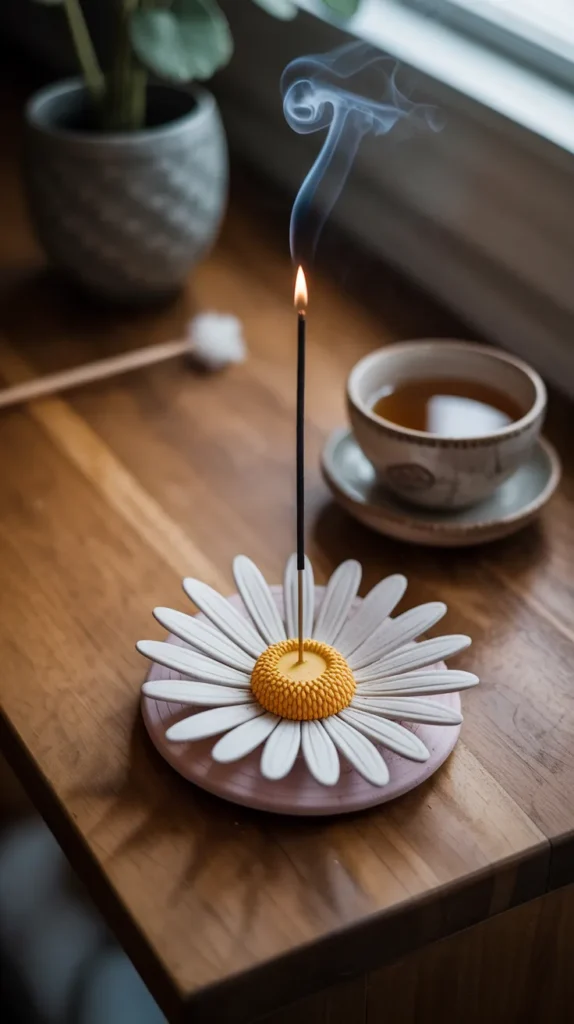
2. Textured Daisy Incense Holder
This project combines beauty with functionality. In this air dry clay flowers tutorial, we’ll create a large, open daisy that serves as a charming holder for your incense sticks. It creates a serene, spa-like vibe in any room.
Difficulty: Beginner
Why we love it:
- Functional home decor.
- Great for experimenting with texture.
- Makes a lovely handmade gift.
Step-by-Step Instructions:
- The Base: Roll a ball of clay and flatten it into a thick disc (about 0.5 cm thick). This is the center of your daisy.
- Texture the Center: Use a toothbrush or a stippling tool to create a rough, pollen-like texture on the disc.
- The Petals: Roll out a sausage of clay and cut it into equal segments. Roll each segment into a ball, then flatten into a long teardrop shape. Use a toothpick to press a central vein down the middle of each petal.
- Assembly: Attach the petals to the underside of the textured center disc. Use a little water or “slip” (water mixed with clay) to act as glue.
- Add the Hole: While the clay is wet, use an incense stick to poke a hole in the center of the textured disc at a slight angle.
- Dry: Let it dry completely before painting the center yellow and the petals white.
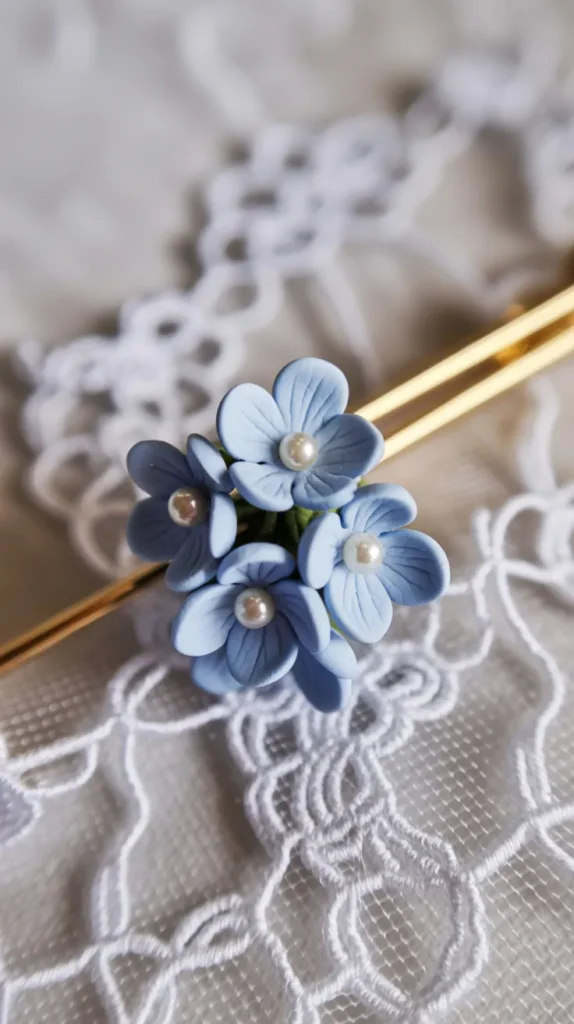
3. Delicate Hydrangea Hair Pins
Hydrangeas are loved for their clusters of tiny, four-petal flowers. In this section of our air dry clay flowers tutorial, we will make miniature versions to attach to bobby pins or hair clips. These are perfect for weddings or spring accessories.
Difficulty: Intermediate
Why we love it:
- Requires precision and delicate work.
- Creates beautiful wearable art.
- Uses very little clay.
Step-by-Step Instructions:
- Small Scale: Roll four tiny balls of clay, each about the size of a peppercorn.
- Join Them: Press the four balls together to form a square.
- Shape the Petals: Use a rounded tool or the end of a paintbrush to press into the center of each ball, flattening it outwards to form a petal shape. You should end up with a four-petaled flower.
- Add Detail: Press a tiny seed bead into the very center of the cluster for a touch of sparkle.
- Dry and Mount: Let the flowers dry completely. Once hard, use a strong glue to attach them to the flat pad of a bobby pin. A glue like {E6000 Craft Adhesive} is essential here. It provides an industrial-strength bond that ensures your delicate clay flower won’t pop off the metal pin, even with daily wear.
- Paint: Paint in soft pastel blues, purples, or pinks.
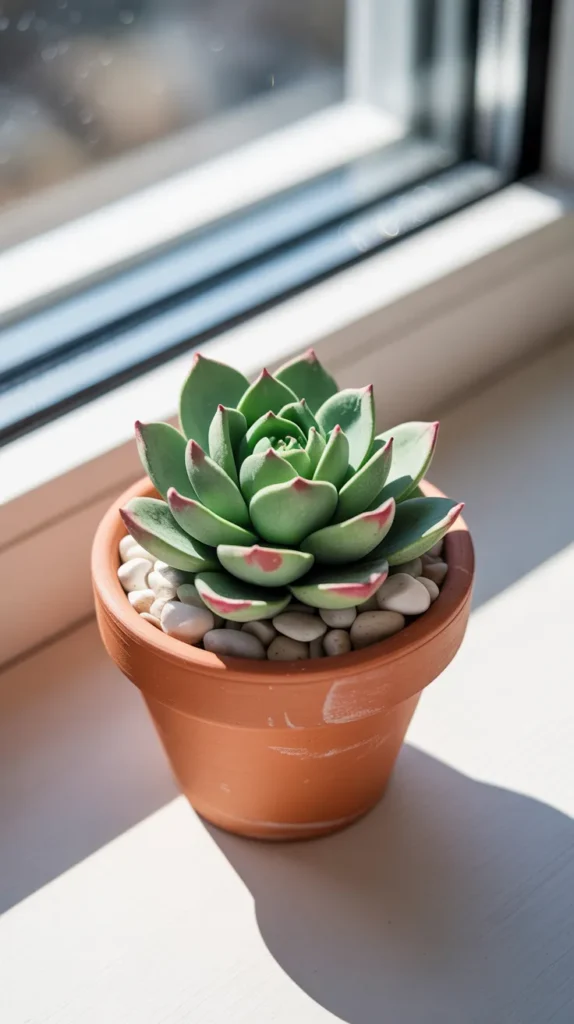
4. Realistic Succulent Pot
Technically not a flower, but succulents are a botanical favorite that fits perfectly into this air dry clay flowers tutorial. Clay succulents are fantastic because they capture the thick, fleshy look of the real plant perfectly, but you never have to worry about watering them!
Difficulty: Intermediate
Why we love it:
- Great for learning to blend colors.
- Looks extremely realistic.
- Adds greenery to your desk.
Step-by-Step Instructions:
- Color Mixing: Mix a small amount of green acrylic paint into your white clay before sculpting. This gives a more natural, uniform color than painting afterwards.
- Leaf Shapes: Create teardrop shapes of varying sizes. You’ll need small ones for the center and larger ones for the outer layers.
- Building the Rosette: Start with a small cone of clay as a base. Attach the smallest leaves at the top, pressing them onto the cone.
- Layering Down: Work your way down the cone, adding layers of larger leaves. Place them in between the leaves of the previous row (brick-laying pattern).
- Finishing Touches: Once built, use your fingers to gently curve the tips of the leaves outward. Dust the tips with a little pink pastel chalk or eyeshadow before sealing to mimic the sun-stressed look of real succulents.
- Potting: “Plant” your finished clay succulent in a small terracotta pot filled with pebbles.
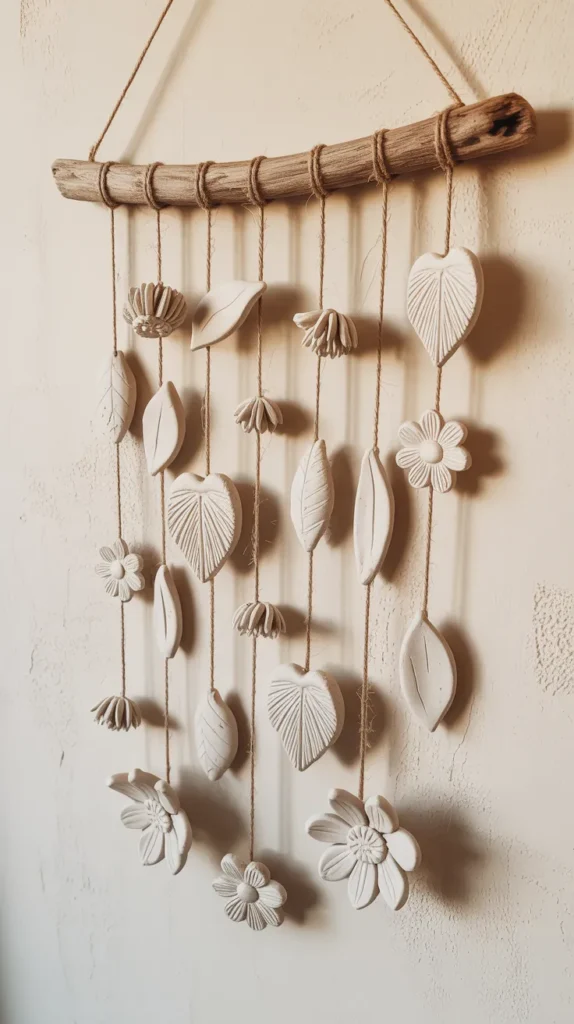
5. Clay Flower Wall Hanging
For a larger statement piece, we’ll combine multiple blooms into a boho wall hanging. This project in our air dry clay flowers tutorial allows you to experiment with different flower shapes and create a cohesive piece of wall art.
Difficulty: Advanced
Why we love it:
- A substantial decor piece.
- Allows for lots of creativity in composition.
- Combines clay with natural textures like driftwood and twine.
Step-by-Step Instructions:
- Make a Variety: Use the techniques from the previous steps to make a collection of roses, daisies, and simple five-petal blossoms. Make about 7-10 flowers of different sizes.
- Poke Holes: Crucial Step: Before the flowers dry, poke two holes near the center of each flower using a skewer. This will allow you to sew or tie them onto the hanging later.
- Create Leaves: Cut leaf shapes out of flattened clay and create vein textures with a knife. Poke holes in these as well.
- Dry: Let everything dry for 24-48 hours.
- Assembly: Tie strands of jute twine to a piece of driftwood. Thread the twine through the holes in your dried flowers and leaves, knotting them in place at different heights to create a cascading effect.
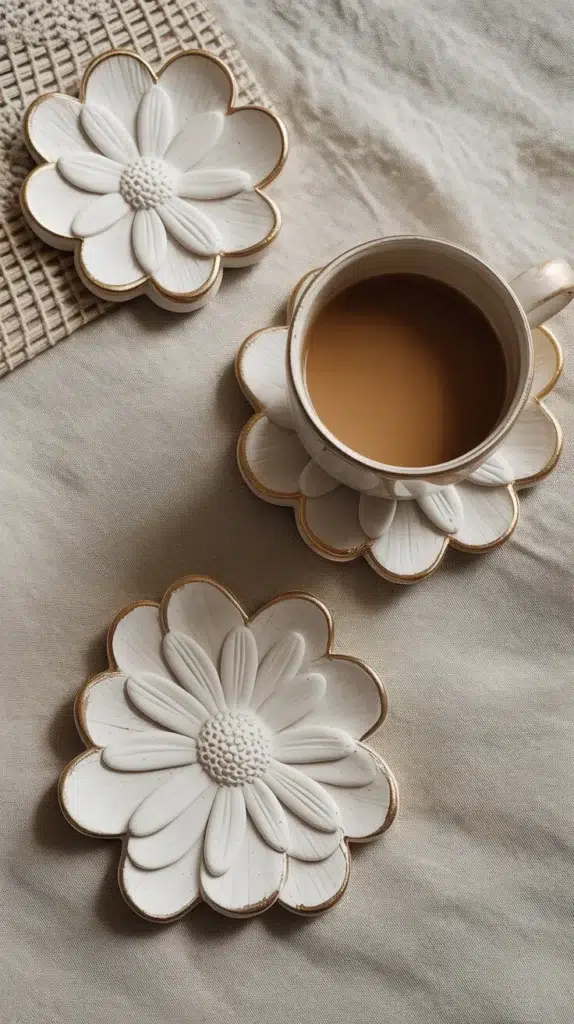
6. Stamped Clay Flower Coasters
Sometimes the “flower” is the shape of the object itself. In this part of the air dry clay flowers tutorial, we’ll use flower-shaped cookie cutters to make beautiful, functional coasters.
Difficulty: Beginner
Why we love it:
- Very easy and fast.
- Practical and durable (when sealed properly).
- Great project to do with kids.
Step-by-Step Instructions:
- Roll it Out: Roll your clay out to a uniform thickness of about 1/4 inch. Using guide rings on your rolling pin helps keep it even.
- Cut: Use a large, flower-shaped cookie cutter to punch out your coaster shapes.
- Imprint: To add interest, press actual dried flowers or lace doilies into the wet clay to leave a delicate impression.
- Dry Flat: It is vital to let these dry slowly and evenly to prevent warping. Turn them over every few hours or sandwich them between weighted boards.
- Seal for Protection: Since coasters deal with moisture, sealing is non-negotiable. Use a waterproof varnish. {Mod Podge Dishwasher Safe Waterbased Sealer} is an excellent choice for this. It cures to a hard, water-resistant finish that ensures condensation from your cold drinks won’t turn your beautiful clay coaster back into mush. Apply 2-3 coats for best results.
7. Sculpted Tulip Pendant
Tulips have a distinct, elegant cup shape. Sculpting a small tulip for a necklace pendant is a lovely way to practice creating 3D forms in this air dry clay flowers tutorial.
Difficulty: Intermediate
Why we love it:
- Teaches 3D hollow sculpting.
- Makes a sophisticated piece of jewelry.
Step-by-Step Instructions:
- The Core: Start with a small ball of clay on the end of a pencil or a round tool handle. This helps maintain the hollow cup shape.
- The Petals: Flatten three oval pieces of clay. Press them onto the core ball, smoothing the seams so they blend at the base but stay separate at the top.
- Outer Layer: Add three more petals in the gaps between the first three. Curve the tips slightly inward.
- Remove the Tool: Gently slide the flower off the pencil handle.
- Add a Loop: Insert a small metal eye pin into the top of the flower (or through the base) before it dries so you can attach it to a chain later.
- Paint: Paint with vibrant reds, yellows, or pinks, perhaps adding a darker shade at the base for depth.
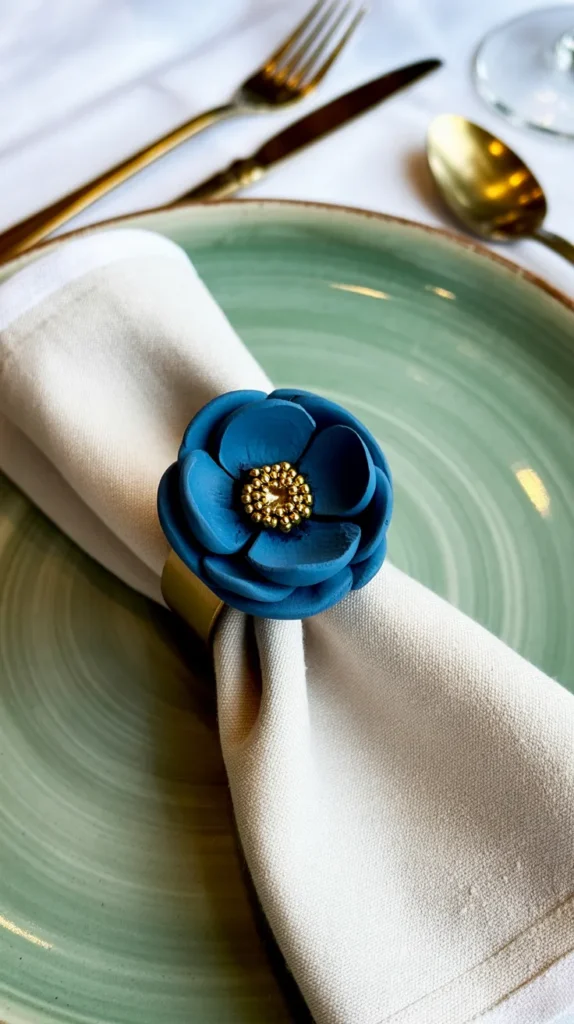
8. Clay Flower Napkin Rings
Elevate your dining table with custom napkin rings. This project in our air dry clay flowers tutorial creates a structured, elegant look perfect for dinner parties.
Difficulty: Beginner
Why we love it:
- Adds a personal touch to table settings.
- Sturdy and functional.
Step-by-Step Instructions:
- The Ring: Roll a thick snake of clay and form it into a ring. Make sure the opening is wide enough for a napkin (use an empty toilet paper roll as a form to keep the circle shape while drying).
- The Flower: Sculpt a simple flat flower, like a five-petal blossom or a sunflower.
- Attachment: Score the surface of the ring and the back of the flower (scratch crisscross lines). Apply a little water or slip and press the flower firmly onto the ring.
- Dry: Let the assembly dry completely on the cardboard form.
- Finish: Paint the flower in colors that match your dining room decor. A metallic gold or silver ring with a colored flower looks very chic.
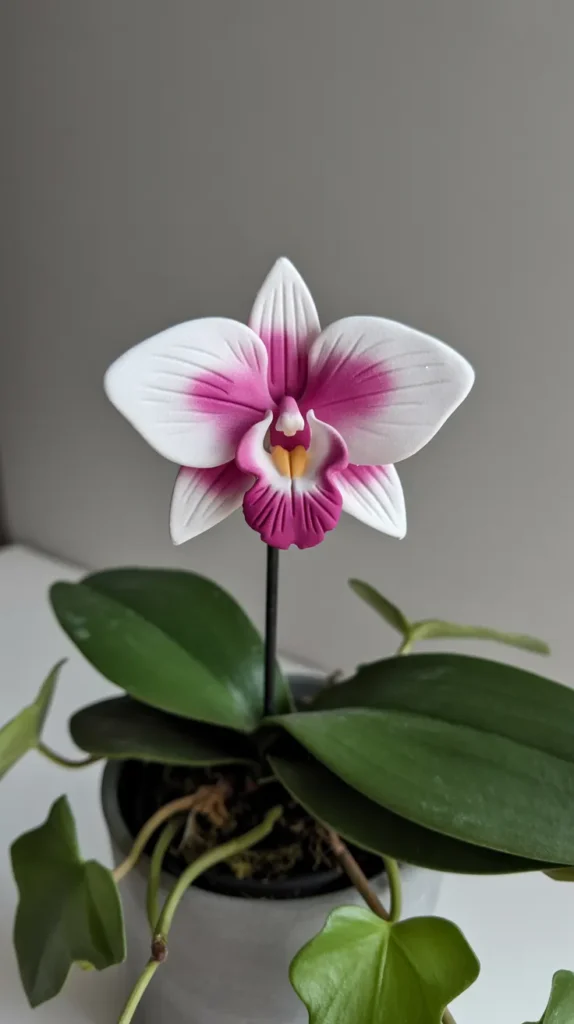
9. Orchid Pot Stake
Orchids are notoriously difficult to keep alive, but a clay orchid is forever! In this air dry clay flowers tutorial, we’ll make a realistic moth orchid bloom attached to a stake, perfect for adding permanent color to a green houseplant.
Difficulty: Advanced
Why we love it:
- Complex, organic shapes.
- Beautiful way to decorate non-flowering plants.
Step-by-Step Instructions:
- Study the Shape: Orchids have specific symmetry: three sepals behind and three petals in front (one being the “lip”).
- Build the Center: Sculpt the intricate center “column” of the orchid first on a piece of wire.
- Add the Petals: Roll out clay thinly. Cut the specific petal shapes (two wide side petals, three narrower sepals). Attach them to the center wire structure carefully.
- Dry Suspended: You may need to hang the wire upside down while drying so gravity helps the petals curve naturally rather than flattening out.
- Paint: Use watercolor paints for orchids to get that translucent, bleeding color effect that looks so realistic.
- Stake: Attach the wire to a green wooden stake or a thicker wire and stick it into a potted fern or ivy.
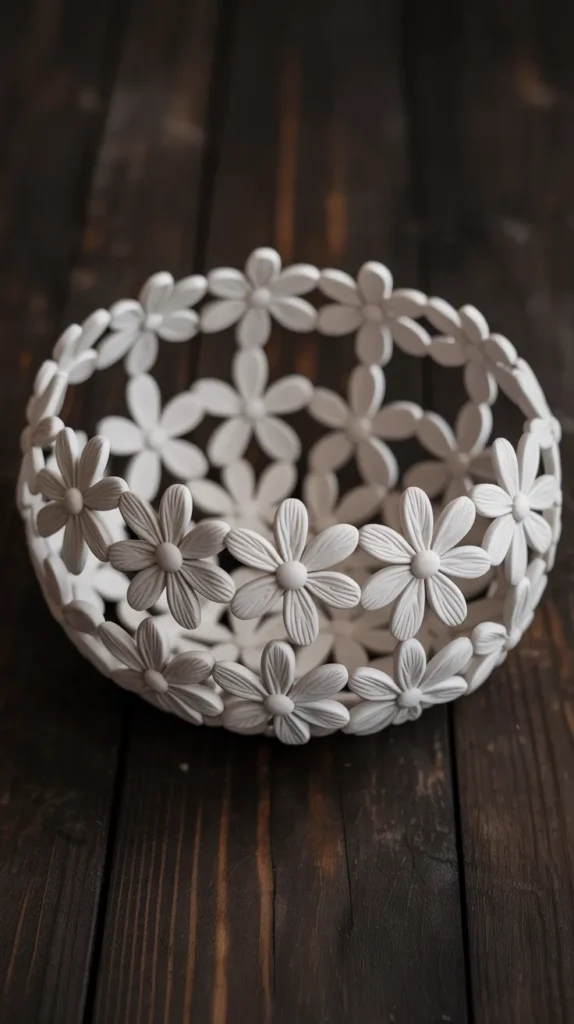
10. Textured Clay Flower Bowl
Instead of making a flower object, why not make a bowl out of flowers? This project involves creating many small blooms and joining them together to form a vessel. It’s a standout project in our air dry clay flowers tutorial.
Difficulty: Advanced
Why we love it:
- Creates a stunning intricate centerpiece.
- Looks like expensive ceramic art.
Step-by-Step Instructions:
- The Mold: Find a bowl you want to use as a shape. Cover the outside with plastic wrap.
- Mass Production: Sculpt about 20-30 small, simple flowers (like the Hydrangea from project #3 or simple daisies).
- Assembly: Start placing the clay flowers onto the inverted bowl mold. Press the edges of the petals together where they touch.
- Fill Gaps: Ensure every flower is connected to at least 2-3 others. Add small clay leaves or balls to fill any gaps that are too large and strengthen the structure.
- Dry: Let it dry completely on the mold. This might take longer than usual due to the thickness.
- Release: Gently pop the clay flower bowl off the mold. Remove the plastic wrap.
11. Botanical Imprint Tags
These tags are incredibly versatile. Use them for gift wrapping, as ornaments, or even as labels for jars. This section of the air dry clay flowers tutorial focuses on the beauty of negative space and impressions.
Difficulty: Beginner
Why we love it:
- Uses real nature to create the design.
- Very quick and satisfying.
Step-by-Step Instructions:
- Foraging: Go outside and find flowers or leaves with strong veins and textures (lavender, fern, rosemary).
- Roll and Press: Roll out small medallions of clay. Gently press your foraged botanical into the clay surface with the rolling pin.
- Peel: Carefully peel the plant away to reveal the detailed impression.
- Cut and Pierce: Use a round cutter or knife to shape the tag. Poke a hole at the top for string.
- Highlight: Once dry, you can do a “dark wash.” Paint the tag with diluted brown or black acrylic paint, then immediately wipe the surface with a paper towel. The paint will stay in the deep impressions of the flower, highlighting the details.

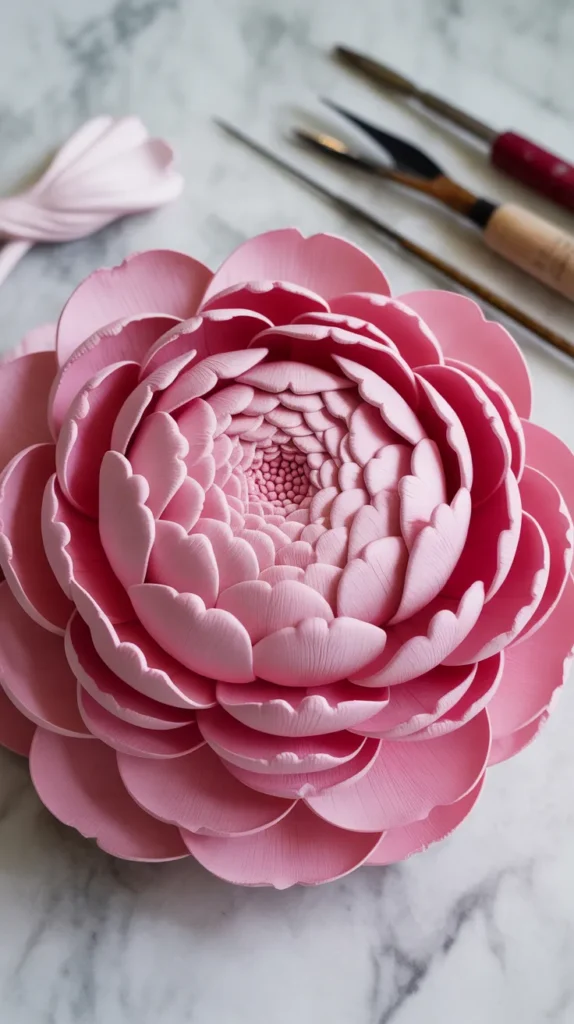
12. The “Forever” Peony
We end our air dry clay flowers tutorial with the queen of flowers: the Peony. This is a complex project involving many layers of ruffled petals to create a lush, full bloom.
Difficulty: Advanced
Why we love it:
- The ultimate test of petal thinning.
- Creates a show-stopping decoration.
Step-by-Step Instructions:
- The Center Ball: Start with a tight ball of clay on a wire loop.
- Inner Ruffles: Create small, irregular petals with very thin, ruffled edges. Glue these tightly around the center ball, crinkling them as you go to create volume.
- Middle Layers: Create slightly larger petals, cupping them inwards. Attach them around the center.
- Outer Petals: Create large, broad petals. Use a ball tool to thin the edges until they are almost transparent. Attach these as the final layer, curving them outwards.
- Smoothing: Because this flower is heavy, use {Mont Marte Modeling Paste} to smooth the joins at the base if needed, or to add extra texture to the petals before painting. This paste is great for building volume and hiding seams.
- Dry: Hang upside down to dry so gravity helps maintain the fluffiness.
Pro Tips for Success
To ensure your projects from this air dry clay flowers tutorial turn out perfectly, keep these tips in mind:
- Avoid Cracks: Cracking usually happens when clay dries too fast or unevenly. To prevent this, keep your drying pieces away from direct heat sources or drafts. If you see a crack forming, smooth a little clay slip (water + clay) into the crack immediately.
- Thin is In: The key to realistic flowers is thin edges. Always spend extra time thinning the very edge of your petals with your fingers or a ball tool. Thick edges are the giveaway of a “clay” look.
- Sealing is Essential: Air dry clay is porous. To protect your work from humidity and dust, always seal it. A matte varnish looks most natural for petals, while a gloss varnish is great for leaves or ceramic-style projects.
Your Clay Flower Toolkit
Here is a summary of the recommended products that will help you achieve the best results with these projects.
| Product Name | Brand | Best Use |
|---|---|---|
| Plus Natural Self-Hardening Clay | Activa | The best all-around clay for fine details; dries strong and smooth. |
| Craft Adhesive | E6000 | Industrial strength glue for attaching clay flowers to metal hair pins or jewelry findings. |
| Dishwasher Safe Waterbased Sealer | Mod Podge | Essential for waterproofing functional items like coasters. |
| Modeling Paste | Mont Marte | Great for smoothing seams on large flowers or adding extra surface texture. |
Conclusion: Watch Your Garden Grow
There is something incredibly satisfying about taking a lump of gray or white earth and transforming it into a delicate bloom.
With this air dry clay flowers tutorial, you now have 12 different ways to explore this art form. From the simplicity of a stamped coaster to the complexity of a full peony, each project builds your skills and adds a touch of handmade beauty to your life.
Remember, clay is forgiving. If a petal doesn’t look right, squish it up and roll it again. Don’t be afraid to experiment with paint colors, sizes, and textures. The only limit is your imagination.
So, clear off your table, open a fresh pack of clay, and start sculpting. Which of these beautiful DIY projects will you try first?