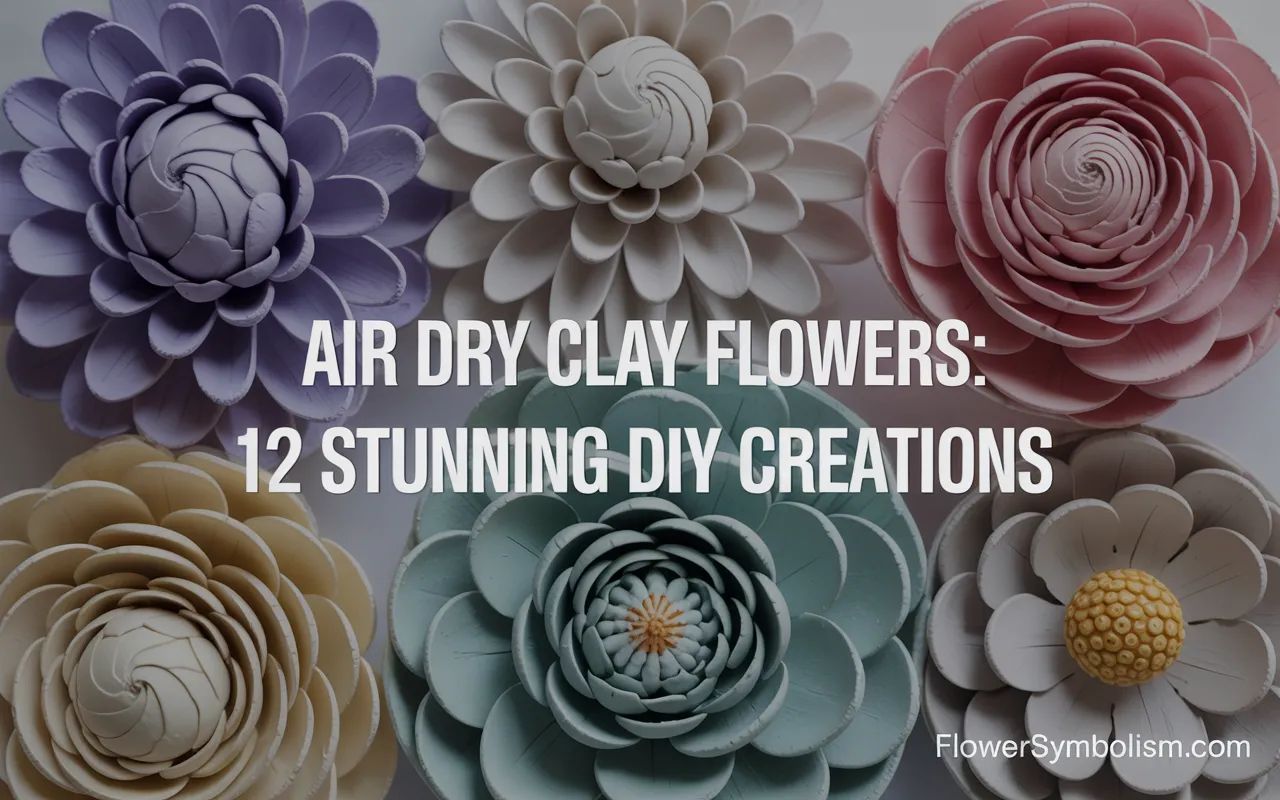
There’s a unique joy in creating something beautiful with your own hands. If you love the look of flowers but wish their beauty could last forever, then the world of air dry clay flowers is waiting for you.
This wonderfully versatile and forgiving medium allows you to sculpt everything from delicate petals to lush bouquets that will never wilt or fade. It’s a craft that combines the tactile pleasure of pottery with the delicate art of floral arrangement.
Air dry clay is the perfect entry point for aspiring sculptors. Unlike traditional clay, it requires no expensive kiln or complicated firing process.
You simply shape it, let it dry, and your creation becomes a lightweight, permanent piece of art. This makes it an incredibly accessible and satisfying hobby for crafters of all ages and skill levels.
This guide is your complete introduction to the enchanting world of air dry clay flowers. We will explore 12 stunning DIY projects that will walk you through creating beautiful, lasting botanicals.
From simple rosebuds to elaborate wall art, there’s a project here to spark your creativity. We’ll provide clear, step-by-step instructions and recommend a few essential tools to help you transform a simple block of clay into a garden of everlasting blooms.

Getting Started with Air Dry Clay
Before we dive into the projects, let’s talk about the star of the show: air dry clay. It comes in a few different varieties, but for beginners, a smooth, lightweight clay is ideal.
A product like {Crayola Air-Dry Clay} is a fantastic starting point. It’s affordable, easy to work with, has a smooth texture that’s great for fine details, and dries to a bright white finish that’s perfect for painting.
A few essential tips:
- Keep it Moist: Air dry clay starts to dry as soon as it’s exposed to air. Only take out as much clay as you need at one time and keep the rest sealed tightly in its original packaging or a zip-top bag. Keep a small bowl of water nearby to moisten your fingers, which helps in smoothing seams and preventing cracks.
- Work on a Non-Stick Surface: A silicone mat, a piece of parchment paper, or a ceramic tile makes a great work surface.
- Drying is Key: Let your creations dry completely before painting or handling them too much. This can take anywhere from 24 to 72 hours, depending on the thickness of your piece. Place them on a wire rack to allow air to circulate underneath for more even drying.
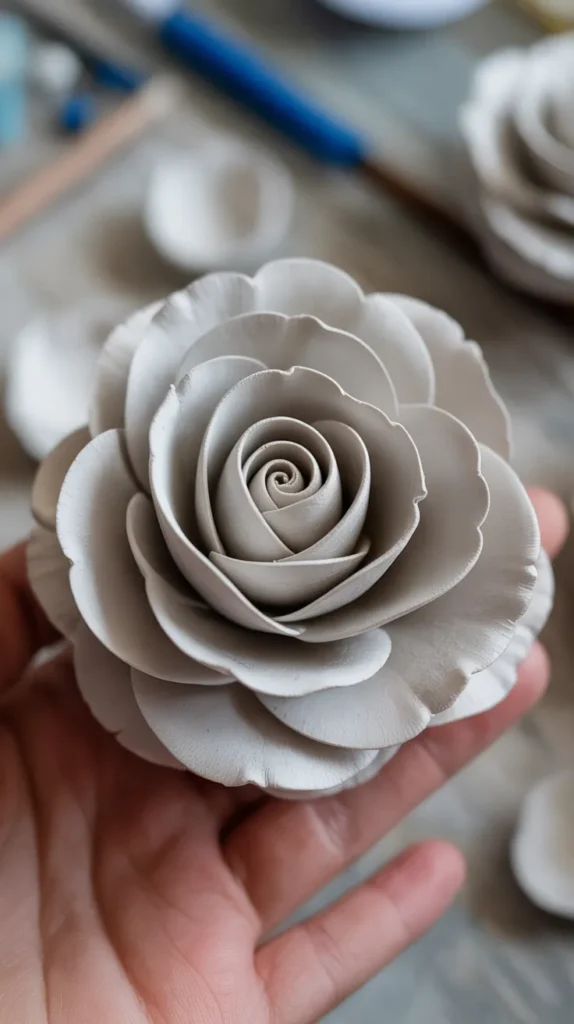
1. The Simple and Classic Clay Rose
The rose is the perfect first project for anyone learning to make air dry clay flowers. This method uses individual petals to build a realistic and beautiful bloom. It teaches you the fundamental skills of shaping and assembling that you’ll use in many other floral projects.
What You’ll Need:
- Air dry clay
- A small bowl of water
- A toothpick or sculpting tool
Step-by-Step Instructions:
- Create the Center: Start by rolling a small, teardrop-shaped piece of clay. This will be the central bud of your rose.
- Make the Petals: Roll several small balls of clay, all roughly the same size.
- Shape the First Petal: Take one ball and flatten it into a thin, round disc between your fingers. Gently pinch the top edge to make it even thinner, creating a delicate petal look.
- Wrap the Bud: Wrap this first petal around the top of your teardrop-shaped center. Use a tiny bit of water to help it adhere.
- Add More Petals: Continue making and shaping petals. Wrap each new petal around the center, overlapping the previous one slightly. As you work your way outwards, you can make the petals slightly larger and flare the top edges out more to create the look of an opening rose.
- Finishing Touches: Once your rose is the desired size, you can gently curl the edges of the outer petals outwards. Let it dry completely before painting it in your favorite shade.
2. A Charming Clay Flower Garland
Create a whimsical, rustic garland to hang over a mantelpiece, a headboard, or a doorway. This project is wonderfully forgiving and allows you to experiment with different simple flower shapes. It’s a beautiful way to create a large-scale piece of air dry clay flowers decor.
What You’ll Need:
- Air dry clay
- A skewer or toothpick
- Jute twine or ribbon
- Acrylic paints
Step-by-Step Instructions:
- Decide on Your Flowers: For a garland, simple, stylized flower shapes work best. Think five-petaled daisies, simple spiral roses, or small, flat sunflowers.
- Sculpt Your Flowers: Create about 15-20 flowers of varying shapes and sizes. Don’t worry about making them all perfect—the slight variations will add to the handmade charm.
- Make a Hole for Stringing: This is the most important step! While the clay is still wet, use a skewer to poke a hole through each flower. Make sure the hole is large enough for your twine to pass through easily. You can create holes in the center or through a petal on the side.
- Dry Completely: Let all your flowers dry thoroughly on a wire rack.
- Paint and String: Once dry, paint your flowers in a cohesive color palette. After the paint has dried, thread them onto a long piece of jute twine, alternating flower shapes and adding knots between them to keep them spaced out.

3. Delicate Botanical Wall Art
This project combines your air dry clay flowers with a canvas or wooden plaque to create a stunning piece of 3D wall art. It looks incredibly sophisticated and allows you to create a custom piece that perfectly matches your home decor.
What You’ll Need:
- Air dry clay
- A blank canvas or wooden plaque
- Strong craft glue
- Acrylic paints
Step-by-Step Instructions:
- Plan Your Design: Decide on the composition for your wall art. Will you have a cascade of flowers flowing down one corner? A crescent shape? A full wreath?
- Sculpt Your Elements: Create a variety of flowers (roses, peonies, daisies) and leaves. Making flowers in different sizes will add depth and interest to your final piece.
- Dry and Paint: Let all your clay pieces dry completely. Then, paint them. You can paint them realistically or choose a chic monochromatic scheme (all white or all gray, for example).
- Assemble Your Artwork: Arrange your dried, painted flowers on the canvas to finalize your layout.
- Glue Everything Down: Once you’re happy with the arrangement, use a strong craft glue to attach each piece to the canvas. A product like {E6000 Craft Adhesive} is excellent for this, as it creates a permanent, industrial-strength bond that will hold the weight of the clay pieces securely. Apply the glue to the back of each flower and press it firmly onto the canvas. Let the glue cure completely before hanging.
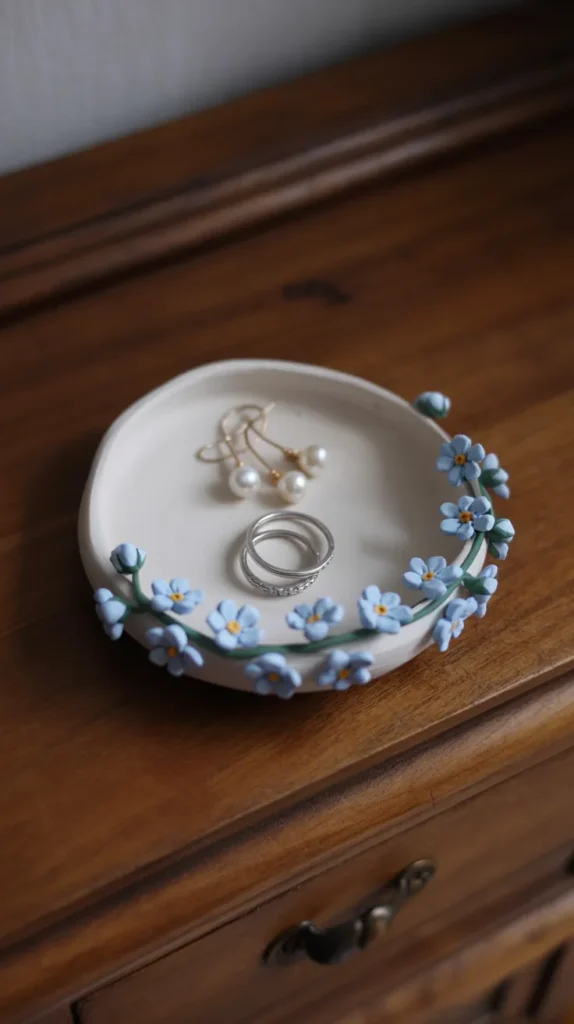
4. An Elegant Floral Jewelry Dish
A small, beautiful dish to hold your rings, earrings, or other trinkets is a perfect and practical project. By adding air dry clay flowers to the rim of the dish, you can transform it from a simple object into a piece of functional art.
What You’ll Need:
- Air dry clay
- A small bowl to use as a mold
- A rolling pin
- A knife
- (Optional) Metallic paint and a clear sealant
Step-by-Step Instructions:
- Create the Dish: Roll out a circle of clay about 1/4-inch thick. Gently drape it inside a small, plastic-wrap-lined bowl to give it its dish shape. Let it dry completely.
- Sculpt Small Flowers: While the dish is drying, sculpt a few very small, delicate flowers like forget-me-nots or tiny rosebuds, along with some small leaves.
- Attach the Flowers: Once the dish is dry, use a bit of clay slip (a mix of clay and water that acts as glue) or craft glue to attach your small, dried flowers around the rim of the dish.
- Paint and Seal: Let the entire piece dry again. You can leave it white for a minimalist look or paint it. Painting the rim and the flowers with gold metallic paint adds a touch of luxury. To make the dish water-resistant and give it a professional finish, apply a coat of clear sealant. A brush-on glaze like {Mod Podge Dishwasher Safe Waterbased Sealer} is perfect, as it provides a durable, waterproof, and even food-safe finish once cured.
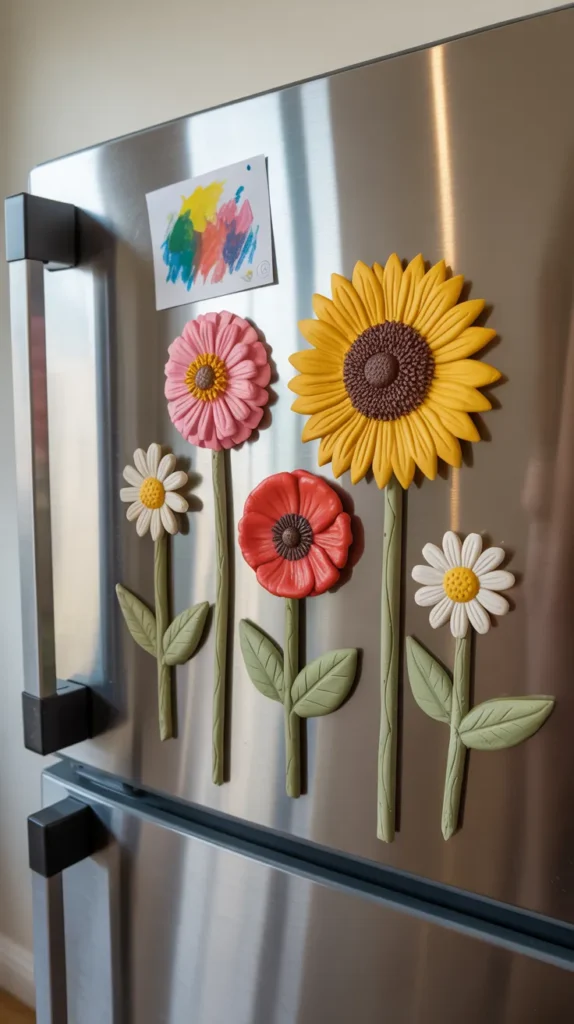
5. Everlasting Clay Flower Magnets
Brighten up your refrigerator or office whiteboard with a set of charming floral magnets. This is a fun and simple project that’s perfect for using up small, leftover bits of clay. They make wonderful small gifts and are a great project to do with kids.
What You’ll Need:
- Air dry clay
- Small, strong magnets
- Strong craft glue
- Acrylic paints
Step-by-Step Instructions:
- Sculpt Your Flowers: Create a variety of small, relatively flat flower designs. Sunflowers, zinnias, and daisies are great choices. Keep the backs as flat as possible so the magnet will attach securely.
- Dry and Paint: Let the flowers dry completely. Once dry, paint them with bright, cheerful colors.
- Attach the Magnets: Turn the painted flower over and apply a strong glue to the back. Press a small, strong craft magnet into the glue.
- Cure and Use: Let the glue cure fully before using your magnets. They look fantastic when packaged in a small set on a piece of branded cardstock.
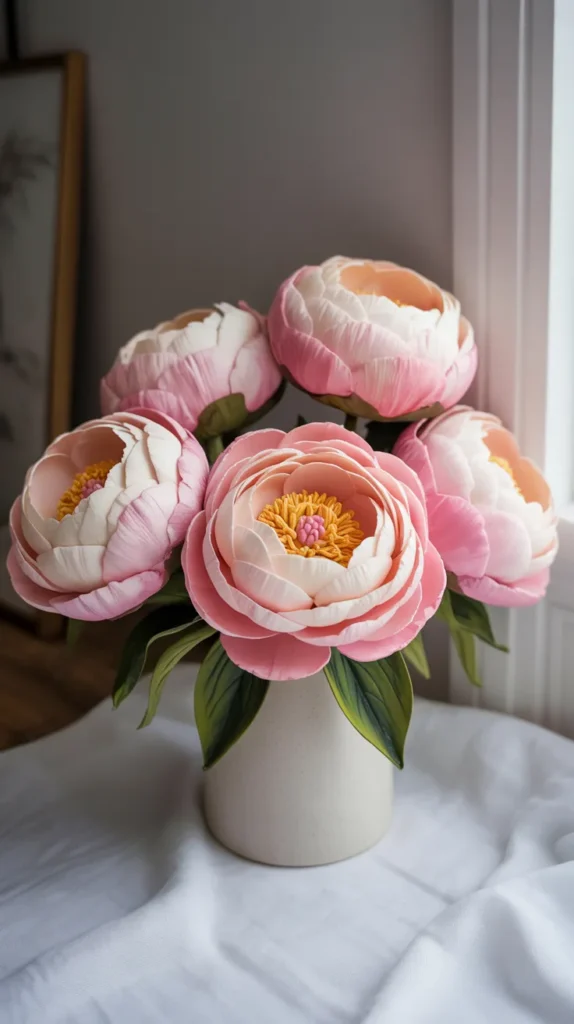
6. A Stunning Clay Peony Bouquet
The peony, with its lush, ruffled layers of petals, is a breathtaking flower to replicate in clay. This is a more advanced project, but the stunning result is well worth the effort. By creating several peonies and adding some leaves, you can assemble a bouquet that will be a permanent centerpiece in your home.
What you’ll need:
- Air dry clay
- Floral wire (for stems) and green floral tape
- A ball-ended sculpting tool
- A foam pad
Step-by-Step:
- Create the Stem and Center: Create a small hook at the end of a piece of floral wire. Cover this hook with a small ball of clay—this will be the very center of your peony.
- Make the Petals: Roll out many small balls of clay. Flatten each one into a thin petal.
- Add Texture: Place a petal on a foam pad. Use a ball-ended tool to gently thin and ruffle the edges of the petal, giving it that characteristic peony look. A dedicated set of {Meuxan Pottery Clay Sculpting Tools} is invaluable for this, as it includes various ball styluses and shaping tools perfect for creating realistic petal textures.
- Build Your Flower: Start attaching the ruffled petals around the clay center on your wire stem, using a bit of water to help them stick. The inner petals should be smaller and more tightly wrapped, while the outer petals should become progressively larger and more open.
- Dry and Finish: Once you have a full, lush peony, let it dry completely (you can hang it upside down). Wrap the wire stem with green floral tape to finish. Create several peonies and leaves to assemble your everlasting bouquet.
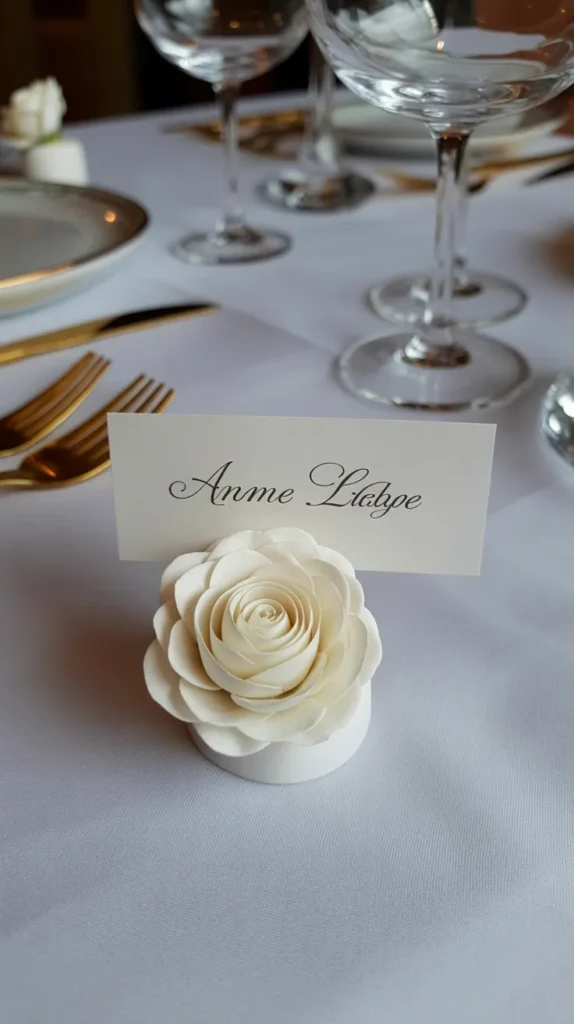
7. Unique Floral Place Card Holders
Elevate your next dinner party or holiday gathering with handmade place card holders. These small, elegant details show your guests how much you care and can also serve as a lovely party favor for them to take home.
What You’ll Need:
- Air dry clay
- A knife or sculpting tool
Step-by-Step Instructions:
- Create the Base: Roll a piece of clay into a small, semi-flat dome or cube shape, about 1-2 inches wide. This will be the base that sits on the table.
- Sculpt a Flower: On top of the base, sculpt a single, beautiful flower. A simple rose or a gardenia works well.
- Create the Slit: While the clay is still wet, use a knife to carefully make a narrow, straight slit in the base, either in front of or behind the flower. This slit is where the place card will go. Make sure it’s deep enough to hold the card securely.
- Dry and Paint: Let the holders dry completely. You can paint them to match your tablescape or leave them a simple, elegant white.
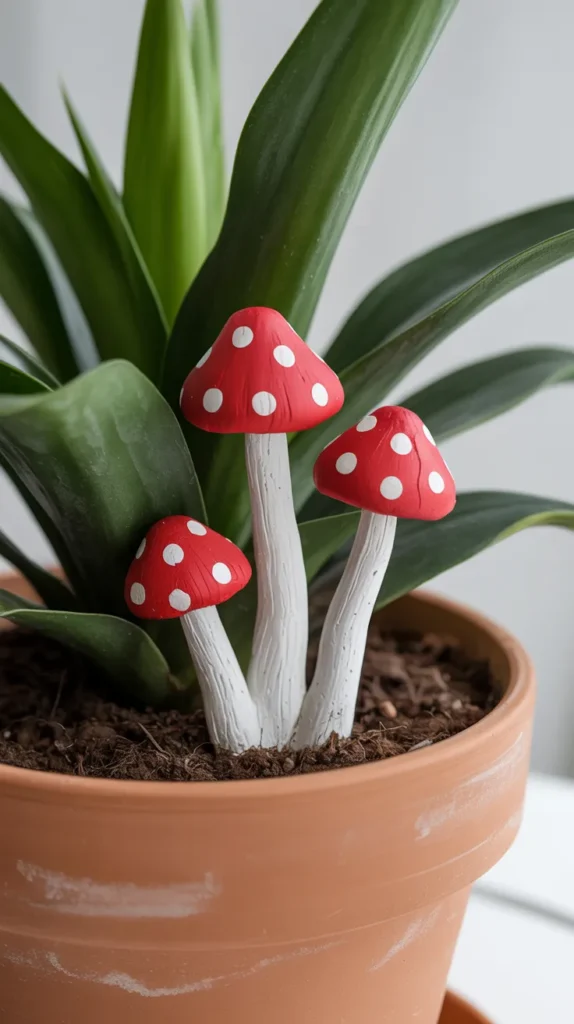
8. Whimsical Mushroom Garden Stakes
Bring a touch of fairytale magic to your indoor potted plants with handmade mushroom garden stakes. While not technically flowers, these fungal friends are a classic part of any whimsical garden scene and are incredibly fun to make with air dry clay.
What You’ll Need:
- Air dry clay
- Wooden skewers or thick wire
- Acrylic paints (red and white are classic)
Step-by-Step Instructions:
- Create the Stem: Roll a thick cylinder of clay for the mushroom stem.
- Insert the Stake: Gently insert a wooden skewer or a piece of thick wire into the bottom of the clay stem, leaving about half of the stake exposed.
- Make the Cap: Create the mushroom cap by shaping a dome of clay. You can make it perfectly round or a more organic, wavy shape.
- Attach the Cap: Use a bit of water to attach the cap to the top of the stem.
- Dry and Paint: Let the mushroom dry completely on its stake. Once dry, paint it in a classic fairytale style—a bright red cap with white spots is always a winner. Once the paint is dry, you can stick them into the soil of your houseplants for a touch of whimsy.
9. An Everlasting Flower Crown
Perfect for festivals, photoshoots, or just feeling like royalty, a flower crown made from air dry clay flowers is a beautiful, durable alternative to a fresh one. It becomes a keepsake you can wear again and again.
What You’ll Need:
- Air dry clay
- A sturdy, pre-made wire crown base or thick floral wire
- Thin floral wire and green floral tape
- A hot glue gun
Step-by-Step Instructions:
- Sculpt Your Flowers: Create a variety of small, lightweight flowers and leaves. It’s important to keep them small so the crown doesn’t become too heavy. Make sure to poke a hole through the base of each flower with a pin while the clay is wet.
- Dry and Paint: Let your clay pieces dry completely, then paint them in your desired color palette.
- Wire Each Flower: Cut small pieces of thin floral wire. Thread a wire through the hole in each flower and twist it to create a small “stem.”
- Assemble the Crown: Start attaching your wired flowers to the crown base using green floral tape. You can also use a hot glue gun for extra security. Layer the flowers and leaves to create a full, beautiful design.

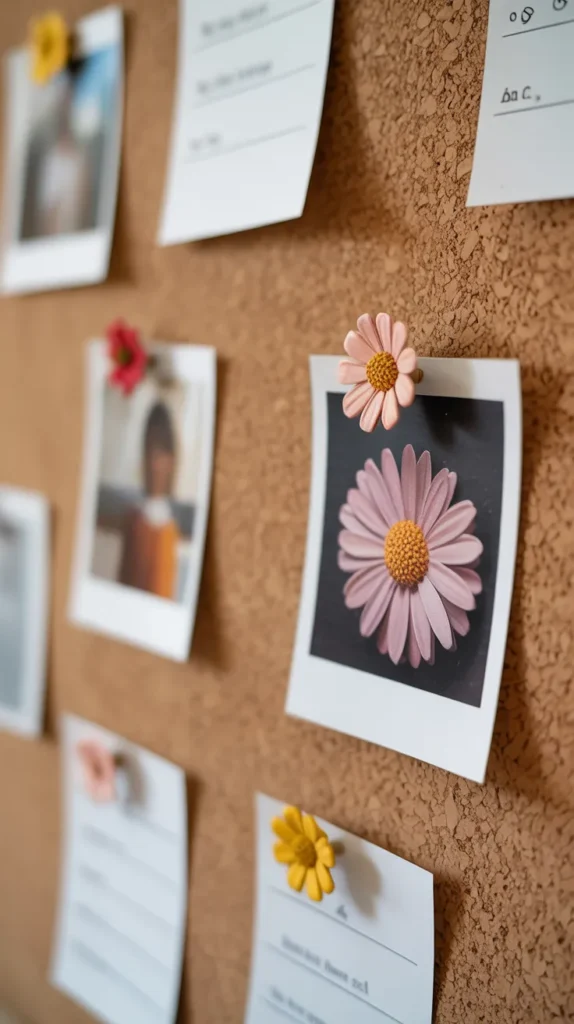
10. Decorative Floral Push Pins
Add a touch of floral beauty to your corkboard or home office with custom decorative push pins. This is another fantastic project for using up small scraps of clay and makes for a wonderful, personalized gift for a coworker or student.
What You’ll Need:
- Air dry clay
- Plain, flat-topped metal thumbtacks
- Strong craft glue
- Acrylic paints
Step-by-Step Instructions:
- Sculpt Tiny Flowers: Create a series of very small, relatively flat flower heads. Simple shapes like daisies, forget-me-nots, or tiny spiral roses work best.
- Dry and Paint: Let the tiny flowers dry completely. This won’t take long due to their small size. Once dry, paint them with fine-tipped brushes. A good quality brush set like the {AIT Art Select Paint Brush Set} is crucial here for getting into all the tiny crevices and painting clean details.
- Glue to the Tacks: Apply a small dot of strong craft glue to the flat top of a thumbtack.
- Attach the Flower: Gently press the back of a painted clay flower onto the glue.
- Cure: Let the glue cure for at least 24 hours to ensure a strong bond before using your beautiful new push pins.
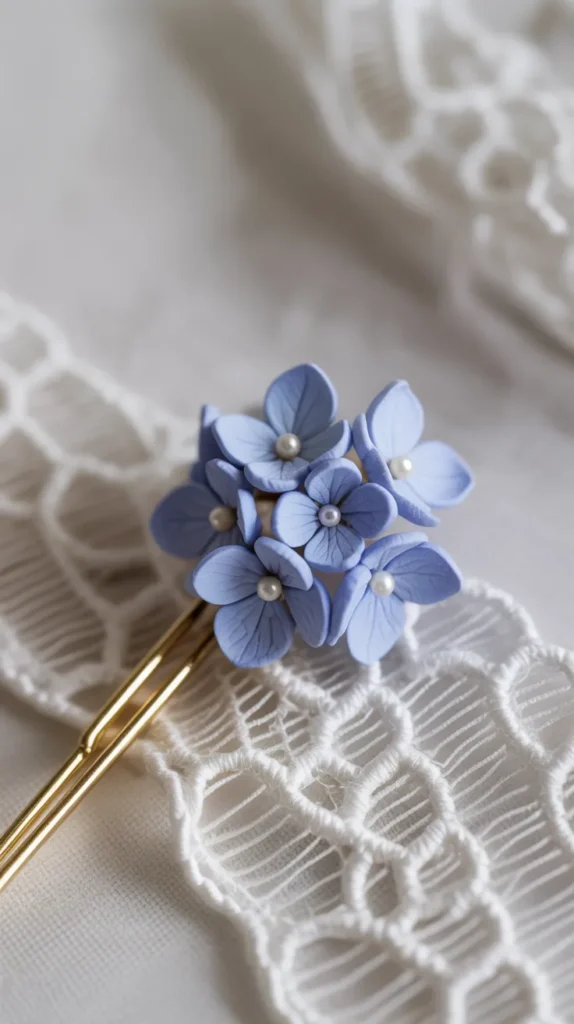
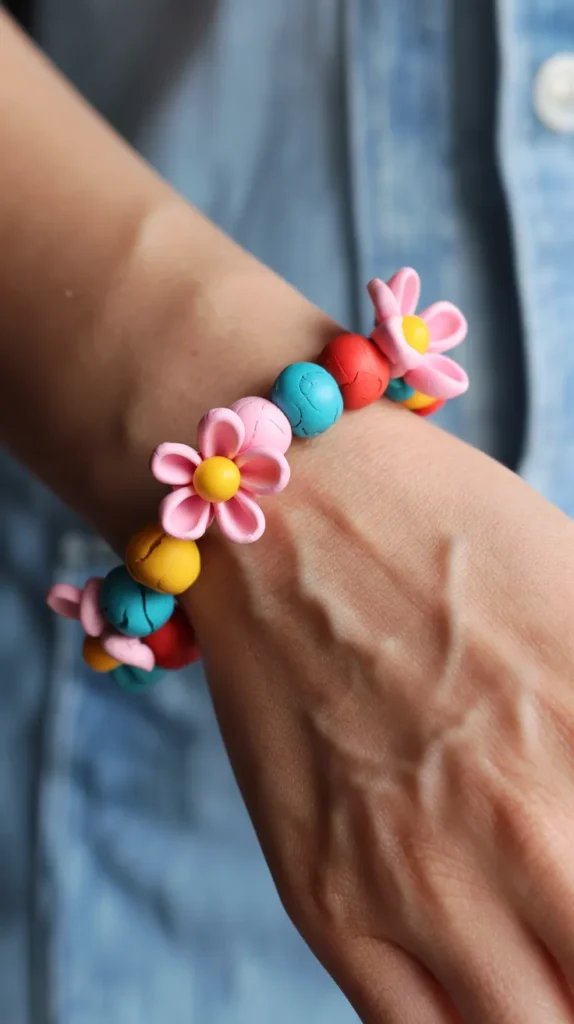
11. Custom Clay Flower Beads for Jewelry
Create your own unique beads to make one-of-a-kind bracelets and necklaces. Making beads is a fun way to play with color and shape, and the finished jewelry is sure to get compliments.
What You’ll Need:
- Air dry clay
- A skewer or knitting needle
- Jewelry elastic or string
- (Optional) Clear glaze or varnish
Step-by-Step Instructions:
- Shape Your Beads: Roll small pieces of clay into your desired bead shape—round, oval, or tubular.
- Add Floral Detail: You can either sculpt a tiny flower onto the surface of the bead or use a stamp to impress a floral pattern into the clay.
- Pierce the Hole: While the clay is still wet, carefully push a skewer through the center of each bead to create the hole for stringing. Gently rotate the skewer to make the hole clean and smooth.
- Dry and Paint: Let the beads dry completely on the skewer (you can prop it up over a cup) to prevent them from getting a flat side. Once dry, paint them in your desired colors.
- Seal and String: Apply a coat of clear gloss varnish to give your beads a professional, shiny finish and protect the paint. Once the varnish is dry, string them onto jewelry elastic to create your custom bracelet.
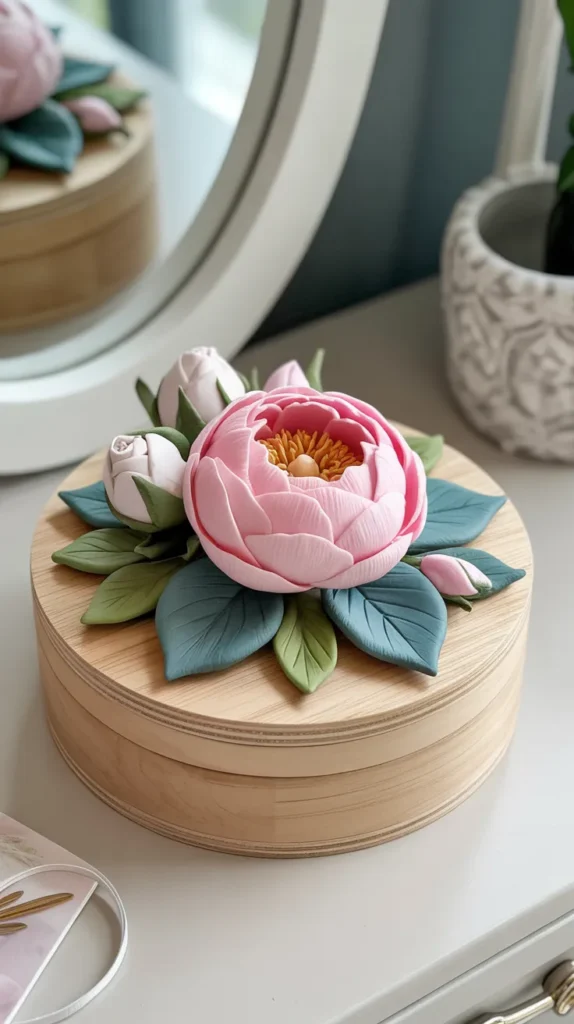
12. Floral Toppers for Jars and Boxes
Transform a simple container into a beautiful keepsake box by adding a custom floral topper to the lid. This is a wonderful way to personalize a gift box or create elegant storage for your own home.
What You’ll Need:
- Air dry clay
- A plain jar or box with a flat lid
- Strong craft glue
Step-by-Step Instructions:
- Sculpt Your Arrangement: Directly on a piece of parchment paper, create a small, self-contained floral arrangement. Sculpt a few larger flowers, some buds, and some leaves, arranging them into a pleasing cluster. Make sure the base of the arrangement is relatively flat.
- Dry the Topper: Let your entire floral cluster dry as one single piece.
- Paint Your Creation: Once dry, paint the floral arrangement. You could match the colors to the room where the box will be kept.
- Attach to the Lid: Apply a generous amount of strong craft glue to the bottom of your dried floral arrangement and to the center of the container lid.
- Press and Cure: Press the topper firmly onto the lid and let the glue cure completely. The result is a simple jar transformed into a stunning decorative object.
Your Air Dry Clay Flower Toolkit
While you can start with just a block of clay, having a few extra tools can elevate your creations from simple to stunning. Here’s a summary of the helpful products mentioned in this guide.
| Product Name | Brand | Use |
|---|---|---|
| Air-Dry Clay | Crayola | A smooth, affordable, and beginner-friendly clay that dries to a bright white, paintable finish. |
| E6000 Craft Adhesive | E6000 | An industrial-strength glue perfect for permanently attaching heavy clay pieces to wall art. |
| Dishwasher Safe Waterbased Sealer | Mod Podge | Creates a durable, waterproof, and food-safe finish for projects like jewelry dishes. |
| Pottery Clay Sculpting Tools | Meuxan | A versatile set that includes ball styluses, perfect for thinning and ruffling petals for realistic flowers. |
| Select Paint Brush Set | AIT Art | A set with various fine-tipped brushes, essential for painting intricate details on small clay flowers. |
Conclusion: Let Your Creativity Blossom
The world of air dry clay flowers is a gateway to endless creativity. It’s a craft that is both meditative and magical, allowing you to create a garden of blooms that will last a lifetime.
From a simple, elegant rose to a complex, cascading piece of wall art, the possibilities are limited only by your imagination.
We hope these 12 stunning ideas have inspired you to pick up a block of clay and start sculpting. Don’t be afraid to experiment with different shapes, colors, and projects.
The beauty of air dry clay is its forgiving nature—if you don’t like something, you can simply roll it up and start again.
So, find a clear spot on your table, open a fresh package of clay, and let your hands create something beautiful. Which of these enchanting DIY creations will you bring to life first?