
Irises are one of the most elegant and striking flowers you can grow in a garden. With their intricate, orchid-like blooms and sword-shaped leaves, they bring a touch of drama and a rainbow of color to any landscape.
This guide is here to show you exactly how to plant iris bulbs and set the stage for a spectacular spring flower show.
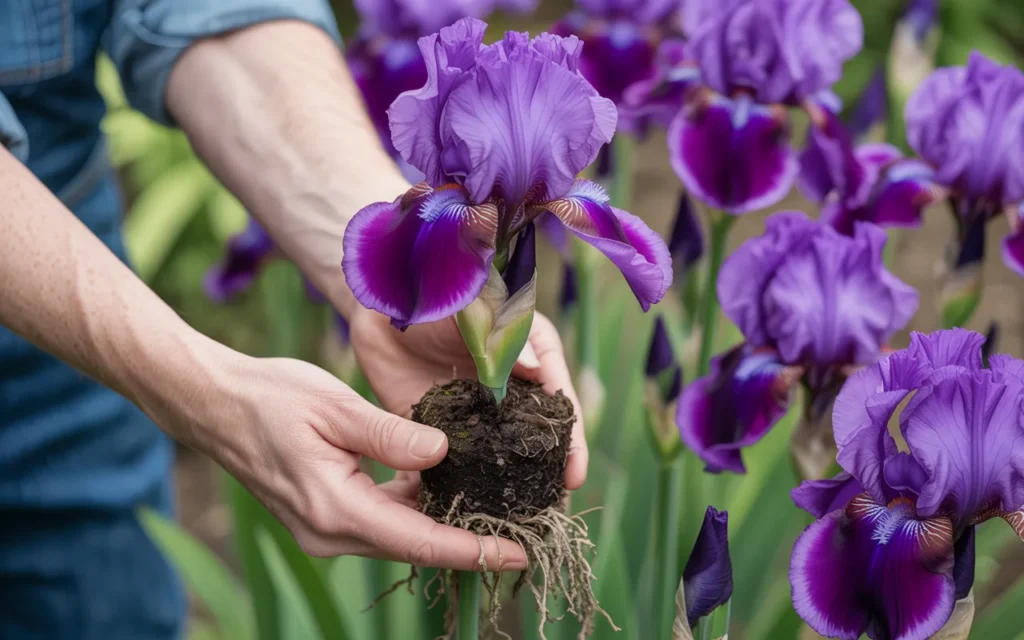
You might be surprised to learn that what we often call an “iris bulb” is usually a “rhizome,” which looks like a thick, fleshy root. Don’t worry, the planting process is just as simple.
We’ll walk you through everything from choosing the right variety to the most important planting secrets that guarantee beautiful blooms for years to come. Let’s get these garden jewels into the ground!
First, Let’s Talk About “Bulbs” vs. “Rhizomes”
This is the most important thing to understand before we begin. The world of irises is vast, and they grow from two different types of underground structures. Knowing which one you have is key to planting it correctly.
Bearded Irises (Grow from Rhizomes)
This is the most common and iconic type of iris, famous for its large, ruffled flowers with a fuzzy “beard” on the lower petals.
- What They Look Like: A rhizome looks like a thick, lumpy, potato-like root. It often has some old leaf stems on top and thin, wiry roots on the bottom.
- The Planting Secret: They must be planted very shallow, with the top of the rhizome exposed to the sun. This is the number one rule for bearded irises.
Dutch and Siberian Irises (Grow from True Bulbs)
These irises, often sold for early spring blooms or in mixed bulb bags, grow from something that looks more like a small onion or a tulip bulb.
- What They Look Like: A small, teardrop-shaped bulb, often with a papery outer skin.
- The Planting Secret: Unlike rhizomes, these true bulbs must be planted several inches deep under the soil.
This guide will focus primarily on planting the very popular bearded iris rhizomes, but we will also cover the proper depth for planting true iris bulbs.
Choosing the Best Iris Varieties for Your Garden
Irises come in a dizzying array of sizes, colors, and bloom times. It’s fun to pick a few different types to extend your flowering season.
The Major Iris Players
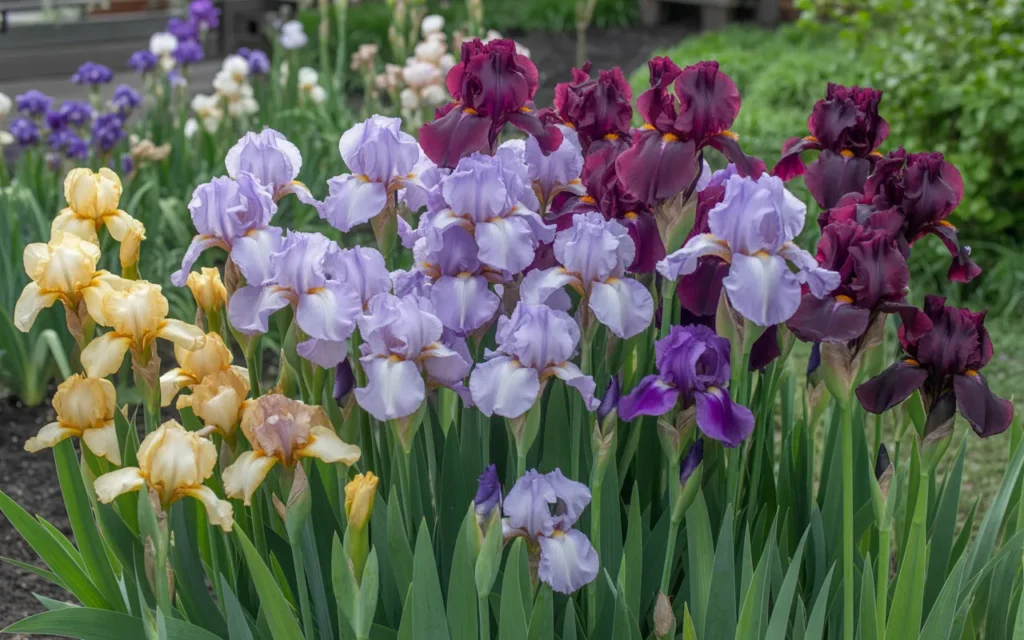
- Bearded Irises (Iris germanica): The superstars of the iris world. They are classified by height, from tiny Dwarf Bearded Irises (perfect for rock gardens) to majestic Tall Bearded Irises that can reach nearly 4 feet. They come in every color imaginable.
- Siberian Irises (Iris sibirica): These are elegant and graceful, with smaller, more delicate flowers on slender stems. They are incredibly hardy, disease-resistant, and tolerate wetter soil than bearded irises. They grow from small rhizomes that are planted differently than bearded irises.
- Dutch Irises (Iris hollandica): These grow from true bulbs and are often what florists use in cut flower arrangements. They produce beautiful blooms in shades of blue, purple, yellow, and white in late spring.
- Japanese Irises (Iris ensata): These have huge, flat, plate-like flowers and absolutely love water. They are the perfect choice for planting alongside a pond or in a boggy area of the garden.
When you buy your irises, the packaging should tell you exactly what type you have. If you get a bag of small bulbs, they are likely Dutch irises. If you get a fleshy, root-like structure, it’s a bearded iris rhizome.
[Amazon Product: Collection of 12 Reblooming Bearded Iris Rhizomes]
When and Where to Plant Irises
Timing and location are everything for a happy iris patch.
The Best Time to Plant
- The ideal time to plant bearded iris rhizomes is in the late summer to early fall (July through September).
- This gives the rhizome plenty of time to establish a strong root system before the ground freezes for winter. Planting at this time sets them up for a beautiful bloom the following spring.
- You can sometimes plant them in the spring, but they may not bloom in their first year.
- For true iris bulbs (like Dutch Iris), you should plant them in the fall, at the same time you plant your tulips and daffodils.
Finding the Perfect Location
The right spot in your garden will make all the difference. Irises have three main requirements:
- Full Sun: Irises need at least 6 to 8 hours of direct, blazing sun per day to produce a good show of flowers. If they are in too much shade, you will get lots of leaves but very few blooms.
- Excellent Drainage: This is a non-negotiable rule. Irises absolutely hate having “wet feet.” Their rhizomes will quickly rot in soil that stays soggy.
- Good Air Circulation: Planting them where a gentle breeze can move through the leaves helps to prevent common fungal diseases. Avoid crowding them too closely with other plants.

How to Plant Iris Bulbs (The Bearded Iris Method)
This is where we reveal the secrets to planting bearded iris rhizomes for guaranteed success. The process is unique and very different from planting a typical bulb.
Step 1: Prepare the Soil
A little bit of soil prep will ensure your irises have the perfect home.
- Weed the Area: Clear your chosen planting site of all weeds and grass.
- Loosen the Soil: Use a garden fork or spade to loosen the soil to a depth of about 10-12 inches. This makes it easy for the new roots to grow.
- Improve Drainage: If you have heavy clay soil, it’s very important to amend it. Mix in a generous amount of compost and coarse sand to improve the soil structure and drainage.
- Avoid High-Nitrogen Fertilizer: A little compost is great, but do not add fresh manure or a high-nitrogen fertilizer to the planting hole. Too much nitrogen will encourage lush leaf growth at the expense of flowers and can promote rhizome rot.
Step 2: Dig the Planting Hole
This is the part that feels strange, but it’s the most important step.
- Instead of digging a deep hole, you are going to dig a wide, shallow basin.
- In the center of this basin, build up a small mound of soil, like a little volcano. The top of this mound should be almost level with the surrounding ground.
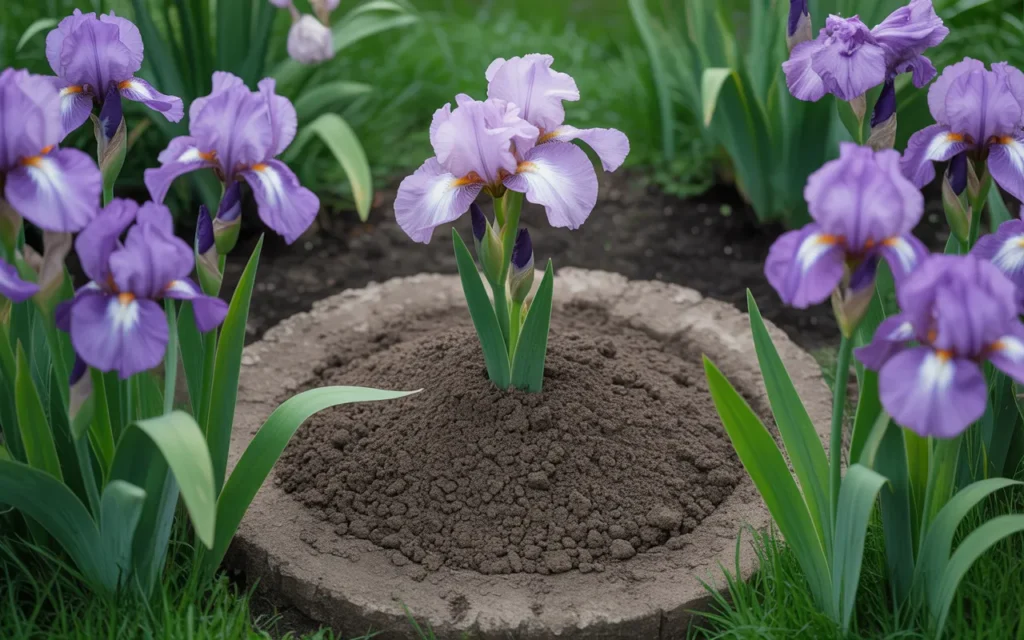
Step 3: Planting the Rhizome
Now it’s time to place your iris rhizome.
- Take the rhizome and place it directly on top of the mound of soil you created, as if you are straddling a horse.
- Spread the long, wiry roots out on either side, draping them down the sides of the mound.
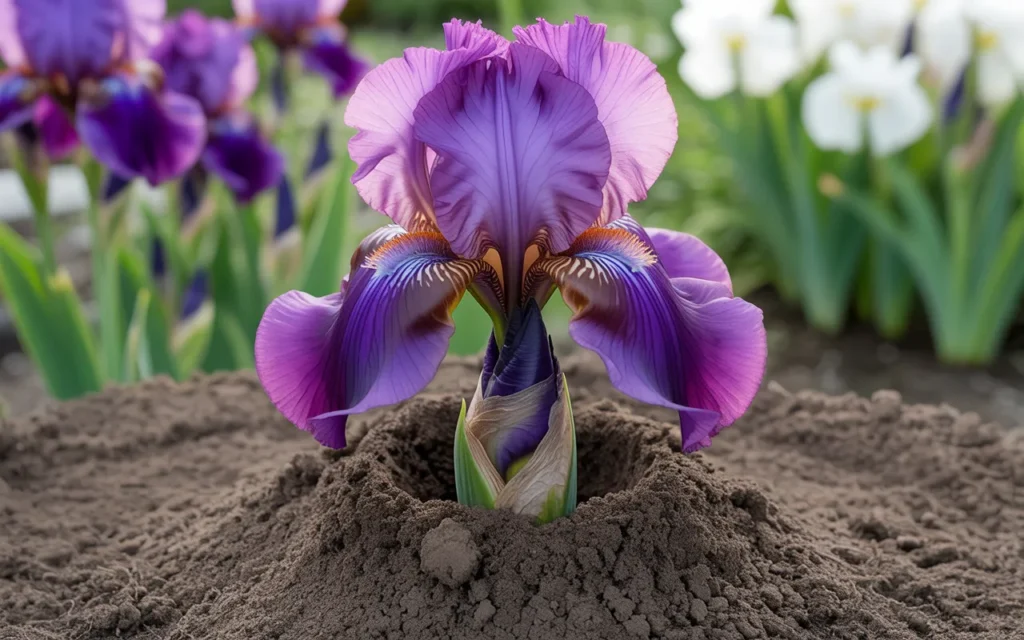
- The top of the rhizome should be level with or even slightly above the soil surface. This is the secret! Exposing the top of the rhizome to the sun and air prevents it from rotting. In very hot desert climates, you can cover it with a half-inch of soil, but everywhere else, leave it exposed.
- The rhizome has a “fan” end (where the leaves were) and a “tail” end. Point the fan of leaves in the direction you want it to grow.
Step 4: Backfill and Water
- Gently fill the hole with soil, covering the roots but leaving the top of the rhizome exposed.
- Firm the soil down gently with your hands to secure the plant and remove any air pockets.
- Water the newly planted iris thoroughly. This helps to settle the soil around the roots and encourages them to start growing.
Spacing Your Irises
- Give your irises some room to breathe and grow. Plant individual rhizomes about 12 to 18 inches apart.
- If you are planting in a group of three, you can arrange them in a triangle, with the leaf fans facing outwards.
How to Plant True Iris Bulbs (Dutch, Reticulata)
If you have the small, onion-like iris bulbs, the process is much more traditional.
- Planting Depth: Follow the rule of thumb for all bulbs: plant them about 3 times as deep as the bulb is tall. For most Dutch iris bulbs, this means planting them about 4 to 5 inches deep.
- Pointy End Up: Place the bulb in the hole with the pointy end facing up.
- Spacing: Plant these smaller bulbs closer together, about 3 to 4 inches apart, for a beautiful, dense display of color.
- Location: Like their rhizomatous cousins, they also need full sun and well-draining soil.
Caring for Your Irises After Planting
Irises are wonderfully low-maintenance once they are established. A little bit of care will keep them healthy and blooming for years.
Watering
- After the initial watering at planting time, you may not need to water them again unless you have a long, dry spell.
- Once established, bearded irises are very drought-tolerant. Overwatering is a much bigger threat than underwatering.
Fertilizing
- The best time to fertilize irises is in the early spring, just as new growth begins to appear.
- Use a low-nitrogen fertilizer, like a bone meal mixture or a 5-10-10 formula. Sprinkle a small amount around the base of the plant, being careful not to get it directly on the rhizome.
[Amazon Product: Low-Nitrogen Bone Meal Fertilizer for Bulbs]
Keeping the Bed Clean
- Good garden hygiene is the best way to prevent pests and diseases.
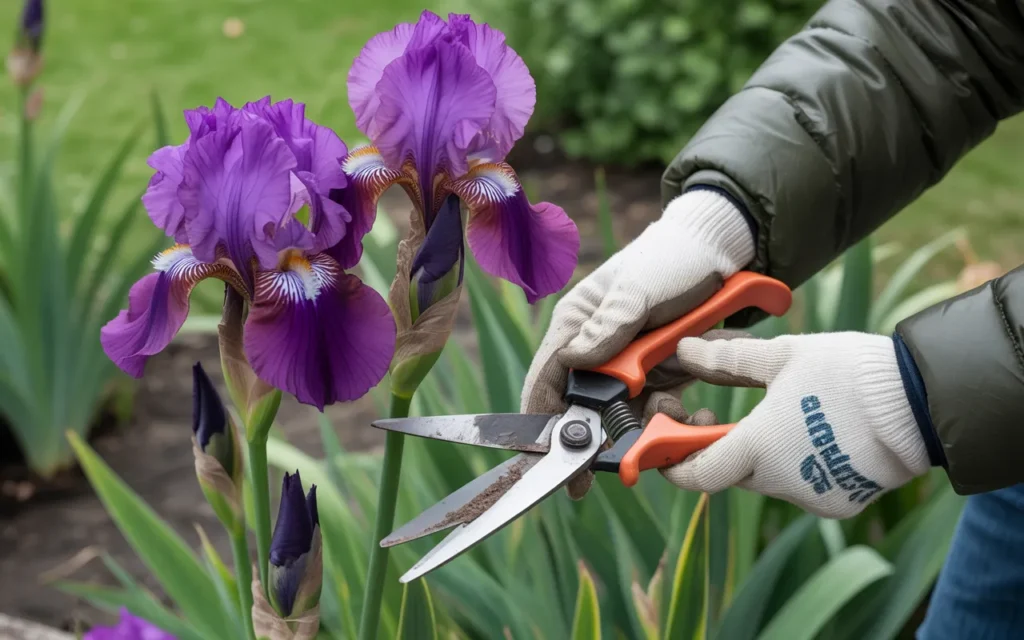
- Throughout the season, remove any yellowing or dead leaves from the plant.
- In the fall, after the first hard frost, cut the leaf fans back to about 4-6 inches tall. This removes any potential hiding spots for pests like the iris borer.
- Keep the area around the rhizomes free of weeds and thick mulch, which can trap moisture and lead to rot.
Dividing Your Irises
- Every 3 to 5 years, you will notice that your iris clump has become crowded and isn’t blooming as well as it used to. This is a sign that it’s time to divide them.
- The best time to do this is in the late summer, after they have finished blooming.
- Simply dig up the entire clump, use a sharp knife to cut the rhizomes apart into smaller sections (making sure each section has at least one fan of leaves), and replant them. This reinvigorates the plants and gives you lots of free irises to expand your garden or share with friends!
Conclusion
You are now ready to add the timeless elegance of irises to your garden. The most important lesson in learning how to plant iris bulbs is understanding the unique needs of the bearded iris rhizome.
By planting it high and proud, with its back to the sun, you are giving it the perfect conditions to thrive. With a little care and a sunny spot, these garden beauties will reward you with a spectacular and colorful performance year after year.
Frequently Asked Questions (FAQs)
1. What is the best way to plant iris rhizomes?
The best way is to plant them very shallow in a sunny, well-drained spot. Dig a shallow hole, create a small mound of soil in the center, and place the rhizome on top of the mound so that its top surface is exposed to the sun and air.
2. What happens if you plant iris bulbs too deep?
If you plant a bearded iris rhizome too deep, it will almost certainly rot. It needs sunlight and air on its “back” to stay healthy and produce flowers. If you plant a true iris bulb (like a Dutch iris) too shallow, it may not have a strong enough anchor and could be damaged by frost.
3. Do you soak iris bulbs before planting?
It is not necessary to soak iris rhizomes before planting. As long as they are firm and healthy, they are ready to go straight into the ground.
4. How deep should I plant iris bulbs?
For bearded iris rhizomes, plant them so the top is level with or slightly above the soil surface. For true iris bulbs (like Dutch or Siberian), plant them about 3 times as deep as the bulb is tall, which is usually 4-5 inches deep.
5. What is the best time of year to plant iris bulbs?
The best time to plant bearded iris rhizomes is in the late summer or early fall (July to September). The best time to plant true iris bulbs is in the mid-fall, along with your other spring-blooming bulbs.
6. Do irises multiply?
Yes, irises multiply quite readily. The rhizomes will grow and branch out underground, creating a larger clump each year. You will need to dig up and divide the clumps every 3-5 years to keep them healthy and blooming well.
7. Do irises need full sun?
Yes, irises are sun-lovers. For the best bloom production, they need at least 6 hours of direct, full sun each day. They will not flower well in shady conditions.