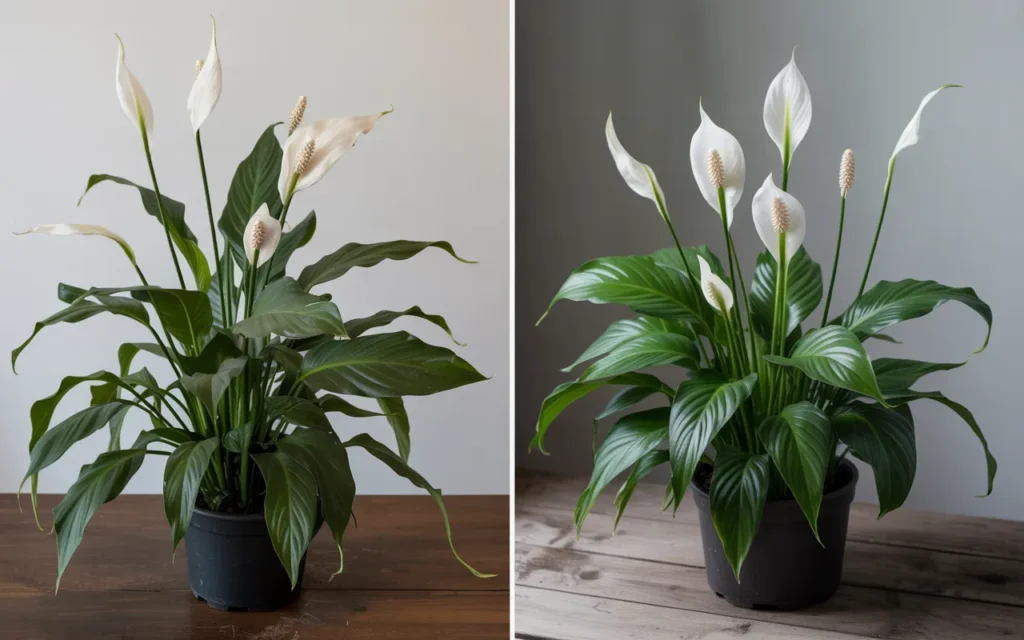
Is your beautiful peace lily looking sad, droopy, and dramatic? Don’t worry, you haven’t failed as a plant parent! Peace lilies are famous for their dramatic wilting, but they are also incredibly resilient.
This guide will show you every single step for how to revive a peace lily plant, turning your drooping drama queen back into a lush, thriving beauty.
Seeing your plant suffer can be stressful, but most of the time, the fix is surprisingly simple.
We’ll play plant detective to figure out exactly what’s wrong and walk through the easy solutions to bring it back to life. Get ready to watch your peace lily spring back with new energy!
Playing Plant Detective: Why Is My Peace Lily Drooping?
Before we can fix the problem, we have to identify it. Peace lilies communicate their needs very clearly, usually by drooping. Let’s look at the most common reasons your plant might be unhappy.
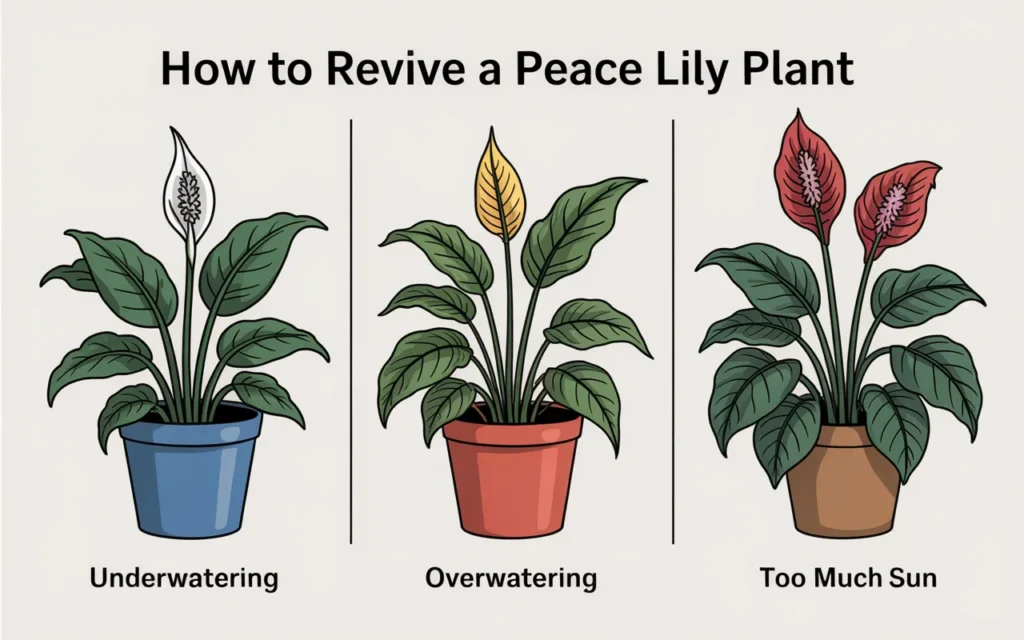
The #1 Culprit: A Thirsty Plant (Underwatering)
This is, by far, the most common reason for a wilting peace lily. They are tropical plants that love consistently moist soil.
- The Symptoms: The entire plant will look dramatically wilted and limp, like it has fainted. The leaves will feel soft and lifeless. The soil in the pot will be dry, light in color, and may even be pulling away from the sides of the pot.
- The Cause: You simply waited a little too long between waterings. The plant has used up all the available moisture in the soil and can no longer keep its leaves upright.
The Sneaky Impostor: A Drowning Plant (Overwatering)
This is the second most common issue, and it’s much more dangerous than underwatering. It can be confusing because the main symptom is also wilting.
- The Symptoms: The plant is wilted, but the leaves might also be turning yellow or brown, starting from the base. The soil will be soaking wet, soggy, or even smell musty. The base of the stems may feel mushy.
- The Cause: You’ve been watering too frequently, or the pot does not have proper drainage. The roots are sitting in water, unable to breathe. This leads to root rot, a serious condition that can kill the plant if not addressed.
Other Potential Issues:
- Too Much Sunlight: Peace lilies prefer indirect light. If they are in a spot with harsh, direct sun, the leaves can get scorched (developing brown, crispy spots) and the plant may wilt during the hottest part of the day as it loses moisture too quickly.
- Temperature Stress: They dislike cold drafts and sudden temperature changes. A plant placed near an air conditioning vent or a drafty winter window might show its stress by drooping.
- Nutrient Problems: Both a lack of nutrients (the plant is starving) or too much fertilizer (the roots are burned) can cause yellowing leaves and general unhappiness.
- Root-Bound Plant: If the plant has been in the same pot for years, its roots may have filled the entire container. A root-bound plant can’t absorb water and nutrients properly, leading to constant wilting and stunted growth.
How to Revive a Peace Lily Plant: Step-by-Step Solutions
Now that you have a better idea of what might be wrong, let’s get to the fixes!
Solution 1: Reviving a Thirsty, Underwatered Peace Lily
This is the easiest fix with the most dramatic results.
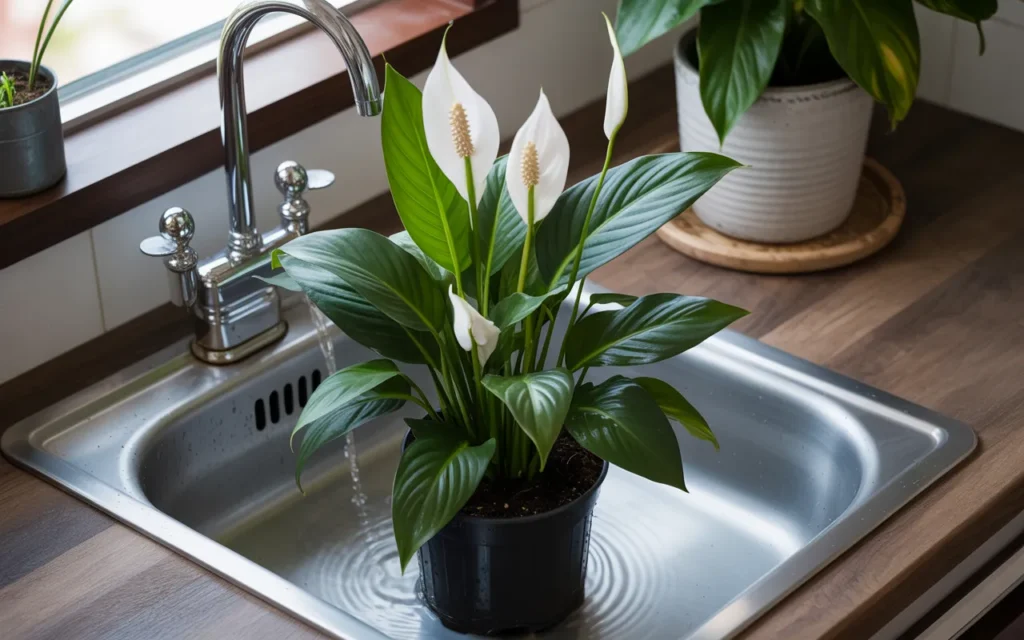
Step 1: The “Bottom-Watering” Soak
Instead of just pouring water on top, we’re going to let the plant drink from the bottom up. This ensures the entire root ball gets completely and evenly saturated.
- Find a sink, bathtub, or a large basin.
- Fill it with about 3-4 inches of room-temperature water.
- Place your peace lily (still in its pot) into the water. Make sure the pot has drainage holes!
- Let the plant sit and soak for at least 45 minutes to an hour. You will see the top of the soil become dark and moist as it wicks water all the way up.
Step 2: Let It Drain Completely
- After the soaking period, lift the pot out of the water and place it in an empty sink or on a rack.
- Let it sit for another 20-30 minutes to allow all the excess water to drain out of the bottom. This step is crucial to prevent it from becoming overwatered.
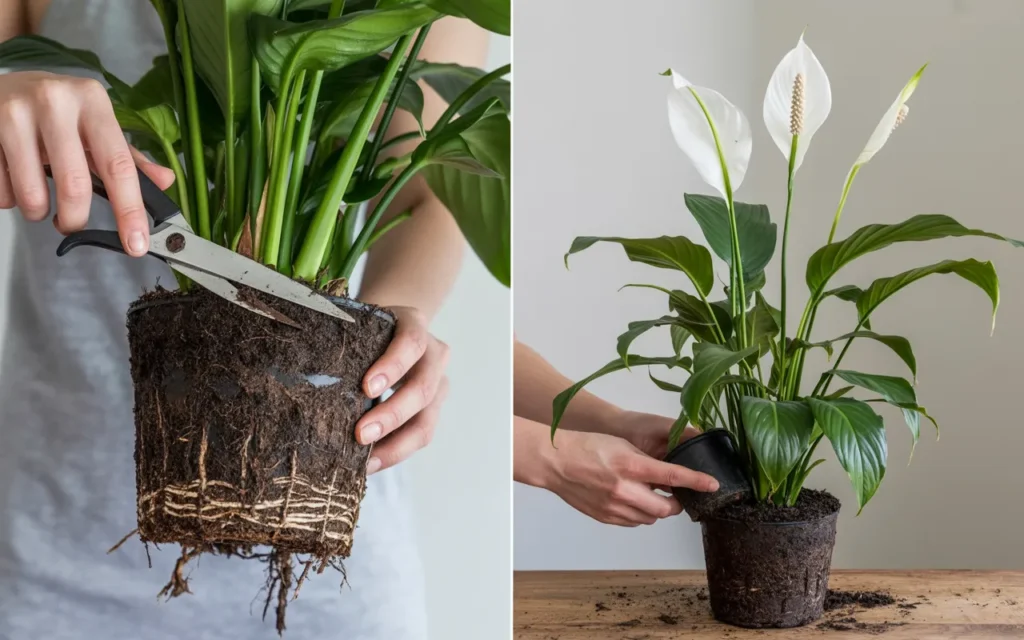
Step 3: Prune Damaged Leaves
- While it’s draining, take a look at the plant. If there are any leaves that are completely yellow or brown and crispy, it’s best to remove them.
- Use a clean pair of scissors or pruning shears to snip these leaves off at the base of their stem. This allows the plant to focus its energy on its healthy leaves. [Amazon Product : Precision Pruning Shears for Houseplants]
Step 4: Return to Its Spot and Be Amazed
- Place your plant back in its usual spot (as long as it’s not in direct sun!).
- Within a few hours, you should see a miraculous recovery. The leaves will perk up and return to their former glory. It’s one of the most satisfying things to watch!
Solution 2: Saving an Overwatered Peace Lily (Emergency Root Rot Surgery)
This requires more work, but it can absolutely save your plant’s life. You need to act quickly.
Step 1: Gently Remove the Plant from the Pot
- Tip the pot on its side and gently slide the plant out. Be very careful, as the waterlogged roots will be fragile.
Step 2: Inspect the Roots
- Gently shake off the old, soggy soil so you can get a good look at the root system.
- Healthy roots are firm, plump, and creamy-white.
- Rotted roots will be brown or black, mushy, slimy, and may even have a foul, rotten smell.
Step 3: Perform Root Surgery
- Using a clean, sharp pair of scissors, you must trim away every single piece of rotted root. Be ruthless! If you leave any rot behind, it will continue to spread in the new soil.
- Rinse the remaining healthy roots under gentle, lukewarm running water to wash away any remaining old soil and rot-causing bacteria.
Step 4: Prune the Foliage
- Your plant has just lost a significant portion of its root system. It can no longer support all of its leaves. You need to prune back about one-third of the foliage to balance things out.
- Remove any yellow or brown leaves first, then trim off a few of the older, outer green leaves. This reduces the stress on the remaining roots.
Step 5: Repot in Fresh Soil and a Clean Pot
- Choose a new pot that is just big enough for the remaining healthy root ball. Do not put it in a huge pot! If the old pot is the right size, you can reuse it, but you must wash it thoroughly with hot, soapy water first to kill any lingering bacteria. Make sure it has excellent drainage.
- Fill the pot with a fresh, well-draining potting mix. A mix designed for aroids or one with added perlite and orchid bark is fantastic for promoting air circulation. [Amazon Product: Premium Aroid and Monstera Potting Mix]
- Place your plant with its trimmed roots into the new pot and fill in around it with the fresh soil.
Step 6: Careful Aftercare
- Water the freshly repotted plant lightly—just enough to moisten the new soil.
- Place it in a spot with medium, indirect light and good humidity. Avoid bright light while it’s recovering.
- Do not water again until the top inch or two of soil feels dry. It’s critical to let the soil dry out a bit to prevent rot from returning. Be patient; it will take a few weeks for the plant to recover and start showing new growth.
Long-Term Care: The Keys to a Happy Peace Lily
Reviving your plant is great, but keeping it happy is the real goal. Here’s how to provide the perfect environment.
The Right Way to Water
Forget a strict schedule like “once a week.” The best way to know when to water is to check the soil.
- Stick your finger about an inch into the soil. If it feels dry, it’s time to water. If it feels moist, wait another day or two and check again.
- When you do water, water thoroughly until it runs out the drainage holes. Then, dump out any excess water from the saucer. Peace lilies should never be left sitting in a tray of water.
- Filtered or Distilled Water: Peace lilies can be sensitive to the chlorine and fluoride in tap water, which can cause brown, crispy leaf tips. If you notice this, try letting your tap water sit out overnight before using it, or switch to filtered or distilled water. [Amazon Product: Stylish Long-Spout Watering Can]
Light Requirements: Bright but Indirect
The phrase “low light” is misleading. While peace lilies can survive in low light, they will thrive and bloom in bright, indirect light.
- Perfect Spot: An east-facing window that gets gentle morning sun is ideal. A spot a few feet back from a bright south- or west-facing window is also great.
- Signs of Too Much Sun: Yellowing leaves or brown, scorched patches.
- Signs of Too Little Sun: No flowers, slow growth, and a darker green leaf color.
Humidity: They Love a Tropical Feel
Peace lilies are rainforest plants and adore high humidity. Our homes are often too dry for them.
- How to Increase Humidity:
- Place the pot on a pebble tray (a shallow tray filled with pebbles and water).
- Group it together with other plants.
- Run a small humidifier nearby. [Amazon Product: Small Cool-Mist Humidifier for Plants]
- Keep it in a naturally humid room, like a bathroom with a window.
Feeding Your Peace Lily
Peace lilies are not heavy feeders, but they do appreciate some food during their growing season (spring and summer).
- Fertilize with a balanced liquid houseplant fertilizer, diluted to half-strength, about once a month from spring through fall.
- Do not fertilize in the winter when the plant is resting.
- Over-fertilizing can cause brown leaf tips, so less is more.
Conclusion
You now have all the tools and knowledge for how to revive a peace lily plant and keep it thriving for years to come.
These elegant plants are tough, forgiving, and communicate their needs clearly. By learning to read their signals especially their dramatic wilting you can provide exactly what they need to flourish. Enjoy the beauty and air-purifying benefits of your happy, healthy peace lily!
Frequently Asked Questions (FAQs)
1. Why does my peace lily droop so dramatically?
Peace lilies wilt very visibly as a survival mechanism. When they don’t have enough water, they can’t maintain turgor pressure in their leaves, causing them to go limp. This reduces the surface area exposed to light and preserves moisture. It’s their way of screaming, “I’m thirsty!”
2. How long does it take for a peace lily to recover from wilting?
If the wilting is just from thirst, a good bottom-watering soak will usually have the plant looking completely perky again within a few hours. If you had to treat it for root rot, the recovery will be much slower, taking several weeks to a month before you see signs of new, healthy growth.
3. Should I cut the yellow leaves off my peace lily?
Yes, you should. A yellow leaf will never turn green again. Pruning it off allows the plant to redirect its energy toward new growth and healthy leaves. Use clean scissors and cut the stem at the base of the plant.
4. Why are my peace lily’s leaves turning brown on the tips?
Brown, crispy tips are most often caused by a watering issue. It can be from mineral buildup from tap water (fluoride and chlorine), low humidity, or allowing the soil to get too dry between waterings. Try using filtered water and increasing humidity.
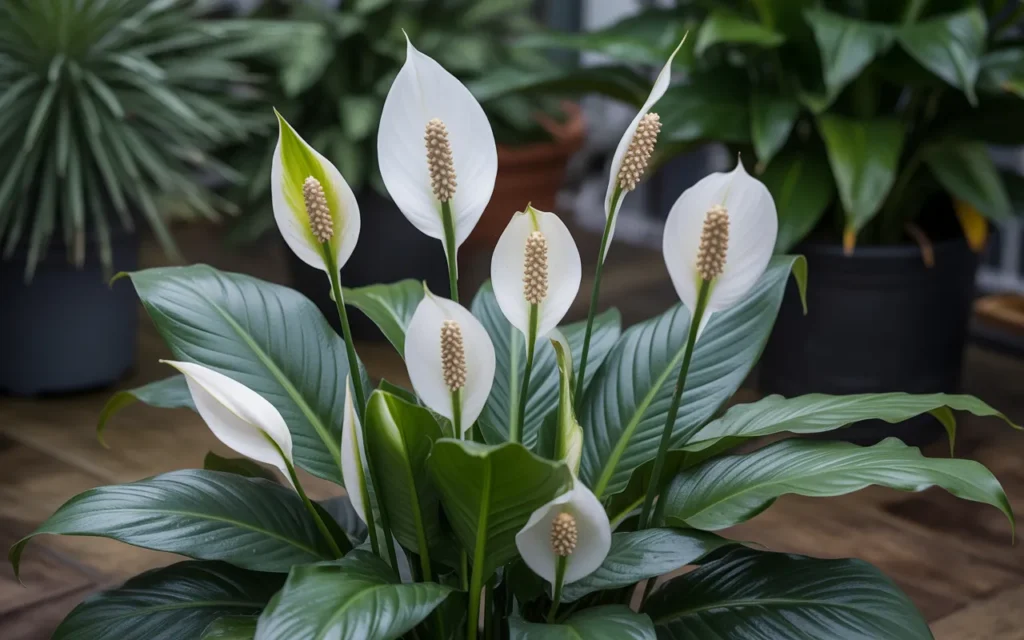
5. How do I get my peace lily to flower again?
To bloom, a peace lily needs two things: maturity and enough light. Make sure your plant is in a spot where it gets plenty of bright, indirect light (not direct sun). An east-facing window is perfect. If it’s healthy and getting enough light, it should produce its signature white spathe flowers.
6. Is it okay to mist my peace lily?
Misting can provide a temporary humidity boost and can help keep leaves clean, but it’s not a long-term solution for low humidity. A pebble tray or a humidifier is a much more effective method. If you do mist, do it in the morning so the leaves have time to dry during the day.
7. How do I know when it’s time to repot my peace lily?
It’s time to repot when the plant becomes root-bound. Signs include roots growing out of the drainage holes, the plant needing to be watered constantly, or if you can see a dense mass of roots when you slide the plant out of its pot. Generally, you’ll need to repot every 1-2 years.