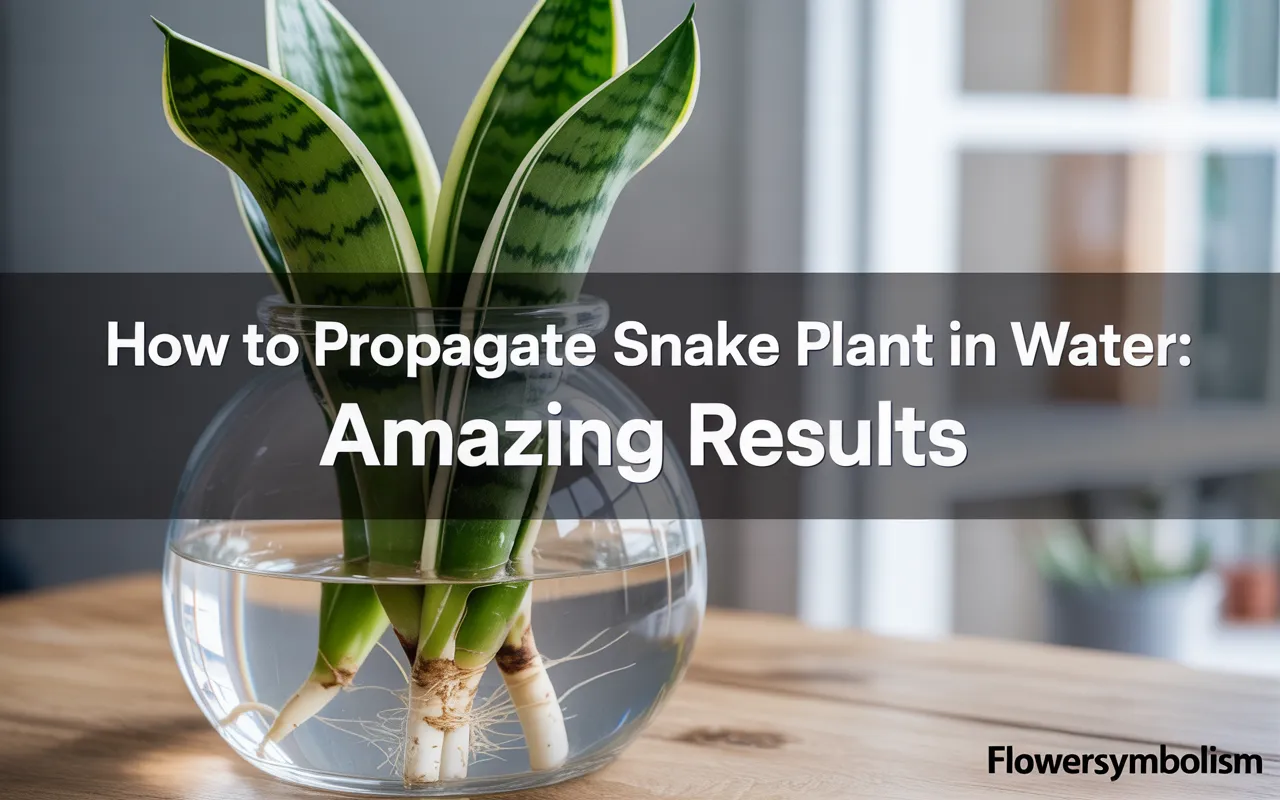
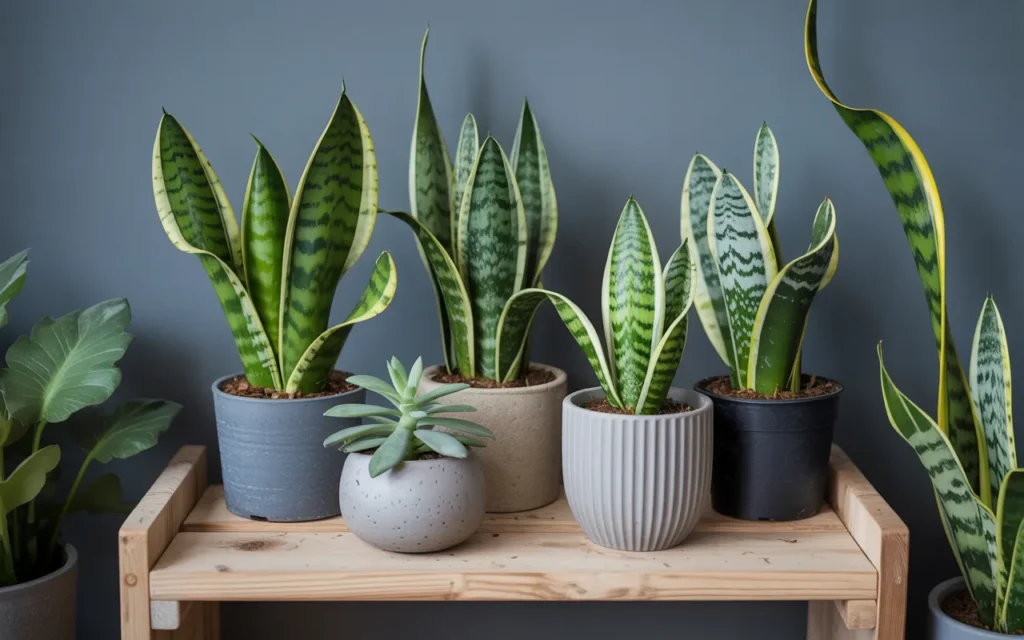
The snake plant, or Dracaena trifasciata, is famous for being one of the toughest and most forgiving houseplants you can own. But did you know it also holds a magical secret? You can easily create brand new snake plants from a single leaf, for free!
This guide is here to show you the most popular and visually satisfying method: how to propagate a snake plant in water.
Watching roots emerge from a simple leaf cutting is one of the most rewarding projects for any plant lover, from beginner to expert. We will guide you through every simple step, from making the perfect cut to watching your new plantlet grow.
Forget buying new plants; let’s learn how to multiply the ones you already have and fill your home with even more of these architectural beauties.
Why Water Propagation is a Great Choice
While you can also propagate snake plants directly in soil, the water method is a favorite for several good reasons. It’s an excellent way for beginners to get started with propagation.
- It’s Visually Rewarding: This is the best part! You get a front-row seat to the entire process. Watching those first tiny white roots appear and grow longer each day is incredibly exciting and motivating.
- Easy to Monitor: You can see everything that’s happening. It’s easy to spot any potential issues, like rot, and you know exactly when the roots are long enough to be planted in soil. There’s no guesswork involved.
- Simple and Clean: The process requires very few supplies and is less messy than working with soil from the start. All you really need is a leaf, a sharp tool, and a jar of water.
- High Success Rate: For many people, water propagation feels more controlled and leads to a high rate of success. The constant supply of water helps the cutting stay hydrated as it works on growing new roots.
What You’ll Need for This Project
The beauty of this method is its simplicity. You likely have everything you need sitting around your house right now.
Your Propagation Toolkit:
- A healthy, mature snake plant
- A clean, sharp knife or a pair of strong scissors/pruning shears
- A clear glass jar, vase, or bottle (seeing the roots is the whole point!)
- Room temperature water (tap water is usually fine)
- A bright spot out of direct sunlight
- Optional: Rooting hormone
[Amazon Product: Set of 3 Clear Glass Propagation Vases with Wooden Stand]
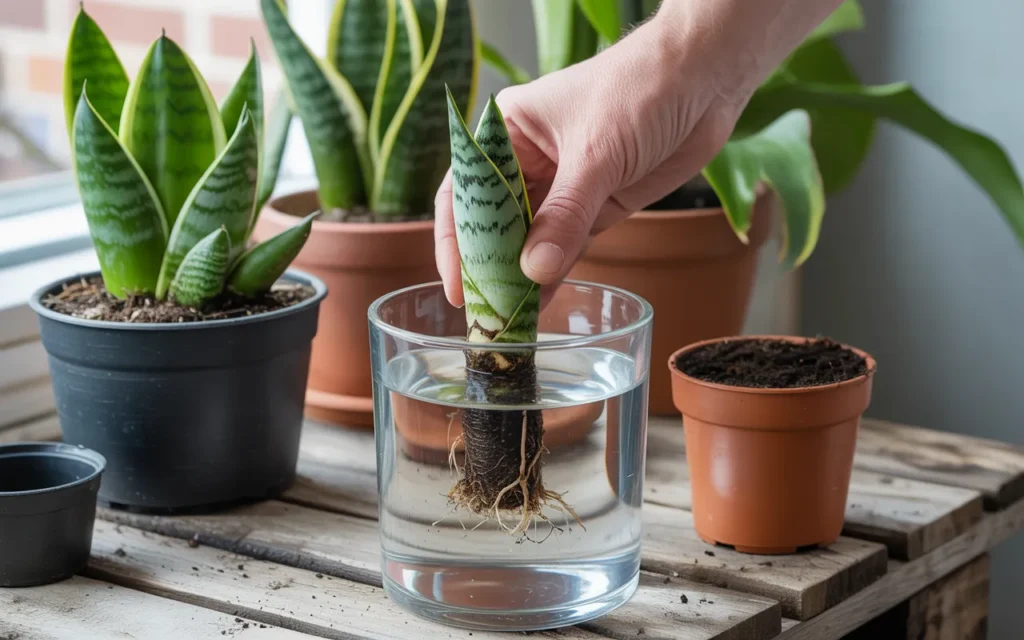
Step 1: Choosing and Cutting the Perfect Leaf
The success of your propagation journey begins with selecting a good candidate and making a clean cut.
Selecting a Healthy Leaf
- Look for a leaf that is healthy, mature, and vibrant. Avoid any leaves that are yellowing, mushy, or very old.
- A larger, well-established leaf has more stored energy, which can help it survive the process and produce roots more effectively.
- Choose a leaf that is at least 4-6 inches tall.
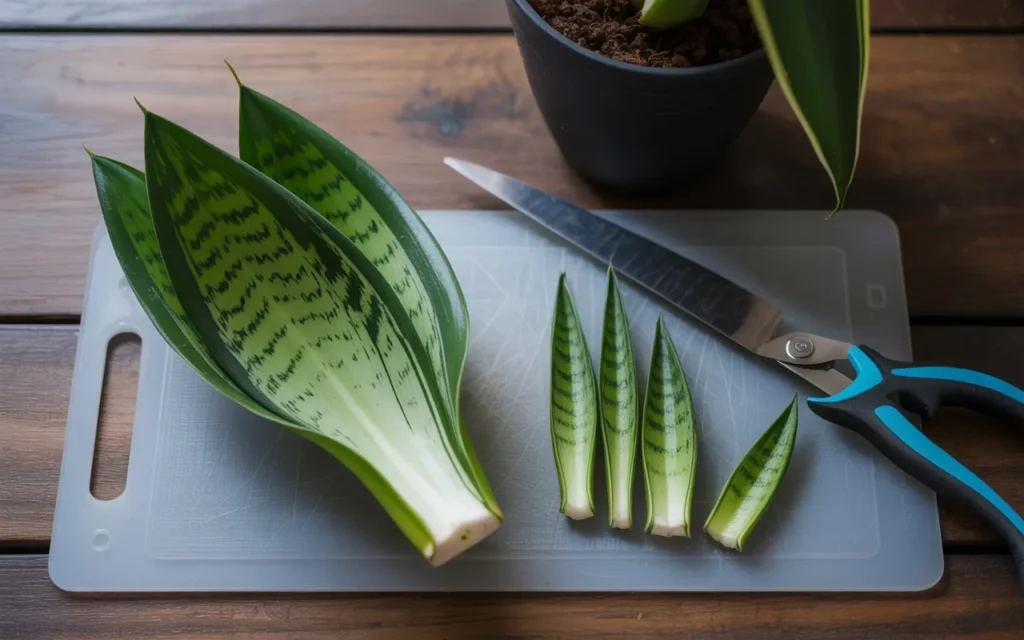
Making the Cut
- Using your clean, sharp knife or shears, make a clean cut across the leaf near the soil line. It’s important to use a sharp tool to avoid crushing the plant’s cells, which can lead to rot.
- Now, take your long leaf cutting and place it on a cutting board. You can root the whole leaf, but cutting it into smaller sections is a great way to create multiple new plants from a single leaf.
- Cut the leaf into sections that are each about 3 to 5 inches long.
- This next part is the most important secret to success: You must remember which end is the bottom (the part that was closer to the roots) and which is the top. A snake plant cutting will only grow roots from the bottom end.
- To avoid getting mixed up, many people make a V-shaped cut (an inverted chevron) on the bottom of each section. This not only helps you remember which way is down but also increases the surface area for roots to grow.
Step 2: The Callousing Process (Don’t Skip This!)
You’ve made your cuttings. Now, you might be tempted to put them straight into water. Wait! You must let the cut ends dry out and form a callus first.
- Why is this important? The fresh, open wound on the bottom of the cutting is very susceptible to rot when placed in water. Letting it dry and form a protective callus is like letting a scab form over a cut. It seals the wound and dramatically reduces the chance of your cutting turning to mush.
- How to do it: Simply place your cuttings on a clean, dry surface, like a paper towel on a counter, out of direct sunlight.
- How long to wait: Let the cuttings sit for at least 2 to 3 days. You will notice the cut end becomes dry and leathery to the touch. For very thick cuttings, you might even wait up to a week. Don’t worry, the leaf has plenty of stored water to survive this process.
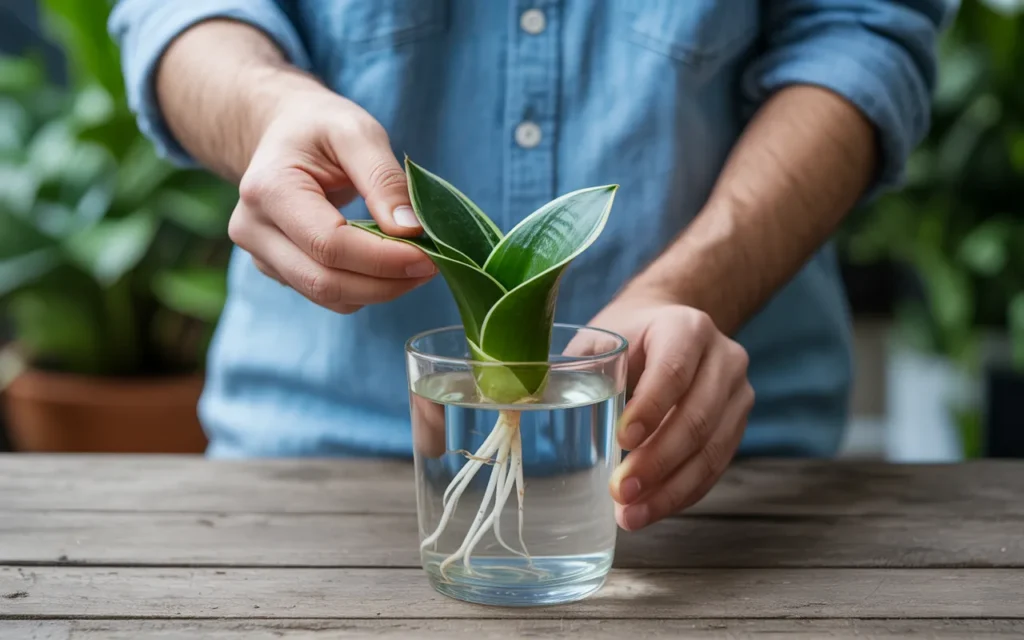
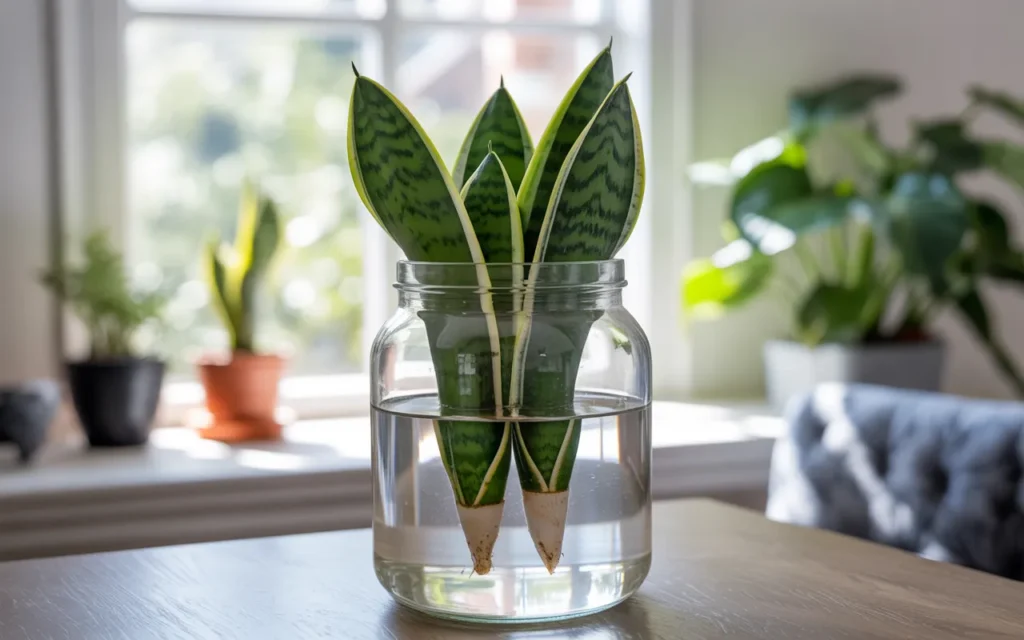
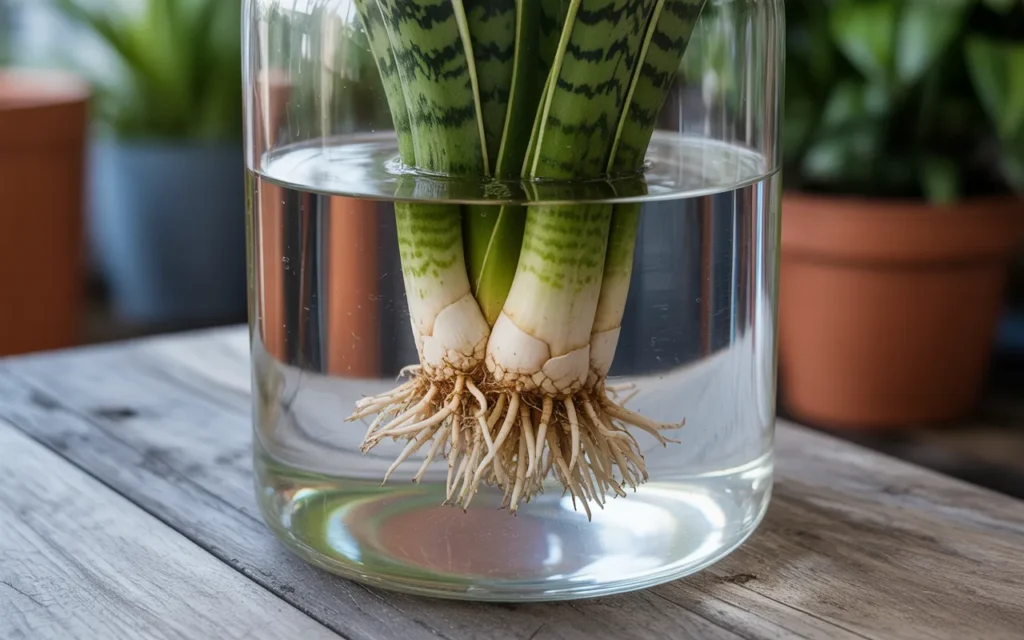
Step 3: Placing Your Cuttings in Water
Your cuttings are calloused and ready for their new home. It’s time to add water!
- Take your clean glass jar or vase.
- Place your snake plant cuttings inside, making sure the bottom end (the V-cut end) is facing down.
- Add enough room temperature water to submerge the bottom 1 to 2 inches of the cuttings. Don’t submerge the entire leaf, as the parts not in water need to breathe.
- Place the jar in a spot that receives plenty of bright, indirect light. A spot near a window but not directly in the sun’s harsh rays is perfect. Too much direct sun can encourage algae growth.
Step 4: The Waiting Game and Routine Care
This is where your patience comes in. Snake plant propagation is not a fast process. It’s a marathon, not a sprint. But with a little routine care, you’ll see results.
Be Patient
- It can take anywhere from a few weeks to a few months for you to see the first signs of roots. The speed depends on the health of the cutting, the time of year, and the amount of light it receives. Propagation is fastest during the spring and summer growing season.
Routine Water Changes
- This is the most important part of the care routine. You must change the water every 5 to 7 days, or sooner if you notice it getting cloudy.
- Fresh water replenishes oxygen and prevents the growth of bacteria and algae, which can cause your cuttings to rot.
- When you change the water, you can also give the cuttings and the jar a gentle rinse to remove any slimy buildup.
Optional: Using Rooting Hormone
- While not strictly necessary, using a rooting hormone can sometimes speed up the process and increase your chances of success.
- How to use it: After you make your cuttings but before you let them callus, you can dip the bottom end of each cutting into a powdered rooting hormone. Tap off the excess, then let the cutting callus as usual before placing it in water.
[Amazon Product: Garden Safe TakeRoot Rooting Hormone Powder]
Watching for Growth: Roots and Pups
After a period of waiting, the magic will start to happen.
- First Roots: The first thing you’ll see are tiny, white nubs emerging from the bottom cut of the leaf. These will slowly elongate into full-blown roots. It’s incredibly exciting!
- The First Pup: After a healthy root system has developed (this could take another month or two), you will see a brand new baby snake plant, called a “pup” or “rhizome,” begin to form near the base of the roots. This pup will grow upwards, eventually sprouting its own tiny leaves.
Important Note for Variegated Snake Plants: If you are propagating a snake plant with yellow edges (like the popular ‘Laurentii’ variety), the new pups that grow from a leaf cutting will not have the yellow variegation. They will revert to the solid green form of the plant. This is because the variegation is a chimeral mutation that cannot be passed on through leaf cuttings.
Step 5: Planting Your Rooted Cuttings in Soil
The final step is to move your new plant from its water home to a more permanent residence in a pot.
When Is It Ready?
- It’s time to plant when your cutting has developed a healthy root system. A good rule of thumb is to wait until the new roots are at least 1 to 2 inches long.
- If a new pup has started to form, that’s an even better sign that it’s ready for the transition to soil.
The Planting Process
- Choose a Small Pot: Start with a small pot, about 3 to 4 inches in diameter, with excellent drainage holes.
- Use the Right Soil: Snake plants need a very well-draining soil mix. A high-quality cactus and succulent mix is the perfect choice. You can also make your own by mixing regular potting soil with perlite or coarse sand.
- Planting: Fill the pot with soil and create a small hole. Gently place your rooted cutting into the hole, being careful not to break the delicate roots. Plant it just deep enough for the roots to be covered and for the cutting to stand upright.
- Water Lightly: Give the soil a light watering. The new roots are used to a water environment, but you don’t want to shock them by placing them in soggy soil.
- Aftercare: For the first few weeks, keep the soil lightly moist (but not wet) to help the roots acclimate to their new environment. After that, you can switch to a normal snake plant watering schedule, allowing the soil to dry out completely between waterings.
Troubleshooting Common Problems
- My Cutting is Slimy and Rotting: This is the most common issue. It’s almost always caused by not letting the cutting callus properly before putting it in water, or by not changing the water frequently enough. If you see rot, take the cutting out, cut off the mushy part with a clean knife, and let the new cut callus before trying again.
- The Water is Green and Smelly: This is algae and bacteria. Change the water immediately and move the jar to a spot with slightly less intense light. Clean the jar and rinse the cuttings before adding fresh water.
- It’s Been Months and Nothing is Happening: Patience is key. As long as the cutting is still firm and green and not rotting, it’s still alive and working on it. Try moving it to a slightly warmer or brighter spot to encourage it. Propagation is much slower in the winter.
Conclusion
You are now fully equipped with the knowledge of how to propagate a snake plant in water. This simple and fascinating project is a perfect entry into the world of plant propagation and a wonderful way to multiply your houseplant collection for free. The joy of watching a new plant emerge from a simple leaf is a unique gardening thrill. So grab a leaf, a jar, and get started on creating your very own snake plant family!
Frequently Asked Questions (FAQs)
1. How long does it take to propagate a snake plant in water?
Patience is essential. It can take anywhere from 1 to 4 months for roots to appear. After the roots form, it can take another 1-2 months for a new baby plant (pup) to start growing. The entire process from cutting to a plantable pup can take several months.
2. Can you put a snake plant cutting directly in water?
You should not put a fresh cutting directly in water. It’s a critical step to let the cut end dry out and form a callus for 2-3 days first. This seals the wound and prevents the cutting from rotting in the water.
3. Is it better to propagate a snake plant in water or soil?
Both methods work well, and it’s a matter of personal preference. Propagating in water is more visual and allows you to easily monitor root growth, which many beginners find helpful. Propagating in soil is more direct but requires you to trust that roots are forming underground.
4. Why is my snake plant cutting not rooting?
The most common reasons are a lack of patience, not enough light, or the time of year. Propagation is much faster in the warm, bright months of spring and summer. As long as your cutting is firm and not rotting, it is likely still viable. Try moving it to a spot with more bright, indirect light.
5. How do you know when to move your water propagation to soil?
A good rule is to wait until the new roots are at least 1 to 2 inches long. This indicates that the root system is robust enough to handle the transition from a water environment to soil.
6. Do you need to use rooting hormone for snake plants?
No, it is not necessary. Snake plants will root on their own without any help. However, using a rooting hormone can sometimes speed up the process and may increase the success rate.
7. Can I propagate a snake plant from a leaf that has broken off?
Yes, absolutely! As long as the broken piece is healthy and at least a few inches long, you can use the exact same method. Just be sure to let the broken end callus over before placing it in water. It’s a great way to save a damaged leaf.