There is something undeniably magical about a rose. Its velvety petals, intoxicating fragrance, and timeless beauty can transform any garden into a romantic paradise.
But what if you could capture that magic and multiply it, creating new, vibrant rose bushes from a simple stem cutting? It sounds like a secret reserved for master gardeners, but this guide is here to show you that learning how to plant roses from stems is an achievable and incredibly rewarding DIY project.
Imagine turning a single stem from a beloved bouquet or a favorite bush into a brand new plant, for free.
This beautiful DIY guide is designed for everyone, from the curious beginner to the seasoned gardener looking for a new challenge.
We will delve deep into the art of rose propagation, exploring various methods step-by-step. You will learn the best time to take cuttings, how to prepare them for success, and the secrets to encouraging those delicate new roots to grow.
Get ready to unlock the potential hidden within every rose stem and fill your garden with beauty you created yourself.
Why Propagate Roses from Cuttings?
Before we get our hands dirty, let’s explore why this age-old technique is so beloved by gardeners everywhere. Propagating roses from cuttings, also known as “striking” roses, is more than just a way to get free plants; it’s a connection to the gardening past and a deeply satisfying process.
- It’s Economical: A new rose bush from a nursery can be quite an investment. Propagating your own is virtually free, allowing you to expand your garden on a minimal budget. You can create an entire hedge of roses from just one parent plant over time.
- Preserve a Special Plant: Do you have a sentimental rose bush in your garden—perhaps one planted by a grandparent or received as a special gift? Taking cuttings ensures that its legacy lives on, even if the original plant ages or succumbs to disease. It’s a way to clone and protect a living piece of your history.
- Replicate a Favorite Variety: Have you ever admired a friend’s stunning rose and wished you had the same one? If they give you permission to take a few cuttings, you can grow an exact genetic replica in your own garden. This is perfect for varieties that are rare or no longer sold in stores.
- The Ultimate DIY Satisfaction: There is a unique sense of pride and accomplishment that comes from watching a bare stem, that you prepared with your own hands, sprout leaves and eventually produce its first breathtaking bloom. It’s a tangible result of your patience and care.
- Create Thoughtful Gifts: A healthy, rooted rose cutting in a beautiful pot makes an incredibly personal and meaningful gift for fellow garden lovers. You’re not just giving a plant; you’re giving a piece of your own garden and a story.
Understanding the Basics: How Does It Work?
Learning how to plant roses from stems relies on a plant’s incredible ability to regenerate. When you take a cutting, you are essentially creating a small wound.
In response, the plant’s cells at the cut site, known as the cambium layer, are stimulated to change their function.
Instead of just transporting water and nutrients, they begin to differentiate and form adventitious roots new roots that grow from a part of the plant other than the primary root system.
Our job as gardeners is to create the perfect environment to encourage and support this natural process.
This means providing the right balance of moisture, humidity, warmth, and light to keep the stem alive long enough for these new roots to form and become self-sufficient. Every step in this guide is designed to optimize these conditions for the highest possible chance of success.
When Is the Best Time to Take Rose Cuttings?
Timing is one of the most critical factors for successfully rooting roses. The type of wood you use for your cutting determines the best season to act.
| Cutting Type | Description | Best Time to Cut | Success Rate |
|---|---|---|---|
| Softwood | New, flexible green shoots from the current season’s growth. They root quickly but are prone to drying out or rotting. | Late Spring to Early Summer (May-June) | High, but requires close attention. |
| Semi-hardwood | Stems from the current season that are starting to mature. The base is becoming woody, but the tip is still soft. | Mid-Summer to Early Autumn (July-September) | Very High. This is the most reliable and recommended type for beginners. |
| Hardwood | Mature, woody stems from the previous season’s growth, taken when the plant is dormant. | Late Autumn to Early Spring (October-February) | Lower, but cuttings are very resilient. |
For beginners, semi-hardwood cuttings taken in mid-summer are the gold standard. The stems have the perfect balance of stored energy and active growth hormones, making them eager to root.
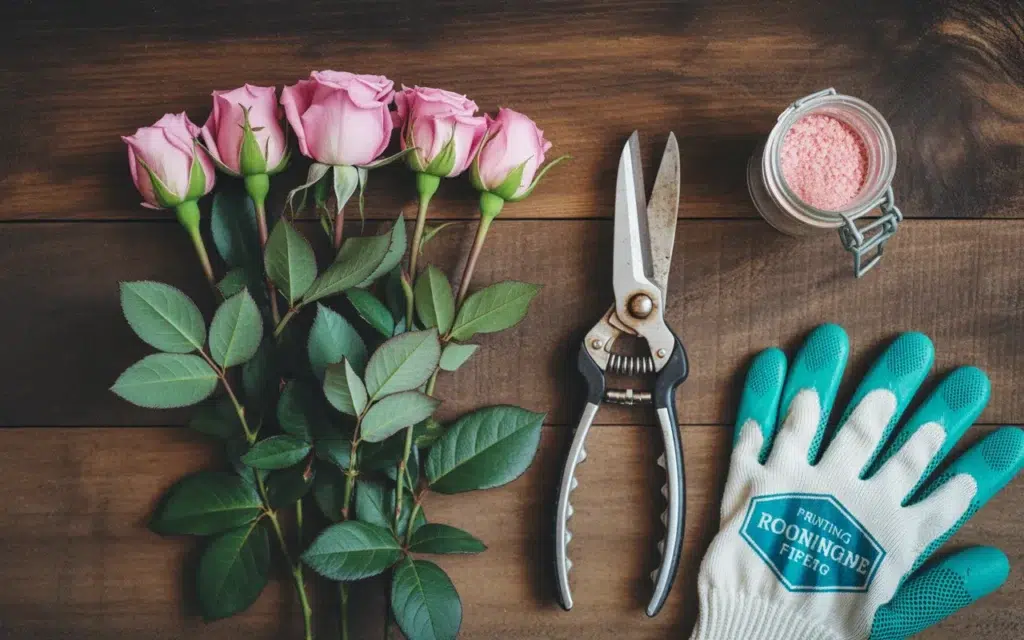
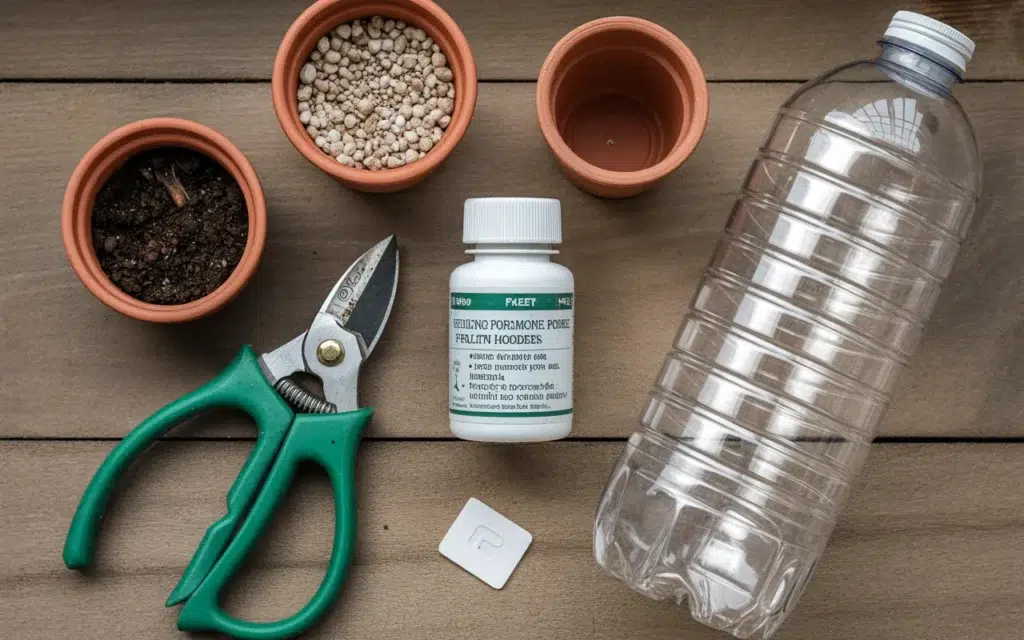
Essential Tools and Materials
Gathering your supplies beforehand makes the process smooth and enjoyable. You don’t need a lot of expensive equipment, but using the right tools will significantly increase your success rate.
- A Healthy Parent Rose Bush: Choose a vigorous, well-established, and disease-free plant to take your cuttings from.
- Sharp, Sterile Pruning Shears: This is non-negotiable. A clean cut from a sharp tool minimizes damage to both the parent plant and the cutting. A dull tool will crush the stem’s delicate tissues. A quality pair of Bypass Pruning Shears is an excellent investment. Sterilize the blades with rubbing alcohol or a bleach solution before and after use.
- Rooting Hormone: While some roses will root without it, using a rooting hormone dramatically improves your odds. It contains auxins (plant hormones) that stimulate root formation and fungicides that protect the cut from rot. You can find it as a Rooting Hormone Powder or gel.
- A Dibber or Pencil: For making planting holes in your soil mix.
- Plant Pots: Small to medium-sized pots (4-6 inches) with excellent drainage holes are perfect.
- A High-Quality Rooting Medium: This is crucial. Your cuttings need a light, airy, and sterile mix that holds moisture but drains freely. Do not use heavy garden soil. The best options are:
- DIY Mix: Equal parts [Perlite], [Vermiculite], and peat moss or coco coir.
- Pre-made: A high-quality seed starting mix.
- A Humidity Dome: Creating a humid environment is key to keeping the cutting hydrated before it has roots. You can use a clear plastic bag, a cut-in-half soda bottle, or a proper Plant Propagation Dome Tray.
- Watering Can with a Fine Rose: For gentle watering.
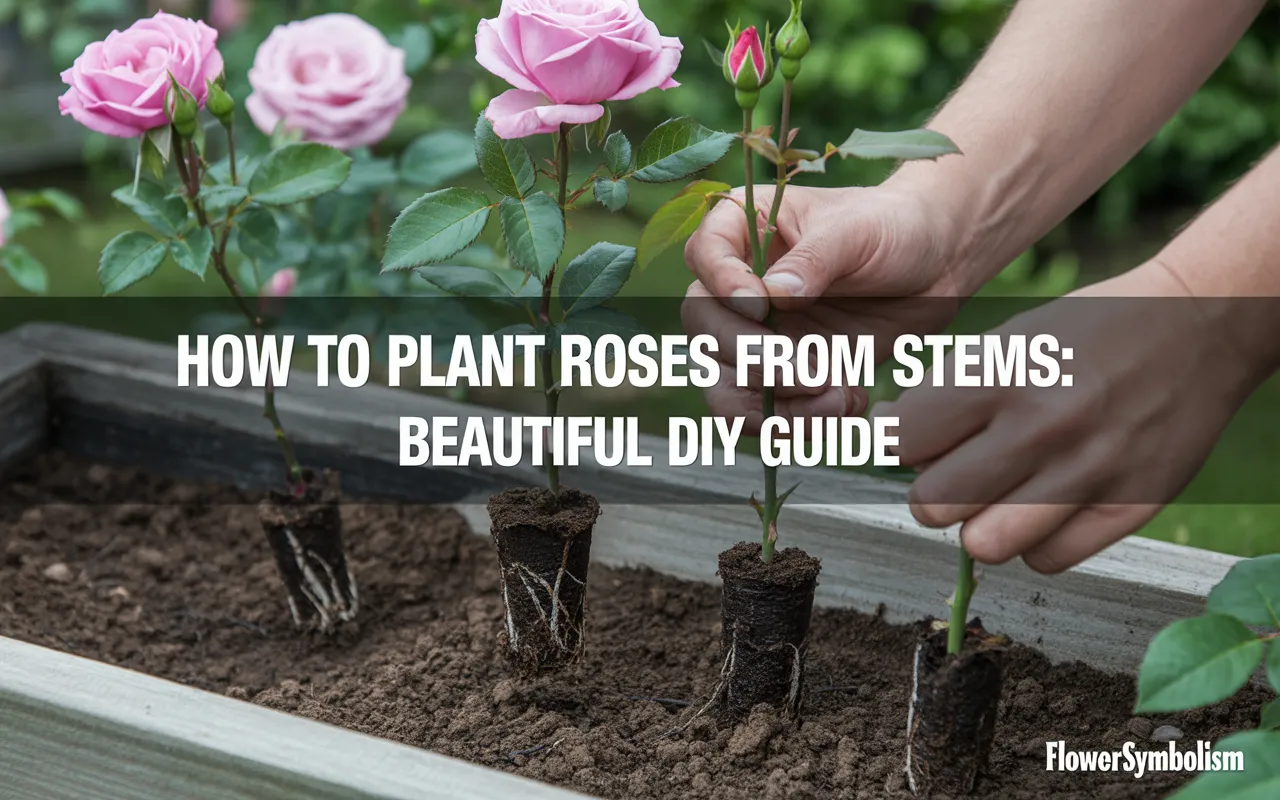
How to Plant Roses From Stems: A Step-by-Step Guide
This is the main event! Follow these steps carefully to prepare and plant your cuttings. We will focus on the most reliable semi-hardwood method.
Step 1: Taking the Perfect Cutting
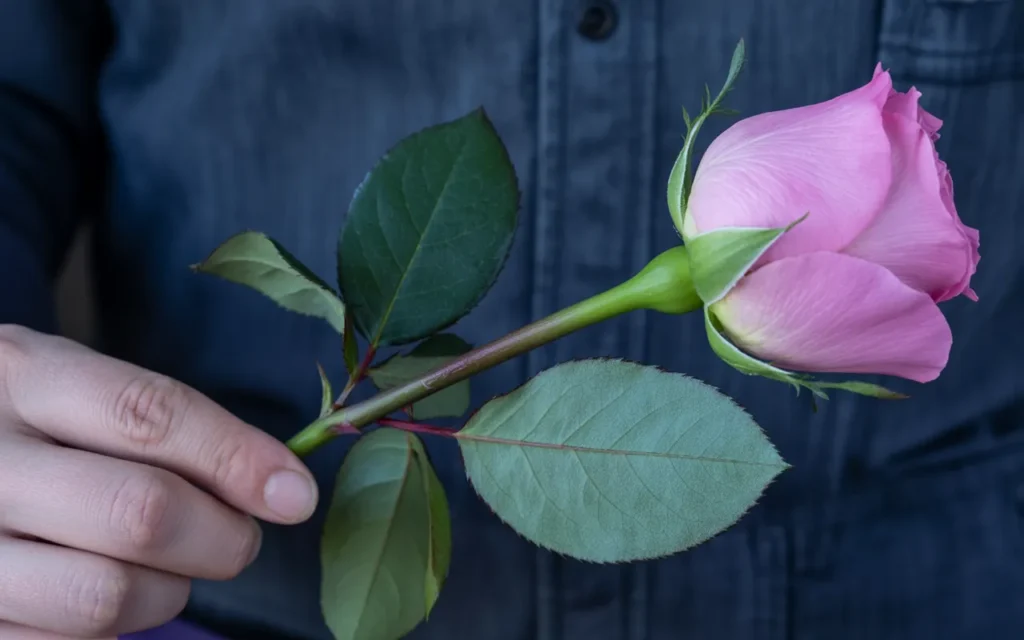
- Choose the Right Stem: In the morning, when the plant is most hydrated, look for a long, healthy stem from this year’s growth. The ideal stem is one that has just finished flowering. The “heel”—where the flower meets the stem—is a good indicator. The stem should be about the thickness of a pencil.
- Make the Cut: Using your sterilized pruners, snip off a section of the stem that is about 6-8 inches long.
- Prepare the Cutting: Now, take that 6-8 inch section and prepare it for rooting.
- Top Cut: Make a straight cut just above a top leaf node (the small bump where a leaf grows).
- Bottom Cut: Make a 45-degree angled cut just below a bottom leaf node. The angled cut exposes more of the cambium layer, providing a larger surface area for roots to emerge.
- Remove Lower Leaves: Carefully snip off all the leaves from the bottom half of the cutting. These would rot under the soil.
- Reduce Top Leaves: Leave only the top one or two sets of leaves. If these leaves are large, you can cut them in half horizontally. This step is crucial as it reduces moisture loss through transpiration, allowing the stem to conserve energy for root production.
- (Optional) Lightly Wound the Base: Gently scrape the outer bark off the bottom inch of the cutting on one or two sides with your knife. This can further stimulate rooting but be very gentle.
Step 2: Applying Rooting Hormone
- Pour a small amount of Rooting Hormone Powder onto a clean dish. Do not dip the cutting directly into the main container to avoid contamination.
- Moisten the bottom inch of your prepared cutting with water.
- Gently dip and roll the moistened end in the rooting hormone powder, ensuring the entire cut surface and the lower stem are lightly coated.
- Tap the cutting gently to remove any excess powder.
Step 3: Planting the Cutting
- Fill your pot with your prepared rooting medium and water it lightly so it’s damp but not soggy.
- Use a dibber or pencil to create a planting hole in the center of the pot. This prevents the rooting hormone from being wiped off as you insert the cutting.
- Carefully place your cutting into the hole, ensuring it’s about 3-4 inches deep, so at least two leaf nodes are buried.
- Gently firm the soil around the cutting to ensure good contact and to hold it securely in place.
Step 4: Creating a Humid Microclimate
This is the final, critical step to keep your leafless, rootless stem from drying out.
- Gently water the pot again to settle the soil.
- Place a clear plastic bag over the pot, using stakes or sticks to ensure the plastic does not touch the leaves.
- Alternatively, use a cut-in-half soda bottle placed over the cutting to act as a mini-greenhouse.
- Place your potted cutting in a warm location that receives bright, indirect sunlight. Avoid direct sun, as it will overheat and cook your cutting inside its humidity dome. A spot near a bright window but out of the direct sunbeams is perfect.
The Waiting Game: Caring for Your Cuttings
Patience is a gardener’s greatest virtue. Your cutting now needs time to work its magic.
- Check Moisture: Check the soil every few days. It should remain consistently moist but never waterlogged. If the soil feels dry, water gently around the base of the cutting.
- Ventilate: Once a week, remove the plastic cover for about an hour to allow fresh air to circulate and prevent mold or fungal growth.
- Watch for Growth: After 4 to 8 weeks, you should see new leaf growth. This is a very exciting sign! However, new leaves don’t always mean new roots. Plants can use stored energy to produce a few leaves first.
- The Tug Test: The best way to check for roots is to wait about 8-10 weeks and then give the cutting a very gentle tug. If you feel resistance, congratulations! Your cutting has successfully formed roots and is on its way to becoming a new plant. If it pulls out easily, it hasn’t rooted yet, so simply place it back, firm the soil, and give it more time.
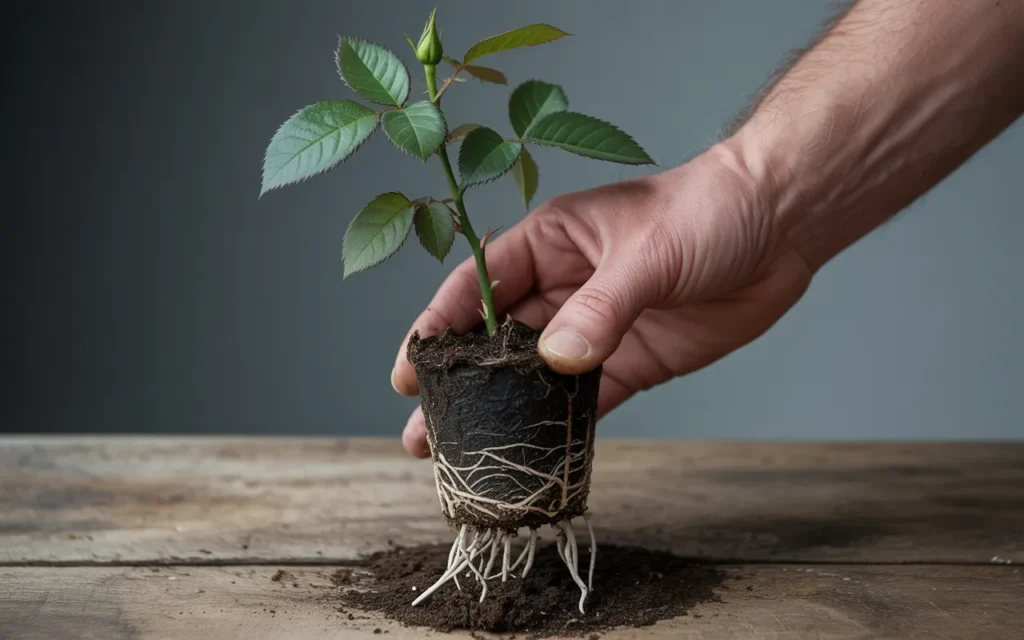
Transplanting Your New Rose Bush
Once your cutting has a robust root system (you can often see roots coming out of the drainage hole), it’s time to acclimate it to the real world.
- Harden Off: Gradually acclimate your new plant to lower humidity by removing the plastic cover for longer periods each day over the course of a week.
- First Transplant: Move the rooted cutting into a slightly larger pot (about 1-gallon size) using a high-quality potting mix. Care for it in this pot for a few months or even a full season to allow it to develop into a strong, sturdy plant.
- Planting in the Garden: The following spring or autumn, you can transplant your strong new rose bush into its permanent home in the garden.
Frequently Asked Questions (FAQ)
Q1: Can I root a rose cutting from a florist’s bouquet?
You can certainly try, but the success rate is much lower. Roses for bouquets are often treated with preservatives, have been in cold storage for a long time, and the varieties chosen for cut flowers are not always vigorous growers on their own roots. It’s a fun experiment, but for best results, use fresh cuttings from a garden plant.
Q2: My cutting’s leaves turned yellow and fell off. Is it dead?
Not necessarily! It’s common for the original leaves to yellow and drop. The most important thing is the health of the stem itself. If the stem is still green and firm, it’s still alive and working on producing roots. If the stem turns black or brown and feels mushy, it has likely rotted and should be discarded.
Q3: Can I just stick a rose cutting in a potato or a glass of water?
You will see these “hacks” all over the internet. While you might get lucky, these methods are not reliable.
- Potato Method: The theory is the potato provides moisture and nutrients. In reality, the potato usually rots long before the rose roots, creating a fungal mess that kills the cutting.
- Water Method: Some roses will root in water, but these water-grown roots are very fragile and often struggle to adapt when moved to soil, leading to a high failure rate. The soil method described in this guide produces much stronger, more resilient plants.
Q4: How many cuttings should I take?
Always take more cuttings than you think you will need. Propagation is a numbers game, and not every cutting will be successful, even for experienced gardeners. If you want two new plants, take at least five or six cuttings to be safe.
Q5: What are the best types of roses to propagate from cuttings?
Climbing roses, ramblers, and old garden roses tend to be the easiest and most vigorous rooters. Many modern hybrid tea roses can be more challenging, but it’s always worth a try